

When the sun is high and you need something instantly cool, who wants to fuss with an oven? Seriously, the best summer desserts transport you straight to that satisfying, chilled moment, and that’s exactly what this Grasshopper Pie does. Forget the complicated steps you see everywhere else; I’m showing you the foolproof, non-alcoholic version from my own kitchen roster. This isn’t some fancy pastry chef creation; this is how we make a truly creamy, minty delight that my whole family begs for, especially around St. Patrick’s Day. As Aria Thompson always says, true culinary confidence comes from mastering simple, beloved classics, and this easy, no-bake recipe proves that extraordinary flavor doesn’t need extravagant effort—it just needs the right creamy base!
- Why This No-Bake Grasshopper Pie Recipe Works for You
- Gathering Ingredients for Your Creamy Mint Grasshopper Pie
- Step-by-Step Instructions for the Perfect Grasshopper Pie Recipe
- Tips for the Best No Bake Mint Pie Results
- Serving Suggestions for Your Grasshopper Pie
- Storage and Reheating Instructions for Leftover Grasshopper Pie
- Frequently Asked Questions About Grasshopper Pie
- Understanding the Nutrition of This Creamy Mint Dessert
- Share Your Grasshopper Pie Creations
Why This No-Bake Grasshopper Pie Recipe Works for You
Let’s be real: when you’re craving something sweet and cool, you don’t want to wait an hour for an oven to preheat. That’s the magic of this recipe! There is zero baking involved, which means less heat in your kitchen and more time spent enjoying that gorgeous green color. This preparation makes it such an Easy No Bake Dessert.
It also happens to be a huge hit with everyone younger than fifty. Since we skip the booze, this becomes the ultimate Family Friendly Pie that’s perfect for kids’ parties or big family get-togethers. If you ever need a quick, amazing dessert to bring to a gathering, trust me, this will vanish first. If you love this kind of effortless, chocolate-layered magic, you might also want to check out my Ultimate No-Bake Oreo Dirt Cake for another guaranteed crowd-pleaser!
Gathering Ingredients for Your Creamy Mint Grasshopper Pie
Okay, since this is a no-bake beauty, the quality of your components really shines through. The ingredient list is surprisingly simple, which I love because it means less time at the grocery store and more time enjoying the results! We are keeping this totally Family Friendly Pie friendly, so we are ditching the traditional liqueurs and sticking strictly to extracts for that perfect refreshing burst.
Here’s what you’ll need to round up for this Creamy Mint Dessert:
- 2 cups chocolate cookie crumbs (that usually means crushing about 28 Oreos, wrappers and all—don’t worry about scooping the filling out!)
- 1/2 cup unsalted butter, melted (please use real butter, it makes the crust hold together so much better!).
- 1 package (8 ounces) cream cheese, make sure it’s nice and softened so it beats up smooth.
- 1 cup powdered sugar (also called confectioners’ sugar).
- 1 teaspoon vanilla extract.
- 1 teaspoon peppermint extract—this is your main mint driver!
- 1/4 teaspoon mint extract (Optional, but I highly recommend it if you want that extra little *oomph*).
- Just a few drops of green food coloring if you want that classic retro look!
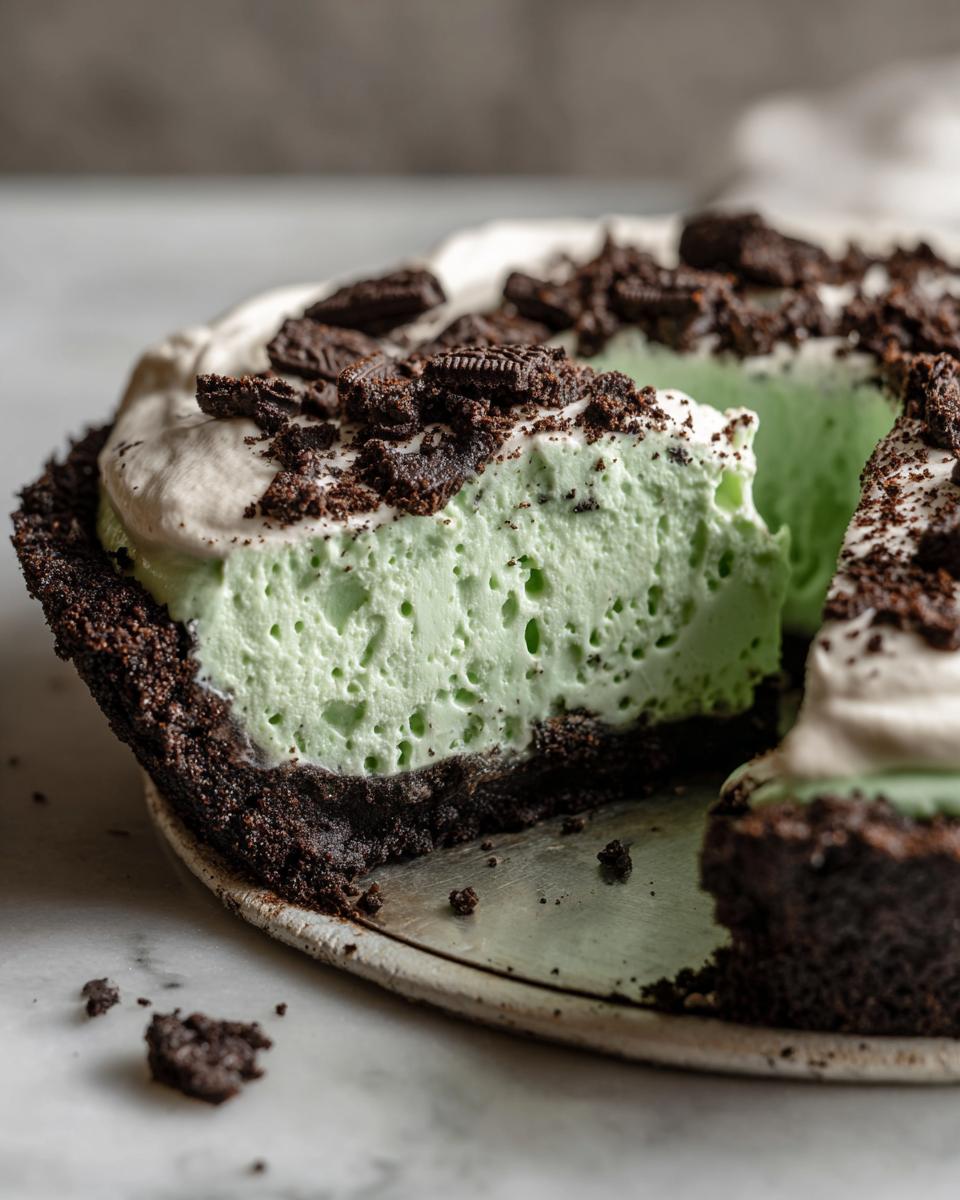
- 1 container (8 ounces) frozen whipped topping, thawed (Cool Whip works perfectly here and locks in that airy texture).
Don’t stress too much about the green color; it’s totally fine to have a pale, creamy pie if that’s what you prefer!
Ingredient Notes and Substitution Tips
The crust is built around those dark, chocolatey cookies because they give us that perfect deep, slightly bitter contrast to the sweet filling. They make the ultimate Chocolate Cookie Crust Dessert base! If, for some wild reason, you don’t have Oreos, you can totally swap them out for chocolate wafers or even graham crackers if you mix in a tablespoon of cocoa powder with the crumbs. But honestly, the classic Oreo crust is king here.
Now, about the mint flavor: I use both peppermint and mint extract, just to layer the flavor profile, but you can absolutely use just peppermint. Make sure your peppermint extract is high quality, as this is where all that wonderful mint power comes from. If you find a recipe calling for Crème de Menthe liqueur, just skip it! Using extracts keeps this an accessible, quick dessert idea for everyone.
If you want to see how I get the crust just right for my other quick pies, check out my guide on making an amazing Oreo Pie crust—the technique is exactly the same!
Step-by-Step Instructions for the Perfect Grasshopper Pie Recipe
This is where the magic happens, and the best part? We don’t even need to turn on the oven! Following these steps ensures you get that beautifully set, airy texture that makes this such a dream of a Mousse Pie Recipe. Just remember, patience during the chill time is absolutely mandatory; don’t rush it!
Creating the Oreo Crust Dessert Base
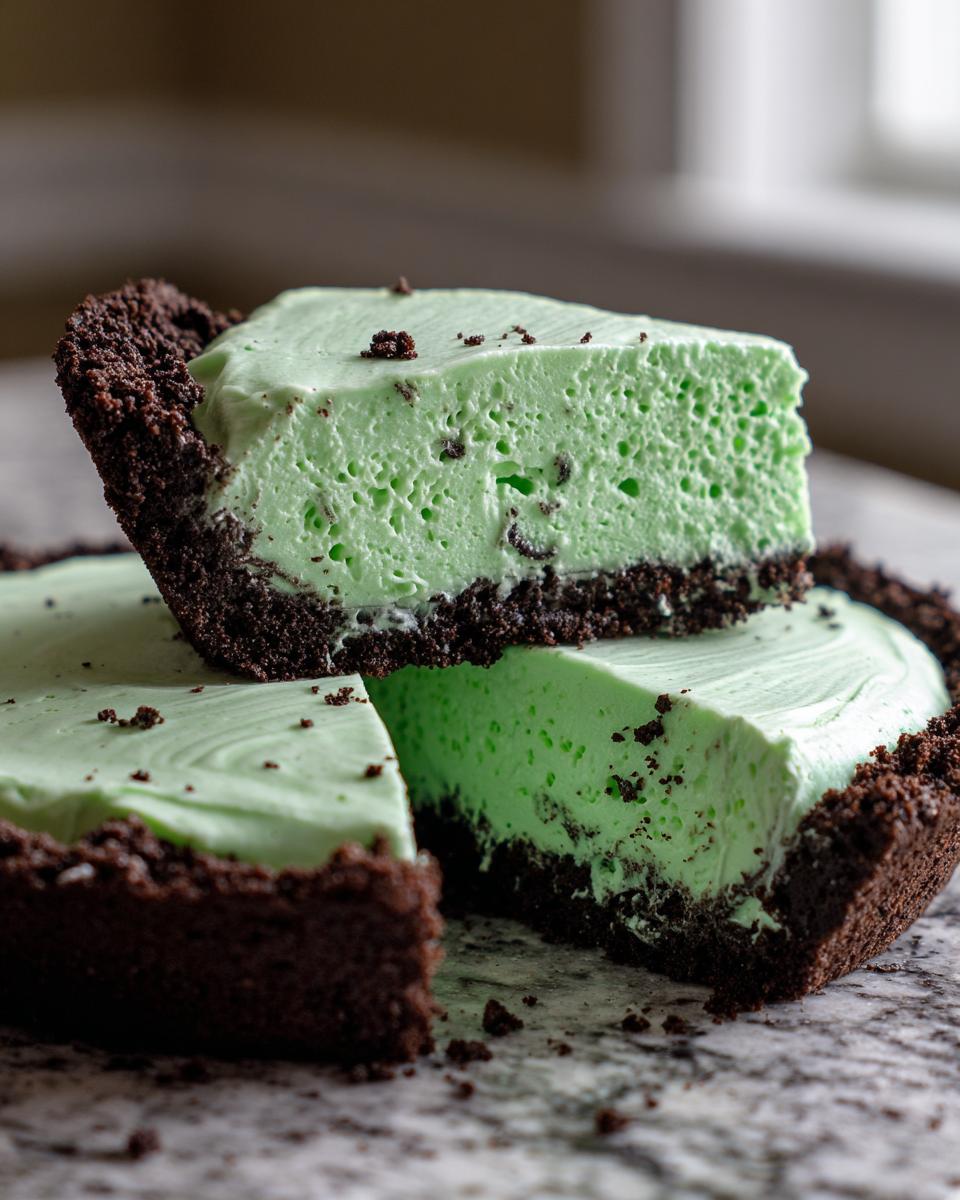
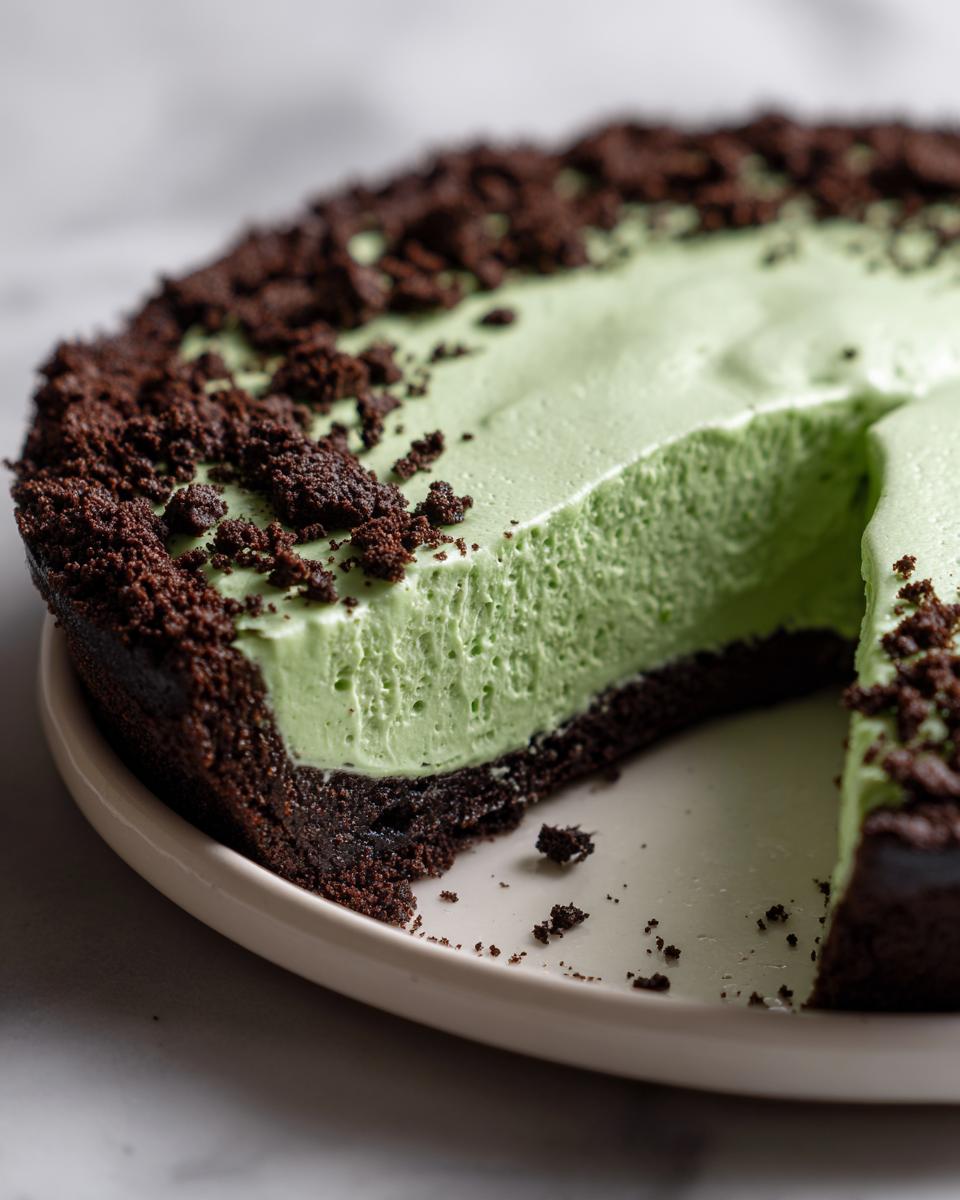
First things first, we need that sturdy chocolate base. Grab your clean bowl with the cookie crumbs and pour that melted butter right over them. Mix it around with a fork until everything is evenly coated—it should look like wet sand. Then, take your 9-inch pie plate and press that mixture firmly into the bottom and up the sides. Here’s my little tip: use the bottom of a dry measuring cup to really pack it down tight. That firm press is key to keeping your Oreo Crust Pie from crumbling everywhere when you slice it! Once it’s super packed, pop that shell into the freezer while you whip up the filling.
Mixing the Creamy Mint Filling
Now for the creamy green heart of the pie. Grab your stand mixer or a hand mixer. Start by beating that softened cream cheese until it’s completely smooth—you don’t want any lumps hiding in your final product. Slowly start beating in that powdered sugar until everything looks incorporated. Next, add those extracts—vanilla, peppermint, and if you want that vibrant color, add a couple of drops of green food coloring right now so you can mix it evenly.
The absolute most crucial point for this Creamy Mint Dessert is the whipped topping. Since the topping is what gives us the fluff, you have to fold it in, sweetie, don’t beat it! Gently use a rubber spatula to fold that thawed whipped topping into the cream cheese mixture, working until you see no more white streaks. Overmixing here deflates all the air we just incorporated, and we want light and airy, not dense!
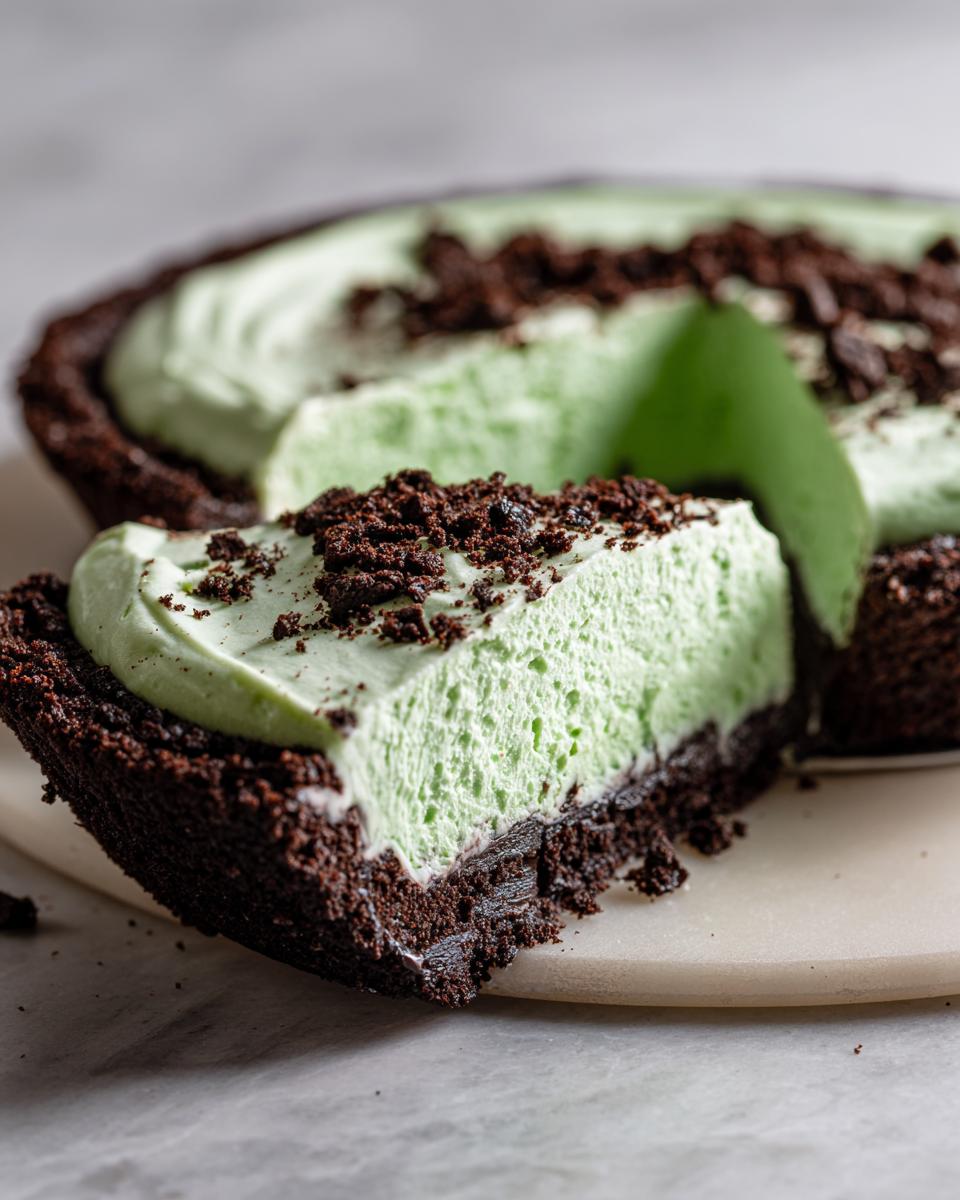
Once everything is folded together, spoon that minty goodness right into your chilled crust, smooth out the top with your spatula, and then cover it loosely with plastic wrap. Seriously, you must let it chill for at least four hours, but promise me you’ll try to let it go overnight. It sets up so much better! If you want a deeper dive into best practices for no-bake crusts, take a peek at my post on making every no-bake crust perfect. This patient chilling is what stops your beautiful slice from collapsing, just like the folks at The First Year Blog explain in their great guide on Grasshopper Pie.
Tips for the Best No Bake Mint Pie Results
Now that you’ve mixed everything together, I need you to listen to me very carefully about the next step: chilling! This is where amateur bakers often sabotage their beautiful work, especially with a No Bake Mint Pie like this. The biggest mistake you can make is trying to rush the setting process.
If you skip the full chill time, your grasshopper pie filling will remain soft and floppy, and when you try to cut a slice, the whole thing might just puddle onto the plate. That creamy texture we worked so hard to fold in needs time—and cold—to stabilize properly. If you can possibly manage it, let it chill overnight. I know, I know, waiting is the hardest part! But freezing it overnight results in something akin to the best frozen dessert you’ve ever had.
Speaking of freezing, if you’re looking for a true temperature contrast, you can absolutely turn this into a Frozen Grasshopper Pie. If you go that route, just transfer the assembled pie directly to the freezer for about 4 to 6 hours until it’s rock solid. It becomes lovely and dense, definitely more ice-cream-like than mousse-like, which is wonderful on a super hot day. If you want tips on how to make a pie that sets perfectly—whether frozen or chilled—you should definitely check out the great ideas on Sweet Treat Recipes!
Another thing to watch out for is gentle folding! I cannot stress this enough: when that glorious whipped topping meets the cream cheese mixture, use a light hand. If you mash it around, you deflate the air, and that delicious airy texture that makes this pie so refreshing disappears. Think smooth movements, not aggressive mixing. These little secrets are what separate a good pie from a truly sensational one. If you need more reminders on keeping your crust sturdy, my guide on setting any Oreo crust is a handy reference!
Serving Suggestions for Your Grasshopper Pie
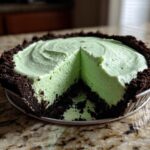
Once your beautiful, cool Grasshopper Pie has set up perfectly—and trust me, you can smell that minty goodness through the plastic wrap—it’s time to make it look as good as it tastes! For the ultimate Mint Chocolate Pie presentation, top generous slices with a dusting of finely shaved dark chocolate. A single, fresh little mint leaf placed right in the center of the shaving pile looks so professional.
This pie is honestly so rich and flavorful on its own, it barely needs a thing. However, if you’re serving it after a big meal or bringing it to a potluck, I love having some simple fresh raspberries or strawberries on the side. The slight tartness cuts through the richness beautifully, making it feel lighter. It also pairs wonderfully with a simple, strong cup of coffee. It’s the easiest way to make this an impressive Potluck Dessert Recipe with almost zero extra work!
Storage and Reheating Instructions for Leftover Grasshopper Pie
One of the great things about this grasshopper pie being a no bake dessert is that leftovers keep beautifully—if you actually have any leftovers, which is rare in my house! This is a refrigerated pie since the base is cream cheese and whipped topping, so we absolutely cannot reheat this by any means. Forget microwaving or putting it in the oven; that would just result in a minty, melted mess, and we don’t want that!
For simple storage when you want to enjoy a slice later in the week, just cover the pie plate tightly with plastic wrap. Make sure the wrap doesn’t actually touch the surface of the pie filling itself. Keep it stored in the refrigerator. Because of all that dairy goodness, I find it tastes perfect for about three to maybe four days. After that, the texture starts to change just a tiny bit, but in my experience, it rarely lasts that long.
Now, if you made this for a holiday, like St. Patrick’s Day, and you know you won’t eat it all within four days, freezing is your best friend. Pop the fully set pie into the freezer just like it is, wrapped tightly. If you want to keep it extra safe from freezer burn, slip the whole thing into a large zip-top freezer bag, pushing out as much air as you can. This pie freezes like a dream! You can pull it out whenever you want a quick summer treat.
When you’re ready to serve a frozen slice, just pull it out of the freezer about 20 to 30 minutes before you plan to eat it. That quick time on the counter softens it up just enough so your knife cuts through cleanly without shattering the crust. It moves beautifully from solid freezer temperature to that perfect, cool texture you want for a creamy mint dessert.
Frequently Asked Questions About Grasshopper Pie
I always get questions when I share a recipe that seems old-school, like this fun grasshopper pie! It’s because people worry about making it correctly when it involves setting up without an oven. So, let’s tackle the most common things folks ask me about making this ultra-creamy mint treat.
Is this grasshopper pie recipe safe for kids?
Absolutely, yes! This is one of the things I love most about this version. Traditional recipes sometimes call for Crème de Menthe liqueur, but since we are using standard peppermint and mint extracts, this is completely family-friendly. It tastes refreshing and minty, but there’s no alcohol involved at all. If you want to skip the green coloring, it still tastes just as amazing—it just looks more like a pale chocolate pie instead of the bright green version you see everywhere.
Can I use real mint instead of extract?
That’s a great question if you’re trying to step away from extracts! While using fresh mint sounds lovely, it’s actually quite tricky in a no bake mint pie like this. Fresh mint leaves don’t dissolve or blend into the cream the way extracts do. If you try to blend actual mint leaves into the filling, you end up with tiny, slightly bitter flakes throughout your smooth mousse, and the flavor isn’t as clean or intense as peppermint extract. I really recommend sticking to one of the extracts, or if you absolutely want that fresh flavor, you could try infusing the butter with mint leaves before using it in the crust, but that adds a whole extra step!
Can I make this grasshopper pie recipe ahead of time?
This is my favorite part of making this recipe! Yes, you absolutely can, and honestly, you *should* make it ahead of time. Since it requires at least four hours of chilling—and I always suggest overnight for the best set—it’s the perfect quick dessert idea for busy weeks. You can prepare the entire pie, crust and all, up to two days in advance. Just keep it covered tightly in the fridge. You pull it out, garnish it, and serve! It saves so much time when you have company coming over.
What makes this a ‘Retro Dessert Recipe’?
Oh, this pie is pure nostalgia! The concept of a mint and chocolate frozen or chilled dessert really took off back in the mid-20th century, especially in the 1950s and 60s. They were everywhere at church socials and holiday dinners! These desserts were a way to bring that cooling, slightly boozy flavor of the classic Grasshopper cocktail into a perfect, sliceable, family-safe dessert. It fits right in with other wonderful retro dessert recipes that relied on convenience items like whipped topping to create light, fluffy textures without any fancy labor. It’s just a slice of American comfort food history!
How do I make the green color brighter?
If you want that ultra-bright, St. Paddy’s Day-worthy green, you need to be careful not to add too much liquid coloring, or you risk thinning out your beautiful filling. I start with just two drops of standard green food coloring, mix it thoroughly, and assess. If it’s still too pale, I add one drop of *electrics* gel food coloring (if you have it) rather than liquid drops. Gel colors are highly pigmented, so you use way less to get a brilliant hue without disrupting the texture of your creamy mint dessert. If you need help nailing the texture for desserts that rely on whipped topping, check out my tips on no-cook homemade sauces—the gentle mixing concept is the same!
For more tips on planning ahead without stressing out, take a look at what the folks at Dessert Now Dinner Later suggest for their Grasshopper Pie Recipe!
Understanding the Nutrition of This Creamy Mint Dessert
Now, I know some of you look closely at the numbers, and I want to be totally straight with you about the nutritional information for this incredible Grasshopper Pie.
Because I develop and test these recipes right here in my own kitchen with whatever brand of cream cheese or Oreos I happen to grab that day, I have to give you a major disclaimer. The nutritional information—things like calories, sugar, and fat content—is just an estimate. It’s based on the standard averages for the ingredients listed, but honestly, yours might fluctuate a bit!
Where you see the biggest variation is usually in the crust and the whipped topping. If you use a low-sugar cookie crust alternative or a specific light whipped topping, your final numbers on sugar and fat will definitely change. This Creamy Mint Dessert is a joyous treat, not an everyday health food, so think of these values as a helpful guideline rather than a strict measurement. If you’re curious about how these numbers compare to other treats, you might want to check out the guide on setting any Oreo crust, which can impact the final slice count!
Share Your Grasshopper Pie Creations
That’s it—you’ve made it! You’ve mastered the incredibly simple steps to the fluffiest, most refreshing Grasshopper Pie you’ve ever tasted. But honestly, the kitchen isn’t complete until we share what we’ve created, right?
I truly hope you loved making this as much as I love sharing it. Once you’ve let it chill properly and you finally get that first perfect, cool slice, please come back here and tell me about it! Drop a rating below—did you go for the bright green color, or keep it pale? Did you sprinkle on some chocolate shavings?
I get so much inspiration and joy seeing all your beautiful pies come to life. Snap a picture of your finished slice—especially if you served it up for a St. Patrick’s Day bash or a summer BBQ—and tag me on social media! Seeing your confidence blossom in the kitchen is exactly why Cooking Zenith exists.
Keep experimenting, keep that curiosity shining, and always remember that even the simplest recipes, like this no-bake wonder, can create the most memorable moments around the table!
PrintNo-Bake Creamy Mint Grasshopper Pie with Oreo Crust
Make this easy, no-bake Grasshopper Pie for a cool, refreshing dessert. It features a creamy, mint-flavored filling and a simple chocolate cookie crust. This family-friendly recipe uses mint extract for flavor.
- Prep Time: 20 min
- Cook Time: 0 min
- Total Time: 4 hr 20 min
- Yield: 8 servings 1x
- Category: Dessert
- Method: No-Bake
- Cuisine: American
- Diet: Vegetarian
Ingredients
- 2 cups chocolate cookie crumbs (about 28 Oreos)
- 1/2 cup unsalted butter, melted
- 1 package (8 ounces) cream cheese, softened
- 1 cup powdered sugar
- 1 teaspoon vanilla extract
- 1 teaspoon peppermint extract
- 1/4 teaspoon mint extract (optional, for stronger flavor)
- Green food coloring (optional, a few drops)
- 1 container (8 ounces) frozen whipped topping, thawed
Instructions
- Prepare the crust: Combine the chocolate cookie crumbs and melted butter in a medium bowl. Press the mixture firmly into the bottom and up the sides of a 9-inch pie plate. Place the crust in the freezer while you prepare the filling.
- Make the filling base: In a large bowl, beat the softened cream cheese until smooth. Gradually beat in the powdered sugar until fully incorporated.
- Add flavorings: Mix in the vanilla extract, peppermint extract, and green food coloring, if using, until the color is uniform.
- Fold in topping: Gently fold in the thawed whipped topping until no streaks remain. Be careful not to overmix; keep the filling light and airy.
- Assemble the pie: Spoon the mint filling evenly into the chilled chocolate cookie crust. Smooth the top with a spatula.
- Chill: Cover the pie loosely with plastic wrap and refrigerate for at least 4 hours, or until the filling is firm. For best results, chill overnight.
- Serve: Slice and serve this easy no bake dessert cold. You can garnish with chocolate shavings if desired.
Notes
- For a richer chocolate flavor in the crust, use dark cocoa powder in addition to the crumbs.
- If you prefer a frozen grasshopper pie, place the assembled pie in the freezer for 4 to 6 hours until solid before serving.
- If you want a slight alcoholic note without using liqueur, you can add 1/2 teaspoon of clear crème de menthe extract instead of some of the peppermint extract.
Nutrition
- Serving Size: 1 slice
- Calories: 350
- Sugar: 28
- Sodium: 250
- Fat: 22
- Saturated Fat: 12
- Unsaturated Fat: 10
- Trans Fat: 0
- Carbohydrates: 35
- Fiber: 1
- Protein: 4
- Cholesterol: 45