
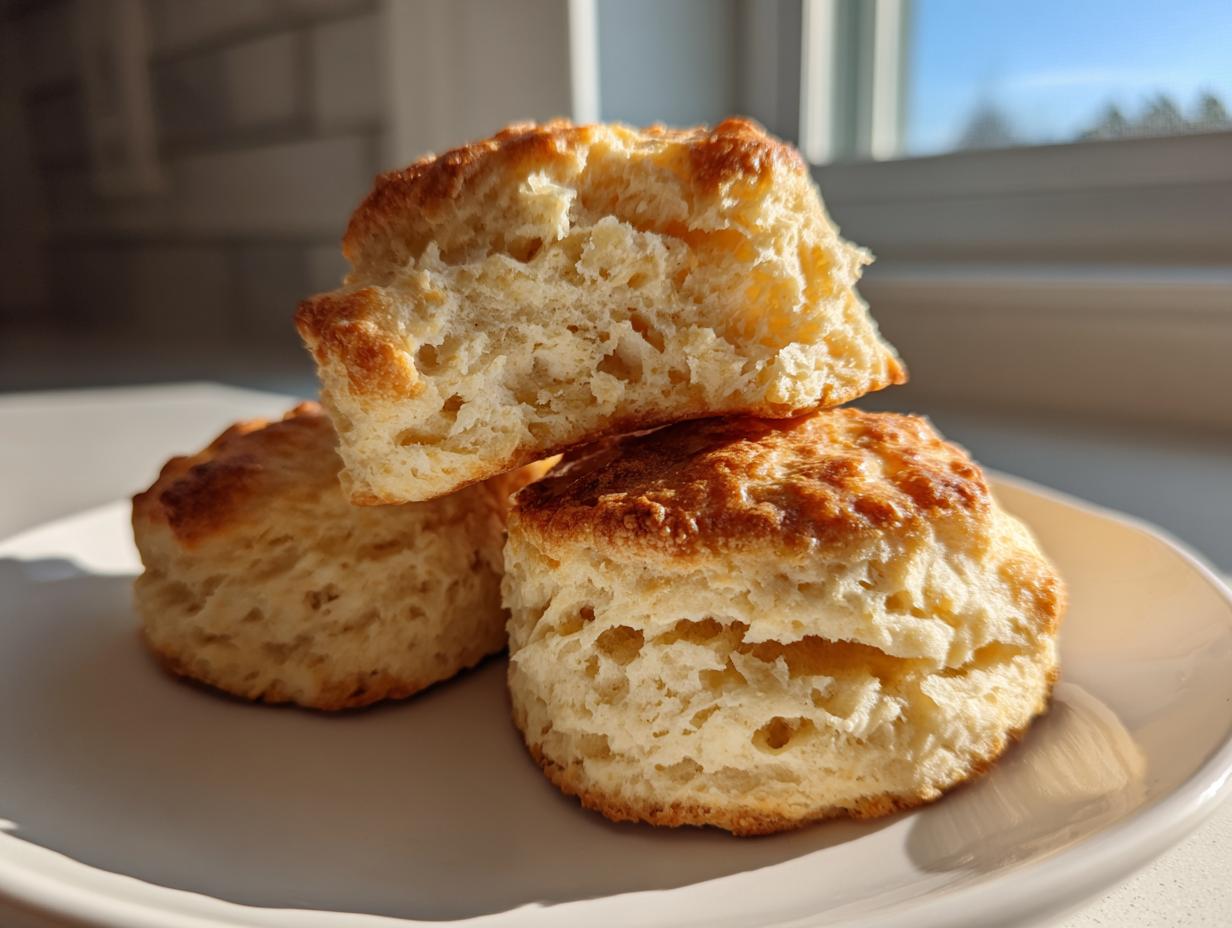
There is just something magical about pulling a tray of homemade baked goods out of the oven, right? The smell alone makes everything feel right with the world. I used to think truly great bakery-style scones were completely out of reach for the home cook, but that’s just nonsense! I’m Aria, and mastering this basic buttermilk recipe was one of the breakthroughs that made me realize I could conquer anything in the kitchen. Trust me when I say that once you nail these, you have the key to the ultimate fluffy, buttery, and wonderfully tall scones that crumble perfectly—no dry, sad hockey pucks here!
- Why This Buttermilk Scones Recipe Works Every Time
- Ingredients for the Best Buttermilk Scones
- Step-by-Step Instructions to Make Perfect Scones
- Tips for Achieving Bakery Style Scones at Home
- Flavor Variations for Your Scones
- Serving Suggestions for Your Fresh Scones
- Storage and Reheating Scones
- Frequently Asked Questions About Scones Baking
- Nutritional Estimate for Buttermilk Scones
Why This Buttermilk Scones Recipe Works Every Time
When you’re aiming for that perfect bite—the one that shatters just slightly on the outside while melting on your tongue—you need technique, not magic. That’s what makes this a rock-solid Fluffy Scones Recipe; it respects the science of Buttery Scones Baking. We aren’t just throwing things in a bowl! We are intentionally creating layers. And if you want to brighten up your tea service alongside these beauties, you should absolutely check out my recipe for easy homemade classic lemonade!
The hero here, besides the cold butter, is the buttermilk. That little bit of acid is crucial. When buttermilk hits the baking powder, it creates a swift, powerful lift, which is how we guarantee these turn out beautifully tall and tender instead of dense. It tenderizes the gluten structure just enough without making the dough gummy. It’s the difference between a good scone and one you’ll never stop making.
The Secret to Tall, Flaky Scones
If you take one thing away from this tutorial, let it be this: keep it cold and handle it gently. Seriously, pop your flour and butter in the freezer for ten minutes before you start. We want that butter to stay in distinct, pea-sized pieces. When those cold bits hit the hot oven, they steam rapidly, forcing those beautiful, flaky layers throughout your Perfect Flaky Scones.
After you mix it, don’t turn it into a smooth ball! We fold the dough over itself three or four times before cutting. That folding action builds the structure needed for height. And here’s my pro tip: when you cut the wedges, press the cutter straight down. Do not twist! Twisting seals the edges shut and prevents your scones from having those lovely straight sides that rise perfectly toward the sky.
Ingredients for the Best Buttermilk Scones
Okay, let’s talk supplies. Buying the right ingredients and prepping them correctly is 90% of the battle here. Remember what I always say: baking is serious work, but it should still be fun! These quantities are what give you a perfect batch of 8 bakery-quality scones, perfect for grabbing on your way out the door.
- 2 cups all-purpose flour
- 1/4 cup granulated sugar
- 1 tablespoon baking powder
- 1/2 teaspoon salt
- 1/2 cup (that’s one full stick) unsalted butter, kept very cold and cut into small cubes—don’t skip the ‘cold’ part!
- 3/4 cup cold buttermilk—and I mean ice cold!
- 1 large egg, beaten until frothy (this is just for the wash, not the dough!)
- 1 tablespoon milk or heavy cream (mixed with your egg for the wash)
- Optional Flavors: If you’re adding fruit, use about 1 cup of fresh blueberries or 1/2 cup of dried cranberries. If you use frozen fruit, make sure they are fully frozen.
See? Nothing scary here. Just good, simple stuff. Having everything measured out before you start mixing is what makes this an Easy Homemade Scones recipe that moves fast. You’ll be waiting for the oven timer instead of scrambling for ingredients!
Step-by-Step Instructions to Make Perfect Scones
Ready to crank out some amazing scones? This is where our patience pays off! Our goal here is a quick mixing time because the less you mess with this dough, the flakier it gets. If you’re whipping these up for a weekend brunch, think about making my easy homemade teriyaki sauce to serve alongside some savory scones sometime!
Preparing the Dough and Cutting the Scones
First things first: crank that oven up to 400°F (200°C) right now, and grab a sheet of parchment paper for your baking tray. While the oven preheats, you’re whisking those dry ingredients together. Then comes the fun part—cutting in the cold butter. You want it to look like coarse cornmeal with some definite pea-sized chunks still hanging around. Remember, those chunks are what create the lift!
Once the butter is in, pour that ice-cold buttermilk over everything. Mix it with a fork only until you see *just* combined. I mean it—it should look shaggy, maybe a little messy. Don’t panic if you see white streaks; that means you haven’t overmixed! Turn it onto your floury counter and knead it maybe three times—just enough so it holds its shape. Pat it down to about 3/4-inch thick. Now, cut those wedges out, pressing straight down hard. No twisting, remember? Twisting seals the edges!
Don’t forget the egg wash! Whisk that single egg with a tablespoon of milk or cream. Give the tops of your cut dough a nice, even brush for that gorgeous golden color. This whole process is shockingly fast once you get the hang of it—it really is Quick Scone Baking at its finest!
Tips for Achieving Bakery Style Scones at Home
This is where we move from just following a recipe to really understanding how to master your baking. Achieving those coveted Bakery Style Scones at Home really comes down to a few non-negotiables. The number one rule, which I cannot stress enough for that light, flaky texture, is temperature control. Your butter and buttermilk need to feel like they just came out of an ice bath!
If your kitchen is warm, seriously, don’t be a hero—pop your dry ingredients bowl in the fridge while you grab your butter. Those tiny cold butter pockets are the engine of your Moist Scone Recipe; if they melt before the oven, you get a flat, tough cookie, not a lovely towering scone.
Now, don’t worry about baking these immediately after mixing! If you need to get ahead of your brunch planning, you can totally wrap that cut dough in plastic wrap and chill it for up to 24 hours. Baking them straight from the fridge later guarantees they’ll still rise high. For some more detailed insights on handling delicate doughs like this, you might want to check out my general guide on baking tips for tender scones. It really demystifies why cold matters so much!
One last final thought: if you’re looking to cut back on sugar in the batch, you can definitely reduce the sugar in the dough itself down to just two tablespoons. They’ll still be delicious, just less intensely sweet, which is wonderful if you plan on topping them with a really sweet jam later.
Flavor Variations for Your Scones
The beauty of a classic buttermilk base is that it’s just begging for customization! This recipe for scones is fantastic plain, but I always find myself swapping things up depending on the season or what I have in the fridge. You absolutely have to try mixing in about a cup of fresh blueberries—the tartness is just heavenly.
If you are baking for fall, you can toss in about a teaspoon of cinnamon and half a teaspoon of nutmeg right alongside your dry ingredients. If you prefer that warm spice note, check out my recipe for cinnamon sugar pecans—you could even chop those up and fold them in if you’re feeling adventurous!
For a bright spring treat, go for lemon zest and fresh or dried cranberries. That combination is unbeatable! When you add something strong like citrus, you might want to switch the simple milk glaze for a lemon glaze. Just use two tablespoons of lemon juice instead of milk to thin out your powdered sugar. It makes these sweet treats feel incredibly gourmet.
Serving Suggestions for Your Fresh Scones
Now that you have these amazing, tall, buttery clouds, how are you going to eat them? That’s the best part! Honestly, for me, these are simply the Best Breakfast Scones when served warm with just a smear of good quality salted butter.
But if you’re going for that proper English afternoon tea vibe, you simply must have jam and clotted cream. That combination is non-negotiable—the richness of the cream against the sweet fruit just sings. If you want to elevate it further, a simple lemon glaze is divine. Just whisk a cup of powdered sugar with two tablespoons of fresh lemon juice; if you need it thinner, add just a few drops more juice until it drizzles beautifully. If you need a bright drink to go alongside, you absolutely have to try my easy homemade classic lemonade!
Storage and Reheating Scones
Even the best scones don’t last long in my house, but if you manage to have leftovers, don’t just leave them on the counter! Store them in an airtight container—that’s key to keeping them from drying out overnight or the next day. If they start to feel a little soft the next morning, just ignore the microwave! Microwaving makes them tough, which ruins that flaky texture we worked so hard for.
Instead, reheat them briefly in a 350°F oven for about five minutes. This warms them through and brings back a little bit of that fresh-from-the-oven crispness on the outside. If you want some detailed tips on planning ahead, especially for making the dough ahead of time, check out my guide on make ahead scones!
Frequently Asked Questions About Scones Baking
What’s the main difference between a scone and a biscuit?
Oh, that’s a classic question, and the answer is really all about the fat and the sugar! In the US, we often think of biscuits as savory and flaky (thanks to layering lard or shortening), while scones tend to be a bit sweeter and denser, relying on butter for that rich flavor. The main technique difference is that biscuits are usually kneaded or folded just enough to get layers, but scones often have more sugar and sometimes egg in the dough, giving them a slightly crumblier texture. Learning the nuances between a Simple Biscuit vs Scone really opens up your baking world!
Can I use regular whole milk if I don’t have buttermilk?
You sure can, but you’ll miss out on that amazing tenderness! Buttermilk is acidic, which tenderizes the flour proteins and helps the leavening agents kick into high gear. If you absolutely must substitute, here’s my quick trick: for every cup of buttermilk required, use regular milk and add one tablespoon of white vinegar or lemon juice. Let it sit for about five minutes until it curdles slightly. It won’t be exactly the same, but it gets you close! If you are looking for more wonderful morning ideas to serve these with, I have tons of easy breakfast recipes!
How do I keep my scones from getting dry?
Dryness is the enemy of a good scone! The number one thing is to stop mixing the dough once it *just* comes together—shaggy is good! Overmixing develops gluten, which makes the final product tough and dry. Second, use plenty of fat (butter!) and make sure your add-ins, like fruit, aren’t dried out. If you’re using dried fruit, soaking it first, as I mention in the main tips, keeps it from stealing moisture during the bake. A good, moist scone should feel tender even the next day!
What is the trick to making homemade scones tall?
This goes back to Technique 101: cold butter and minimal handling. But for height specifically, you must skip the twisting when cutting. When you cut a wedge, push down quickly and firmly. Twisting seals the bottom and sides, forcing the scone to spread out instead of rise up. Also, the folding technique—folding the dough over itself a few times before cutting—creates internal scaffolding, which is what helps you achieve those great high sides. Knowing How to Make Scones Tall is all about respecting those layers of cold butter!
Nutritional Estimate for Buttermilk Scones
Now, I always tell people that when you’re baking something this wonderful, you shouldn’t obsess over the numbers—you should just enjoy the moment! But I know some of you like to keep track, so I pulled the general estimates together for our classic buttermilk batch. Remember, since we are using real, cold butter and buttermilk, these aren’t intended to be low-calorie treats; they are rich, soul-satisfying breakfast fare! These numbers reflect one serving (one single scone) based on the standard recipe measurements, which yields 8 servings total.
Keep in mind these figures are an estimate, of course. If you swap out the sugar for something else, or if you use a different kind of milk for the wash, the totals will shift slightly. But here is the ballpark breakdown for that perfect, tender bite:
- Serving Size: 1 scone
- Calories: 310
- Fat: 18g (with 11g of that being saturated fat—worth it for the flavor!)
- Carbohydrates: 32g
- Protein: 6g
- Sugar: 7g
- Cholesterol: 65mg
Isn’t that fascinating? It shows you exactly why these homemade scones feel so indulgent and satisfying. They have good structure and just enough sweetness to feel like a real treat for brunch or your afternoon tea service!
PrintThe Ultimate Buttermilk Scones Recipe: Flaky, Buttery, and Tall

Learn how to make bakery-style scones at home. This easy recipe uses buttermilk to create scones that are flaky, buttery, and perfectly moist every time. Ideal for breakfast, brunch, or afternoon tea.
- Prep Time: 15 min
- Cook Time: 18 min
- Total Time: 33 min
- Yield: 8 servings 1x
- Category: Breakfast
- Method: Baking
- Cuisine: American
- Diet: Vegetarian
Ingredients
- 2 cups all-purpose flour
- 1/4 cup granulated sugar
- 1 tablespoon baking powder
- 1/2 teaspoon salt
- 1/2 cup (1 stick) cold unsalted butter, cut into small cubes
- 3/4 cup cold buttermilk
- 1 large egg, beaten (for egg wash)
- 1 tablespoon milk or cream (for egg wash)
- Optional Add-ins: 1 cup blueberries, 1/2 cup white chocolate chips, or 1/2 cup dried cranberries
Instructions
- Preheat your oven to 400°F (200°C). Line a baking sheet with parchment paper.
- In a large bowl, whisk together the flour, sugar, baking powder, and salt.
- Add the cold, cubed butter to the dry ingredients. Use a pastry blender or your fingertips to cut the butter into the flour until the mixture resembles coarse crumbs with some pea-sized pieces of butter remaining. This step is key for flaky scones.
- If using add-ins, gently stir them into the flour mixture now.
- Pour the cold buttermilk into the flour mixture. Use a fork to mix until just combined. Do not overmix; the dough will look shaggy.
- Turn the dough out onto a lightly floured surface. Gently knead it 3 or 4 times until it comes together.
- Pat the dough into a 3/4-inch thick circle or rectangle. For tall scones, fold the dough in half, then in half again, patting it down gently after each fold.
- Cut the dough into 8 wedges or use a round biscuit cutter to cut out shapes. Place the scones on the prepared baking sheet, spacing them about 1 inch apart. For taller sides, press the cutter straight down without twisting.
- In a small bowl, whisk the egg and milk/cream together to create an egg wash. Brush the tops of the scones lightly with the wash.
- Bake for 15 to 18 minutes, or until the tops are golden brown and the centers are cooked through.
- Let the scones cool slightly on the baking sheet before transferring them to a wire rack. Serve warm with jam and clotted cream.
Notes
- Keep all ingredients, especially the butter and buttermilk, very cold to achieve the best rise and flaky texture.
- For a sweet finish, mix 1 cup powdered sugar with 2 tablespoons of milk or lemon juice to create a simple glaze and drizzle over the cooled scones.
- If you prefer a less sweet scone, reduce the sugar in the dough to 2 tablespoons.
- You can make the dough ahead of time, wrap it tightly, and chill it for up to 24 hours before cutting and baking.
Nutrition
- Serving Size: 1 scone
- Calories: 310
- Sugar: 7
- Sodium: 350
- Fat: 18
- Saturated Fat: 11
- Unsaturated Fat: 7
- Trans Fat: 0
- Carbohydrates: 32
- Fiber: 1
- Protein: 6
- Cholesterol: 65