
Oh, that moment when you’re deep into a takeout craving, but you know the delivery is going to take forever? I get it! That’s why I’m obsessed with nailing those restaurant favorites right here in my own kitchen. Forget waiting thirty minutes for delivery; we are making chinese green beans with garlic sauce in under twenty minutes, total! Seriously, we’re unlocking that secret smoky, blistered texture you get at the best spots. As I learned when I started Cooking Zenith, taking something that seems complicated—like achieving that perfect char—and breaking it down into fearless steps is the real magic trick. Trust me, this recipe is foolproof, punchy, and unbelievably fast.
- Why You Will Master This Recipe for chinese green beans with garlic sauce
- Essential Ingredients for chinese green beans with garlic sauce
- The Secrets to Perfect Blistered Green Beans: Equipment Needed
- Step-by-Step Instructions for Wok Fried chinese green beans with garlic sauce
- Tips for Success with dry fried green beans
- Pairing Your chinese green beans with garlic sauce
- Storage and Reheating for leftover chinese side dishes
- Frequently Asked Questions about vegan chinese sides
- Estimated Nutritional Profile of chinese green beans with garlic sauce
- Share Your Experience Making This Recipe
Why You Will Master This Recipe for chinese green beans with garlic sauce
I honestly believe you’ll nail this side dish perfectly the very first time you try it. It checks all the boxes for a weeknight win:
- Blazing Speed: We’re talking less than 20 minutes total, start to finish. You can make this while your main dish is still thawing!
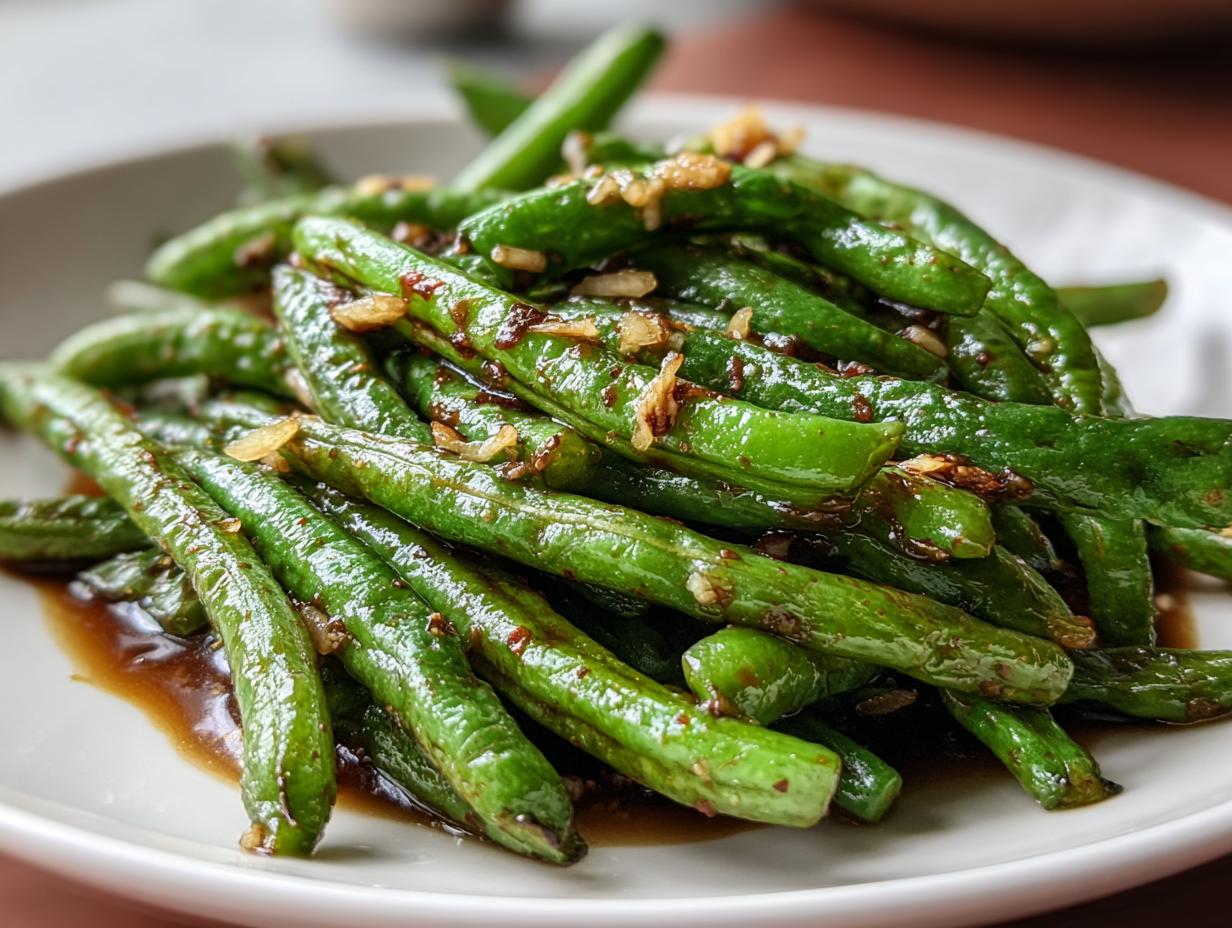
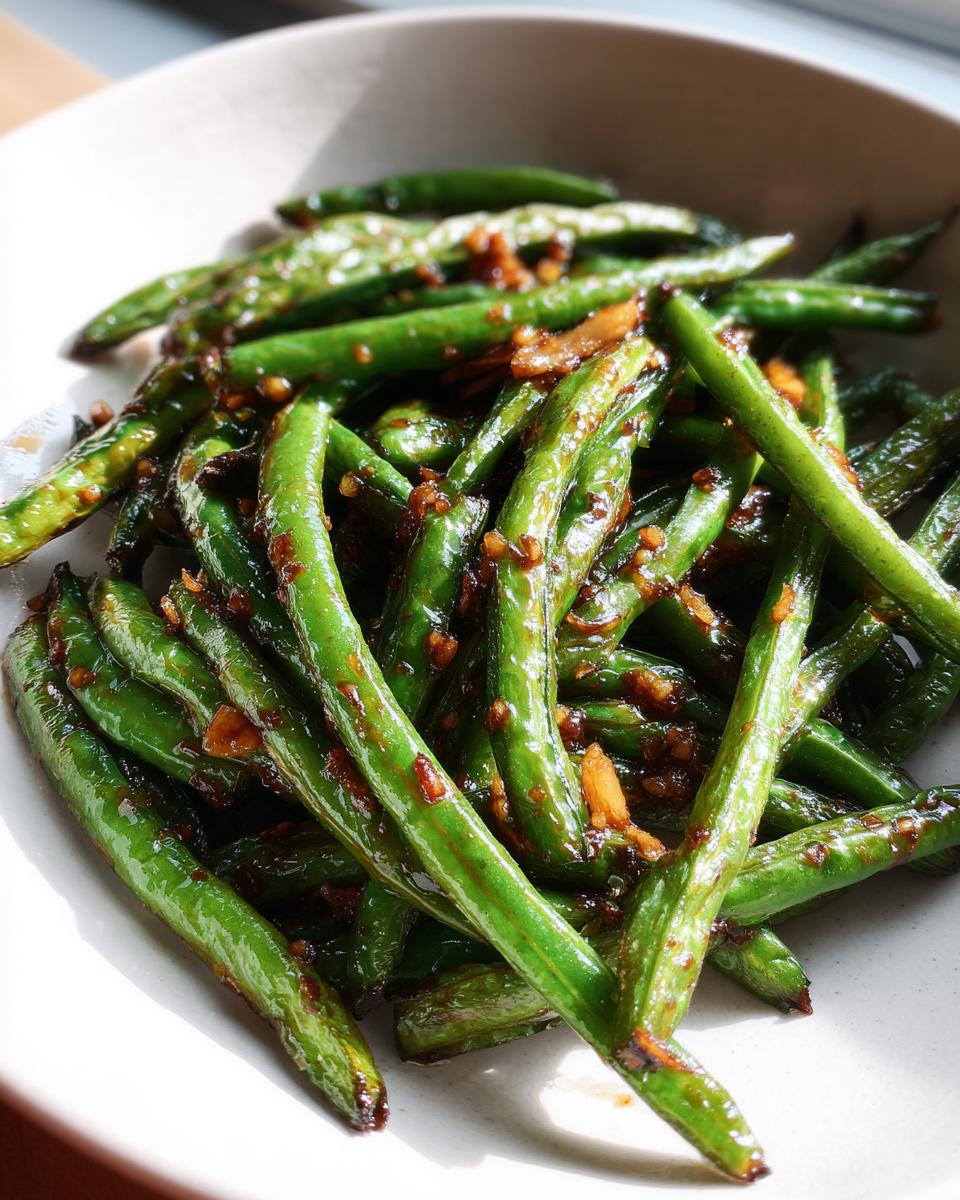
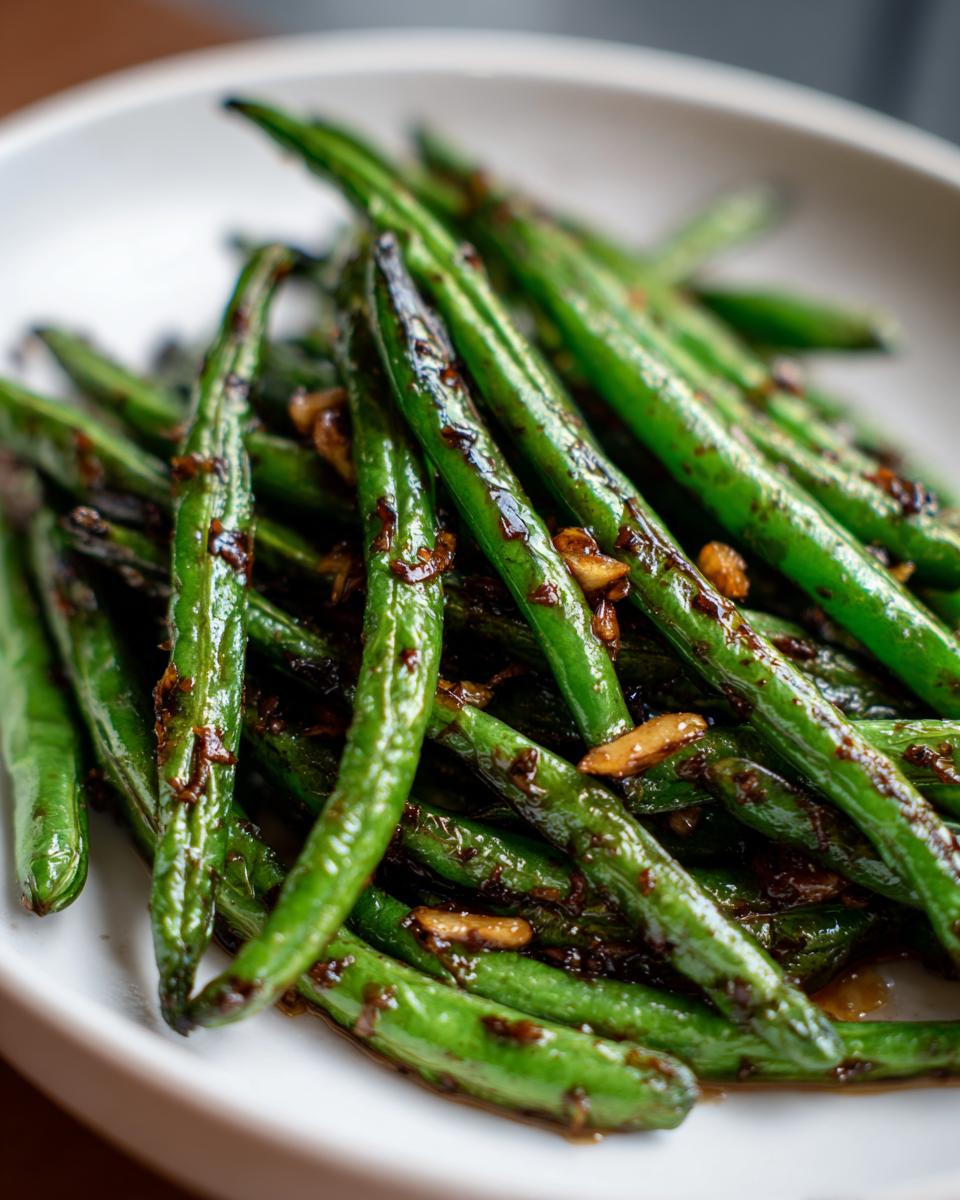
- That Signature Texture: You get those beautiful, savory, charred spots—the hallmark of perfectly blistered green beans.
- Incredible Flavor: That punchy, savory garlic sauce sticks perfectly without making the beans soggy.
- Simple Tools: No fancy gadgets here. If you have a good skillet or a wok, you are set for success.
Essential Ingredients for chinese green beans with garlic sauce
Okay, let’s talk about what you need because with a dish this fast, your ingredient prep matters so much. You’ll need about a pound of those gorgeous fresh green beans, and please, make sure the very ends are trimmed off. We’re using about three tablespoons of neutral oil, something like canola or plain vegetable oil, because we need an oil that can handle screaming hot temperatures without smoking out your kitchen.
For the flavor bomb, mince up four cloves of garlic—don’t skimp!—and a little teaspoon of fresh ginger, grated finely. The sauce base is super simple: just one tablespoon of soy sauce, a teaspoon of sugar for balance, and a pinch of white pepper. And remember, if you’re steering clear of gluten, that soy sauce can easily swap out for tamari.
Ingredient Notes and Substitutions for garlic green beans
Listen up, this is where we build confidence. That oil needs to be hot—like, smokin’ hot—before the beans even think about hitting the pan. That heat is what gives you the char. Also, if you don’t have water handy for loosening the sauce at the end, a splash of vegetable broth works beautifully and adds depth. And yes, using tamari as your base gives you the exact same savory punch for your garlic green beans, just without the wheat!
The Secrets to Perfect Blistered Green Beans: Equipment Needed
You might think you need a fancy setup for restaurant-style flavor, but honestly, it’s more about the heat than the gear! To get those amazing, smoky, blistered green beans, you absolutely need high, direct heat. Now, my favorite tool is my wok—it concentrates the heat perfectly in the center.
But hey, not everyone has a wok sitting around! If that’s you, grab the largest, heaviest skillet you own. Cast iron is fantastic here. The crucial part is letting that pan heat up until it feels like a tiny sun before you add *any* oil. This intense heat transfer is what gives you that instant sear and char when the beans hit the surface.
Step-by-Step Instructions for Wok Fried chinese green beans with garlic sauce
Now, we’re getting into the good stuff! This next part moves fast, but honestly, it’s the easiest part. Before you even turn on that burner, get your sauce ready to go. Once the wok is hot, we are moving fast, which is why preparation is key in Asian cooking. If you check out my ‘About’ page on the site, you’ll see that feeling confident in your setup is half the battle! I promise, once you see these wok fried chinese green beans come together, you’ll wonder why you ever called a delivery service for them. It’s really all about that high heat!
Preparing the Punchy Garlic Sauce Base
This first step is totally chill and happens off the heat. In a small little bowl—I use one of my prep bowls—you’re just going to whisk together your soy sauce (or tamari!), that teaspoon of sugar for balance, and the white pepper. Give it a good swirl until that sugar dissolves. Now, set this mixture right next to your stove. It’s your flavor packet, ready to deploy when the time is right.
Achieving the Char: Blistering the green beans
Now we turn up the heat! Get your pan screaming hot—you want it practically glowing. Add your oil and swirl it around quickly. Then, dump those trimmed green beans in. If you can, try to spread them out in a single layer; this helps them char instead of steam. Now for the secret: don’t touch them for a full minute, maybe even two! You’re letting that super-high heat kiss the skin and create those perfect dark, smoky spots—that’s how you get those amazing blistered green beans. Once they look wrinkled and spotty, start tossing them around until they are tender-crisp, probably three to five minutes total.
When they look gorgeous and spotty, I push them all to one side of the pan. I add my minced garlic and that grated ginger right into the clear hot spot. Stir them in just for about 30 seconds until you can really smell that fragrance—we don’t want burnt garlic, just fragrant! Remember what I always say about confidence in the kitchen?Learning the basics builds that confidence!
Toss the beans back over with the aromatics. Then, pour over that sauce mixture you whisked earlier, and add your tablespoon of water or broth. Stir everything together quickly, maybe just 30 seconds more until the liquid thickens up just a tiny bit and coats everything beautifully. Take it off the heat right away! Seriously, don’t overcook it once the sauce hits, or those beans will lose their snap.
Tips for Success with dry fried green beans
Even though this recipe is super simple, high-heat cooking always has a few little tricks up its sleeve! If you’re like me and love a little fire in your vegetables, this one’s for you: toss about half a teaspoon of dried chili flakes in right when you add the garlic and ginger. It gives the dish that little kick you sometimes find in genuine Sichuan green beans. Wow, does that wake things up!
Now, here’s my biggest piece of advice for that char: don’t crowd the pan! If you are doubling this recipe—and you totally should because they disappear fast—cook the beans in two separate batches. If they pile up too high, they steam, and steaming equals soggy, not smoky. We want them lying flat on that hot surface so every bean gets a nice blast of direct heat. That’s how you get the professional, dry fried green beans look we’re after!
Pairing Your chinese green beans with garlic sauce
So you’ve got this incredible side dish ready—smoky, garlicky, and ready to go! Because these garlic green beans are so punchy and flavorful, they honestly pair well with almost anything, but I have a few favorites for my usual takeout night.
If you’re doing a classic spread, you can’t go wrong pairing them with something slightly sweet like General Tso’s Chicken or maybe some honey garlic pork. They cut right through that richness, which is so satisfying. But since this recipe is naturally vegan, I often serve them alongside my simple maple-glazed tofu or even just a big bowl of plain peanut noodles. They bring the necessary vegetable punch no matter what you’re having!
Storage and Reheating for leftover chinese side dishes
Even though these chinese side dishes usually vanish the second I set them on the table, sometimes I get lucky and have a little bit left over. If you do, wrap them up tight in an airtight container. They keep really well in the fridge for about three days, but honestly, they are best within the first 24 hours.
Now, when it comes to reheating, please, for the love of crisp texture, do NOT microwave them! Microwaves turn those gorgeous, blistered beans immediately floppy. Toss them straight into a dry skillet or even your air fryer for just a minute or two over medium heat. This little blast of dry heat wakes up that charred texture and brings back all the garlicky goodness instantly. They’ll taste almost just-made that way!
Frequently Asked Questions about vegan chinese sides
Can I use frozen green beans for these garlic green beans?
Oh, I strongly recommend sticking with fresh for this one! Frozen green beans have way too much surface water. When they hit that scorching wok, they just steam instead of blistering. You won’t get that beautiful char we are aiming for with these garlic green beans. If you absolutely must use frozen, thaw them out, pat them bone dry with paper towels first, and maybe skip the initial rest time on the hot pan.
How can I make this recipe spicier, like true Sichuan style?
That half teaspoon of dried chili flakes I mentioned earlier is your best friend here! If you want more depth than just heat, you can also add a few drops of toasted sesame oil right at the very end—that nutty, deep flavor really complements the spice. You could even try adding some crushed toasted peanuts sprinkled on top for texture and a bit more zing in your vegan chinese sides.
I’m gluten-free; is tamari truly interchangeable here?
Yes, tamari is the perfect solution! I use it all the time when friends come over who need gluten-free options. It has a richer, slightly less salty profile than standard soy sauce, but because we are balancing it with sugar, you won’t even notice the difference in the final garlic green beans dish. Just use a 1:1 swap for the soy sauce in the recipe.
Do I have to use ginger, or just garlic?
You certainly can skip the ginger if you sincerely dislike it, but I hate to see you miss out! The ginger provides a bright, fresh background note that keeps the garlic from tasting too heavy. It’s a subtle layer, but it really elevates the whole experience when you are serving these chinese side dishes, so I’d try hard to keep it in!
If you’re exploring more of our quick recipes, don’t forget to check out our privacy policy, just so you know how we handle your culinary experiments!
Estimated Nutritional Profile of chinese green beans with garlic sauce
I always tell folks, because we’re using such simple ingredients—mostly beans and oil—the numbers are pretty great for this side dish! Just remember, this profile is an estimate based on standard measurements of the ingredients we use here. You’re looking at about 120 calories per serving, with 9 grams of fat. It’s a nice source of fiber, too, packing about 3 grams of protein and 350mg of sodium. Not bad for the best garlic green beans you will ever make!
Share Your Experience Making This Recipe
Okay, my fellow home cooks, now it’s your turn! I absolutely need to know how your chinese green beans with garlic aauce turned out. Did you get that perfect char? Please take just a second to drop a rating—five stars if they were amazing! Leave me a comment below telling me your secrets or any tweaks you tried. And please tag me if you snap a picture while sharing these fantastic chinese side dishes on social media. I love seeing your success in the kitchen! Don’t forget you can check out our Terms of Use anytime.
PrintWok-Blistered Green Beans with Garlic Sauce
Make restaurant-style dry fried green beans at home quickly. This recipe features blistered green beans tossed in a savory, punchy garlic soy sauce.
- Prep Time: 10 min
- Cook Time: 8 min
- Total Time: 18 min
- Yield: 4 servings 1x
- Category: Side Dish
- Method: Stir-Frying
- Cuisine: Chinese
- Diet: Vegan
Ingredients
- 1 pound fresh green beans, trimmed
- 3 tablespoons neutral oil (like canola or vegetable)
- 4 cloves garlic, minced
- 1 teaspoon fresh ginger, grated
- 1 tablespoon soy sauce (or tamari for gluten-free)
- 1 teaspoon sugar
- 1/4 teaspoon ground white pepper
- 1 tablespoon water or vegetable broth
Instructions
- Prepare the sauce: In a small bowl, whisk together the soy sauce, sugar, and white pepper. Set aside.
- Heat the wok or large skillet over high heat until very hot. Add the neutral oil and swirl to coat.
- Add the trimmed green beans to the hot wok in a single layer if possible. Let them cook without stirring for 1 to 2 minutes to allow them to blister and char slightly.
- Stir-fry the green beans continuously for 3 to 5 minutes until they are tender-crisp and show dark, blistered spots.
- Push the beans to one side of the wok. Add the minced garlic and grated ginger to the empty space. Cook for about 30 seconds until fragrant, being careful not to burn the garlic.
- Toss the beans with the garlic and ginger.
- Pour the prepared sauce mixture and the water or vegetable broth over the beans. Stir quickly to coat everything evenly. Cook for 30 seconds until the sauce thickens slightly.
- Remove from heat immediately and serve hot.
Notes
- For extra heat, add 1/2 teaspoon of chili flakes with the garlic.
- If you do not have a wok, use the largest, heaviest skillet you own and heat it thoroughly before adding the oil.
- Use tamari instead of soy sauce if you need a gluten-free option.
Nutrition
- Serving Size: 1 serving
- Calories: 120
- Sugar: 3
- Sodium: 350
- Fat: 9
- Saturated Fat: 1
- Unsaturated Fat: 8
- Trans Fat: 0
- Carbohydrates: 9
- Fiber: 4
- Protein: 3
- Cholesterol: 0