
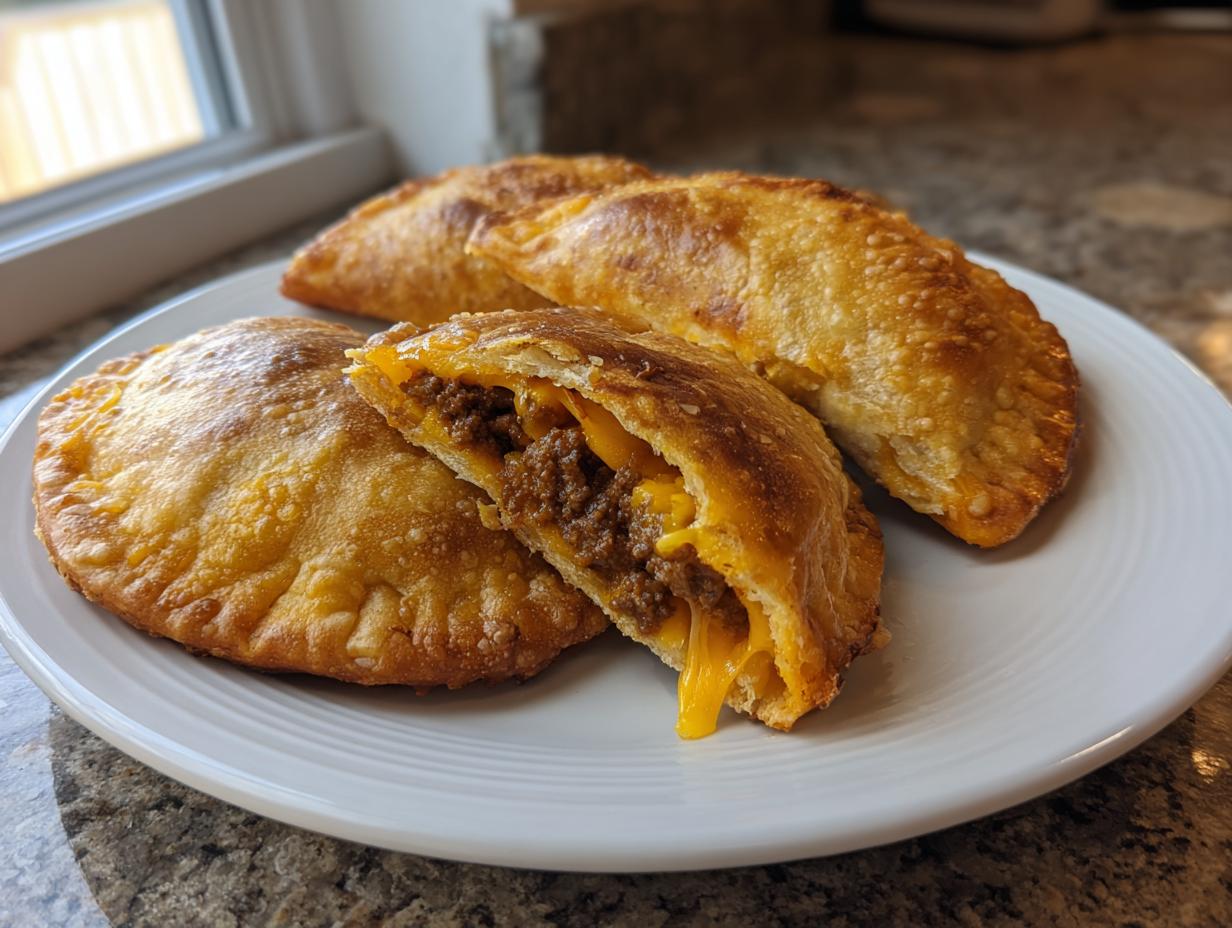
Honestly, how many times have you stood over the sink, trying to eat a truly loaded taco without watching half the filling end up on your shirt? I know I have, and that’s why, in my kitchen, we decided to upgrade Taco Tuesday forever. Forget the spills and the awkward balancing act! We are moving straight to the ultimate handheld solution: cheesy pocket tacos.
As someone who built this whole site on the belief that home cooking should be joyful, not stressful, I developed this recipe to be a total weeknight winner. This is exactly what my friends begged me for when they needed something fast, satisfying, and perfect for the whole family. These aren’t just tacos; they are baked, crispy, gooey little bundles of comfort—your new favorite simple tortilla wraps hiding the best part of taco night inside!
- Why These Cheesy Pocket Tacos Are a Taco Night Game Changer
- Gathering Ingredients for Your Cheesy Pocket Tacos
- Step-by-Step Instructions for Loaded Pocket Tacos
- Tips for Perfect Cheesy Pocket Tacos Every Time
- Serving Suggestions for Your Stuffed Tortilla Recipe
- Storage and Reheating Instructions
- Frequently Asked Questions About Pocket Tacos
- Nutritional Estimates for Your Meal
- Share Your Taco Tuesday Idea
Why These Cheesy Pocket Tacos Are a Taco Night Game Changer
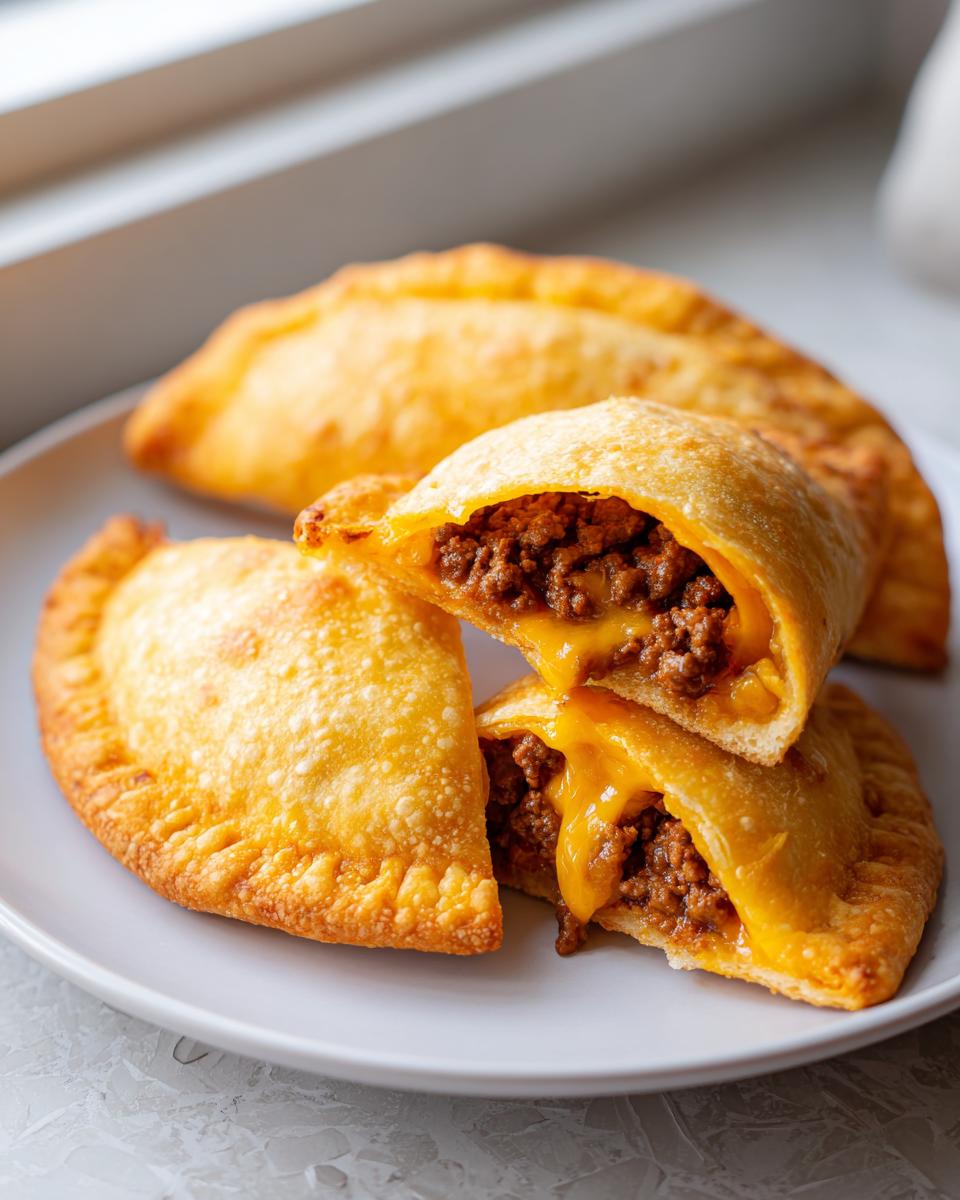
Let’s be honest, sometimes you want the full flavor experience of taco night without the aftermath cleanup. That’s the magic the cheesy pocket tacos bring to the table. They are portable, they are delicious, and most importantly, they keep all that savory goodness safely sealed inside. This recipe truly delivers on being a Taco Night Game Changer because you get all the comfort food vibes tucked neatly into a perfect, handheld package.
Quick Cheesy Dinner Idea Ready in 30 Minutes
You read that right. From the moment you pull out the ground beef to the time you hear that satisfying crunch coming out of the oven, we’re talking 30 minutes total. I timed it last week because I was skeptical, too! This speed makes them the perfect Quick Cheesy Dinner Idea when you’ve barely got enough time to decide what you are watching on TV.
The Secret to Crispy Tortilla Pockets
Nobody wants a soggy pocket, never! The reason people rave about these Loaded Pocket Tacos is the texture. We achieve that golden, crispy exterior not through deep frying, but through a very deliberate step in the oven. Trust me, a quick spritz of cooking spray beforehand totally transforms the tortilla—you get that satisfying crunch without the oil commitment. I’ll show you exactly how when we get to assembly!
Gathering Ingredients for Your Cheesy Pocket Tacos
Okay, before we dive headfirst into assembly, let’s make sure you have everything laid out. Since these cheesy pocket tacos are such a straightforward recipe, ingredient quality really shines through. We aren’t using a million things, so let’s pick the right ones! If you’re looking to step up your cheese game even further, you might want to check out my thoughts on creamy dips, just for inspiration, like my cottage cheese queso recipe.
You’ll need the essentials for the filling, that key creamy binder, and those gorgeous, melty cheeses. Remember, the star here is cheese, so don’t skimp on that Mexican blend. Get your ingredients ready like this:
- 1 tablespoon olive oil
- 1 pound ground beef (we’ll talk substitutes in a minute!)
- 1 packet (1 ounce) taco seasoning mix
- 1/2 cup water
- 8 large flour tortillas—and I mean large, burrito size.
- 8 ounces cream cheese, softened
- 1/2 cup salsa
- 2 cups shredded cheddar or Mexican blend cheese
- Cooking spray (this is vital for getting that nice crispy exterior!)
Expert Ingredient Notes and Simple Substitutions
I’ve learned a few tricks over the years that make this recipe foolproof. First, for the cream cheese, please make sure it’s actually room temperature! Cold, hard cream cheese will fight you, leaving you with messy lumps instead of a smooth, creamy base to mix with your salsa. Just let it sit out for an hour.
For substitutions, if you aren’t doing ground beef, ground turkey works great, or even shredded cooked chicken in a pinch. And listen, if you want to make these Savory Filled Tortillas vegetarian, feel free to swap the meat for two 15-ounce cans of seasoned, drained black beans. The size of the tortilla matters a lot; using a standard taco size almost guarantees a blowout. Stick to the big ones for the best results!
Step-by-Step Instructions for Loaded Pocket Tacos
Alright, this is where the magic happens! If you followed the prep steps, you’ve got your seasoned meat mixture ready to go and your cream cheese/salsa blend waiting patiently. Remember how I said these are quick? That’s because we tackle the filling first, then focus everything on assembly and getting them crispy. If you’re looking for another quick, hands-off meal, check out my guide on easy one-pot ravioli soup—though these tacos are definitely more fun!
Preparing the Seasoned Ground Beef Filling
First things first: get that oven hot! We need it preheated to 400 degrees Fahrenheit, and a baking sheet needs a light spray of cooking spray waiting for the pockets. Don’t forget that!
Grab your skillet and heat the olive oil over medium heat. Toss in the pound of ground beef. You need to break it up completely while it cooks. Once it’s all nicely browned—no pink left—you absolutely must drain off all that extra grease. Seriously, drain it well! Soggy meat equals soggy pockets, and we are aiming for maximum crunch here.
Now, bring the heat back up a touch. Stir in the taco seasoning mix and the half cup of water. Let this simmer now, stirring now and then, for about five minutes. The goal here is for the liquid to mostly evaporate, leaving you with richly flavored, slightly sticky ground beef. Once it looks reduced, kill the heat and set that filling aside.
Assembling and Sealing Your Cheesy Pocket Tacos
This is the most important part for success! Cold tortillas tear like tissue paper, so we need to warm them up just a bit. Pop them in the microwave for about 15 seconds total—just enough so they become floppy and cooperative.
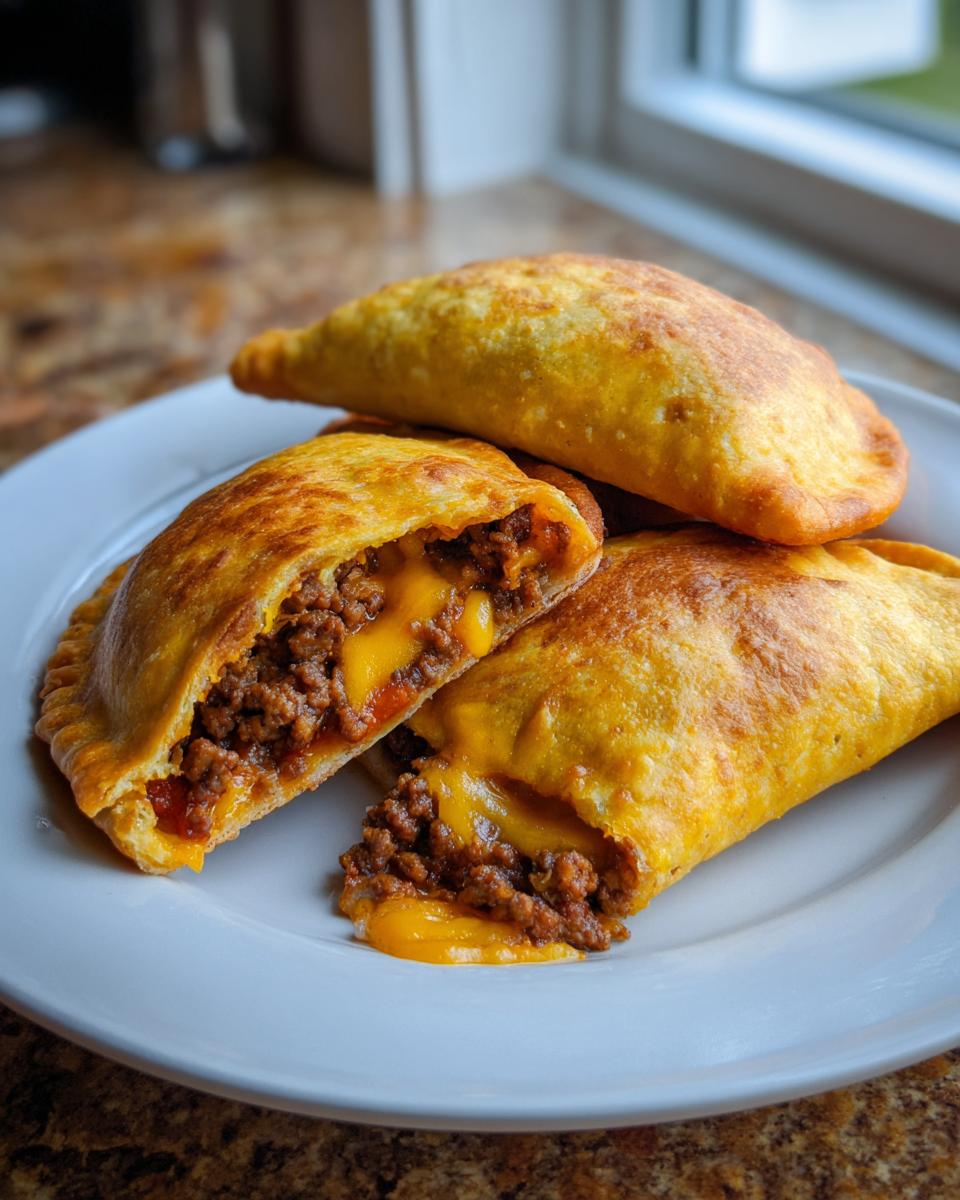
Lay one warm tortilla flat. I like to spread the cream cheese/salsa mix down the center first, maybe about a tablespoon worth. This acts like delicious glue later! Next, layer on about a quarter cup of that seasoned ground beef mixture right over the cream cheese layer. Don’t overstuff them, or they will absolutely burst open—less is more here, even though we are aiming for Loaded Pocket Tacos!
Finally, pile on the shredded cheese. Now, fold that tortilla in half to create that perfect half-moon shape. Don’t just gently fold it; firmly press those edges together! I always grab a fork and crimp the edges all the way around. That fork press makes sure these perfect cheesy pocket tacos stay sealed during their time in the oven.
Baking for Golden, Crispy Perfection
Once all your little pockets are sealed and sitting seam-side down on that prepared baking sheet, grab your cooking spray again. Give the tops a good, light coating. This is the trick that gives them that golden, crackly finish.

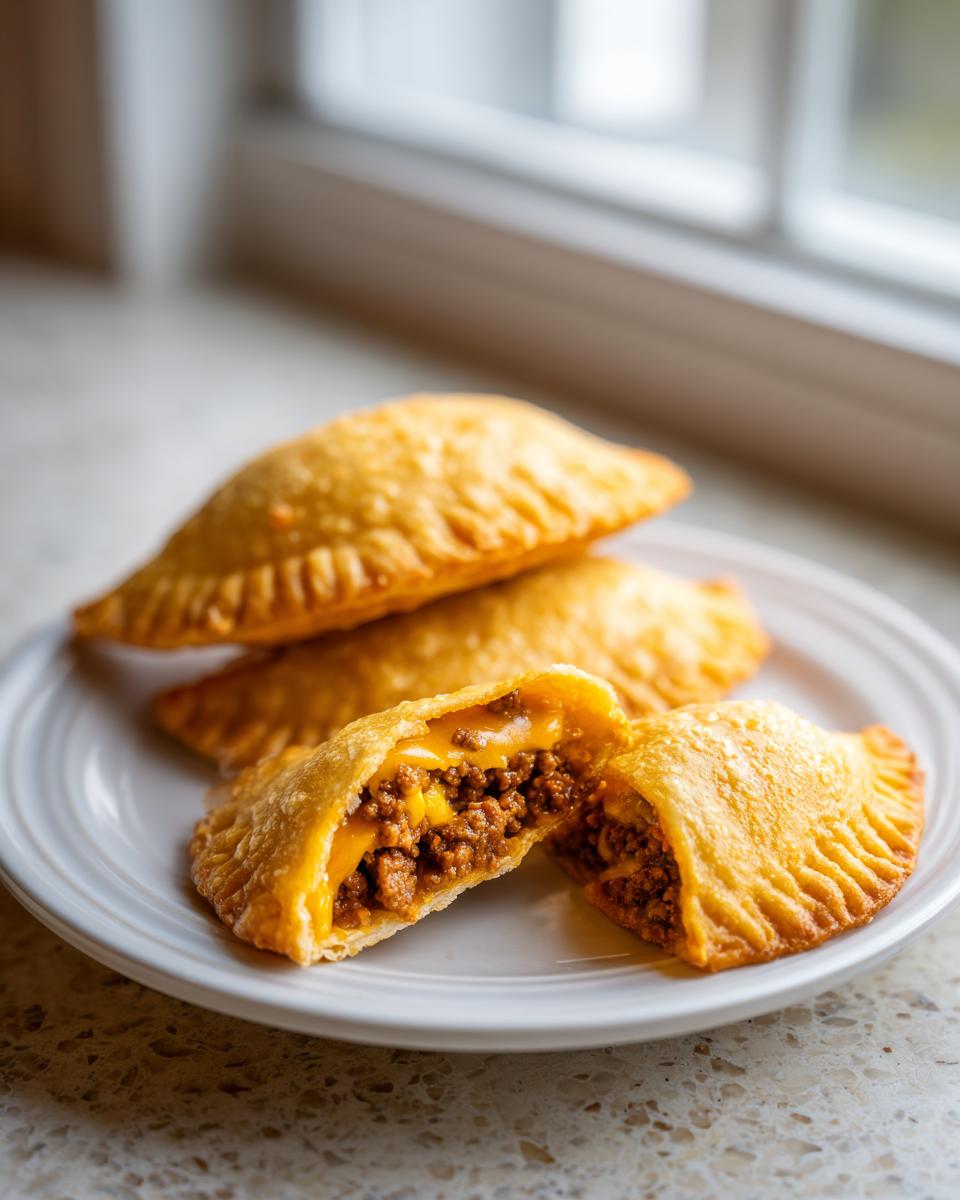
Slide them into the 400°F oven and let them bake for 12 to 15 minutes. You’ll know they are done when the tortillas are deeply golden brown and the cheese inside is bubbling and wonderfully gooey. If you’re using an air fryer—and you totally should if you want the fastest result—just pop them in at 375 degrees Fahrenheit for about 6 to 8 minutes total, flipping them halfway through. Either way, serve these beauties up right away!
Tips for Perfect Cheesy Pocket Tacos Every Time
We’ve made the meat, we’ve sealed the pockets, and we’re ready for the oven, but let me give you a couple of quick pro-tips. Even with the best recipe, sometimes things go a little sideways, especially when you are stuffing tortillas full of delicious, melty filling! My goal here is to send you off with maximum confidence so you don’t end up with a cheesy mess leaking all over your baking sheet.
The biggest fear people have is the blowout—that moment when the filling bursts out because the pressure from the steam is too much. It happens! But usually, it’s because we overfilled or didn’t seal tightly enough. Go back to that crimping step with the fork. Make sure those edges seal up like a bank vault. I sometimes double-crimp, just to be sure!
Another thing to watch out for is the cheese placement. You want the shredded cheese to be near the center, but make sure some is touching both layers of the tortilla right where you folded it. This melted cheese acts like secondary glue, holding the structure together while the tortilla crisps up. It’s a simple trick that makes a huge difference!
Also, if you find your filling mixture is a little too loose even after simmering down the water, let it cool for about 10 minutes before stuffing. Warm filling shrinks less, but *hot* filling will instantly warm the tortilla too much, making it fragile before you even start folding. If you want an idea for a different kind of gooey cheese component, I absolutely adore my best three-cheese bruschetta dip, though that’s better served on toast!
If you followed all these little tips, you should have eight beautifully sealed, golden-brown pockets ready for dipping. Enjoy that perfect crunch!
Serving Suggestions for Your Stuffed Tortilla Recipe
We made these handheld pockets because they are just so easy, but that doesn’t mean we can skimp on the fun toppings! These are perfect for Taco Tuesday because you still get all the fresh, bright flavors you love—you just eat them in a much cleaner way. I honestly think that making these Family Friendly Tacos portable makes them even *more* appealing to the kids, even the picky ones.
Think color and coolness to contrast that warm, savory beef and gooey cheese inside. When mine come out of the oven golden brown, I usually set up a little topping bar so everyone can customize their own.
Here are my must-haves for serving:
- A dollop of cool sour cream or Mexican crema. It just cuts through that richness beautifully.
- Shredded lettuce for that essential crunch.
- If you’re feeling ambitious, some finely chopped fresh cilantro or green onions sprinkled over the top right before serving.
- A side of chunky salsa or guacamole for dipping. Yes, these pockets are stuffed, but you still need salsa for dipping, don’t you? I won’t judge!
If you need a really quick, healthy side dish that pairs well, check out my article on quick, healthy lunch ideas—many of those veggie sides work perfectly here too, like a simple lime and cilantro slaw!
These Stuffed Tortilla Recipe pockets are hearty enough to stand on their own, but pairing them with something cool and fresh just rounds out the whole meal perfectly. Enjoy making this mess-free Taco Night a new tradition!
Storage and Reheating Instructions
If, by some miracle, you have leftovers of these incredible cheesy pocket tacos, you need to store them correctly. Keep them in an airtight container in the fridge for up to four days. Don’t even think about the microwave for reheating! That will just steam the crispiness away. For the best results, pop them back into a 350°F oven or your air fryer for about 5 minutes until that cheese is gooey and the outside is perfectly crisp again. That keeps them tasting just as good as they did fresh!
Frequently Asked Questions About Pocket Tacos
I always love hearing what questions pop up when you all get into the kitchen! It shows me where I might need to be clearer, and honestly, it helps me perfect the recipe even more for next time. Addressing these common concerns makes sure your experience making these Easy Taco Pockets is smooth sailing all the way to that satisfying crunch. If you’re curious about other quick meals, I have a whole section dedicated to easy breakfast recipes, by the way!
Can I make these ahead of time?
Oh, yes! This is a great strategy for busy weeknights. You can absolutely assemble your Stuffed Tortilla Recipe earlier in the day. Go through all the filling and sealing steps, but stop right before you spray them with cooking spray and bake them. Cover the baking sheet tightly with plastic wrap and keep them in the fridge for up to 24 hours. When you’re ready to eat, just pull them out, spray the tops lightly, and bake them for just a few extra minutes since they are starting colder. Perfect!
What is the best tortilla for Crispy Tortilla Pockets?
I harp on this a lot, but it’s critical for getting those beautiful Crispy Tortilla Pockets and avoiding sad leaks! You need large, pliable flour tortillas—the burrito size, typically 10 or 12 inches. These give you enough surface area to fold over and seal securely without the filling ripping through the edges. If you use a standard, smaller taco size, the ratio is off, and you’ll likely end up with a blowout before they even hit the oven. Trust me, stick to the biggest flour tortilla you can find!
Can I use different fillings besides ground beef?
Absolutely, this recipe is incredibly adaptable! While the ground beef mixture is classic for these Cheesy Beef Pockets, feel free to swap it out. Shredded cooked chicken works wonderfully, especially rotisserie chicken for speed. Ground turkey is a great lean swap, too, similar in texture to the beef. If you’re leaning vegetarian and want a hearty filling, use drained black beans instead. Just make sure whatever meat or bean you use isn’t too wet, or you risk a soggy bottom!
Nutritional Estimates for Your Meal
Now, I know you are probably focused on getting these cheesy pocket tacos on the table ASAP, but since we are aiming to elevate our everyday cooking, it’s good to have a rough idea of what’s packed inside. These figures are based on the recipe provided and really just give you a general snapshot of this amazing comfort food.
Remember, these estimates are for one single serving—that’s one beautifully golden, crunchy pocket taco. Because we are using ground beef and substantial cheese, these are certainly hearty! If you swap the beef for leaner ground turkey or use fat-free cream cheese, your numbers will shift, so always treat these as a starting point.
Here’s a quick rundown of the numbers for this fantastic Handheld Taco Recipe:
- Calories: Approximately 380 per pocket
- Fat: Around 22 grams (with about 10g saturated – that’s the cheese talking!)
- Carbohydrates: About 25 grams
- Protein: A solid 20 grams, thanks to that beef filling!
This is why these make such a satisfying meal—lots of protein and fat to fill you up! But seriously, the amount of sodium can vary wildly depending on your brand of taco seasoning and salsa, so if that is a huge concern for you, just opt for low-sodium versions. That’s the Aria Thompson way: know the baseline, then tweak it for your own needs. Enjoy knowing you’re serving up a delicious, satisfying meal!
Share Your Taco Tuesday Idea
Now that you’ve successfully mastered the assembly and baked these perfect, crispy pockets, I really, truly want to hear about it! This recipe is designed to be your next go-to Weeknight Taco Dinner solution, but the best part of sharing recipes like this is seeing how you make them your own.
Don’t be shy! Head down to the comments section below and leave a rating for these Easy Taco Pockets. Did you stick to the classic beef and cheddar, or did you get adventurous? Maybe you tried some smoked pulled pork in there, or maybe you used ground turkey? Tell me your favorite filling variation—I love getting new ideas from fellow home cooks like you. It helps everyone who comes next see just how versatile this Simple Tortilla Wrap can be!
If you snapped a picture of your golden, crunchy, perfectly portable pockets, please share it around! Tag me on social media—I love seeing my recipes out in the real world. Knowing that you used this to transform your usual routine into a fun, family-friendly evening is truly why I do all this work in the kitchen. Happy cooking, and I look forward to reading your success stories!
PrintLoaded Baked Cheesy Pocket Tacos: The Ultimate Quick Dinner Twist on Taco Night

Make these loaded baked cheesy pocket tacos for a satisfying, handheld meal. Seasoned ground beef and gooey melted cheese are sealed inside crispy tortillas for a simple, family-friendly weeknight dinner.
- Prep Time: 15 min
- Cook Time: 15 min
- Total Time: 30 min
- Yield: 8 servings 1x
- Category: Dinner
- Method: Baking
- Cuisine: Mexican Inspired
- Diet: Vegetarian
Ingredients
- 1 tablespoon olive oil
- 1 pound ground beef
- 1 packet (1 ounce) taco seasoning mix
- 1/2 cup water
- 8 large flour tortillas (burrito size)
- 8 ounces cream cheese, softened
- 1/2 cup salsa
- 2 cups shredded cheddar or Mexican blend cheese
- Cooking spray
Instructions
- Preheat your oven to 400 degrees Fahrenheit. Lightly grease a baking sheet or spray it with cooking spray.
- Heat the olive oil in a large skillet over medium heat. Add the ground beef and cook, breaking it apart, until it is fully browned. Drain off any excess grease.
- Stir the taco seasoning mix and water into the cooked ground beef. Bring the mixture to a simmer and cook for 5 minutes, stirring occasionally, until the liquid has mostly evaporated. Remove the skillet from the heat.
- In a small bowl, mix the softened cream cheese and salsa together until smooth.
- Warm the tortillas briefly in the microwave (about 15 seconds) to make them pliable. This prevents tearing when folding.
- Lay a warm tortilla flat. Spread about 1 tablespoon of the cream cheese mixture down the center. Top the cream cheese with about 1/4 cup of the seasoned ground beef mixture. Sprinkle generously with shredded cheese.
- Fold the tortilla in half over the filling to create a half-moon shape. Press the edges firmly together to seal the pocket. You can use a fork to crimp the edges for extra security if desired.
- Place the sealed pocket seam-side down on the prepared baking sheet. Repeat with the remaining tortillas and filling.
- Lightly spray the tops of the pockets with cooking spray.
- Bake for 12 to 15 minutes, or until the tortillas are golden brown and crispy and the cheese inside is fully melted and gooey.
- Serve immediately with your favorite taco toppings.
Notes
- For an air fryer method, cook the pockets at 375 degrees Fahrenheit for 6 to 8 minutes, flipping halfway through, until golden brown.
- You can substitute the ground beef with ground turkey or shredded cooked chicken for a different flavor profile.
- Use a thicker tortilla, like a burrito size, to prevent the filling from leaking during baking.
Nutrition
- Serving Size: 1 pocket
- Calories: 380
- Sugar: 3
- Sodium: 650
- Fat: 22
- Saturated Fat: 10
- Unsaturated Fat: 12
- Trans Fat: 0.5
- Carbohydrates: 25
- Fiber: 2
- Protein: 20
- Cholesterol: 65