
Sometimes, you just need that ultimate hug-in-a-bowl flavor, but you only have about thirty minutes before everyone starts hovering around the pantry door. That’s where the beauty of taking a classic comfort meal and giving it a major convenience upgrade comes in! I’m Aria, and trust me, I know that weekday dinner panic. When my kids were little, trying to replicate a full burger experience without the grill smoke and the endless assembly line of toppings felt impossible.
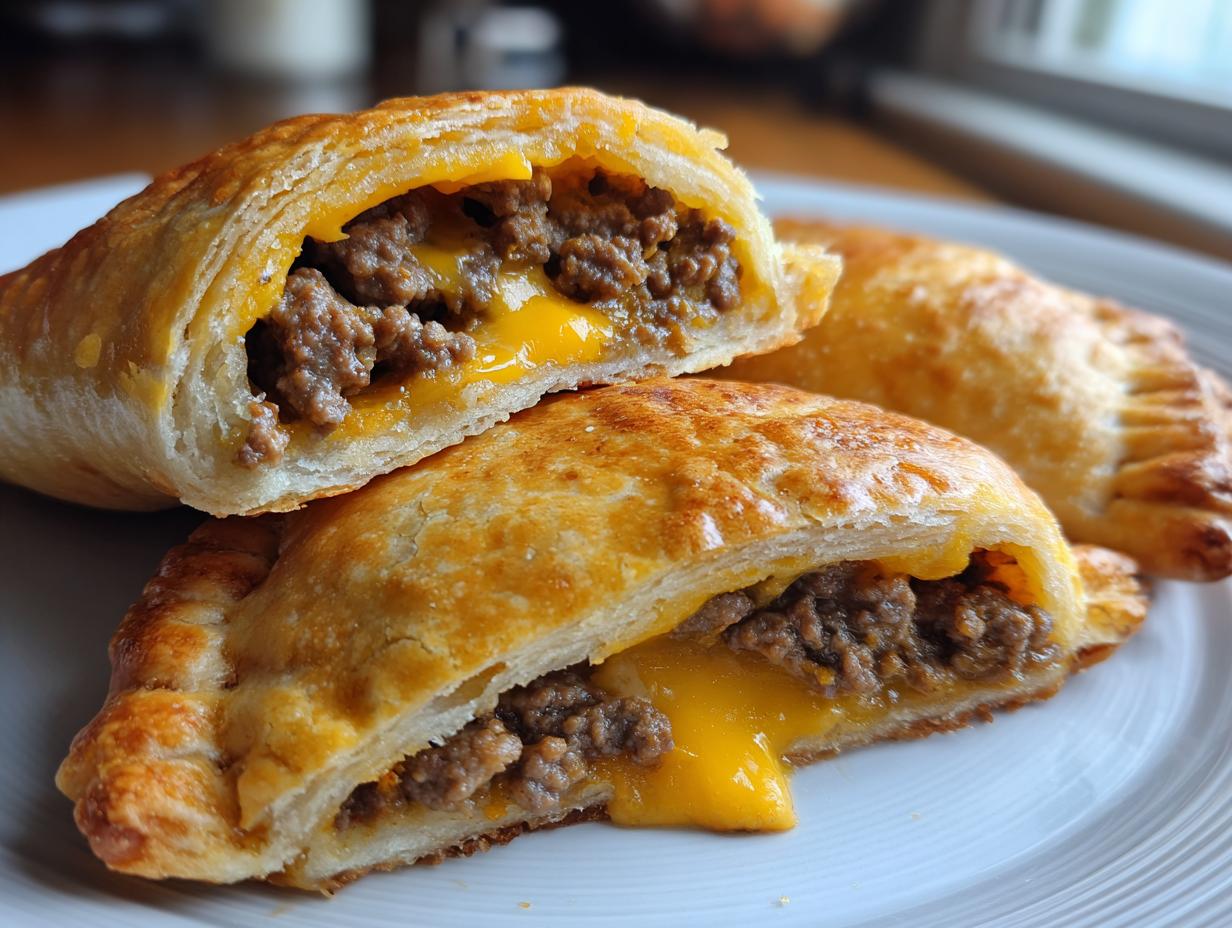
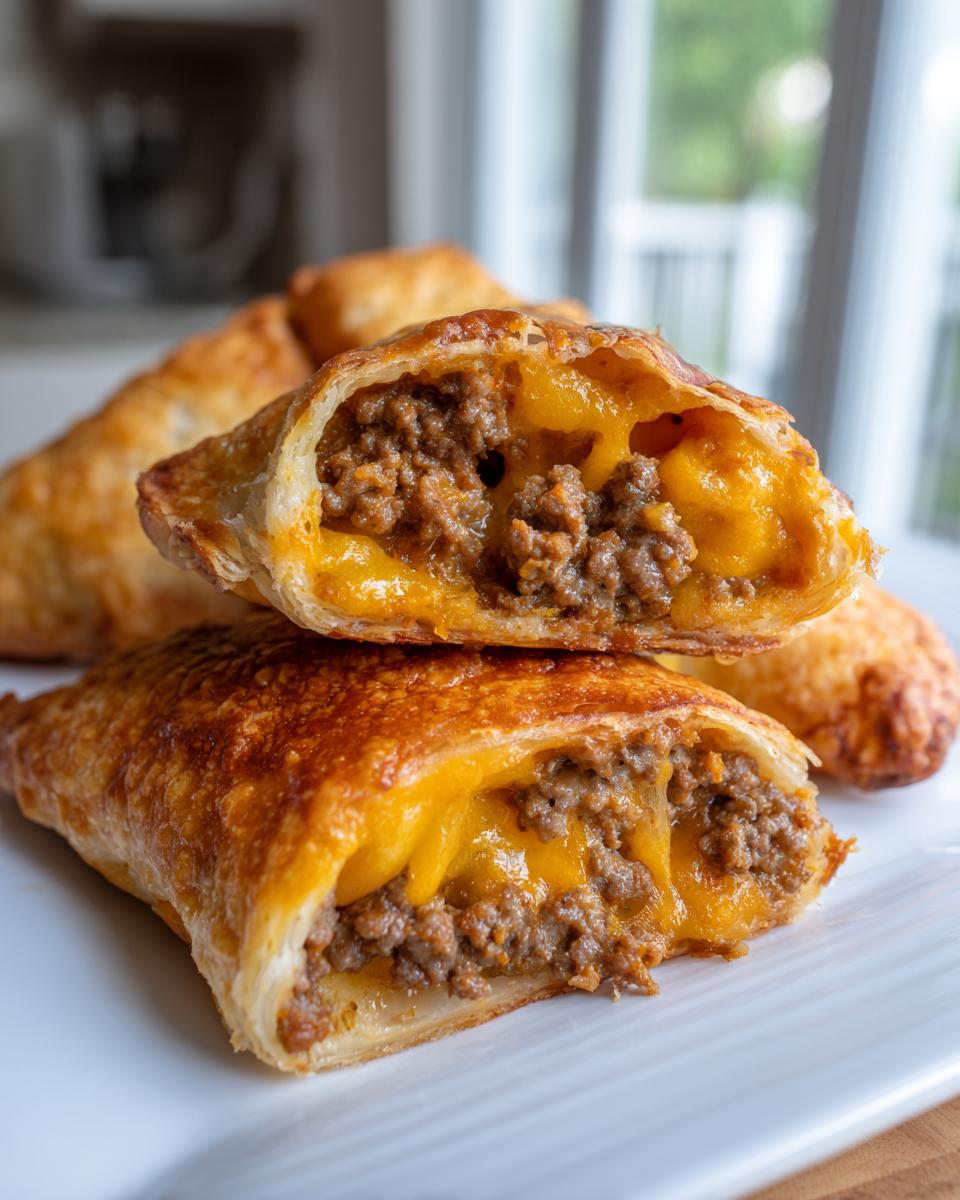
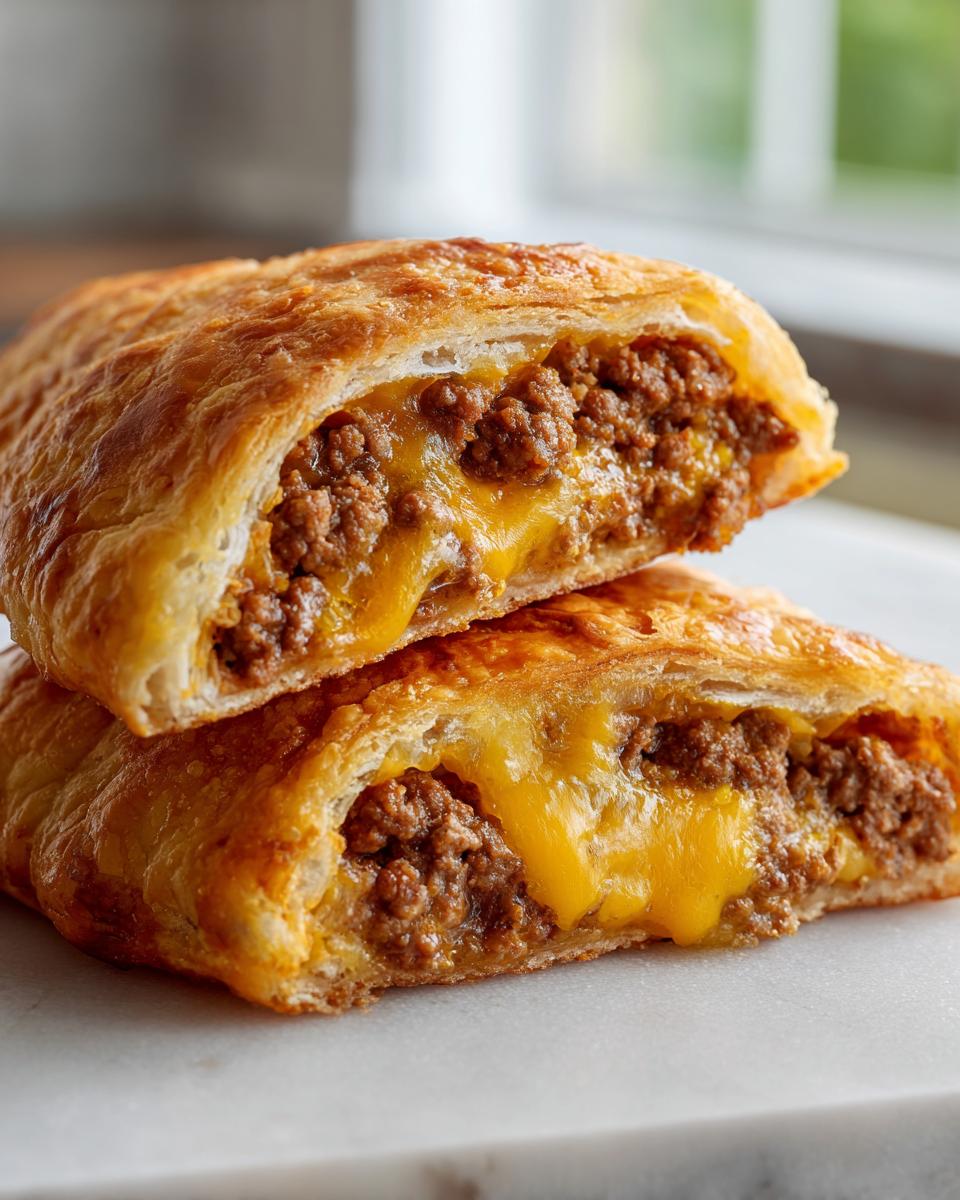
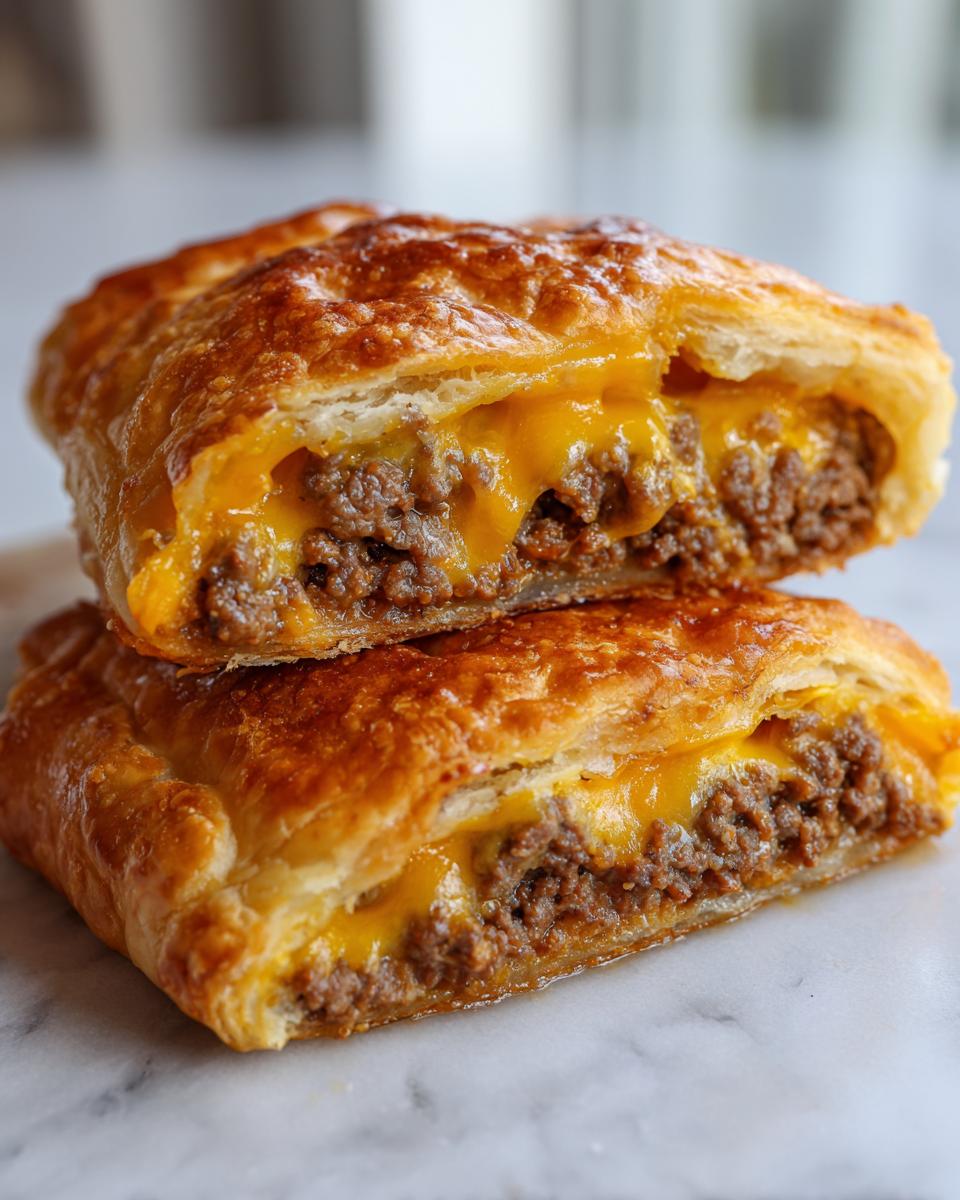
That’s why I perfected these cheeseburger pockets crescent rolls. We’re taking everything we love—that savory, seasoned ground beef, the gooey melted cheddar, that little zing of mustard—and wrapping it all up tight in flaky, buttery crescent dough. It’s like a homemade Hot Pocket, but so much better because you control the quality. This streamlined recipe turns a beloved American favorite into the ultimate quick dinner or the snack everyone begs for on game day. Forget complicated pastry work; we’re using trusty refrigerated dough to get maximum flavor with minimal fuss!
- Why You Will Love These Cheeseburger Pockets Crescent Rolls
- Essential Ingredients for Perfect Cheeseburger Pockets Crescent Rolls
- How to Make Your Easy Crescent Roll Cheeseburger Pockets
- Tips for Perfect Baked Cheeseburger Bites
- Storage and Reheating Your Cheeseburger Pockets Crescent Rolls
- Serving Suggestions for Your Hamburger Pocket Recipe
- Frequently Asked Questions About Cheeseburger Pockets Crescent Rolls
- Estimated Nutritional Data for Cheeseburger Pockets Crescent Rolls
- Share Your Experience Making These Cheeseburger Pockets Crescent Rolls
Why You Will Love These Cheeseburger Pockets Crescent Rolls
When I started developing this recipe, my main goal was speed without losing that flavor punch. I think I nailed it, and you’re going to agree once you see how fast these come together. Seriously, you get that classic American flavor profile faster than it takes my husband to find the barbecue tongs!
- Incredibly Fast Prep Time: With just 15 minutes of prep, these are perfect for those nights when you need a simple weeknight dinner recipe that satisfies everyone.
- Effortless Dough: We rely on ready-made crescent dough. No fancy rolling or proofing required, just unroll and fill!
- Total Comfort Food: They taste exactly like your favorite diner cheeseburger, just miniaturized and baked into gooey pockets.
- Kid-Approved Success: My kids absolutely devour these, making them a reliable choice when you need a sure win for the family.
Essential Ingredients for Perfect Cheeseburger Pockets Crescent Rolls
The key to making these cheeseburger pockets crescent rolls truly brilliant is sticking to simple, high-quality components. Since we are using that amazing pre-made dough—it really is the backbone of many great pillsbury dough recipes—we can focus all our energy on that rich, flavorful filling. You only need about eight core items to make eight perfect little parcels of joy. Don’t overcomplicate it; the magic is in the combination!
Here’s what you’ll need to gather up before we start browning that beef:
- 1 pound ground beef (I prefer 80/20 for the best flavor!)
- 1 teaspoon onion powder
- 1/2 teaspoon garlic powder
- 1/2 teaspoon salt
- 1/4 teaspoon black pepper
- 1/4 cup finely diced yellow onion
- 1 tablespoon yellow mustard
- 1 (8 ounce) package refrigerated crescent roll dough
- 1 cup shredded sharp cheddar cheese
- 1 egg, beaten (for that beautiful golden egg wash!)
Ingredient Notes and Substitutions for Your Cheeseburger Pockets Crescent Rolls
Let’s talk substitutions because I believe in making recipes work for you! For the cheese, I always push for sharp cheddar because it brings a necessary bite that cuts through the richness of the beef. If you aren’t a fan, Monterey Jack or Colby melts beautifully, too. Also, feel free to boost that flavor note I mentioned in the recipe card: adding just one tablespoon of ketchup right in with the mustard really punches up that classic hamburger pocket recipe taste.
How to Make Your Easy Crescent Roll Cheeseburger Pockets
Alright, grab your skillet and your favorite baking sheet! This is where we turn simple pantry ingredients into something truly special. Remember, the goal here is to make these quick dinner crescent rolls taste like they took hours. We’re hitting 375 degrees Fahrenheit, so get that oven preheating right now. Line your sheet with parchment paper; trust me, cleanup is almost nonexistent that way!
Preparing the Savory Beef Filling for Your Cheeseburger Pockets Crescent Rolls
First things first: we need to cook that ground beef until it’s perfectly browned. Once it’s cooked through, this next step is super important: drain off every last drop of grease. We want flavor, not a soggy bottom! Toss in your onion powder, garlic powder, salt, and pepper, and let those spices mingle for about 60 seconds. Pull the pan off the heat before stirring in your finely diced onion and that teaspoon of mustard. It needs just five minutes to cool down before we stuff the dough!
Assembling and Sealing the Cheeseburger Pockets Crescent Rolls
Now for the fun part—turn out your crescent dough and separate those little triangles. We’re spooning the slightly cooled beef mixture onto the wide end of each one, followed by a generous sprinkle of sharp cheddar. When you start rolling, be intentional! Roll tightly up toward the point, and then really work those edges between your fingers. Seriously, pinch, press, and twist the seams together hard. That firm sealing is the difference between a perfect turnover and a cheese explosion in your oven!
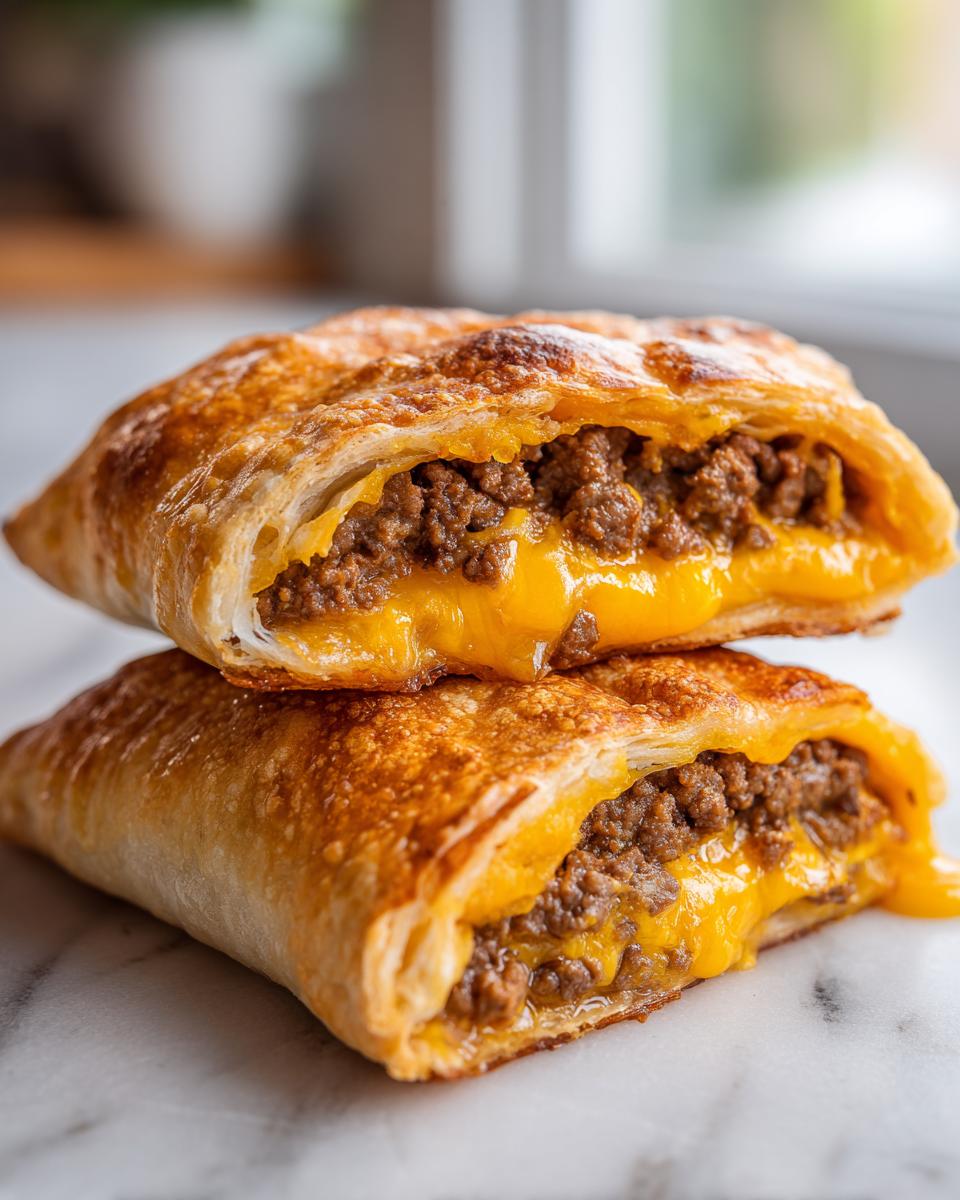
Once they are all tucked in seam-side down, give them a gentle brush of that beaten egg wash—this gives you that irresistible golden shine we all love on our savory crescent roll snacks.
Tips for Perfect Baked Cheeseburger Bites
Even though these cheeseburger pockets crescent rolls are designed to be super simple, there are a couple of little tricks that elevate them from good to absolutely unforgettable. My goal is always to make sure you get that stunning, professional look without breaking a sweat. These tips focus on the final appearance and the texture when you bite in!
Here are my favorite ways to ensure your pockets shine. If you’re looking for more ways to use that dough for quick snacks, check out my ideas for savory crescent roll snacks!
- Don’t Skip the Cooling Step: I cannot stress this enough—letting that beef filling cool for at least five minutes before stuffing the dough is vital. If it’s piping hot, it steams the dough from the inside, leading to a gummy center instead of that lovely flaky pastry.
- The Sesame Seed Trick: If you want that authentic, beautiful look of a classic burger bun, sprinkle a tiny, even layer of sesame seeds over the top right after you apply the egg wash. It looks fantastic and adds a lovely slight crunch!
- Watch the Oven Temperature: Crescent dough cooks fast! You want a hot oven (375°F) so the dough puffs up quickly before the cheese has time to completely melt out. Keep an eye on them after the 10-minute mark so they don’t go from golden brown to burnt too fast.
- The Full Seal is Everything: When you pinch those seams, really press them hard to make sure they are unified. A weak seal is an invitation for cheese lava, and while runny cheese can be delicious, it burns easily on the baking sheet.
Storage and Reheating Your Cheeseburger Pockets Crescent Rolls
The best part about making a big batch of cheeseburger pockets crescent rolls is having leftovers for lunch the next day! If you have any left, just let them cool completely first. I store mine in a standard airtight container right on the counter, and they stay perfectly good for maybe two days. You can freeze them too, wrapped tightly in plastic wrap, for up to a month.
Now, if you decide to reheat them, please, please skip the microwave if you can! Microwaving makes that beautiful flaky dough turn sad and chewy. The oven is your best friend here. Pop those pockets onto a baking sheet at about 350 degrees Fahrenheit for about eight to ten minutes. That little bit of dry heat brings back that wonderful crispness you enjoyed fresh out of the oven!
Serving Suggestions for Your Hamburger Pocket Recipe
These savory little bundles are so self-contained, they are practically a meal on their own! But every great American classic deserves a great companion, right? I find that what the cheesy beef turnovers really need is something bright and acidic to cut through the richness of the beef and cheese. Don’t just grab a bag of chips—let’s elevate this!
When I make a big batch of these for a fun family friendly dinner, or even just as a heavy afternoon snack, I always lean into classic diner sides, but done simply. If you are looking for ways to round out the meal with lighter options, check out my favorite pairings for healthy snack ideas because sometimes you need balance!
Here are my top ways to serve up your savory crescent roll creations:
- The Pickle Factor: A few crunchy dill pickle chips scattered on the plate, or even a simple bowl of ice-cold, crisp dill spears, is non-negotiable for me. That sharp vinegar taste just snaps everything into focus.
- Oven Garlic Fries: Skip the deep fryer! Toss some good quality frozen french fries with olive oil, dried oregano, and a heavy hit of garlic powder. Bake them up alongside your pockets (if you adjust the timing slightly) for that perfect crispy/soft texture contrast.
- Simple Side Salad: If you want to keep things lighter, nothing beats a quick green salad. I use baby spinach tossed with a very light homemade vinaigrette made from red wine vinegar, olive oil, and a pinch of brown sugar. It’s fresh, simple, and keeps the focus on your baked cheeseburger bites.
- Classic Condiment Bar: Set out small bowls of ketchup, extra mustard, and maybe even some thinly sliced tomatoes and lettuce leaves. Kids especially love customizing their own little station, even though the flavor is already packed inside the dough!
Frequently Asked Questions About Cheeseburger Pockets Crescent Rolls
I always get so many questions when people try these out for the first time, and honestly, that’s the best part of cooking—figuring out how to tweak things to fit your life! Since we’re using pre-made dough and simple fillings, most concerns revolve around preventing leakage or adapting for picky eaters. I’ve pulled together the most common ones I hear about these cheeseburger pockets crescent rolls so you can bake with total confidence. If you’re looking for even more ways to use that dough, you should check out my guide on easy crescent roll recipes for more inspiration!
Can I use different types of ground meat in these cheeseburger pockets crescent rolls?
Absolutely, you totally can! While ground beef is classic for that burger flavor, ground turkey or chicken works wonderfully in this recipe too. Just watch out for leaner meats; they sometimes dry out faster. If you switch to turkey, you might want to add just a tiny splash of Worcestershire sauce or a bit more fat (like a teaspoon of melted butter) into the mixture when you add your seasonings to keep those pockets moist and flavorful. It’s a fantastic switch for a slightly lighter meal!
What is the best way to prevent leaks when making these savory crescent roll snacks?
This is the number one question, and the answer has two parts, both key to preventing cheesy blowouts! First, make sure that cooked beef filling is cooled down quite a bit before you try filling the dough. Hot filling melts the cold dough too fast before you can seal it properly. Second, when you roll them up, take your time sealing the long seam and the pointed ends. I use my fingers to really press them together—you want to physically mash the dough shut to create a tight barrier. If you take care with sealing, you’ll have perfect savory crescent roll snacks!
Are these cheeseburger pockets crescent rolls suitable for a fun family friendly dinner?
Oh, without a doubt! This is one of my go-to recipes when I need a guaranteed win for a fun family friendly dinner. Kids love that they are handheld, and they aren’t fussy like traditional burgers. If you have kids who won’t touch onions, you can easily leave them out of their portion of the filling, or even serve the onion separately on the side. They are easy to customize, easy to eat standing up, and they heat up great as leftovers for lunch the next day!
Estimated Nutritional Data for Cheeseburger Pockets Crescent Rolls
I wanted to give you a snapshot of the nutrition in these amazing cheeseburger pockets crescent rolls! Knowing what’s in your food is part of that culinary confidence I talk about. Now, you have to promise me you’ll take this with a slight grain of salt, okay? Different brands of ground beef, even how thick you roll the dough, can change these numbers a little bit. These figures are based on using standard ingredients and serving size of one pocket.
Here is the breakdown of the estimated values:
- Serving Size: 1 pocket
- Calories: 320
- Fat: 18g (with 8g of that being saturated fat—that’s that good flavor!)
- Carbohydrates: 22g
- Protein: 18g
- Sugar: 2g
- Sodium: 550mg (A bit high on the sodium, so maybe use low-sodium seasoning next time if that’s a concern for your family!)
Remember, this is a guide, not a hard and fast rule set in stone! If you load yours up with a leaner ground turkey or go super light on the cheese, your personal numbers are going to change. But this gives you a great starting point for a satisfying, flavorful, and quick meal!
Share Your Experience Making These Cheeseburger Pockets Crescent Rolls
I poured my heart into perfecting a recipe that brings that rich, satisfying cheeseburger flavor right into a convenient, dreamy crescent pocket. Now, the true magic of Cooking Zenith happens when you take this roadmap and make it uniquely yours! I genuinely want to know how they turned out for you and your family.
Did you stick to the classic five-spice filling? Or did you sneak in some smoked paprika or maybe chopped pickles inside, like I sometimes dare to do? These little creations are the perfect stepping stone toward feeling more confident and intuitive in your own kitchen. Don’t be shy about experimenting!
Please take a moment to leave a star rating right below this post—it helps other home cooks find reliable recipes like this one. And if you snapped any photos while these golden beauties were cooling on the rack, tag me on social media! Seeing your successes is truly what keeps me energized in the kitchen. Head over to the About Page to learn more about the philosophy behind making the everyday extraordinary!
PrintEasy Crescent Roll Cheeseburger Pockets

Make quick, satisfying cheeseburger pockets using crescent roll dough stuffed with seasoned ground beef, cheddar cheese, and a hint of mustard for a fun, portable meal.
- Prep Time: 15 min
- Cook Time: 15 min
- Total Time: 30 min
- Yield: 8 pockets 1x
- Category: Lunch
- Method: Baking
- Cuisine: American
- Diet: Low Fat
Ingredients
- 1 pound ground beef
- 1 teaspoon onion powder
- 1/2 teaspoon garlic powder
- 1/2 teaspoon salt
- 1/4 teaspoon black pepper
- 1/4 cup finely diced yellow onion
- 1 tablespoon yellow mustard
- 1 (8 ounce) package refrigerated crescent roll dough
- 1 cup shredded sharp cheddar cheese
- 1 egg, beaten (for egg wash)
Instructions
- Preheat your oven to 375 degrees Fahrenheit. Line a baking sheet with parchment paper.
- Brown the ground beef in a skillet over medium heat. Drain off any excess grease.
- Stir the onion powder, garlic powder, salt, and pepper into the cooked beef. Cook for one minute until fragrant.
- Remove the skillet from the heat. Stir in the finely diced onion and yellow mustard. Let the mixture cool slightly, about 5 minutes.
- Unroll the crescent roll dough onto a clean surface. Separate the dough into 8 triangles.
- Spoon about 2 tablespoons of the cooled beef mixture onto the wider end of each dough triangle. Sprinkle about 2 tablespoons of shredded cheddar cheese over the beef mixture.
- Starting at the wide end, roll each triangle up toward the point. Pinch the edges and the seam firmly to seal the pocket completely. Place the sealed pockets seam-side down on the prepared baking sheet.
- Brush the tops of the pockets lightly with the beaten egg wash.
- Bake for 12 to 15 minutes, or until the crescent dough is golden brown and cooked through.
- Let the cheeseburger pockets cool for a few minutes before serving.
Notes
- For extra flavor, mix 1 tablespoon of ketchup into the beef mixture along with the mustard.
- If you want a crispier crust, sprinkle a tiny pinch of sesame seeds on top before baking.
- You can substitute Monterey Jack or Colby cheese for the cheddar if you prefer a different melt.
Nutrition
- Serving Size: 1 pocket
- Calories: 320
- Sugar: 2
- Sodium: 550
- Fat: 18
- Saturated Fat: 8
- Unsaturated Fat: 10
- Trans Fat: 0
- Carbohydrates: 22
- Fiber: 1
- Protein: 18
- Cholesterol: 60