
You know those nights, right? You’re halfway through a Monday, and all you can think about is that warm, salty, cheesy comfort of a classic cheeseburger. But who has the time, or the motivation, to fire up the grill, deal with the sides, and manage all that grease? Honestly, I don’t, not most weeknights! That is precisely why I obsessed over perfecting these incredibly fast cheeseburger pockets biscuits.
Because we’re using refrigerated canned biscuits, we skip about 45 minutes of prep time, transforming burger night into a 30-minute triumph. This recipe takes everything you love—the savory beef seasoned just right, that perfect layer of melted cheese, and that hint of tangy pickle—and tucks it neatly into a flaky, golden crust. It’s my go-to way to elevate the everyday, because great flavor shouldn’t wait for the weekend. Trust me, these little handheld wonders are total game-changers for busy home cooks.
- Why These Cheeseburger Pockets Biscuits Are Your New Weeknight Hero
- Ingredients for Perfect Cheeseburger Pockets Biscuits
- Step-by-Step Instructions for Making Cheeseburger Pockets Biscuits
- Tips for Success with Baked Ground Beef Pockets
- Variations on Classic Cheeseburger Pockets Biscuits
- Storage and Make Ahead for Cheeseburger Stuffed Biscuits
- Serving Suggestions for Your Quick Cheeseburger Bites
- Frequently Asked Questions About Cheeseburger Pockets Biscuits
- Estimated Nutritional Information for Cheeseburger Pockets Biscuits
Why These Cheeseburger Pockets Biscuits Are Your New Weeknight Hero
Why bother with buns and plates when you can have all that amazing flavor sealed up perfectly? These pockets solve pretty much every weeknight dinner dilemma I have. They are fast, they are filling, and let’s be honest—anything you can eat standing over the sink counts as a win, right?
- Total Time is under 30 minutes—seriously!
- They travel beautifully; perfect for packing lunches or picnics.
- The flavor payoff rivals a drive-thru visit, but you control the ingredients.
- These cheeseburger pockets biscuits are wildly appealing to kids and adults alike.
Ingredients for Perfect Cheeseburger Pockets Biscuits
Getting started is easy because we are leaning on store-bought convenience! For the best texture and flavor, make sure you have everything ready to go before you turn on the heat. You’ll need that standard tube of creamy canned biscuits—the ones that bake up soft and fluffy the moment they hit the oven. Grab your ground beef and the classic combo of seasonings that make a burger taste like a burger.
Here is the full lineup for making eight delicious pockets, ensuring every bite delivers that familiar, satisfying cheeseburger hit we are aiming for:
- 1 (16.3 ounce) can refrigerated biscuit dough (8 biscuits)
- 1 pound ground beef
- 1/2 teaspoon salt
- 1/4 teaspoon black pepper
- 1/2 cup finely chopped onion (optional)
- 1/2 cup shredded cheddar cheese (or American cheese slices)
- 2 tablespoons ketchup
- 1 teaspoon yellow mustard
- 1 teaspoon pickle relish (optional)
- 1 egg, beaten (for egg wash)
Ingredient Notes and Substitutions for Your Cheeseburger Pockets Biscuits
Listen, the structure of this recipe relies on the biscuit dough, so don’t mess with that unless you are using crescent rolls, which I cover later! When it comes to the cheese, I usually default to American slices because they melt into that glorious, gooey state that seals everything up perfectly, just like the drive-thru stuff. Cheddar is great for a sharper bite, though. If you hate pickle relish, don’t worry! You can skip it, or for a real flavor pop, mince up some actual dill pickles finely and mix those right in with your ketchup and mustard. Remember, the cooling step after cooking the beef is vital—hot filling melts the raw biscuit dough before it can seal properly!
Step-by-Step Instructions for Making Cheeseburger Pockets Biscuits
Putting this together is almost faster than ordering takeout! With only about 15 minutes of prep time and just 15 minutes of actual baking time, these are perfect for those nights when dinner needs to be on the table before anyone starts complaining. Remember, the key to all wrapped dough recipes is making sure the filling isn’t piping hot when you seal it up. We want sealed dough, not exploded dough; trust me on the cooling step!
If you need more ideas for speedy meals that feel homemade, you have to check out my guide for simple weeknight dinners. Now, let’s get these pockets stuffed!
Preparing the Savory Ground Beef Filling
First things first: we need to cook that beef! Get a skillet hot over medium heat and brown your pound of ground beef until there’s absolutely no pink left. Now, this is important—drain off every last bit of grease. Soggy pockets are the enemy here. Once drained, stir in your seasonings, the chopped onion if you’re using it, that ketchup, mustard, and relish. Let that mixture cook together for just two minutes to blend the flavors, and then pull it off the heat. Let it cool down for about five minutes before you even think about touching the biscuit dough!
Assembling and Sealing Your Cheeseburger Pockets Biscuits
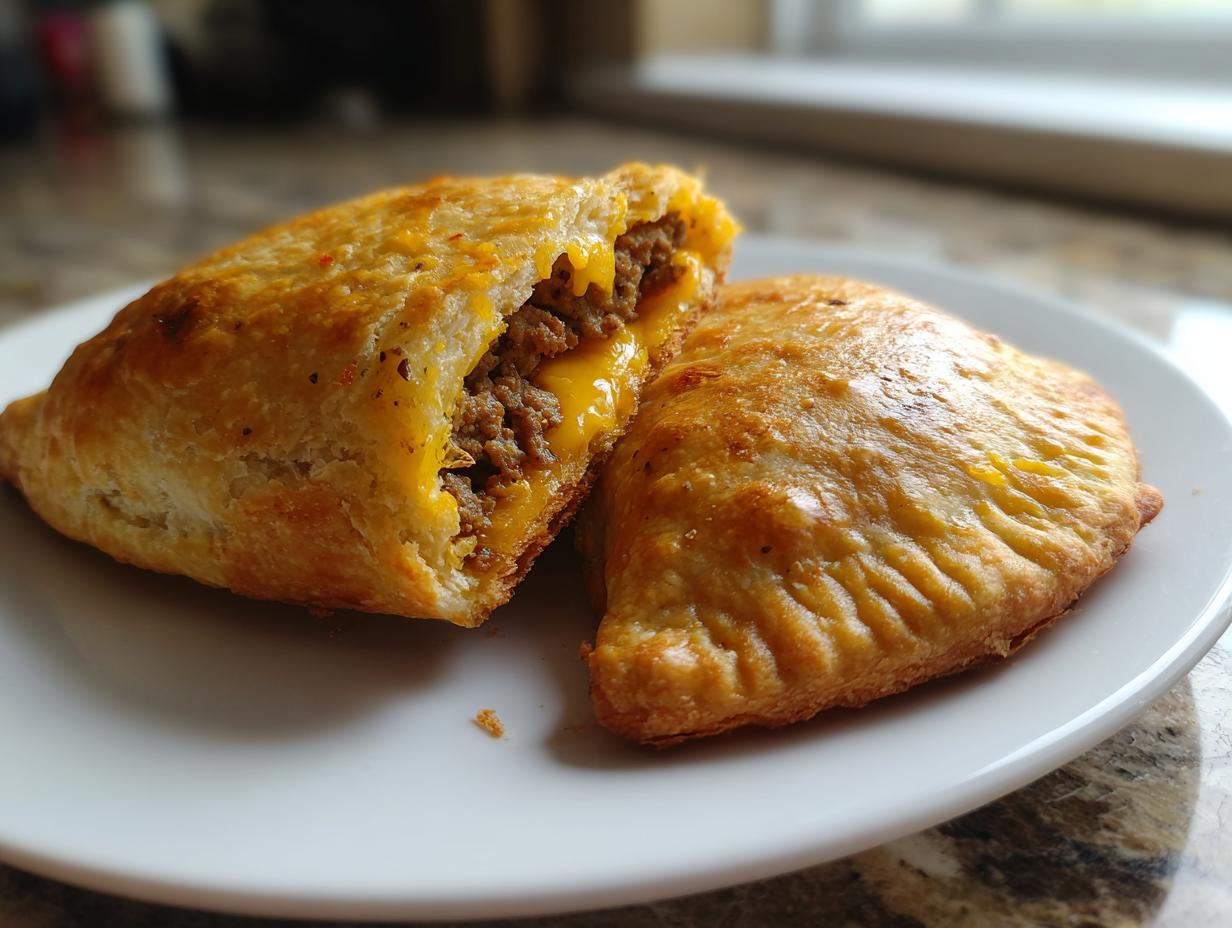
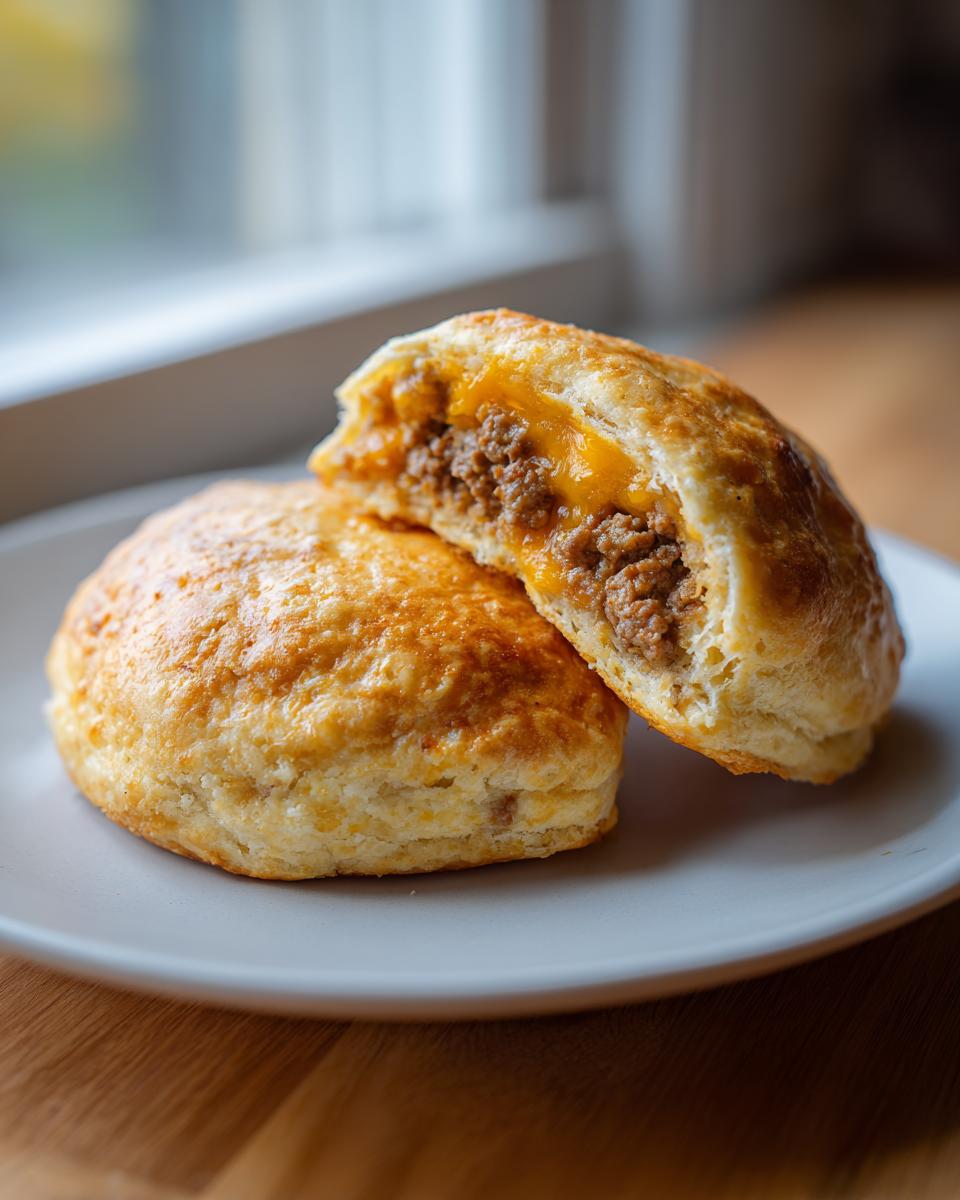
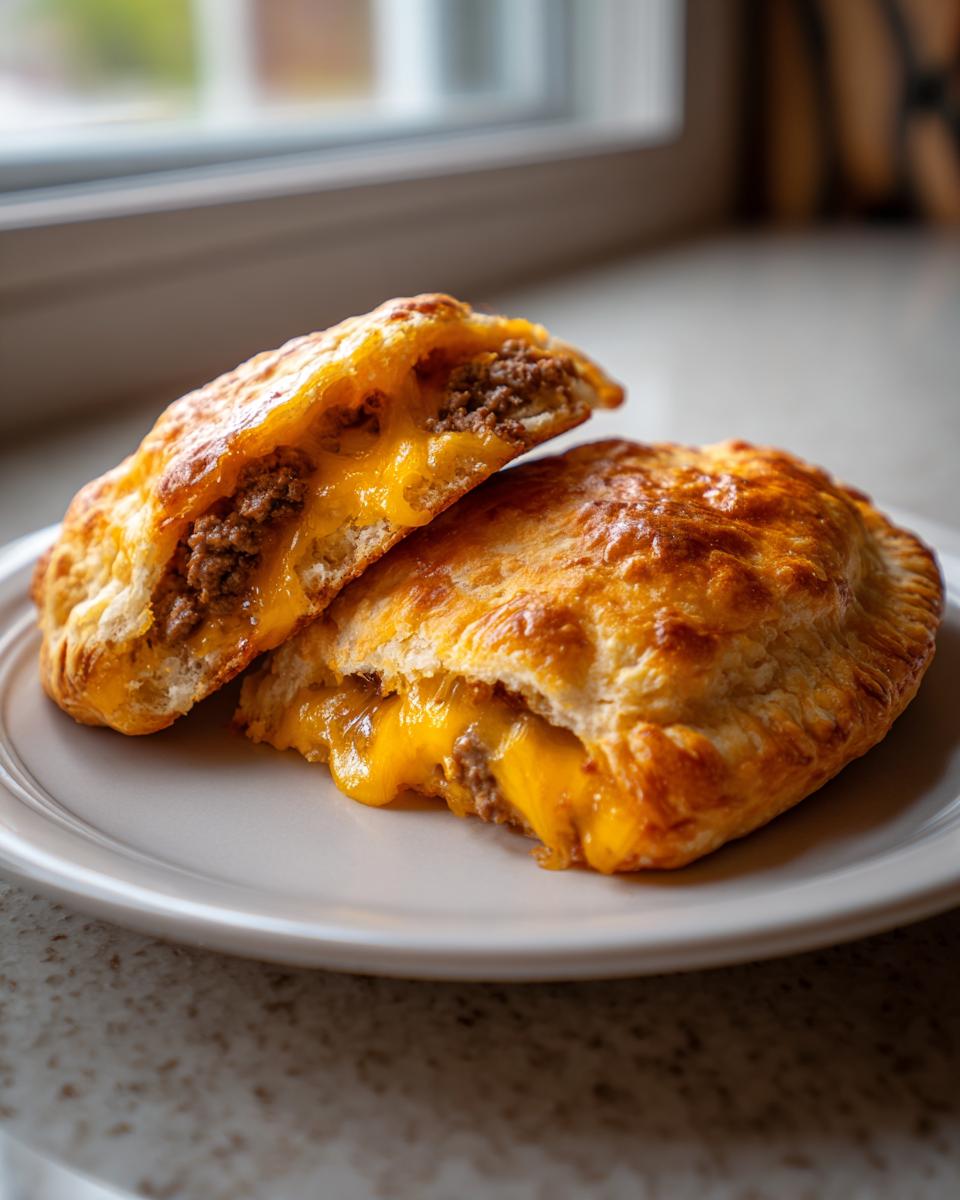
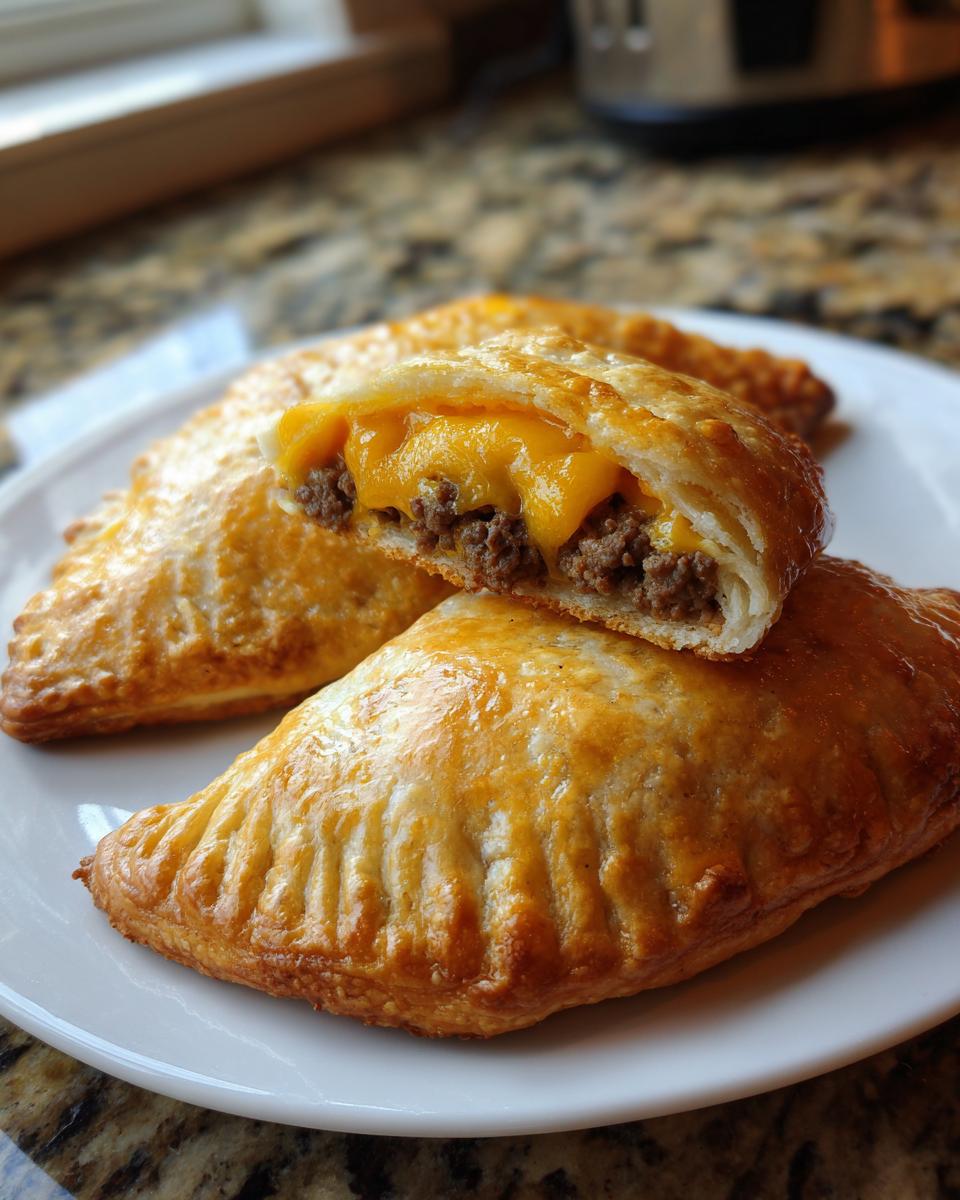
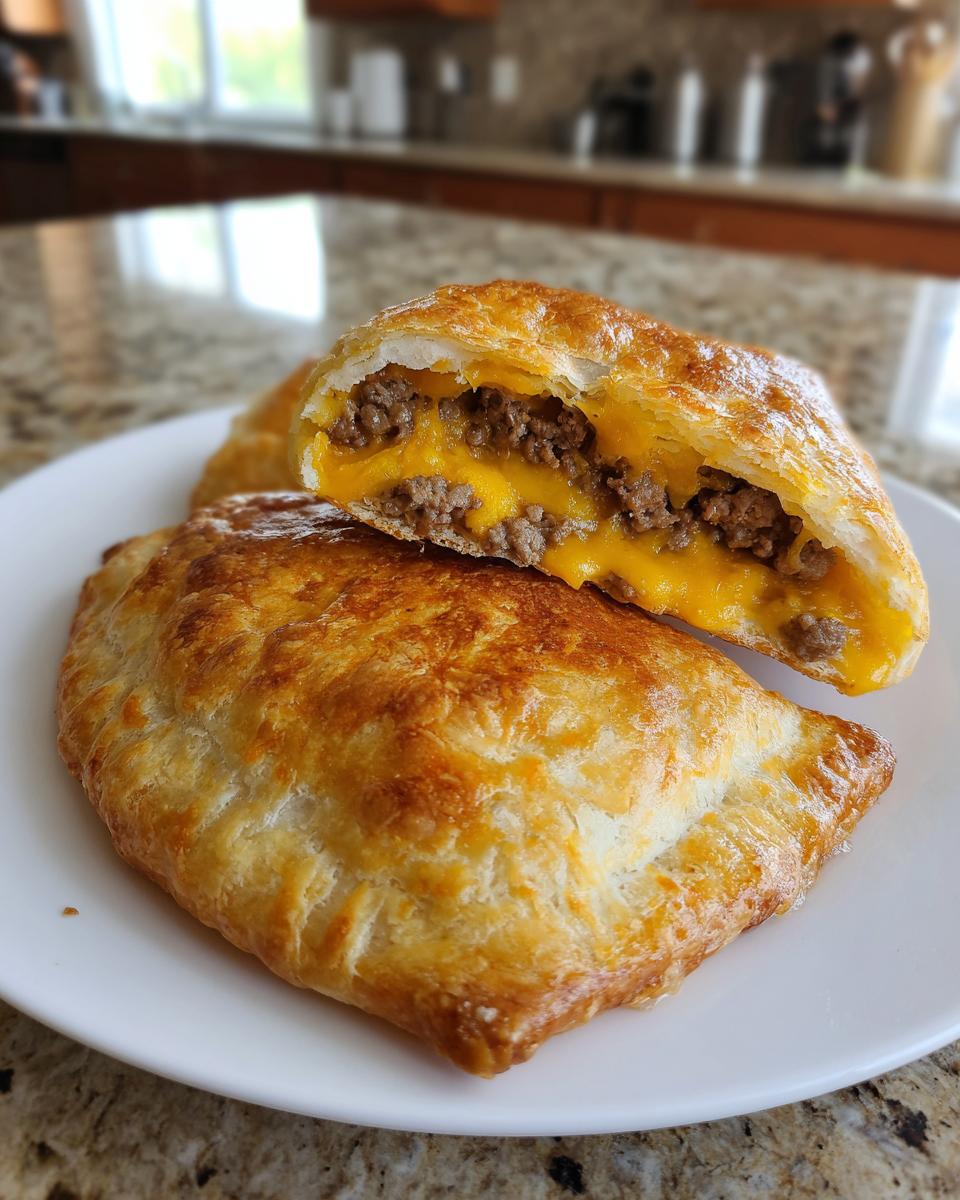
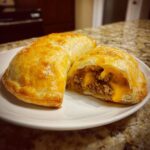
Time to get messy! Preheat that oven to 375 degrees F and line a baking sheet with parchment paper—that makes cleanup a breeze. Open your can of biscuits and gently separate them. Take one biscuit and flatten it gently with your palm or a rolling pin until it’s roughly a 4-inch circle. Spoon about a tablespoon and a half of that cooled beef mixture dead center on the dough. Top that with a small piece of cheese or a sprinkling of your shredded cheese. Now, place a second biscuit on top. Press those edges together firmly with your fingers. Don’t stop there! Take the tines of a fork and really crimp all the way around the edges. You are creating a truly secure seal for your delicious cheeseburger pockets biscuits.
Baking for Golden Perfection
Once all eight pockets are sealed and arranged on your baking sheet, grab that beaten egg, which we call the egg wash. Brush it lightly over the top of every pocket. This is what guarantees that beautiful, shiny, golden brown finish we’re looking for! Slide them right into that preheated oven and bake them for 12 to 15 minutes. You’ll know they are done when they are puffed up and have that gorgeous golden color swirling around.
Tips for Success with Baked Ground Beef Pockets
Look, making these cheeseburger pockets biscuits is incredibly forgiving, but if we want perfection—meaning no cheese explosion halfway through baking—we need to follow a couple of my little chef tricks. The biggest one, I’ve said it twice already, but I’ll say it again: cool your filling! If that beef mixture is still steaming, it will instantly turn the raw biscuit dough into mush where you are trying to seal it, setting you up for leaks later.
For that ideal crust, use that egg wash! It really gives you that professional, baked-dough look. If you are totally against eggs, though, toss them out and brush the tops with melted butter right when they exit the oven instead. That gives you a softer, richer crust, which is also delicious. If you are looking for fast and fun meal ideas that travel well, check out my favorite quick healthy lunch ideas. Mastering the seal is really the mastering step for these baked ground beef pockets!
Variations on Classic Cheeseburger Pockets Biscuits
Okay, so you nailed the classic recipe, and now you want to get jazzy? That’s the spirit! Cooking is all about making things your own, and these pockets are just begging to be customized. While the cheddar and mustard combo is fantastic, we can easily upgrade these little guys into something truly special for a party or just because you’re feeling adventurous.
My favorite trick when I’m making a bigger batch? Bacon, obviously! Cook up some crispy bacon bits while you’re browning the beef, drain it well, and mix it right into the meat mixture along with the ketchup and everything else. Suddenly, you have a bacon cheeseburger experience inside a puffy biscuit! If you want to dive deeper into customizing what goes inside, I have a whole rundown of savory biscuit filling ideas you should check out.
For a totally different cheese experience, swap out that cheddar for slices of Swiss cheese—it gets wonderfully nutty when it melts. Or, if you’re feeling a little fancy, try using pepper jack for a tiny bit of heat. We’ve also talked about adding fresh pickle pieces to the filling, but another twist is to mix in a little bit of finely diced sun-dried tomato for a deeper, almost tangy flavor that complements the beef beautifully. The structure of these cheeseburger pockets biscuits holds up so well, you can really throw anything tasty in there!
Storage and Make Ahead for Cheeseburger Stuffed Biscuits
The best news about these handheld dinners is that you absolutely do not have to eat them all at once! They are perfect for planning ahead, which is a lifesaver when the week gets busy. You can assemble the entire batch of cheeseburger stuffed biscuits, place them on your prepared baking sheet, cover the whole tray lightly with plastic wrap, and stick them right into the refrigerator. They hold up beautifully for up to four hours waiting for you.
Now, if you are baking them straight from the fridge, just remember they are taking a little chill trip, so you might need to give them an extra two or three minutes in the 375°F oven until they get that golden color. If you end up with leftovers—which I doubt you will!—just store them in an airtight container. They reheat surprisingly well in a toaster oven, keeping that biscuit crust much crispier than the microwave ever could. For more tips on prepping food ahead of time, check out my guide on make ahead cheeseburger snacks!
Serving Suggestions for Your Quick Cheeseburger Bites
Sure, these baked ground beef pockets make an amazing snack all on their own, but if you’re serving them up for dinner, you need a little something else on the plate, right? I always aim for speed here, too! Pair these up with some quick oven fries—toss frozen fries with a little oil and salt and bake right alongside your pockets!
If you want something fresh, a simple side salad with crisp lettuce and a light vinaigrette is the perfect counterpoint to all that savory beef and cheese. But honestly, the real game-changer is the dipping sauce. You absolutely must try my recipe for the ultimate copycat burger sauce; it takes five minutes, and suddenly, your quick cheeseburger bites taste like they just came off a hot griddle!
Frequently Asked Questions About Cheeseburger Pockets Biscuits
It’s totally normal to have questions when you’re trying out a new way to serve up a classic favorite! Dealing with refrigerated dough can sometimes feel tricky, but I promise, once you get the hang of it, these become a staple. Here are the questions I get asked most often when people make these for the first time. I hope these quick tips clear everything up so you can cook with total confidence!
Can I use crescent roll dough instead of biscuits for these pockets?
Oh yes, you absolutely can! Crescent roll dough is a fantastic substitute, especially if you like a little flakier, more layered texture than the soft biscuit puff. When you use crescent dough triangles, you’ll want to skip flattening them out quite as much. Just gently separate the dough into its individual triangles. You can still fill and seal them using the fork-tine method, but since the dough is thinner, make sure your filling isn’t too chunky so the dough doesn’t tear while you’re crimping it shut.
How do I prevent my cheeseburger pockets biscuits from leaking cheese?
Preventing leakage is all about technique and temperature, and it’s the number one thing I focus on with these cheeseburger pockets biscuits! First, make sure that cooked ground beef mixture has cooled for at least five minutes—if it is too hot, it will melt the raw dough before they even get into the oven, causing instant leaks. Second, pay attention to where you place your filling on the biscuit. Don’t put any meat or cheese near the very edges! You need a good half-inch border of clean dough so you can press a strong seal. Crimp those edges tight with a fork, and you should be golden!
Are these Biscuit Cheeseburger Turnovers suitable for a picnic or packed lunch?
They are practically *made* for picnics! That’s one of the best parts about transforming a standard meal into an easy pocket—it’s totally portable. These biscuit cheeseburger turnovers hold their shape incredibly well once they are baked and cooled. They taste fantastic warm right out of the oven, but honestly? They are still delicious eaten at room temperature, which makes them perfect for packing in a cooler or throwing into a lunch bag. Just make sure they are fully cooled down before you seal them into whatever container you’re using!
Estimated Nutritional Information for Cheeseburger Pockets Biscuits
I always think it’s important to know what you’re eating, especially when you are whipping up something comforting like these cheesy pockets. While I developed this recipe in my own kitchen and not in a laboratory, I’ve pulled together the closest estimates based on the standard ingredients used, like the refrigerated biscuits and a lean ground beef base. This way, you get a good idea of what you’re serving up!
Keep in mind these numbers are just guidelines for one pocket. If you eat two—and trust me, I’ve seen it happen!—you’ll just double those servings of deliciousness. Here’s the breakdown for one of our fantastic cheeseburger pockets biscuits:
- Serving Size: 1 pocket
- Calories: 350
- Fat: 20g
- Saturated Fat: 9g
- Carbohydrates: 25g
- Protein: 18g
- Sugar: 3g
- Sodium: 650mg
This recipe keeps the sugar pretty low, which is great, and the protein is solid thanks to that hearty beef filling. It’s a really satisfying little meal! As always, these figures are estimates only and will vary based on the exact brand of biscuit dough and fat content of your ground beef. But overall, it’s fantastic comfort food that fits pretty well into a busy lifestyle!
PrintCheeseburger Biscuit Pockets
Make quick, portable cheeseburger pockets using canned biscuits for a simple dinner or snack. These baked turnovers seal ground beef, cheese, and classic burger flavors inside a flaky crust.
- Prep Time: 15 min
- Cook Time: 15 min
- Total Time: 30 min
- Yield: 8 pockets 1x
- Category: Lunch
- Method: Baking
- Cuisine: American
- Diet: Low Lactose
Ingredients
- 1 (16.3 ounce) can refrigerated biscuit dough (8 biscuits)
- 1 pound ground beef
- 1/2 teaspoon salt
- 1/4 teaspoon black pepper
- 1/2 cup finely chopped onion (optional)
- 1/2 cup shredded cheddar cheese (or American cheese slices)
- 2 tablespoons ketchup
- 1 teaspoon yellow mustard
- 1 teaspoon pickle relish (optional)
- 1 egg, beaten (for egg wash)
Instructions
- Preheat your oven to 375 degrees Fahrenheit. Line a baking sheet with parchment paper.
- Cook the ground beef in a skillet over medium heat until browned. Drain off any excess grease completely.
- Return the beef to the skillet. Stir in the salt, pepper, onion (if using), ketchup, mustard, and relish. Cook for 2 minutes until heated through. Remove from heat and let the mixture cool slightly for 5 minutes.
- Separate the refrigerated biscuits. Flatten each biscuit piece slightly with your hands or a rolling pin until it forms a rough 4-inch circle.
- Place about 1 to 1.5 tablespoons of the cooled beef mixture onto the center of one biscuit round. Top the beef with a small piece of cheese or a sprinkle of shredded cheese.
- Place a second biscuit round over the filling. Press the edges firmly together using your fingers to seal the pocket completely. For extra security, crimp the edges with the tines of a fork.
- Place the sealed pockets onto the prepared baking sheet.
- Brush the tops of the pockets lightly with the beaten egg wash. This helps them brown nicely.
- Bake for 12 to 15 minutes, or until the biscuits are golden brown and puffed.
- Serve warm for a simple party appetizer or kid friendly cheeseburger snack.
Notes
- For the best seal, make sure the filling is not too close to the edges of the biscuit dough.
- If you prefer a softer crust, skip the egg wash and brush the tops with melted butter after they come out of the oven.
- You can substitute the canned biscuits with crescent roll dough, cutting the dough into squares before filling.
- To make ahead, assemble the pockets, place them on the baking sheet, cover, and refrigerate for up to 4 hours before baking. Add 2-3 minutes to the bake time if baking directly from the refrigerator.
Nutrition
- Serving Size: 1 pocket
- Calories: 350
- Sugar: 3
- Sodium: 650
- Fat: 20
- Saturated Fat: 9
- Unsaturated Fat: 11
- Trans Fat: 0.5
- Carbohydrates: 25
- Fiber: 1
- Protein: 18
- Cholesterol: 55