
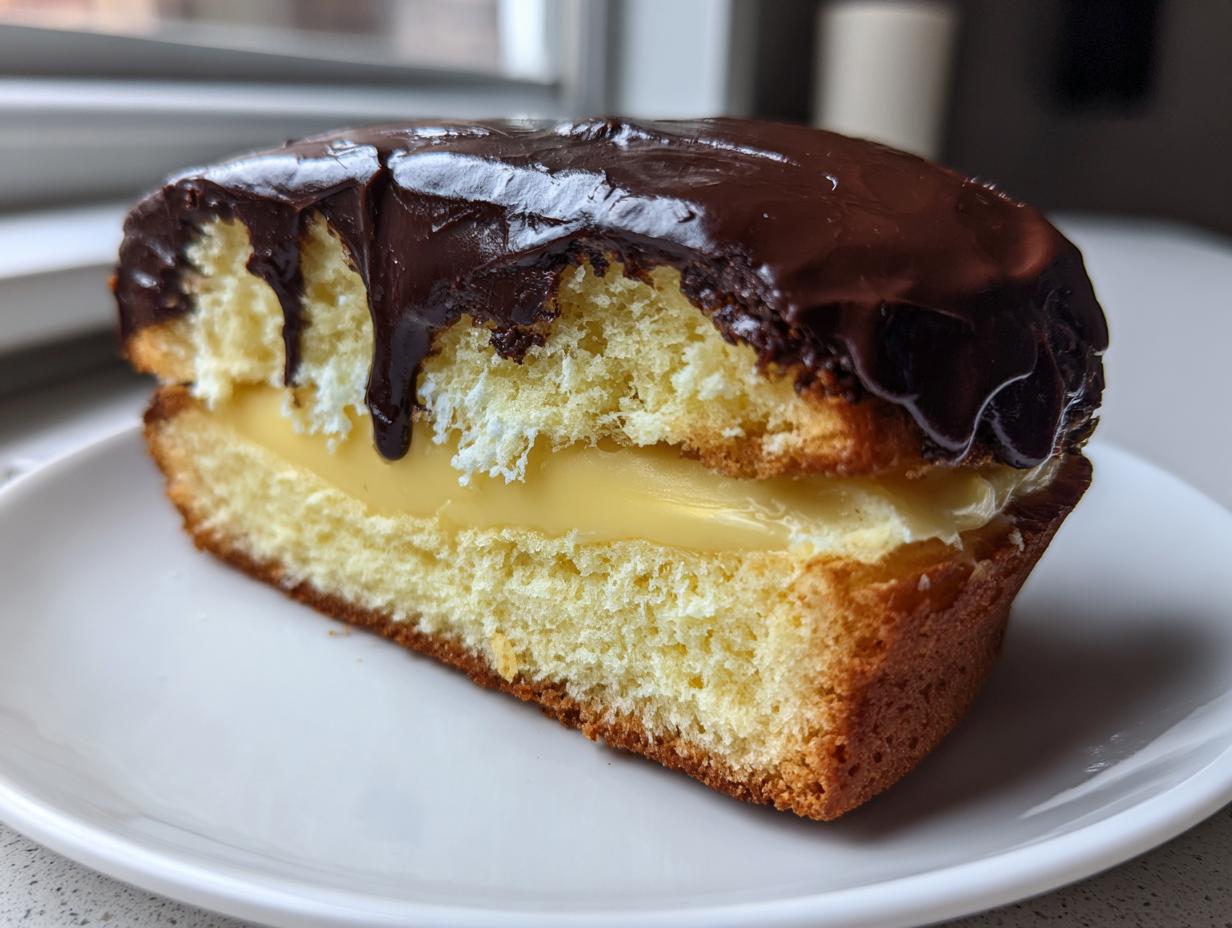
Oh, there’s nothing quite like biting into that perfect slice of nostalgia, right? I’m talking about those dreamy, bakery-style desserts that immediately take you back to childhood celebrations or special Sunday drives. For me, that’s hands-down the boston cream pie. Now, let’s get one thing straight right at the start: it’s technically a cake! A glorious American Classic Dessert featuring fluffy vanilla layers, but we’ll stick to tradition and call it by its famous name.
When I first tried making a boston cream pie from scratch, I was intimidated by the three separate components. But I promise you, mastering this is easier than you think. This is the trusted, tested Boston Cream Pie Recipe from my own kitchen—the one that finally delivered that perfect balance of creamy, fluffy, and chocolatey every single time. You’re going to love making this showstopper dessert!
- Why This Classic Boston Cream Pie Recipe Works Every Time
- Gathering Ingredients for Your Homemade Boston Cream Pie
- How to Make the Fluffy Sponge Cake for Your Boston Cream Pie
- Mastering the Vanilla Custard Filling for the Boston Cream Pie
- Assembling Your Showstopper Dessert: The Boston Cream Pie
- Creating the Perfect Chocolate Ganache Topping for your Boston Cream Pie
- Tips for Success When Making Boston Cream Pie From Scratch
- Frequently Asked Questions About This American Classic Dessert
- Estimated Nutritional Data for Classic Boston Cream Pie
- Share Your Perfect Boston Cream Pie Creation
Why This Classic Boston Cream Pie Recipe Works Every Time
Making a great boston cream pie isn’t just following steps; it’s about balancing three key players. When you get these parts right, the final result is truly bakery-style. I’ve tested so many methods, and sticking to this classic structure guarantees success for you, too! It’s reliable, stunning, and tastes miles better than anything you’d get in a box.
- It provides the perfect framework for the filling, ensuring your layers don’t slide apart. Thanks to the structure in this Boston Cream Pie Recipe, it’s a true showstopper dessert.
- This recipe is built to deliver incredible texture every time, whether you serve it immediately or wait until the next day.
The Fluffy Sponge Cake Base
This isn’t some heavy, dry cake layer, trust me! We use a specific method to make sure the sponge is tender and light. It needs that springiness to hold up against the creamy filling without compressing into a dense brick. It’s the feather-light foundation that sets this dessert apart.
Rich Vanilla Custard Filling for Your Boston Cream Pie
You absolutely have to make the Vanilla Custard Filling from scratch for an authentic experience. Using a solid Pastry Cream Recipe means a filling that isn’t runny; it sets up beautifully and holds its shape perfectly when you slice into your beautiful boston cream pie. This is non-negotiable for that classic, rich flavor.
Glossy Chocolate Ganache Topping
Forget dull, matte chocolate! The secret here is the ratio that creates that amazing mirror-like shine. When you pour this warm topping over the chilled cake, it settles into a perfect, smooth sheet. It elevates the whole thing into a stunning, bakery-style dessert that looks like you spent hours wrestling with techniques. (Spoiler: you won’t have!).
Gathering Ingredients for Your Homemade Boston Cream Pie
Okay, so we’re making the boston cream pie entirely from scratch, which means we need to be specific about our ingredients. Don’t let this list overwhelm you, though! It’s just broken down into the three stars of the show: the cake, the filling, and the amazing chocolate topping. Check your pantry for the basics, but make sure your butter is truly softened for the cake, and your chocolate for the topping is chopped finely so it melts beautifully. We want all the components singing together!
If you want to see how others structure their ingredients lists for this amazing dessert, check out this guide on getting that perfect look: prettysimplesweet.com/boston-cream-pie/.
For the Vanilla Sponge Cake
This is going to create two beautiful, light layers. Make sure you have all of this ready before you even think about turning on the oven!
- 1 3/4 cups all-purpose flour
- 1 1/2 cups granulated sugar (yes, that much, it needs the sweetness!)
- 1 tablespoon baking powder
- 1/2 teaspoon salt
- 1/2 cup unsalted butter, softened to that perfect squishy temperature
- 2 large eggs
- 1 teaspoon vanilla extract
- 1 cup whole milk (Don’t skimp here; whole milk gives the best richness for the cake!)
For the Vanilla Custard Filling (Pastry Cream Recipe)
This is what turns it from just a cake into magic. We need rich flavor here, so whole milk is key to making this Pastry Cream Recipe taste authentic.
- 1/2 cup granulated sugar
- 1/4 cup cornstarch (This is the thickener, so weigh it out if you can!)
- 1/4 teaspoon salt
- 2 cups whole milk (Seriously, use whole milk for creamy, dreamy custard.)
- 4 large egg yolks (Save those whites for meringues later!)
- 2 tablespoons unsalted butter
- 1 teaspoon vanilla extract
For the Chocolate Ganache Topping on the Boston Cream Pie
This is the finishing touch for our iconic boston cream pie. Note that light corn syrup is optional, but I always include it because it gives the ganache that professional, high-gloss finish. It helps keep that chocolate layer looking fresh.
- 4 ounces bittersweet chocolate, finely chopped (Using good quality chocolate makes a huge difference!)
- 1/2 cup heavy cream
- 1 tablespoon light corn syrup (Optional, but gives that gorgeous shine!)
How to Make the Fluffy Sponge Cake for Your Boston Cream Pie
Alright, let’s get baking, because the cake layers are the first big step for an amazing boston cream pie! First things first: get that oven fired up to 350°F (175°C). While it’s warming up, grease and flour two 8-inch cake pans. I always like lining the bottoms with a little parchment circle just for extra insurance—it’s the best way to guarantee a clean release later on.
In your big mixing bowl, whisk together your dry stuff: flour, sugar, baking powder, and salt. Once that’s fluffy, add the softened butter, eggs, and vanilla extract. You need to beat this mix for a solid two minutes on medium speed. This is where we build the structure for our fluffy sponge cake!
After two minutes of good beating, switch your mixer to low and slowly drizzle in that cup of whole milk. You only want to mix until it just comes together. Seriously, stop mixing the second you stop seeing flour streaks, or you’ll ruin that fluffy texture. Divide that batter between your prepared pans, slide them in the oven, and set your timer for 25 minutes. We’re aiming for that toothpick test—clean means go! Cool them for 10 minutes in the pan before inverting them onto a rack. You can check out some pro tips on getting the bake just right here: howtofeedaloon.com/classic-boston-cream-pie-recipe-from-scratch/.
Mastering the Vanilla Custard Filling for the Boston Cream Pie
Okay, deep breath! This is where we move from great cake batter to making an incredible, rich Vanilla Custard Filling. This step makes the difference between a good dessert and the kind of boston cream pie that people rave about for years. It is your homemade Pastry Cream Recipe, and it requires a little attention, but I promise, mastering the technique is easy once you see it in action.
In a saucepan, whisk together your sugar, cornstarch, and salt. Then whisk in the two cups of milk until everything is smooth—no lumps allowed! Set this over medium heat. You have to stir constantly here; don’t walk away! Keep stirring until it gets really thick and starts bubbling aggressively. Once it hits that full boil, keep stirring for exactly one more minute. This cooks out that starchy aftertaste. Now, take it off the heat; we’re ready for the trickiest part.
For making your Homemade Boston Cream Pie the absolute best, you need to check out this guide that really breaks down smooth flavor development: butterykitchen.com/homemade-boston-cream-pie/.
Tempering Egg Yolks Safely
This is crucial for a smooth filling! If you just dumped the hot milk into your yolks, you’d end up with scrambled eggs instead of decadent custard. Don’t panic! While whisking your four egg yolks vigorously in a separate bowl, grab a ladleful of that hot milk mixture—about a half cup—and drizzle it in *very* slowly while you keep whisking. This is tempering; we’re gently raising the temperature of those yolks.
Once those yolks are warmed up, pour them back into the saucepan with the rest of the hot milk. Put it back on the heat and stir constantly until it thickens *again* and comes to a full boil. Boil it firmly for that final minute, stirring the whole time. Then, kill the heat! Stir in that two tablespoons of butter and the vanilla extract until it’s all liquid gold. Don’t forget to check out my tips on getting fluffy results in general, like making a vanilla buttercream frosting—the principles of gentle mixing are similar!
Chilling the Pastry Cream
Once the custard is perfectly cooked, you have one final, super important step before chilling. You must press plastic wrap directly onto the surface of the custard. I mean, push it right down until it’s touching the filling. If you leave a gap, you’ll get that nasty thick skin forming on top, and that will ruin the silky texture for your boston cream pie assembly later!
Cover the bowl and slide it into the fridge. You need to chill this for a minimum of two hours, but honestly, three or four hours is better. Your custard needs to be completely cold and firm before you even think about layering it onto your cakes or it’s going to melt everywhere.
Assembling Your Showstopper Dessert: The Boston Cream Pie
The cakes are cool, the custard is chilled—now for the exciting part where our beautiful boston cream pie finally comes together! Before we stack these layers, if your vanilla sponge cakes domed up a little bit in the oven (which they totally might have!), now is the time to fix them. Remember that little note I put in the recipe details?
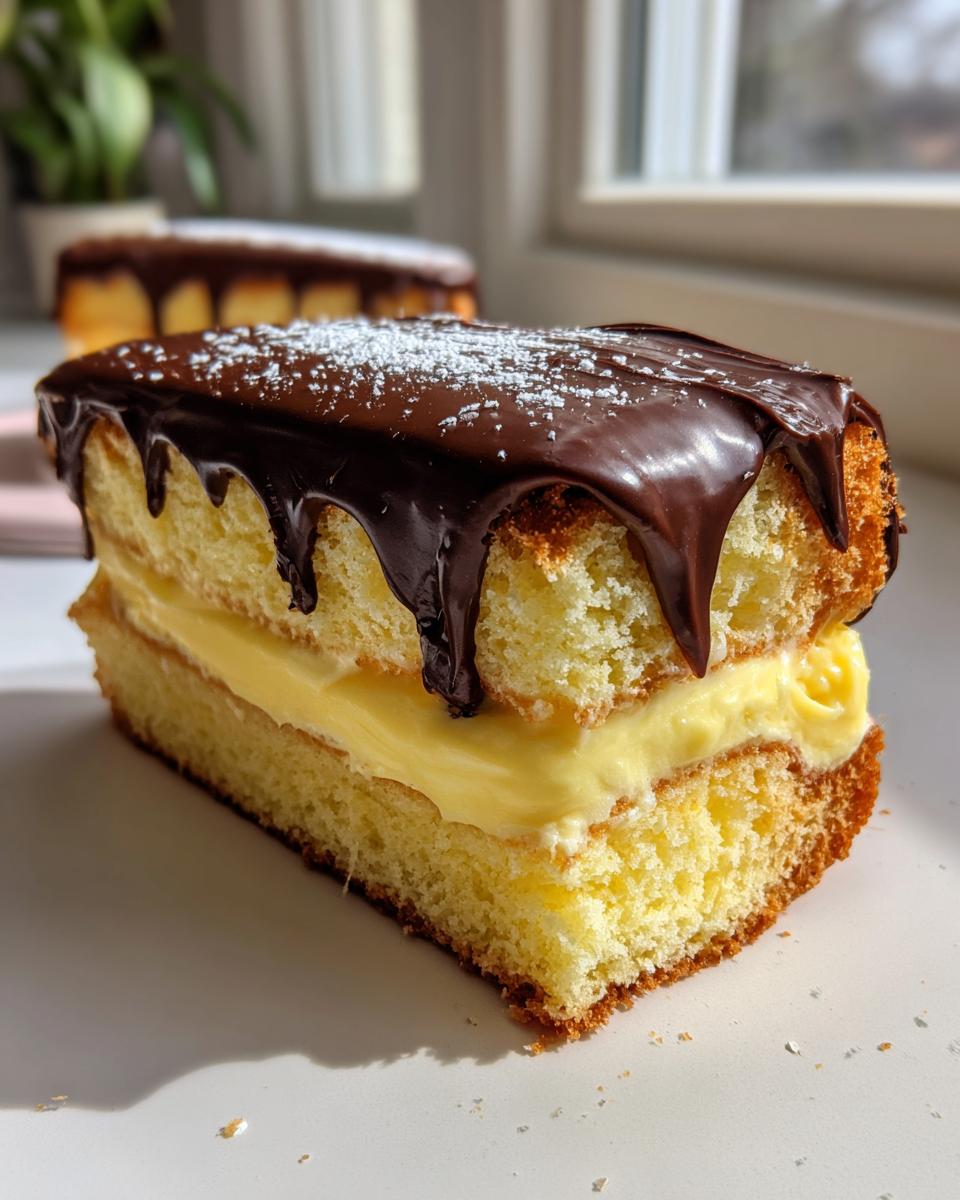
If you have a dome, just take a large serrated knife—like the one you use for bread—and carefully slice off the top, making that layer perfectly flat. I know, it feels wrong cutting into a beautiful cake, but this step ensures your final boston cream pie isn’t listing to one side like the Leaning Tower of Pisa. It makes for such a crisp, professional look!
Place one flat cake layer onto your serving dish or cake stand. Now, grab that firm, cold vanilla custard. You want to spread it out evenly across this bottom layer. Don’t be shy, but don’t pile it so high that it’s spilling over before you even add the top layer. Use an offset spatula for this; it makes smoothing it out so much easier.
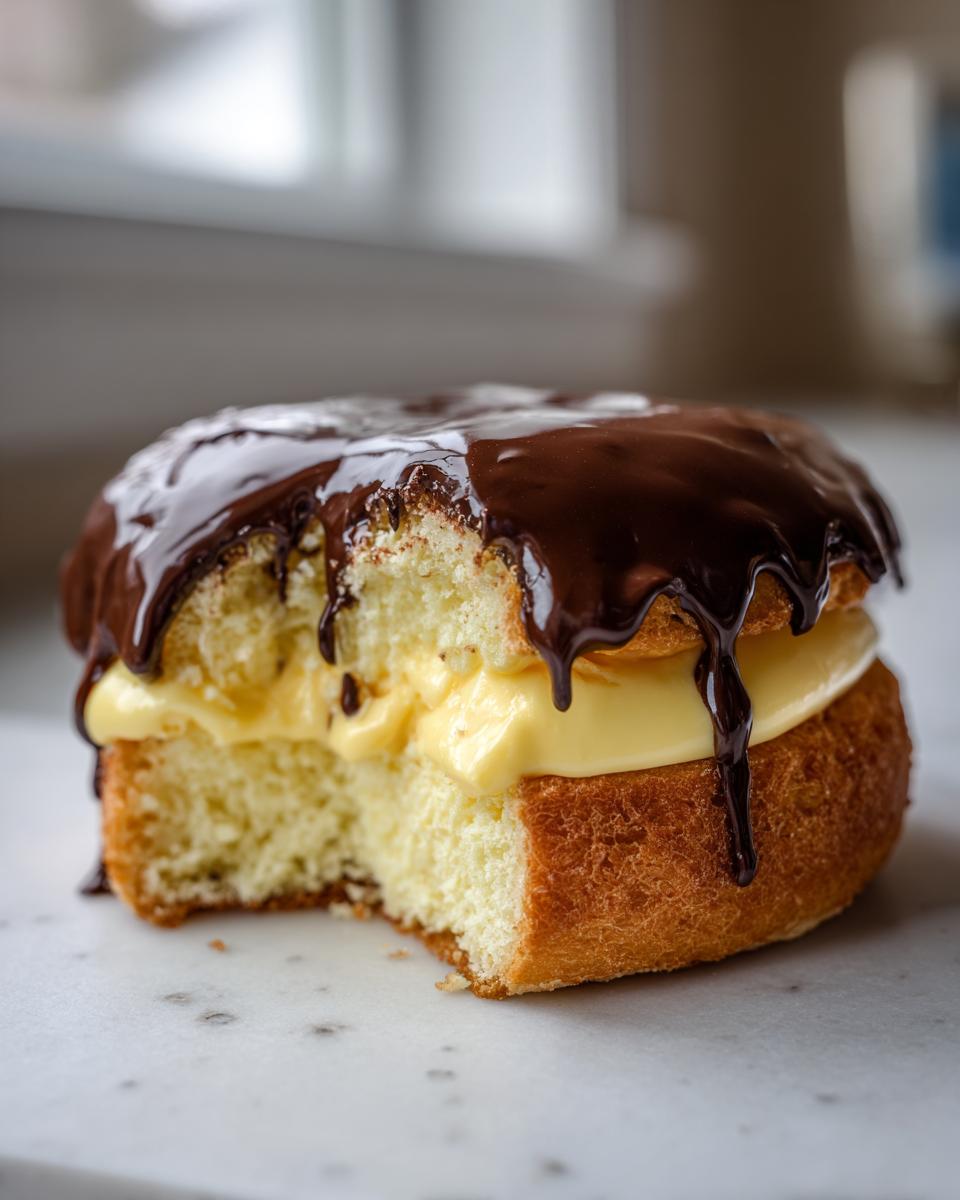
Once the custard is spread evenly—aim for about a three-quarter-inch layer—gently place the second cake layer on top. Press down *very* lightly, just enough so the layers kiss and stick together. If you press too hard, you’ll squeeze that glorious filling out the sides, and it’s less forgiving than buttercream! Now this structure is ready for the chocolate blanket to go on. If you’re looking for inspiration on structuring layered desserts, check out my favorite chocolate cheesecake bars—the layering principles are similar for stability!
Creating the Perfect Chocolate Ganache Topping for your Boston Cream Pie
This is the grand finale! The rich, glossy chocolate topping is what grabs everyone’s attention on a stunning boston cream pie. And guess what? It’s just two main ingredients—well, three if you count the optional gloss booster! This is almost the easiest part of the whole recipe, but timing is everything here.
First, get organized. You need your bittersweet chocolate, which you should have already chopped up finely; the finer, the better, because it melts so much easier! Place that gorgeous chopped chocolate into a heatproof bowl. Make sure it’s dry, we don’t want any sneaky water droplets in there!
Next, heat your heavy cream in a small saucepan. You’re watching this like a hawk! We want it to just start simmering around the edges—you’ll see those tiny little bubbles forming, but definitely don’t let it come to a rolling, hard boil. That’s too hot and can scorch the chocolate.
Carefully pour that hot cream right over the top of your chopped chocolate. Now, this is an important step for a smooth result: just let it sit there! For a solid five minutes, just let the heat of the cream melt the chocolate undisturbed. Resist the urge to stir immediately; we need patience, even in the final stage of making this boston cream pie!
After five minutes, grab a whisk or a sturdy rubber spatula and gently start whisking from the center outwards. It’s going to look a little messy at first, but keep going until that mixture transforms into one smooth, gorgeous, dark pool of chocolate. If you’re using that light corn syrup—which I totally recommend for that extra incredible shine—whisk it in now until everything is uniform. You can find a great rundown on getting fudgy textures right over here: easy fudge recipe.
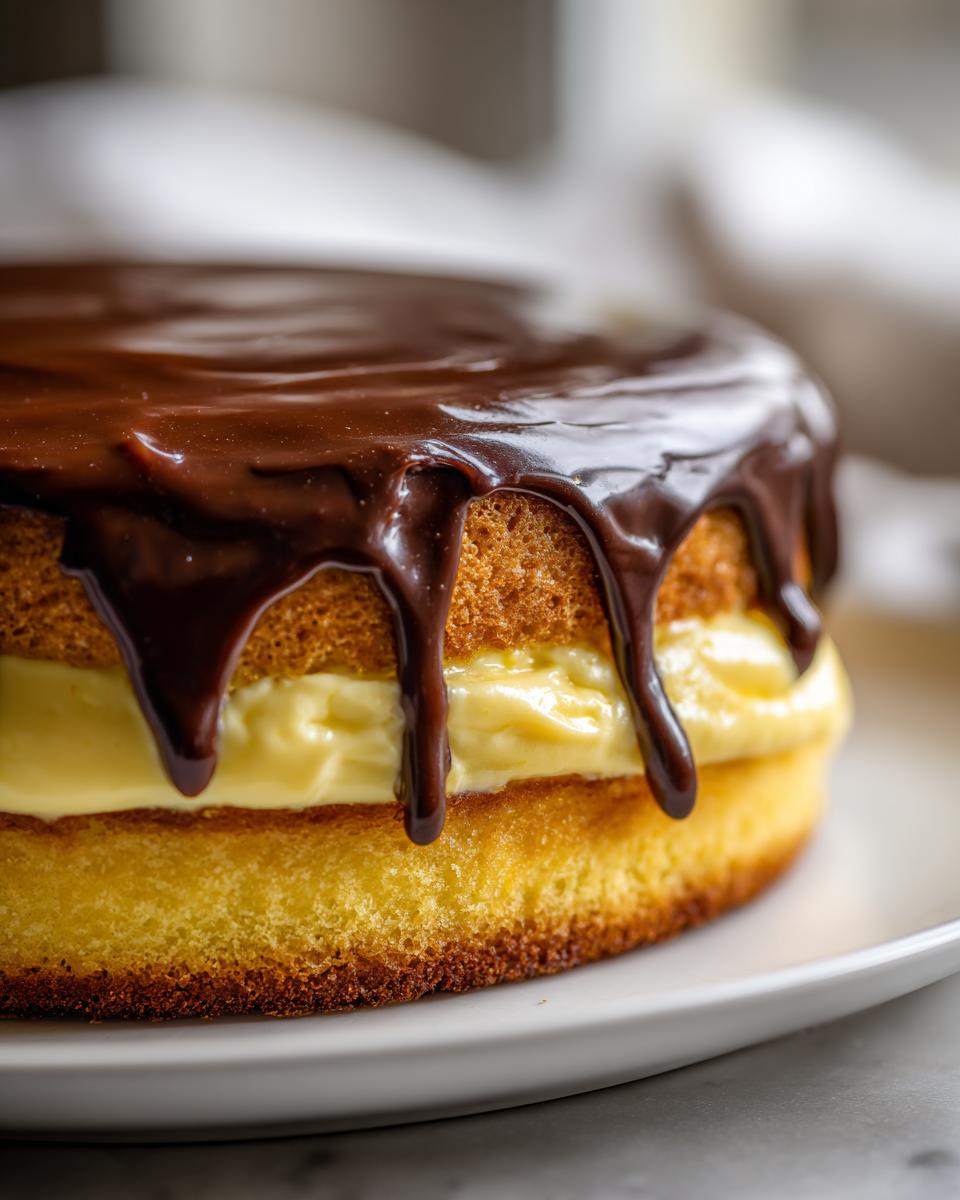
Now, you can’t pour runny chocolate over a set custard, or it’ll thin out the filling and just slide right off! You need to let this ganache cool down for a bit until it reaches that perfect pourable consistency. It shouldn’t be thick like frosting, but it shouldn’t be watery like syrup either. When it drizzles off your spoon in a nice, clean stream—not thick, not thin—it’s ready for the cake. Pour it right over the top center of your assembled boston cream pie and let gravity do the rest, letting it drip naturally down the sides. That beautiful, accidental drip effect is what makes it look so amazing!
Tips for Success When Making Boston Cream Pie From Scratch
Making a boston cream pie is a labor of love, but taking a few crucial steps ensures you get that bakery-style result without any headaches. I learned these little tricks over dozens of test bakes, and they’re what keep me coming back to this from scratch cake recipe over and over again. You want confidence when you step into the kitchen, and knowing these small details is key to that flawless final product!
For instance, leveling those cake layers, like I mentioned earlier, is non-negotiable if you want a truly impressive presentation. It’s the difference between a celebration dessert and a wobbly one! And don’t forget to check out some other fantastic ways people handle their vanilla cake foundations—it really helps build your skills, like learning how to nail a super moist vanilla cake.
Ingredient Notes and Substitutions for Boston Cream Pie
I always advocate for making everything from scratch because the flavor of real cooked vanilla custard filling cannot be beaten. However, I totally get it—sometimes you need a shortcut, especially if you are rushing to get this american classic dessert on the table!
The recipe note I included addresses this perfectly: if you are short on time and cannot make the homemade pastry cream, you can absolutely substitute it with instant pudding. Be warned, though, the texture won’t be *quite* as rich or sophisticated as the real cooked custard, but it will certainly give you an Easy Boston Cream Pie alternative that still tastes great with that chocolate topping. Just make sure you prepare the pudding mix according to the package directions to ensure it sets up firmly enough to handle the weight of the second cake layer.
For more inspiration on making sure your structure holds up perfectly, especially if you are serving this for a big event, take a look at this beautiful guide for keeping things pristine: bakingtaste.com/boston-cream-pie/.
Frequently Asked Questions About This American Classic Dessert
I know that when you’re tackling a classic like this boston cream pie, you might have a few lingering questions. It’s normal! This dessert has such a big reputation, and we want it to be perfect, right? I’ve pulled together the most common things people ask me about the assembly, the ingredients, and the actual name of this incredible American Classic Dessert.
Is Boston Cream Pie really a pie or a cake?
This is my absolute favorite question because I get asked it all the time! Technically speaking, it is absolutely a cake. It has two layers of fluffy sponge cake instead of a pastry crust. The original Massachusetts General Hospital recipe that inspired it was baked in a pie dish, which is where the name stuck, I suppose. So, yes, call it a Boston Cream Cake if you want to be technically correct, but don’t worry if you still call it the classic boston cream pie—everyone will know what showstopper dessert you’re talking about!
Can I make the custard filling ahead of time for my boston cream pie?
Yes, you totally can! And honestly, I often prefer it that way because it saves a step right before assembly, which can be hectic. You can certainly prepare your Vanilla Custard Filling (that amazing Pastry Cream Recipe!) a day ahead of time. The key thing, which I stressed in the instructions, is using that plastic wrap to press directly onto the surface to prevent the skin from forming. Once it’s completely chilled and firm, it stores beautifully in the fridge for up to two days before you assemble the whole thing.
What is the best way to store leftover boston cream pie?
Since this Homemade Boston Cream Pie is loaded with rich dairy and eggs thanks to that beautiful custard, you must keep it refrigerated if you have any left over—though let’s be real, there usually isn’t much left!
If you do end up with slices remaining, cover them loosely with plastic wrap or foil, or place them in an airtight container. The recipe notes mention that because of the high sugar content in both the cake and the filling, it stays wonderfully fresh for up to three days in the fridge. Just pull a slice out about 15 minutes before serving so the cake softens up just a tiny bit, and enjoy that perfect bite of boston cream pie!
Estimated Nutritional Data for Classic Boston Cream Pie
I always want to give you the full picture when you’re baking something this decadent, right? We use real butter, whole milk, and rich chocolate, so this is definitely not a light snack! These numbers are just an estimate for one generous slice of that Homemade Boston Cream Pie, based on the ingredient list above. Since we’re making everything from scratch, the final count is always going to depend on exactly what brand of chocolate or how much filling you pile on!
This information is here to help you understand what’s in this indulgent dessert. Honestly, when you serve a beautiful, bakery-style dessert like this, you just have to accept that it’s going to be glorious nourishment for the soul!
- Serving Size: 1 slice
- Calories: 450
- Sugar: 45g (That rich custard and cake need that sweetness!)
- Sodium: 250mg
- Fat: 24g
- Saturated Fat: 14g
- Unsaturated Fat: 10g
- Trans Fat: 0.5g
- Carbohydrates: 55g
- Fiber: 2g
- Protein: 7g
- Cholesterol: 150mg
Share Your Perfect Boston Cream Pie Creation
Well, that’s it! We’ve gone from simple ingredients to assembling a show-stopping, bakery-quality boston cream pie that’s made entirely in your own kitchen. Can you believe it? I truly hope you enjoyed the process as much as I do every time I make it.
Here at Cooking Zenith, we thrive on building a community of confident home cooks, and that means I absolutely love seeing what you create! Did yours set up perfectly? Is your chocolate ganache dripping just right? Don’t keep that perfection to yourself!
Please take a minute to leave a rating right down near the recipe card—your feedback tells me what’s working and what flavor combinations you want to see me tackle next. And if you took a beautiful photo of your finished layers, please share it on social media and tag us! It just warms my heart to see my recipes bringing joy (and sugar!) to your table.
If you want to learn more about exactly how we approach testing recipes here to ensure they are foolproof for your home kitchen, you can always head over to peek at the About Page. Happy baking, friends!
PrintClassic Homemade Boston Cream Pie Recipe

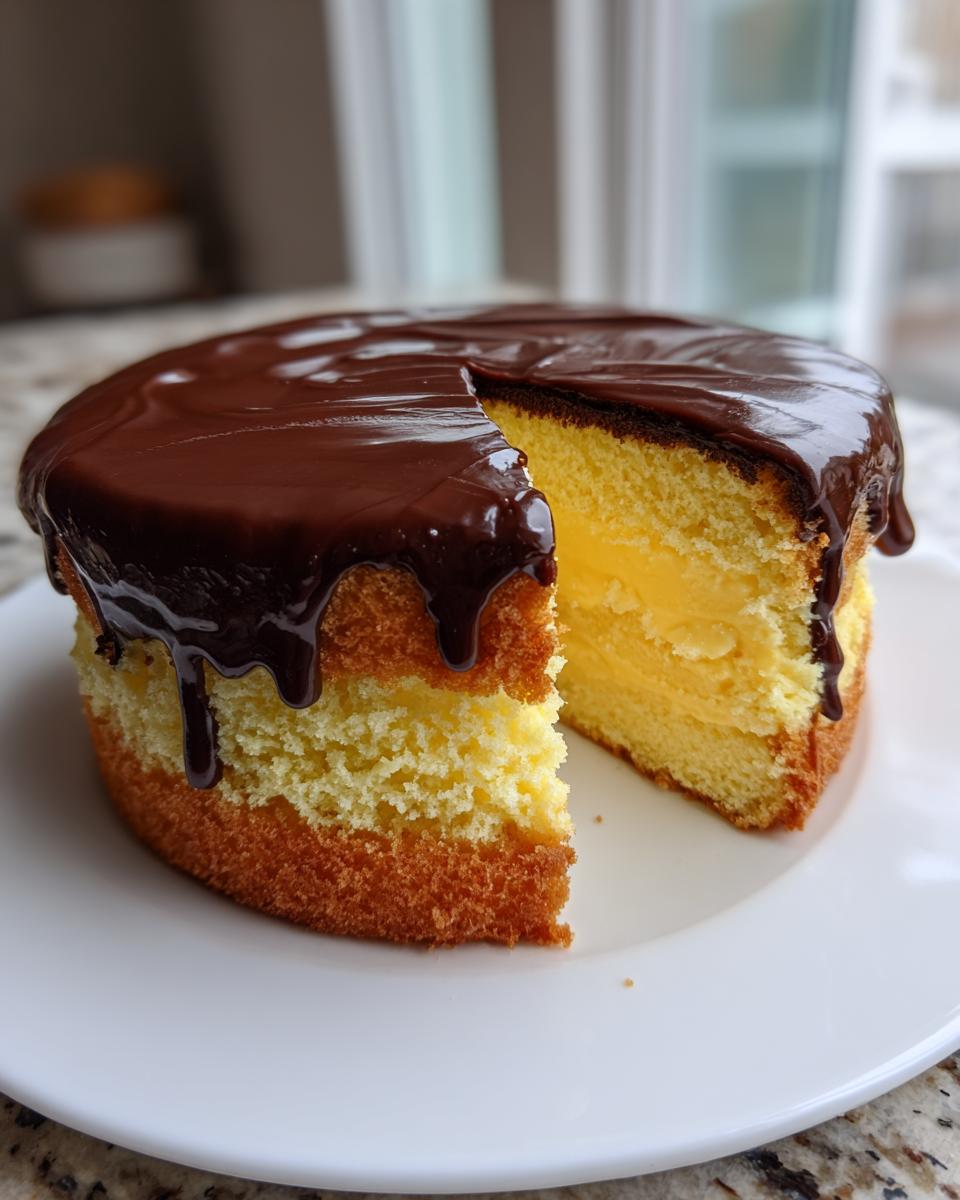
Create the iconic Boston Cream Pie from scratch. This recipe guides you through making a tender vanilla sponge cake, a rich pastry cream filling, and a glossy chocolate ganache topping for a bakery-style dessert.
- Prep Time: 40 min
- Cook Time: 30 min
- Total Time: 3 hours 10 min
- Yield: 8 servings 1x
- Category: Dessert
- Method: Baking
- Cuisine: American
- Diet: Vegetarian
Ingredients
- For the Vanilla Sponge Cake:
- 1 3/4 cups all-purpose flour
- 1 1/2 cups granulated sugar
- 1 tablespoon baking powder
- 1/2 teaspoon salt
- 1/2 cup unsalted butter, softened
- 2 large eggs
- 1 teaspoon vanilla extract
- 1 cup whole milk
- For the Vanilla Custard Filling (Pastry Cream):
- 1/2 cup granulated sugar
- 1/4 cup cornstarch
- 1/4 teaspoon salt
- 2 cups whole milk
- 4 large egg yolks
- 2 tablespoons unsalted butter
- 1 teaspoon vanilla extract
- For the Chocolate Ganache Topping:
- 4 ounces bittersweet chocolate, finely chopped
- 1/2 cup heavy cream
- 1 tablespoon light corn syrup (optional, for shine)
Instructions
- Prepare the Cake Layers: Preheat your oven to 350°F (175°C). Grease and flour two 8-inch round cake pans.
- In a large bowl, whisk together the flour, sugar, baking powder, and salt.
- Add the softened butter, eggs, and vanilla extract to the dry ingredients. Beat with an electric mixer on medium speed for two minutes.
- Gradually pour in the milk while mixing on low speed until just combined. Do not overmix.
- Divide the batter evenly between the prepared pans. Bake for 25 to 30 minutes, or until a toothpick inserted into the center comes out clean.
- Let the cakes cool in the pans for 10 minutes before inverting them onto a wire rack to cool completely.
- Make the Vanilla Custard Filling: In a medium saucepan, whisk together the sugar, cornstarch, and salt.
- Whisk in the milk until smooth. Cook over medium heat, stirring constantly, until the mixture thickens significantly and begins to bubble. Continue to cook and stir for one minute after it thickens.
- In a separate bowl, whisk the egg yolks lightly. Temper the yolks by slowly whisking about 1/2 cup of the hot milk mixture into the yolks.
- Pour the tempered yolk mixture back into the saucepan with the remaining hot milk mixture. Cook over medium heat, stirring constantly, until the custard thickens again and comes to a boil. Boil for one minute.
- Remove the custard from the heat. Stir in the butter and vanilla extract until smooth.
- Press plastic wrap directly onto the surface of the custard to prevent a skin from forming. Chill in the refrigerator for at least 2 hours, or until completely cold and firm.
- Assemble the Boston Cream Pie: Once the cakes are cool and the custard is chilled, place one cake layer on your serving plate.
- Spread the chilled vanilla custard filling evenly over the first cake layer.
- Top with the second cake layer.
- Make the Chocolate Ganache Topping: Place the chopped chocolate in a heatproof bowl.
- Heat the heavy cream in a small saucepan until it just begins to simmer around the edges. Do not let it boil rapidly.
- Pour the hot cream over the chopped chocolate. Let it sit undisturbed for 5 minutes.
- Whisk gently until the chocolate is completely melted and the mixture is smooth. Stir in the corn syrup, if using. Let the ganache cool slightly until it is pourable but not runny.
- Pour the chocolate ganache over the top center of the assembled cake, allowing it to drip naturally down the sides.
- Chill the Boston Cream Pie for at least 30 minutes before slicing and serving.
Notes
- For a perfectly flat cake layer, you can level the domes with a serrated knife after cooling.
- If you prefer a quicker filling, you can substitute the homemade custard with 3 cups of good quality vanilla instant pudding mix prepared according to package directions.
- This dessert is best served the day it is made, but leftovers store well covered in the refrigerator for up to 3 days.
Nutrition
- Serving Size: 1 slice
- Calories: 450
- Sugar: 45g
- Sodium: 250mg
- Fat: 24g
- Saturated Fat: 14g
- Unsaturated Fat: 10g
- Trans Fat: 0.5g
- Carbohydrates: 55g
- Fiber: 2g
- Protein: 7g
- Cholesterol: 150mg