
Oh my goodness, how many times have you searched online for a truly amazing **vanilla cake recipe** only to end up with something dry or crumbly? Seriously, it drives me crazy! I’m Aria, and I promise you, that search is officially over. We’re diving into my absolute favorite cake: the Super Moist Classic Vanilla Layer Cake. This homemade vanilla cake stays soft for days—I’m not kidding! It’s surprisingly easy to whip up, which is why I love it for celebrations.
I developed this recipe not as a professional chef, but as a passionate home cook who believes in making incredible food without the fuss. My goal is always to give you the blueprint for that dream bakery-style result. Get your mixer ready, because this is the recipe you’ll be making again and again!
- Why This Vanilla Cake Recipe is Your New Go-To
- Essential Ingredients for the Best Vanilla Cake Recipe
- Step-by-Step Instructions for Your Classic Vanilla Layer Cake
- Tips for a Bakery Style Vanilla Cake Recipe
- Variations for Your Homemade Vanilla Cake
- Storage and Making Ahead for Your Celebration Cake Recipes
- Frequently Asked Questions About This Vanilla Cake Recipe
- Estimated Nutritional Data for This Vanilla Cake Recipe
- Share Your Homemade Vanilla Cake Success
Why This Vanilla Cake Recipe is Your New Go-To
I know you’ve been burned by sad, dry layers before. That’s exactly why I’m obsessed with sharing this one! This is the **easy vanilla cake recipe** you’ll turn to for birthdays, anniversaries—seriously, any excuse will do.
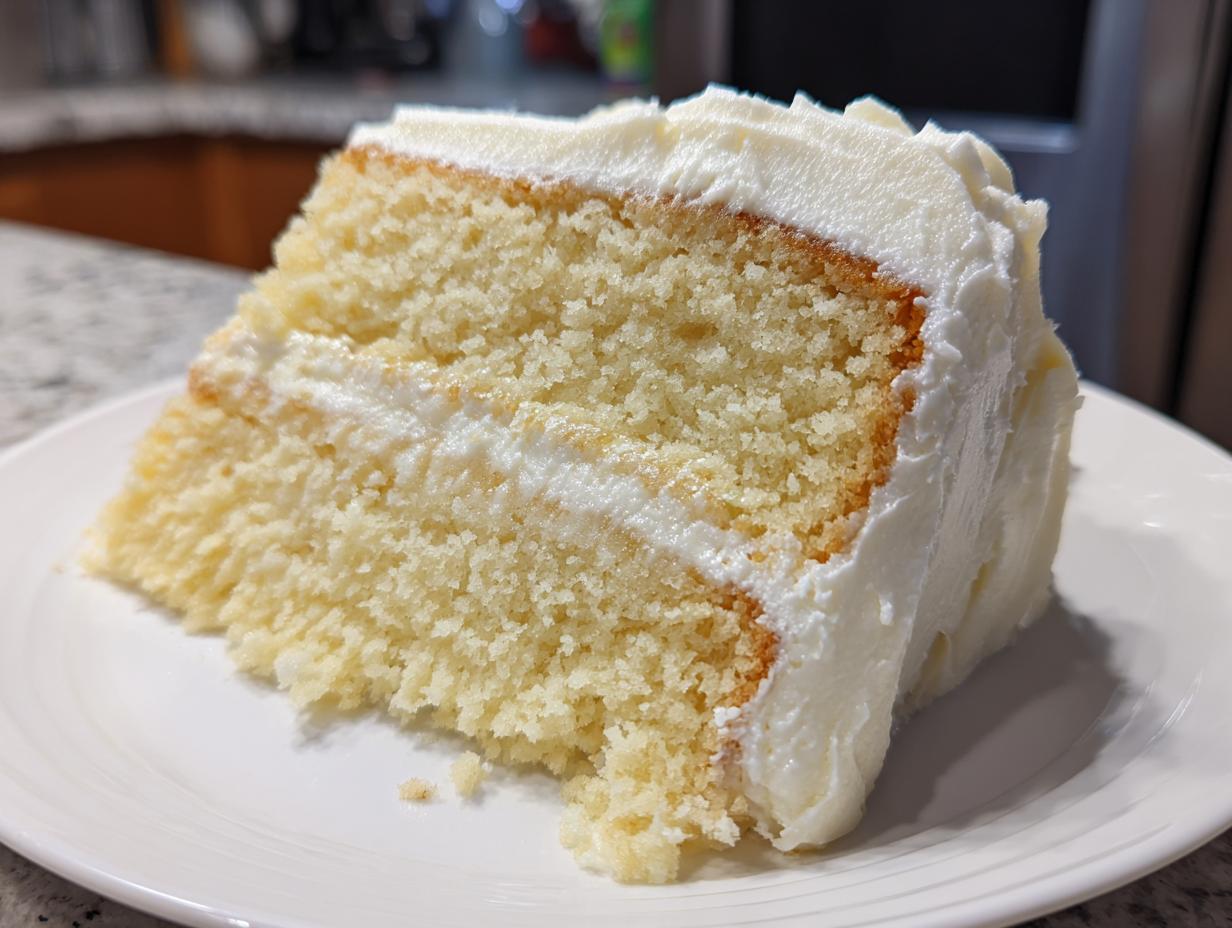
What makes this cake different? It’s all about the texture. You get that unbelievable softness every single time. It’s my signature **moist vanilla cake**, even on day three!
- It’s quick: We whisk most of the dry ingredients right in the bowl!
- It’s fluffy: The mixing method traps tons of air for that classic birthday cake lift.
- It stays moist: This recipe is designed to be incredibly tender and stay that way.
Achieving a Tender Crumb Every Time
It all comes down to how those butter and liquid ingredients meet the flour. We don’t overmix once the flour goes in, which keeps the gluten relaxed. Trust me, when you follow the recipe precisely, the balance of fat and liquid locks in moisture, guaranteeing you a beautiful, tender crumb that just melts in your mouth. It’s the quiet magic behind a truly great cake.

Essential Ingredients for the Best Vanilla Cake Recipe
Okay, so mastering this **vanilla cake recipe** hinges entirely on what you bring to the counter! Before we even touch the mixer, I need you to do one big thing for me: use room temperature ingredients. I mean it! Room temp eggs and milk emulsify so much better with the fat, which is non-negotiable for getting that soft, fluffy texture we’re aiming for. It seems small, but that temperature difference is huge when you want a bakery-style cake.
Cake Component Ingredient Notes
Here are the players for the cake layers themselves. Make sure your butter is actually *soft*—you can press a finger into it slowly without sinking straight through. It should feel slightly cool, not greasy.
- 1 3/4 cups all-purpose flour
- 1 1/2 cups granulated sugar
- 1 tablespoon baking powder
- 1/2 teaspoon salt
- 1/2 cup unsalted butter, softened
- 2 large eggs (room temperature, please!)
- 1 cup whole milk (room temperature!)
- 2 teaspoons pure vanilla extract
A quick note from me: Don’t cheap out on the vanilla extract here. Since vanilla is our star flavor, use the best pure vanilla extract you can find. If you use imitation, you’ll taste the difference immediately, and we want pure, sweet heaven!
Silky Buttercream Frosting Ingredients
Now for the fun part—the frosting that makes this perfection! If you want that gorgeously smooth finish and that perfect pairing for your layers, these are the simple building blocks for your **vanilla cake with buttercream**:
- 1/2 cup unsalted butter, softened (again, soft!)
- 3 cups powdered sugar (sifted is always nicer if you have the time)
- 1 teaspoon pure vanilla extract
- 2-3 tablespoons milk or heavy cream
The cream is where you control things. We add it slowly until that beautiful, silky spreadable consistency is just right for frosting those tender layers.
Step-by-Step Instructions for Your Classic Vanilla Layer Cake
Alright, let’s get baking! This is where the magic happens in this simple **vanilla cake recipe**. Don’t feel intimidated by layers; I promise this method is super straightforward, which is perfect if you’re a beginner baker. Remember that feeling of anticipation? It’s almost time to eat!
Mixing the Fluffy Vanilla Cake Batter
First things first: preheat your oven to 350°F (175°C) and make sure those two 8-inch cake pans are greased *and* floured. I still sometimes use a bit of baking spray, but nothing beats a classic grease-and-flour job for security. Now, get a big bowl! We’re aiming for that easy, one-bowl feel here.
Whisk all your dry stuff—flour, sugar, baking powder, and salt—together first. Then, toss in the softened butter, your room-temp eggs, milk, and that gorgeous vanilla extract. You absolutely must beat this with your electric mixer on medium speed for a full two minutes once it’s combined. Don’t stop early! Those two minutes are crucial for incorporating air and getting that fluffy texture we talked about. Scrape down the sides halfway through, just to make sure everything plays nicely together.
Baking and Cooling the Layers
Once your batter is smooth and happy, divide it evenly between your two prepared pans. Into the oven they go for about 30 to 35 minutes. How do you know they’re done? The old rule still works best: stick a toothpick right in the center. If it comes out absolutely clean, pull them out! That’s the signal.
This next part is important for layer stability. Let those cakes rest right there in the pans for about 10 minutes. Give them patience! If you try to flip them out immediately, they might tear on you, and nobody wants a sad, broken layer cake. After 10 minutes, invert them gently onto a wire rack so they can cool completely. Don’t even think about frosting until they are stone cold!
Preparing the Buttercream and Assembling the Vanilla Cake Recipe
While the layers cool down, we whip up the silky frosting. Beat that other half-cup of softly softened butter until it’s creamy—this is our base. Now, gradually introduce the powdered sugar on low speed so you don’t create a sugar cloud explosion across your kitchen! Once it looks shaggy, splash in the vanilla and 2 tablespoons of cream or milk.
Turn that mixer up to medium-high and let it rip until it’s super light and fluffy. You can add that last tablespoon of liquid if it’s too stiff to spread. Once those layers are fully cool, place the first one down, spread about a third of that glorious frosting perfectly over top. Then, place the second layer on, and frost the top and sides of your finished **vanilla cake recipe**. That’s it! You did it! For more insights into my cooking journey, check out my passion for home cooking over at Cooking Zenith.
Tips for a Bakery Style Vanilla Cake Recipe
Look, anyone can follow a recipe, but if you want that truly professional, soft, and reliable **vanilla cake recipe**—the kind that tastes like it came from a fantastic local bakery—you need a couple of insider secrets. These aren’t fancy tricks; they’re just patience and understanding *why* things work. Honestly, I think these small adjustments are what makes my cake so much better than others I’ve tried.
When you nail these small details, you elevate the whole experience. For more ideas on leveling up your baking game, check out this amazing guide on Classic Vanilla Cake perfection!
Ingredient Temperature Matters for Moist Vanilla Cake
We talked about room temperature ingredients earlier, but wow, this cannot be stressed enough for a truly **moist vanilla cake**. When your eggs and milk are cold, they clash with that softened butter we creamed earlier.
A cold ingredient shocks the butter mixture, causing the butter to seize up again, and you lose all the beautiful air pockets we worked so hard to beat in! Room temperature components mix together smoothly, creating what chefs call a great emulsion. Think of it like mixing oil and water—it needs that warmth to blend seamlessly, resulting in that incredibly fine, silky crumb structure instead of a grainy or coarse texture.
Variations for Your Homemade Vanilla Cake
Sometimes you just crave a little twist on a classic, right? While this recipe is fantastic as is, it’s also a wonderful base for other fun flavors. Think of it as your blank canvas for **vanilla dessert ideas**! It’s your kitchen, so feel free to experiment a little once you’ve mastered the basic structure—that way, you avoid sad baking fails later!
If you’re interested in exploring a denser version of this cake, you might want to check out how similar recipes handle a vanilla pound cake recipe sometime. But for layer cakes, these simple swaps are usually the best way to go.
Simple Flavor Swaps
You only need a tiny adjustment to completely change the vibe of your layers. These are so easy you can do them without even pulling out extra notes!
For a slightly richer, nuttier layer, try this: take out a quarter teaspoon of the pure vanilla extract and swap it in with almond extract. Almond is strong, so start small—you want that hint of depth, not a full marzipan experience! Many people find this combination divine in a **fluffy vanilla cake**.
Another easy way to brighten things up, especially if you plan on serving this in the summer, is using citrus zest. Grab a microplane and zest one whole lemon or orange directly into your dry ingredients mix. The oils release during baking, giving the whole cake a lovely, sunny aroma. It pairs beautifully with a simple glaze if you decide to skip the heavy buttercream!
Storage and Making Ahead for Your Celebration Cake Recipes
The best thing about this **vanilla cake recipe**, besides how amazing it tastes right out of the oven, is that it’s actually better the next day! Seriously, I tested this relentlessly because who wants a cake that goes stale overnight? The good news is this cake is legendary for staying moist for up to four full days when stored correctly. This makes it the dream **dessert for parties** because you aren’t scrambling on the day of the event.
Here’s the foolproof storage method: Make sure your cake layers are completely cool—and that means *completely*—before you even think about storing them. If you’ve frosted them, wrap each layer tightly in plastic wrap before putting it in an airtight container. If you’re keeping them unfrosted, place them in a container lined with a paper towel on the bottom; this helps wick away any condensation.
Keep the whole thing at cool room temperature, not in the fridge unless your kitchen is sweltering hot! Refrigeration actually dries out cake, and we don’t want that! If you absolutely must store frosted layers longer, give them a quick 15-second zap in the microwave before serving for that ‘just baked’ softness. For more tips on making great cakes ahead of time, check out this great link on baking the best vanilla cake!
Frequently Asked Questions About This Vanilla Cake Recipe
I totally get it—baking can bring up a ton of little panicked questions! When you’re making something special like this **classic vanilla layer cake**, you want to be totally sure you’ve got everything right. Don’t worry, I’ve answered the questions I always get from friends trying this recipe for the first time. Hopefully, this helps you feel super confident before you start mixing!
Can I make this an easy vanilla cake recipe using only one pan?
Absolutely, you can! If you only have one 8-inch round pan, or if you want to turn this into a loaf cake for easy slicing, it’s no problem at all. Just remember that if you pour all that batter into a single, deeper pan, you have to increase the baking time significantly. We’re talking maybe 50 to 60 minutes instead of 30. You’ll still use the toothpick test, but keep checking every 10 minutes after the initial 45-minute mark until you feel that perfect soft center!
What is the best way to store the vanilla cake with buttercream?
Okay, my biggest piece of advice here: keep it cool, but outside the fridge if you can! Since this is such a **fluffy vanilla cake**, the texture is everything. The buttercream frosting we made hardens up like a rock when it gets too cold, and nobody wants a dense, stiff bite!
If your house is cool, wrap the frosted cake tightly in plastic wrap right on the serving plate, or place it in an airtight container. It will stay perfect at room temperature for two to three days. If you *must* refrigerate it due to heat or humidity, remember to take it out at least two hours before serving. That allows the butter to soften up again so you get that wonderful, creamy, **vanilla cake with buttercream** experience.
Can I substitute the butter in the cake batter?
This is where I always preach: use the butter! Fat provides flavor and structure, and honestly, the flavor of butter is key to this **homemade vanilla cake**. However, I know sometimes people need an alternative. You *can* substitute oil, like vegetable or canola, but you have to know it changes things.
Oil creates a cake that feels wetter and stays moist longer, but it lacks the structure that creamed butter provides. If you swap butter for oil 1:1, you’ll likely end up with a cake that feels denser and perhaps a little heavier. We want that glorious light lift, so I always recommend sticking to the softened butter for the best results. If you’re interested in learning more about how we structure our site policies, you can view our guidelines here at our Privacy Policy.
Estimated Nutritional Data for This Vanilla Cake Recipe
Let’s quickly look at the numbers for this heavenly **vanilla cake recipe**. Remember, since we’re all baking at home with slightly different brands of butter or sugar, these are just good starting estimates per slice, yielding 10 servings total. This data helps you plan for any parties!
- Serving Size: 1 slice
- Calories: 450
- Sugar: 55g
- Fat: 22g
- Protein: 5g
If you want to dive deeper into how we keep our site running smoothly and handle user data, you can check out our Terms of Use. Seriously though, focus on enjoying that soft crumb, and don’t sweat the precise accounting too much!
Share Your Homemade Vanilla Cake Success
I truly hope this recipe becomes one of your favorites! That’s the whole point of sharing my best work with you—to bring joy to your kitchen. Once you try this **homemade vanilla cake**, please come back and let me know how it went!
Go ahead and give it a rating out of five stars right here on the recipe card. And if you happen to snap a photo of your beautiful layers, tag me! I absolutely love seeing your creations. If you ever have questions or just want to chat about baking, feel free to drop me a line over at the contact page. Happy baking!
PrintSuper Moist Classic Vanilla Layer Cake with Silky Buttercream
Bake this easy, homemade vanilla cake that results in a soft, fluffy, and moist crumb perfect for any celebration. This recipe includes instructions for a classic vanilla buttercream frosting.
- Prep Time: 20 min
- Cook Time: 35 min
- Total Time: 55 min
- Yield: 10 servings 1x
- Category: Dessert
- Method: Baking
- Cuisine: American
- Diet: Vegetarian
Ingredients
- 1 3/4 cups all-purpose flour
- 1 1/2 cups granulated sugar
- 1 tablespoon baking powder
- 1/2 teaspoon salt
- 1/2 cup unsalted butter, softened
- 2 large eggs
- 1 cup whole milk
- 2 teaspoons pure vanilla extract
- 1/2 cup unsalted butter, softened (for frosting)
- 3 cups powdered sugar (for frosting)
- 1 teaspoon pure vanilla extract (for frosting)
- 2–3 tablespoons milk or heavy cream (for frosting)
Instructions
- Preheat your oven to 350°F (175°C). Grease and flour two 8-inch round cake pans.
- In a large bowl, whisk together the flour, sugar, baking powder, and salt.
- Add the softened 1/2 cup butter, eggs, 1 cup milk, and 2 teaspoons vanilla extract to the dry ingredients.
- Beat with an electric mixer on medium speed for two minutes until the batter is smooth and well combined. Scrape down the sides of the bowl as needed.
- Divide the batter evenly between the prepared cake pans.
- Bake for 30 to 35 minutes, or until a toothpick inserted into the center comes out clean.
- Let the cakes cool in the pans for 10 minutes before inverting them onto a wire rack to cool completely.
- To make the frosting, beat the 1/2 cup softened butter until creamy.
- Gradually add the powdered sugar, mixing on low speed until combined.
- Add 1 teaspoon vanilla extract and 2 tablespoons of milk or cream. Beat on medium-high speed until light and fluffy, adding the remaining milk if needed to reach a smooth, spreadable consistency.
- Once the cakes are completely cool, place one layer on a serving plate. Spread about one-third of the frosting evenly over the top.
- Place the second cake layer on top and frost the top and sides of the entire cake.
Notes
- For a bakery style crumb, use room temperature eggs and milk.
- This cake stays moist for up to four days when stored in an airtight container.
- You can substitute the milk with buttermilk for a slightly tangier flavor profile.
Nutrition
- Serving Size: 1 slice
- Calories: 450
- Sugar: 55g
- Sodium: 250mg
- Fat: 22g
- Saturated Fat: 14g
- Unsaturated Fat: 8g
- Trans Fat: 0.5g
- Carbohydrates: 60g
- Fiber: 1g
- Protein: 5g
- Cholesterol: 75mg