
Remember those fancy little candies you’d find tucked away at holiday parties? The ones everyone secretly hoped were still left at the bottom of the box? Well, friends, we are reclaiming that moment of delight! Making homemade chocolate covered cherries isn’t just about candy; it’s about pure, nostalgic magic crafted right in your own kitchen. When I first tackled these, I thought they’d be impossible, but let me tell you, seeing that chocolate shell crack open is one of the most satisfying kitchen wins ever. This recipe isn’t overly complicated—it’s about simple steps that build incredible flavor and assurance. We’re aiming for that signature, beautiful, slightly gooey cordial center, and trust me, we’re going to get it.
If you’ve been looking for a simple homemade candy recipe that feels secretly gourmet, this is it. I’ve put everything I learned from testing batches until my counters were covered in melted chocolate into these steps. You won’t believe how easy it is to make stunning chocolate chip cookie alternatives!
- Why You Will Love These Homemade Chocolate Covered Cherries
- Essential Ingredients for Perfect Chocolate Covered Cherries
- How to Make the Fondant Coating for Chocolate Covered Cherries
- Crucial Chilling Steps for Dipping Chocolate Covered Cherries
- Mastering Chocolate Dipping Techniques for Chocolate Covered Cherries
- Tips for Success with Your Chocolate Covered Cherries Recipe
- Storage and Making Ahead for Your Chocolate Covered Cherries
- Frequently Asked Questions About Making Chocolate Covered Cherries
- Share Your Homemade Candy Recipes
Why You Will Love These Homemade Chocolate Covered Cherries
So why should you bother making these instead of just buying that box around Valentine’s Day? Honestly, the flavor difference is night and day. I promise you, your kitchen will smell incredible while you work on these incredible no bake eclair cake recipe alternatives!
- They taste richer and far fresher than anything you get at the store. We control the quality of the chocolate, and that makes a huge difference!
- The active time is surprisingly short for such an elegant confection. Most of the time is just waiting for things to chill or set—hands-off time!
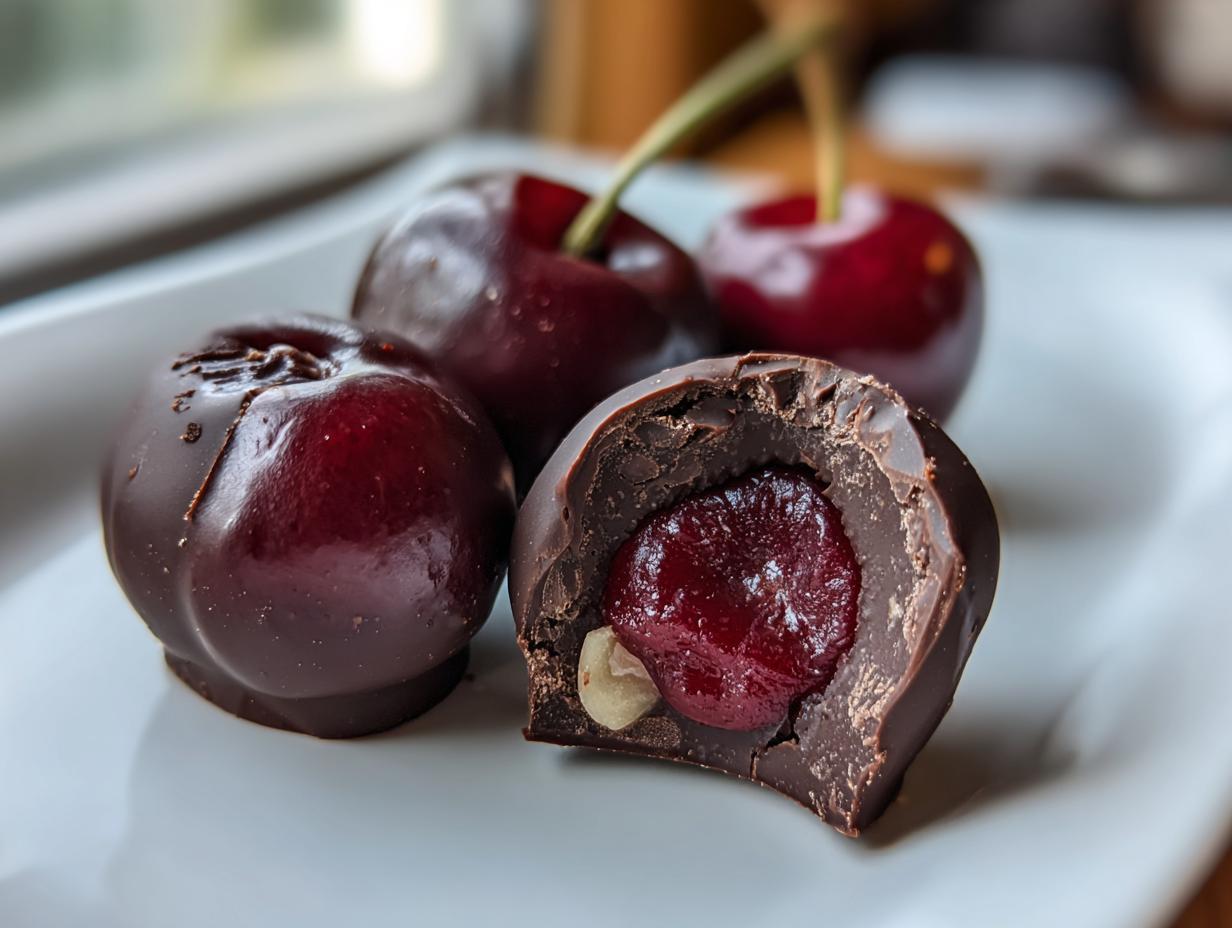
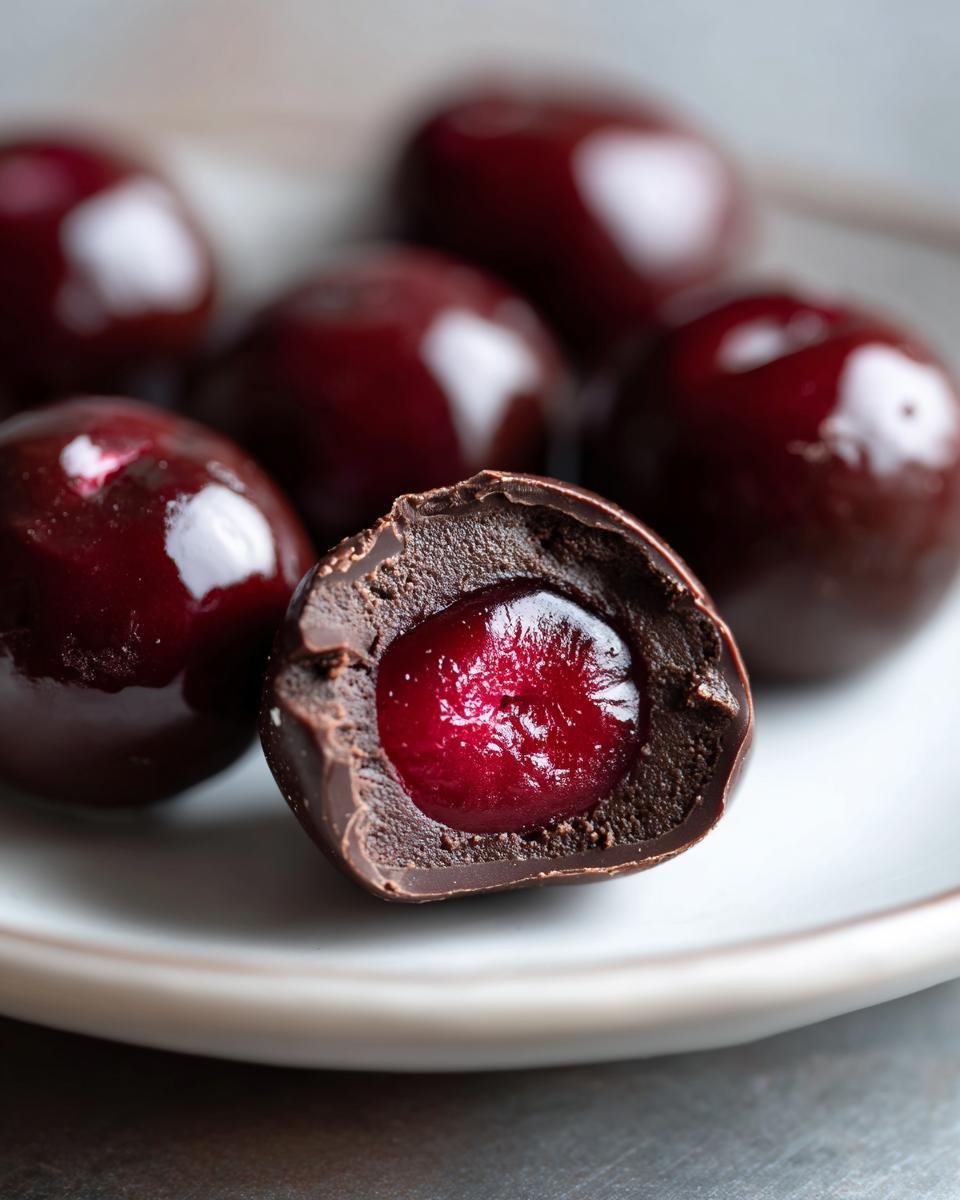
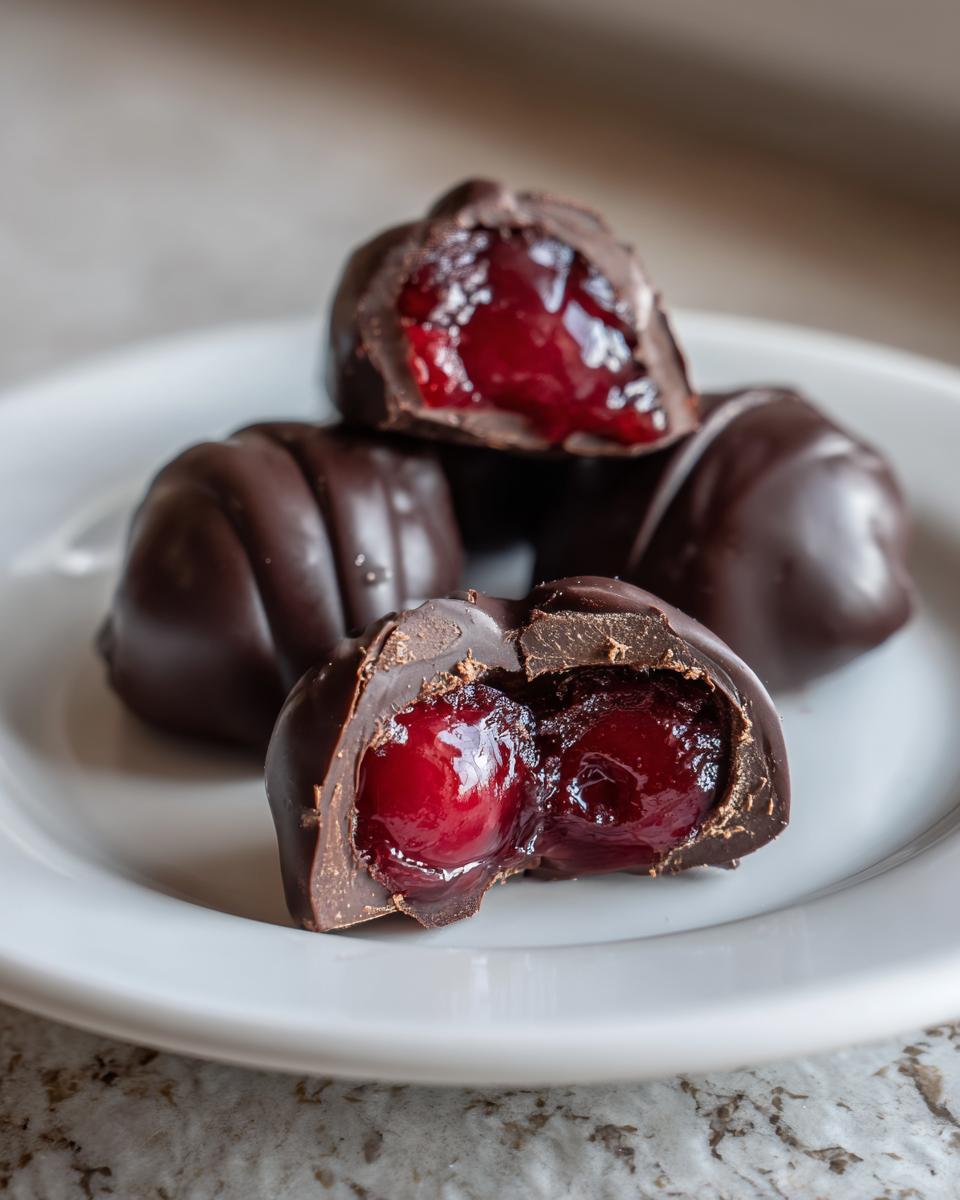
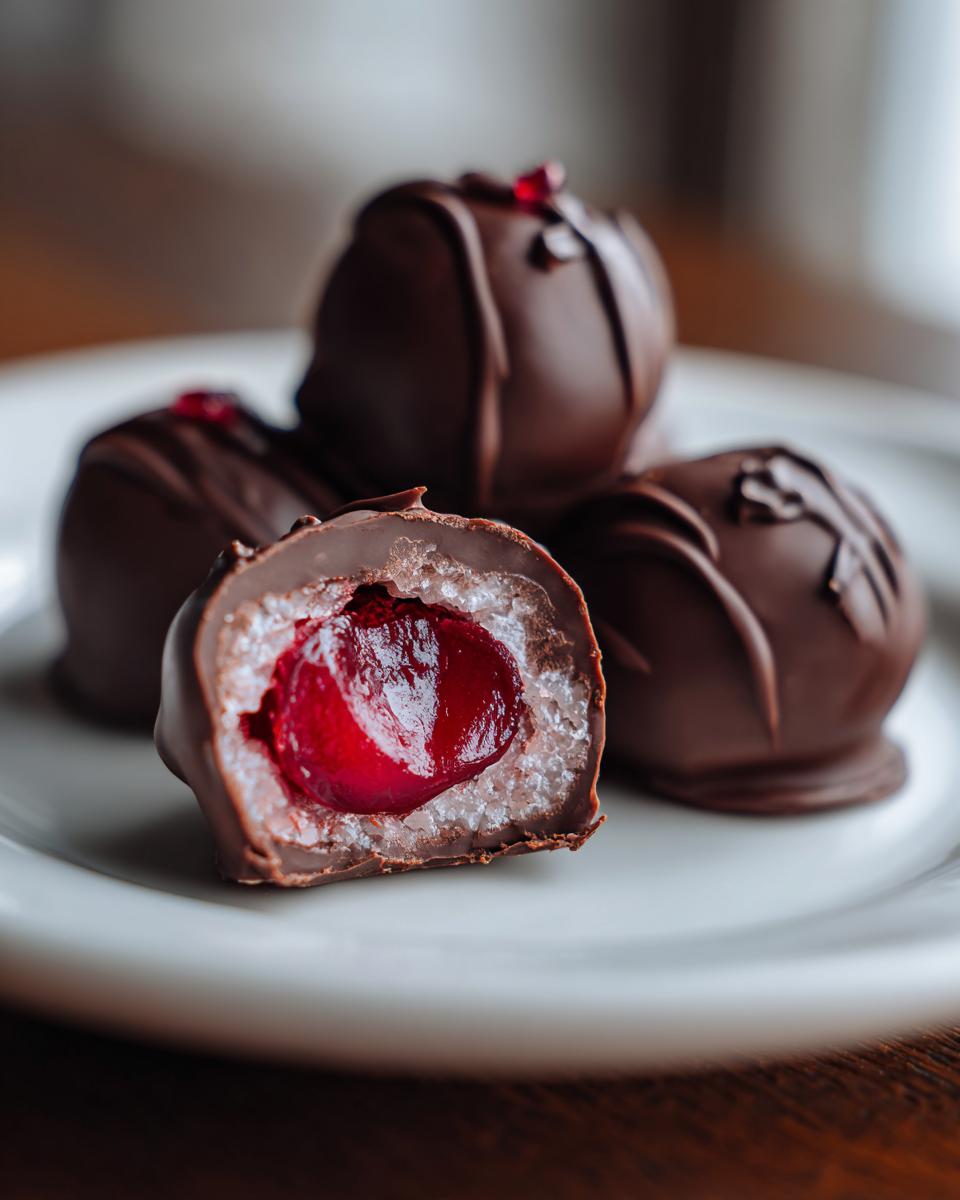
- You get that perfect textural contrast: the snap of the hard chocolate shell, the slight chewiness of the fondant, and that sweet, juicy center. It’s amazing!
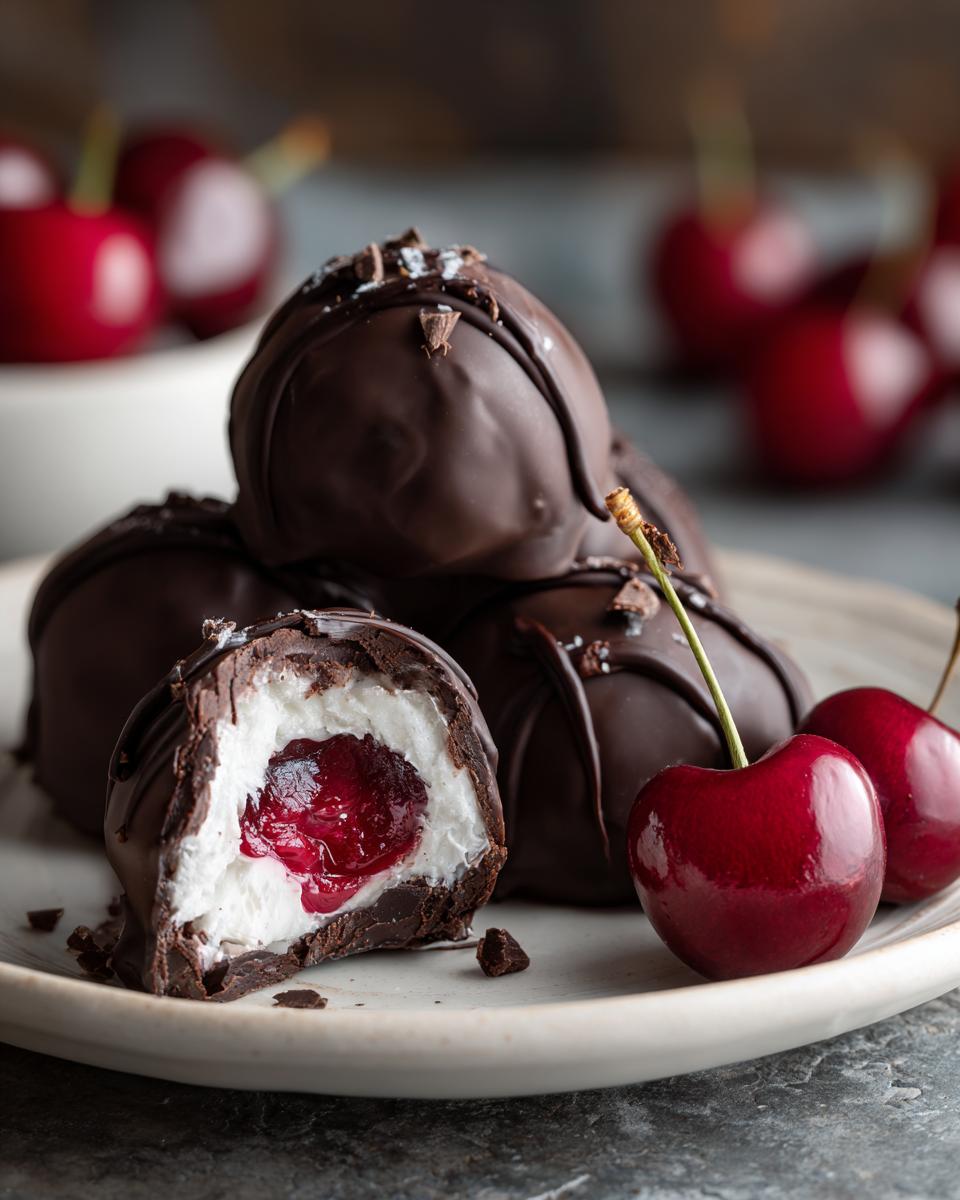
Achieving the Signature Cordial Center
This is where we move past just making simple chocolate-dipped fruit and step into true confectionery territory. If you want that real cherry cordial effect—where the center is syrupy or completely liquid—you have to have a little patience! The magic happens *after* you dip them.
When you wrap those drained cherries in the powdered sugar fondant, you are basically creating a sugar seal. Over the next two or three days, the sugar naturally draws the moisture and syrup right out of the cherry. It creates this rich, syrupy liquid under the fondant. So, while these are ready to eat right away, they only hit peak gooey perfection after they sit for a couple of days at room temperature. Don’t rush it if you can help it!
Perfect for Gourmet Gifting
Seriously, these chocolate covered cherries look like they came straight from a fancy chocolatier! They immediately elevate whatever you package them in. If you are looking for ideas for Gourmet Chocolate Gifts, try placing them in small white boxes lined with crinkled paper. People always ask where I bought them.
They look incredibly impressive tucked into a tin for the holidays or brought as a homemade contribution to a potluck. You’ve spent your time and care making them, and that always shows through in the final look. They are simply stunning!
Essential Ingredients for Perfect Chocolate Covered Cherries
Okay, let’s look at what you need. The beauty of this recipe is that it’s really only five main ingredients to build the candy itself, plus the chocolate coating. But every single one of these items matters, especially when we are aiming for that beautiful, classic texture. Clarity here is key, because if one thing goes wrong, your whole dipping process can get messy!
- 1 jar (10 ounces) maraschino cherries, drained well
- 1 tablespoon butter, softened
- 2 cups powdered sugar, sifted
- 1 teaspoon vanilla extract
- 1-2 tablespoons milk or water (as needed)
- 12 ounces dark or milk chocolate, for dipping
- 1 teaspoon vegetable shortening or coconut oil (optional, for smoother dipping)
Now, I really need to stress one point before we move on—it’s the cherries! They must be drained as well as you can possibly manage. I usually take them out of the jar and spread them on a few layers of paper towels. Then, I press them gently. If they are wet when you wrap them in that fondant, the whole thing will weep moisture and make your sugar dough sticky, and nobody wants that mess.
Ingredient Notes and Substitutions
Since this is essentially a make-ahead cheesy egg bake of a recipe, if you skip a crucial prep step, you’ll pay for it later! Here are my thoughts on the components:
For the chocolate coating, I always, always, *always* recommend using good quality dark chocolate or semi-sweet chocolate. The slight bitterness of the dark chocolate cuts through the intense sweetness of the cherry and the fondant wrapper so perfectly. If you use milk chocolate, they can taste a little too sweet overall, but hey, if that’s your jam, go for it!
That optional teaspoon of shortening or coconut oil? That’s pure gold for dipping! Chocolate, especially when melting, can sometimes get too thick and seize up when dipping. Adding just a tiny bit of fat helps thin the melted chocolate just enough so it flows beautifully off the cherry, giving you that thin, glossy coating. Don’t skip it if you want that professional look!
And one last thing on those cherries: Yes, you need the maraschino ones for this specific cordial recipe. Fresh cherries just won’t work here because we need that preserved, uniform sweetness and texture for the fondant to adhere correctly and for that amazing liquid center to develop later on.
How to Make the Fondant Coating for Chocolate Covered Cherries
Alright, this is the fun part—building the sweet blanket that protects our little jems! This fondant wrapper is what separates these from just being chocolate-dipped cherries. It gives the candy body and that gorgeous sweet counterpoint to the dark chocolate. We are blending butter, sugar, and vanilla until we get a texture that’s perfect for working with. Think of it like playdough, but way tastier!
First things first: make sure that tablespoon of butter you’re using is truly softened. I sometimes leave it out on the counter for an hour before I start. You want it mushy, but definitely not melty.
In a good mixing bowl, cream the softened butter right away with the vanilla extract. Just stir it until it’s happy and smooth. Don’t overthink it! Then, start adding your two cups of sifted powdered sugar gradually. Mixing slow here keeps the sugar from puffing up and making a giant cloud in your kitchen—trust me, I learned that the hard way!
Keep mixing until it starts pulling away from the sides of the bowl and it looks thick, almost like a crumbly paste. Now, this is where you need to use your judgment. We are shooting for a pliable, slightly sticky dough. If it looks bone dry, add your milk or water, just a teaspoon at a time. Seriously, start with one teaspoon, mix it in, and see how it feels. Too much liquid and you’ll end up with sticky goo that melts right off the cherry during dipping, and nobody wants that headache!
Wrapping the Cherries Tightly
Once your fondant is at the right texture—firm enough to roll, but soft enough to not crack—it’s time to wrap. I find it helps if I grab a small spoonful of the fondant, roll it between my palms just for a second to warm it up, and then flatten it into a small disk. You want it wide enough to wrap completely around the dried cherry. If you want to see exactly how I manage the consistency of this mixture, check out my detailed guide on fondant-covered cherries!
Place one of those painstakingly patted-dry maraschino cherries right in the middle of your fondant disk. Now, bring the edges of the fondant up and over the cherry. You need to pinch the seam closed really well. This step is crucial! If you leave any openings, that chocolate coating you worked so hard to get smooth will just seep right into the fondant, making it dissolve and creating a total mess on your parchment paper.
Pinch it tight, and then gently roll the whole thing between your palms one more time to get it shaped back into a smooth ball. Think of it like wrapping a tiny, sweet little present. After you wrap them, get them onto parchment paper right away and straight into the fridge. They need to be super firm before they meet warm chocolate!
Crucial Chilling Steps for Dipping Chocolate Covered Cherries
Okay, listen up, because this is the step that separates the triumphant candy maker from the person swearing at melted cherry goo on their counter. Chilling your fondant-covered centers isn’t optional; it is non-negotiable! I know we just spent time carefully wrapping these little morsels, and I know you’re excited to dip them, but you absolutely cannot rush the chill time.
You have to get those sugar-wrapped cherries rock hard in the refrigerator. Why? Because fondant is mostly sugar and butter—it’s soft at room temperature. If you try to dip a room-temperature, fondant-wrapped cherry into melted chocolate, two bad things happen: One, the soft fondant will start to melt right away, making your chocolate runny and weak. Two, the cherry wrapper will actually slip right off the cherry ball and float around in your lovely chocolate pot! It’s a disaster, trust me.
I insist you chill them for a minimum of one full hour. I usually leave mine in the fridge for at least 90 minutes, just to be safe, especially if it’s humid in my kitchen. They need to be firm to the touch. You want them to feel almost frozen when you pull them out. This firmness gives you the crucial window of time you need to dip them quickly and efficiently before they start to warm up too much.
Once they are firm, you should work quickly! Keep the rest of the batch in the fridge while you are dipping. You can even rotate batches in and out. This little bit of patience ensures you get that crisp chocolate shell, which is what makes our chocolate eclair cake recipe relatives jealous!
Mastering Chocolate Dipping Techniques for Chocolate Covered Cherries
Okay, this is the moment of truth, where we transform our perfectly pale, chilled balls into gorgeous, glossy, decadent chocolate covered cherries. Dipping is an art, honestly, but once you get the rhythm down, it’s fast, fun, and incredibly satisfying. Remember, these centers are cold, so you have to move with purpose!
First up, you need to melt that chocolate. I find the microwave method is the easiest and most controllable for home cooks. Take your 12 ounces of quality chocolate and put it in a microwave-safe bowl. You’re going to pulse it in 30-second intervals. Stir it well after *every* interval. And I mean really stir! Chocolate gets hot unevenly, and you don’t want burnt patches. Keep going until it’s almost completely smooth, then take it out; the residual heat will melt the last few chunks.
Now, if you’re adding that optional shortening or coconut oil—and I highly recommend you do—stir that teaspoon in right now until everything is silky. This makes the chocolate flow like water off a duck’s back, which is exactly what we need for a thin, professional shell. For a quick tutorial on getting the perfect melted consistency, take a look at my guide on easy creamy chocolate fondue recipe; the principles are the same!
Grab your chilled cherries and let’s dip! I use two forks for this, or a specialized chocolate dipping tool if I’m feeling fancy. Plunge one cold cherry completely under the surface of the chocolate. Hold it there for just a second, let the chocolate start to cling, then slowly lift it out. As you lift, gently tilt the fork so the excess chocolate drips back into the bowl. A good tip here is to tap the side of the fork gently against the side of the bowl—don’t scrape it against the edge, just a light tap—to encourage drips to fall off.
Place the dipped cherry onto the parchment paper we laid out earlier. If you work efficiently, the chocolate from the first few cherries will still be wet when you finish dipping the last ones. That’s okay, but you do need to let them set up before you even *think* about moving them or adding a second layer. If you want that super thick, crack-resistant shell, we need to double-dip, and that requires a little patience first!
The Double-Coat Method for a Thick Shell
To get that truly rich look, the kind you see in professional boxes, you need a double coat. It also ensures that if the first coat was thin anywhere, you cover up any of those gaps where the fondant wrapper might peek through—which we definitely want to hide based on what I read about how others manage this on sites like Style Table.
After the first coat has set for about 10 minutes at room temperature (it should be fully dry to the touch, not tacky at all), it’s time for the second dip. Reheat your chocolate briefly if it got too stiff during the first round. Then, just repeat the exact dipping process—submerge, lift, allow excess to drip, and place back on the parchment.
This second coat makes your chocolate covered cherries look magnificent and adds that satisfying *snap* when you bite into them. Don’t try to do the second coat until the first one is completely hard, or you’ll just end up swirling wet chocolate all over your beautiful chilled centers!
Tips for Success with Your Chocolate Covered Cherries Recipe
I’ve learned a few hard-won tricks over the years making these—especially when trying to get that perfect, crack-free chocolate shell. When you’re working with fondant and chocolate, humidity is officially your kitchen enemy! If it’s a really rainy or humid day, you might find your powdered sugar dough gets sticky faster. Don’t panic; just keep your hands lightly dusted with a bit more powdered sugar as you roll those little balls.
Another thing that trips people up is the chocolate! If you microwave it too long, it gets that awful grainy texture because of seizing. Remember what I said about 30-second bursts? Stick to that religiously. If you see any lumps, pull it out, stir it until it’s smooth, and only then put it back in for 15 more seconds if you absolutely have to. We want liquid silk, not gritty sand!
And here’s my biggest Aria Thompson personal insight, maybe the most important tip for these chocolate covered cherries: If you can manage it, make them ahead of time! I know everyone wants to eat them right away—and you absolutely can—but if you need that true, classic, liquid *cordial* center, you have to give them time to mature. I make a huge batch, usually when I’m working on my peanut butter pretzel bark, and then I just forget about them for three days.
Seriously, put them in a cool, dry spot—not the fridge!—for 72 hours. That time is essential for that sugar coating to work its magic on the cherry syrup. They taste heavenly fresh, but they are transcendent when they’ve had time to age into a real cherry cordial.
Storage and Making Ahead for Your Chocolate Covered Cherries
So, you’ve got a beautiful batch of homemade chocolate covered cherries sitting on your counter, looking perfect and glossy. Now what? Storage is where we discuss the secret to unlocking that signature gooey center versus just keeping them safe until you gift them.
The absolute best place for these candies, if you are aiming for that true, melt-in-your-mouth liquid center like the store-bought cordials, is actually at room temperature! Yes, you read that right. Keep them in a cool, dry spot—a pantry or a cool cupboard is perfect. They need this slightly warmer environment for the fondant to keep drawing that moisture out of the cherries. You must let them sit for at least two to three days before you plan on eating them. I know it’s hard! But when you taste the difference after they’ve had time to mature, you’ll understand why this wait is worth it.
If you’re making these for a party or holiday and need to speed things up, or if your house runs really warm, you *can* store them in the refrigerator. Just promise me you’ll pull them out about an hour before you plan to serve them. The cold can make the chocolate shell brittle and the fondant wrapper hard. If they get too cold, you miss out on that satisfyingly soft texture we worked so hard to achieve. Remember, if you are storing these, think of them like any other homemade candy; they are best eaten within a couple of weeks. If you made a big stash for the holidays, these are perfect to have on hand along with my recipes for fuss-free make-ahead dishes like my easy make-ahead cheesy egg bake!
Frequently Asked Questions About Making Chocolate Covered Cherries
I get so many emails asking about these beautiful treats! It shows me just how much people love these nostalgic candies. Whether you’re a seasoned baker or just looking for some fun no bake tiramisu cheesecake recipe alternatives, chances are you’ll have a few questions before dipping.
Can I use fresh cherries instead of maraschino cherries in this chocolate covered cherries recipe?
Oh, I totally get the desire to use beautiful fresh cherries! But for this specific recipe, no, you really shouldn’t swap them out if you want that classic experience. This particular technique relies on the sugar content and structural integrity of the maraschino cherries—they are preserved in syrup, which makes them firmer and sweeter.
If you use a fresh cherry, it has too much water that isn’t anchored by sugar, and it will break down uncontrollably in your fondant wrapper. To get that lovely syrupy center we talked about, you need the cherries that are already highly concentrated in sugar. So stick to the jarred ones for these chocolate covered cherries!
What is the best type of chocolate for dipping?
For me, the best chocolate is dark chocolate or semi-sweet chocolate. When you are making something this sweet—you have the fondant, and you have the sweet cherry—you need that slightly bitter chocolate to balance everything out. It creates the most beautiful, rich contrast in your mouth. But honestly, if you prefer milk chocolate, go for it! You’ll end up with a wonderfully sweet, classic candy that still qualifies as one of the best Easy Chocolate Dipped Treats.
The most important tip here, no matter what kind you choose, is quality. If you use cheap chocolate chips, they often contain stabilizers that prevent them from melting smoothly. You want something designed for melting or dipping; it makes the entire process so much easier and the final product much glossier!
How long do homemade chocolate covered cherries last?
This is a fun one because the answer depends on what you want! If you cannot wait (and trust me, I rarely can!), they are perfectly fine to eat right after the chocolate hardens, usually within a few hours of dipping. They will taste good, kind of like a sweet chocolate-covered jewel.
However, if you are aiming for that melt-in-your-mouth, liquid-y, *cordial* experience—the real payoff—you must let them cure! Keep them stored in a cool, dry spot and leave them alone for about two to three days. That’s how long it takes for the sugar wrap to draw the liquid out of the cherry perfectly. Once cured, they are still delicious for about two weeks total, but they are definitely best enjoyed in that first week!
Share Your Homemade Candy Recipes
Wow, we did it! We’ve gone from soggy cherries to fully coated, glossy, glorious chocolate covered cherries. I am so proud of you for diving into the world of homemade candy making. This is where the magic of the kitchen really shines, turning a simple jar of fruit into something truly special. Whether you made these for a quiet evening indulgence or as part of your big holiday spread, I really want to hear about how they turned out for you!
Did you manage to get that signature gooey center? Did the chocolate get super smooth thanks to that tiny bit of coconut oil I suggested? Don’t be shy! Head down to the comments section below, give this recipe a star rating—tell me exactly how many stars these deserve in your book! I rely on your feedback to make sure these recipes are truly foolproof for everyone coming along on this culinary journey.
If you took a picture of your stunning batch—especially if you arranged them beautifully for gifting—please tag me on social media! Seeing your creations is truly the highlight of my day. It proves that anyone, even if you think you can’t handle delicate kitchen tasks, can master these simple gourmet sweets. If you enjoyed conquering this challenge, you might want to check out my full collection of homemade candy recipes for your next big baking project!
Happy cooking, and enjoy every single decadent bite!
PrintHomemade Chocolate Covered Cherries (Classic Cordial Style)

Make classic chocolate covered cherries at home using maraschino cherries wrapped in a simple fondant coating and dipped in rich chocolate. This recipe guides you to the signature gooey center.
- Prep Time: 45 min
- Cook Time: 10 min
- Total Time: 55 min
- Yield: About 20 candies 1x
- Category: Dessert
- Method: No Bake
- Cuisine: American
- Diet: Vegetarian
Ingredients
- 1 jar (10 ounces) maraschino cherries, drained well
- 1 tablespoon butter, softened
- 2 cups powdered sugar, sifted
- 1 teaspoon vanilla extract
- 1–2 tablespoons milk or water (as needed)
- 12 ounces dark or milk chocolate, for dipping
- 1 teaspoon vegetable shortening or coconut oil (optional, for smoother dipping)
Instructions
- Prepare the cherries: Drain the maraschino cherries completely. Pat them very dry using paper towels. This step is important for the fondant to adhere.
- Make the fondant: In a medium bowl, cream together the softened butter and vanilla extract. Gradually add the sifted powdered sugar, mixing until a thick dough forms.
- Adjust consistency: If the mixture is too dry to handle, add milk or water one teaspoon at a time until you have a pliable, slightly sticky dough, similar to playdough.
- Wrap the cherries: Take a small piece of fondant (about 1 teaspoon) and flatten it into a small disk. Place one dried cherry in the center and carefully wrap the fondant around it, sealing it completely. Roll it gently into a smooth ball shape.
- Chill the centers: Place the fondant-covered cherries on a baking sheet lined with parchment paper. Chill them in the refrigerator for at least 1 hour, or until firm. This prevents them from melting during dipping.
- Melt the chocolate: Place the dipping chocolate in a microwave-safe bowl. Microwave in 30-second intervals, stirring well after each interval, until smooth. Stir in the shortening or coconut oil if using, to thin the chocolate slightly.
- Dip the cherries: Working quickly, use a dipping tool or two forks to submerge one chilled cherry completely in the melted chocolate. Lift it out, allowing excess chocolate to drip off.
- Set the coating: Place the dipped cherry back onto the parchment-lined baking sheet. If you want a thicker shell, allow the first coat to set for 10 minutes at room temperature, then repeat the dipping process (double-coating).
- Final set: Allow the chocolate covered cherries to set completely at room temperature or briefly in the refrigerator until the chocolate is hard.
Notes
- For a true cordial effect, allow the finished candies to sit at room temperature for 2-3 days before eating. The sugar in the fondant will draw moisture from the cherry, creating a liquid center.
- Use high-quality chocolate for the best flavor in your homemade candy recipes.
- If the fondant becomes too sticky while working, dust your hands lightly with powdered sugar.
Nutrition
- Serving Size: 1 candy
- Calories: 180
- Sugar: 25g
- Sodium: 15mg
- Fat: 9g
- Saturated Fat: 5g
- Unsaturated Fat: 4g
- Trans Fat: 0g
- Carbohydrates: 26g
- Fiber: 1g
- Protein: 2g
- Cholesterol: 5mg