
Oh, you know those desserts that just *smell* like childhood parties and summer barbecues? The ones that take you right back to being a kid waiting impatiently for the good stuff? That’s exactly what this incredible eclair cake does for me! It captures that perfect, creamy, chocolate-and-vanilla flavor of a fancy French pastry, but here’s the best part—we don’t turn the oven on for a second. I’m Aria Thompson, and trust me when I say that my goal at Cooking Zenith is taking those beloved classics and smoothing out all the tricky parts. This recipe is proof that you can have a stunning, crowd-pleasing dessert with practically no fuss.
- Why This No Bake Eclair Cake is Your New Favorite Dessert
- Gathering Ingredients for Your Eclair Cake
- Step-by-Step Instructions for the No Bake Eclair Cake
- Tips for the Perfect Eclair Cake Texture
- Making Your Eclair Cake Ahead of Time
- Variations on the Classic Eclair Cake
- Serving Suggestions for Your Layered Pudding Dessert
- Frequently Asked Questions About Eclair Cake
- Storage and Reheating Instructions for Eclair Cake
Why This No Bake Eclair Cake is Your New Favorite Dessert
Honestly, if I’m bringing something to a friend’s house or serving dessert after a busy weeknight meal, I need it to be magical without the headache. This eclair cake is the answer to almost every dessert prayer, especially when it’s too hot to bake. It’s just pure, creamy convenience!
- It’s designed to be a top-tier Crowd Pleasing Desserts winner—I’ve never seen a dish sit untouched!
- The 20-minute active prep time means you mostly just stand there stirring things in a bowl.
- It’s the perfect Quick Summer Dessert because the freezer does most of the heavy lifting.
Zero Oven Time: The Ultimate No Bake Eclair Cake
Let’s be real, sometimes the oven just needs a break, right? This is true comfort food that doesn’t generate any extra heat in the kitchen. If you’re looking for the best No Oven Desserts that still feel totally legit and satisfying, this is it. You just chill, set, and serve!
Simple Assembly for an Easy Eclair Cake Recipe
Even if you don’t bake often, you can nail this. The whole thing comes together faster than you can decide what movie to watch. I mean, it’s just layering crackers and pudding! That’s why everyone calls it the best Easy Eclair Cake Recipe—it’s intuitive, fast, and the results feel super fancy. You could even whip up a quick cheesy dip with my favorite pairing while the pudding is setting up!
Gathering Ingredients for Your Eclair Cake
Okay, time for the shopping list! Because this is a No Bake Eclair Cake, the ingredients are incredibly straightforward. We are keeping it simple, relying on that perfect combination of crunchy, creamy, and chocolatey to do all the heavy lifting. You’ll need crackers, pudding mix, milk, whipped topping, and the simple glaze components. Just make sure you have everything measured out before you start layering things up!
These are the essentials for the classic flavor profile, but don’t let that stop you if you want to experiment later. Remember, even a basic pantry haul can turn into something spectacular!
- One standard box of graham crackers (the whole box, broken as needed).
- Two packages of instant vanilla pudding mix—this is crucial!
- Three cups of ice-cold milk for mixing up that vanilla goodness.
- One tub of frozen whipped topping (like Cool Whip), make sure it’s thawed out completely.
- For the glaze: Sugar, milk, semi-sweet chocolate chips, and butter.
Ingredient Notes and Substitutions for Eclair Cake
A few quick tips from my kitchen to yours: You absolutely must use the *instant* pudding mix here. If you try to use the cook-and-serve kind, you’ll end up with soup instead of that thick, luscious filling we need for our creamy goodness. The instant kind sets up fast with cold milk, which is exactly what this icebox cake recipe demands.
Another thing—graham crackers work best, but you could technically use Nilla Wafers in a pinch, though that changes the flavor a bit. And hey, if vanilla pudding isn’t your favorite thing, go for it! Swapping in instant chocolate pudding mix makes this a fantastic Chocolate Eclair Cake variation instead. Just keep that base structure the same, and you can’t go wrong.
Step-by-Step Instructions for the No Bake Eclair Cake
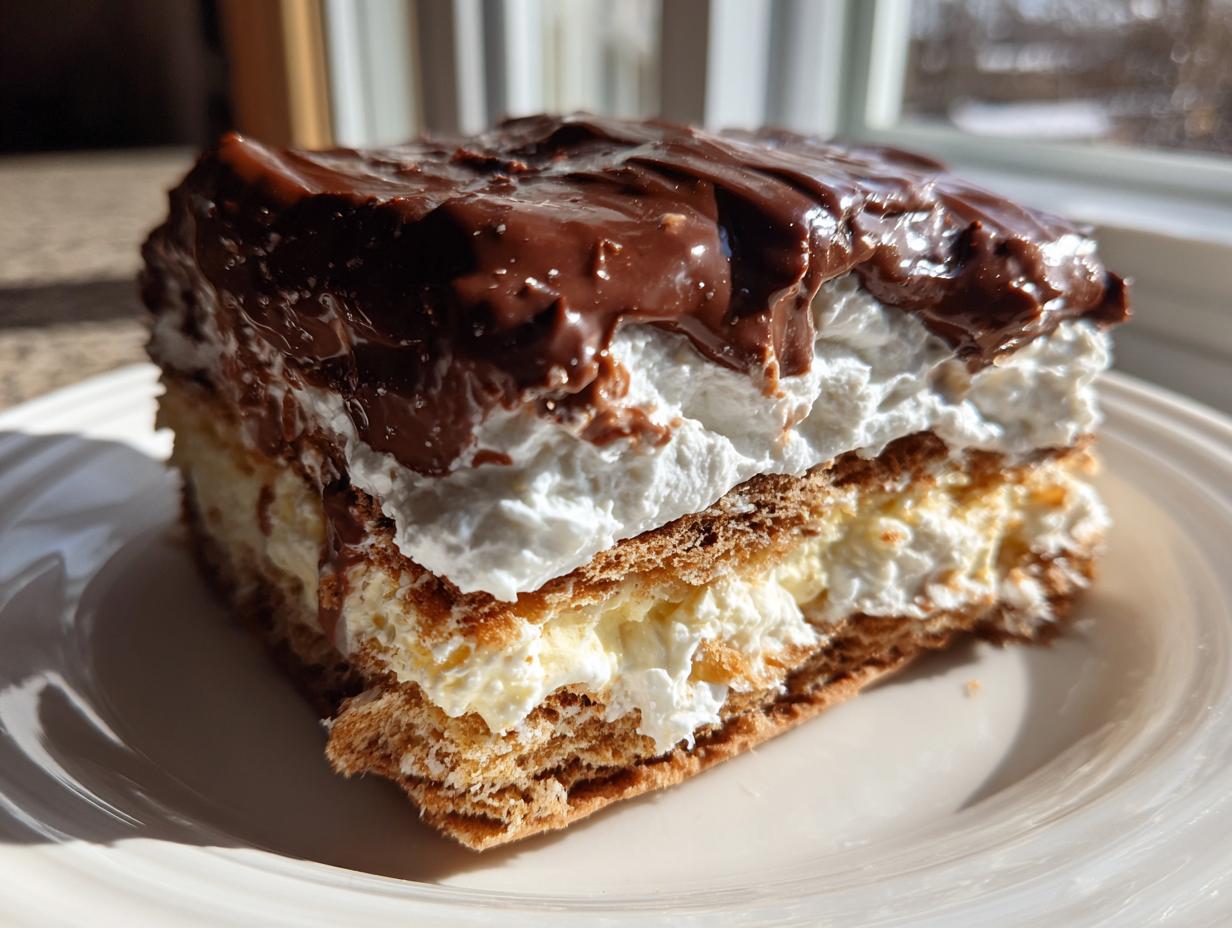
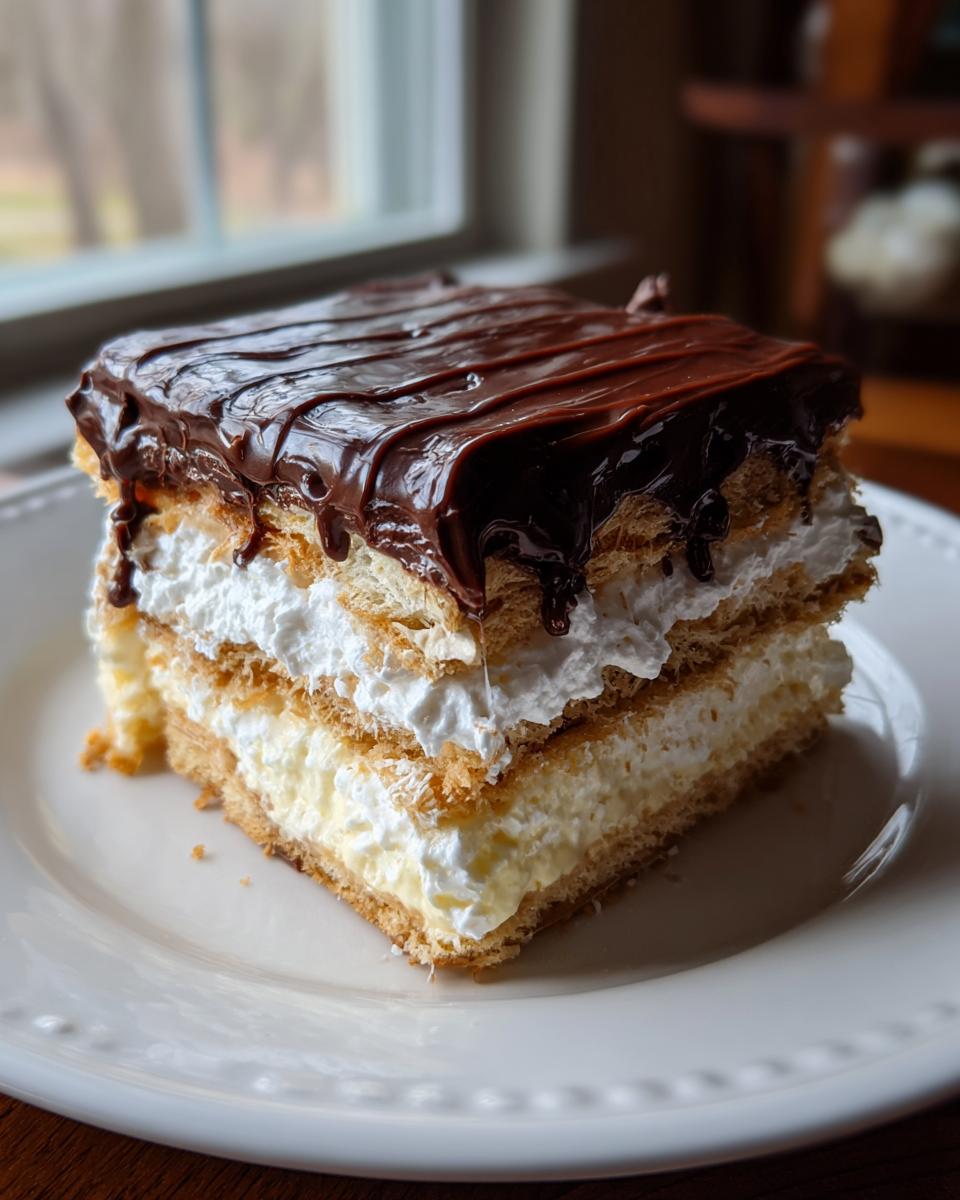
This is where the magic happens, and honestly, it’s more like building a delicious, edible LEGO tower than actual baking. We’re working in a 9×13 dish, so get it lined with plastic wrap first—trust me, that overhang is your best friend for getting this beauty out in one piece later. Don’t skip the wrap!
Preparing the Graham Cracker Base and Pudding Layers of the Eclair Cake
First, we start with a layer of those graham crackers covering the bottom. Break them up to fill any gaps; we want a solid foundation. Next up is the pudding! In a big bowl, get that instant vanilla pudding mix and the 3 cups of ice-cold milk going. Whisk it like you mean it until it starts to thicken up nicely—it should look pretty stiff. Then, gently fold in about half of your thawed whipped topping. We’re just combining, not beating it to death, so keep those air pockets!
Spread half of that creamy pudding mixture right over those crackers. Then, top it with another layer of crackers. You’re seeing the pattern here! Spread the rest of the pudding mix down, and then just top it all off with your final layer of crackers. We’re keeping the last bit of whipped topping reserved for the very end, okay?
Creating the Rich Chocolate Glaze for This Chocolate Eclair Cake
Time for the chocolate! Grab a small saucepan—this is the only bit of stovetop work we do. We combine the powdered sugar, that reserved 1/2 cup of milk, the chocolate chips, and butter. Keep the heat low to medium-low and stir constantly. I mean it, keep stirring! If it ever tries to boil, pull it right off the heat immediately. Boiling ruins that silky mouthfeel we want for this amazing Chocolate Eclair Cake. You just want it melted and smooth enough to pour easily. Right after you stir it smooth, pour that warm glaze lovingly over your top layer of crackers. It should spread nice and easy, like melted velvet.
Chilling and Finishing the Eclair Cake
Now for the hardest part: waiting! You need to cover this loosely and tuck it into the fridge for at least six hours. Honestly, overnight is way better because that’s how the graham crackers get perfectly soft beneath the pudding—that’s the secret to a great layered pudding dessert experience, just like a true icebox cake recipe.
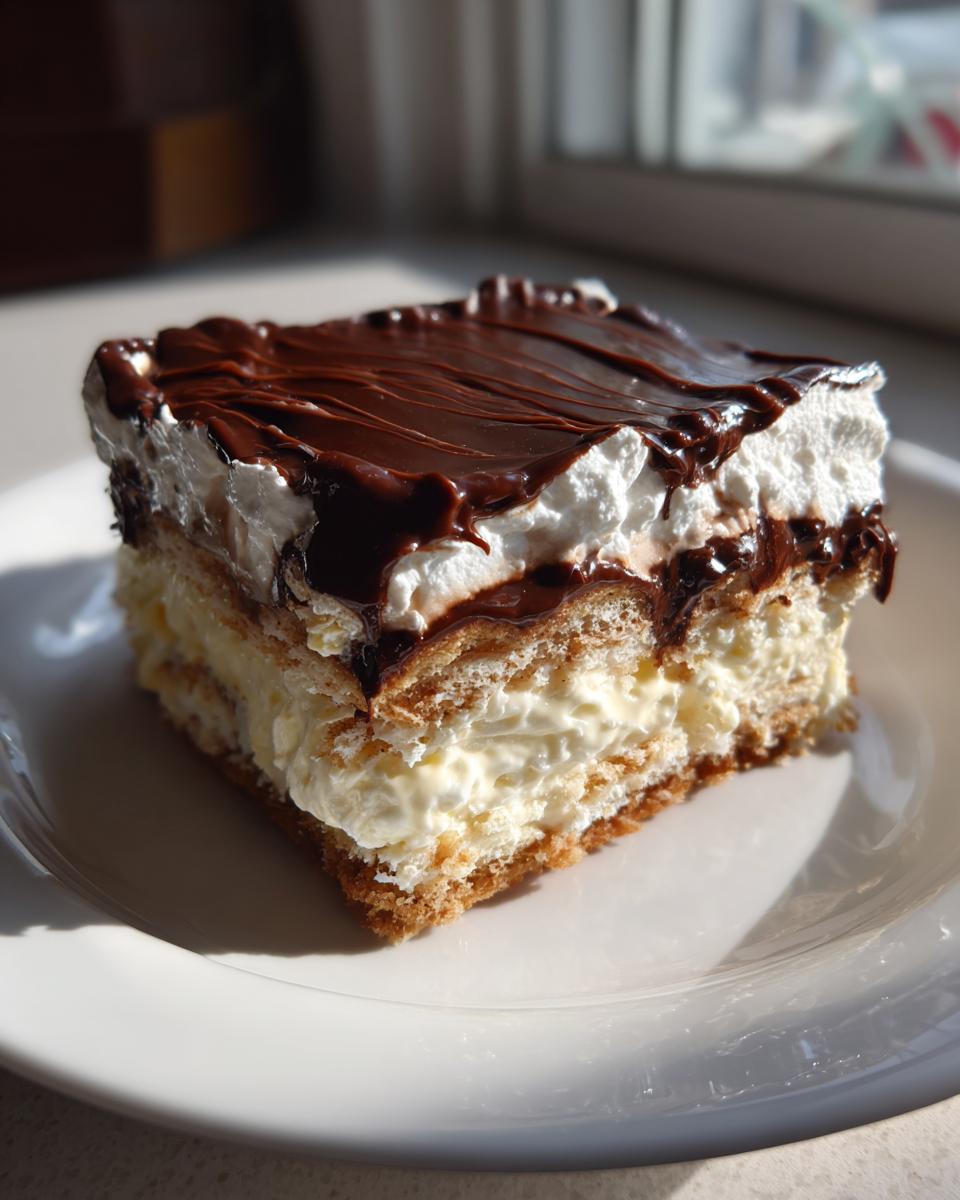
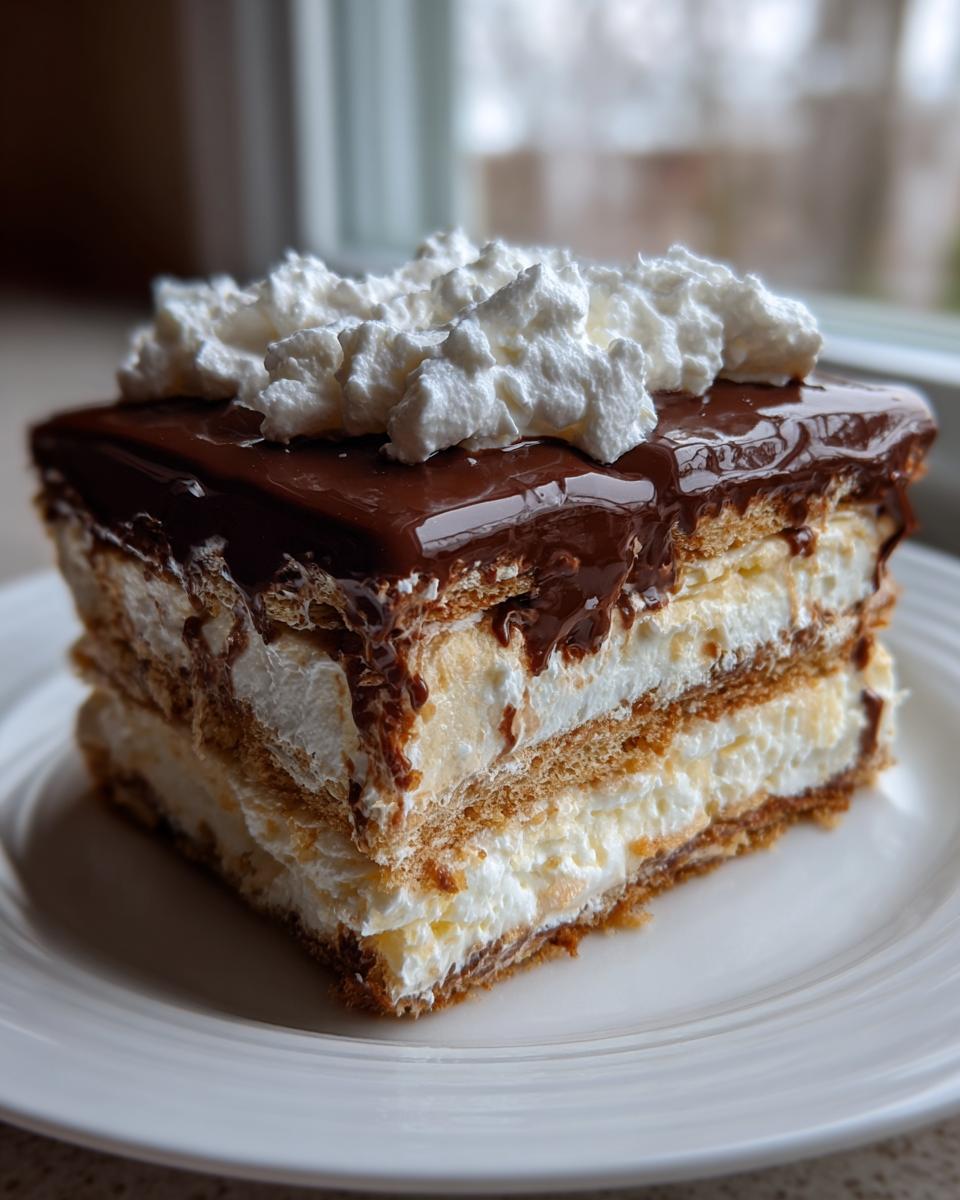
Once it’s fully set and chilled, *then* you take that last half of the whipped topping and spread it across the chocolate glaze. It’s like giving the cake a beautiful, fluffy hat! Slice it cold, and enjoy making everyone very happy.
Tips for the Perfect Eclair Cake Texture
If you want this eclair cake to go from “pretty good” to “I need the recipe right now,” it all comes down to texture. Since this whole thing relies on crackers getting soft, we have to treat it just like a proper icebox cake recipe—patience is the secret ingredient!
The biggest texture tip I can give you involves that chilling time. Don’t cheat the clock! That six hours isn’t just for firming up the pudding; it’s the magical window where the moisture from the pudding kisses the graham crackers and turns them into something soft and cake-like. If you cut it short, you end up with crunchy, soggy squares, and nobody wants that!
Also, remember that chocolate glaze we made? If you see it start to look dull or grainy after it cools, that usually means you heated it too high on the stove. You want that glaze to dry into a smooth, glossy sheet that cracks just a little when you slice it. Think of it like tempering chocolate, but sneakier—low and slow heat is your goal there. For more great tips on getting things perfectly smooth, check out how I handle things like this over on that site.
And one last thing on the whipped topping: make sure you fold it into the pudding gently. If you beat it aggressively, you knock all the air out, and you end up with a dense, heavy layer instead of that light filling you expect when biting into a classic eclair!
Making Your Eclair Cake Ahead of Time
This is honestly what makes the eclair cake such a dream dessert for home cooks like me who like to plan ahead! Because this is a glorious make ahead cake, you can absolutely get it done the day before your party, and your guests will never know you didn’t just assemble it.
The absolute best practice here is chilling it for that full minimum six hours after you pour the chocolate glaze on. That time is non-negotiable for cracker integrity! Once the chocolate glaze is on, just cover that dish gently with plastic wrap or even foil and slide it into the fridge. It holds up beautifully for up to two days this way, but honestly, it tastes best when it’s only been chilling overnight.
Now, here is the crucial part that you cannot mess up: the final layer of whipped topping! That last dollop of fluffy white goodness needs to stay light and airy. If you put that on too early, say, twelve hours ahead of time, it tends to dry out or weep a little, which isn’t pretty. Wait until about an hour before you plan on slicing and serving to spread that final layer on top. That way, it stays cloud-like and fresh when everyone dives in!
If you’re making something else ahead of time, like my super easy potato soup, this timing strategy works perfectly. Everything gets made the day before, and serving day is all about assembly and enjoying the guests!
Variations on the Classic Eclair Cake
While the classic chocolate and vanilla version of this eclair cake is iconic, you know me—I can never leave well enough alone! Once you master the basic technique of layering those crackers and letting the pudding soak in, the sky’s the limit. This is where you turn this simple graham cracker dessert into something totally custom for your taste buds.
I often look at what fruit I have on hand for spontaneous swaps. It’s all about adaptability! These little tweaks take the same easy groundwork and give you a brand new experience.
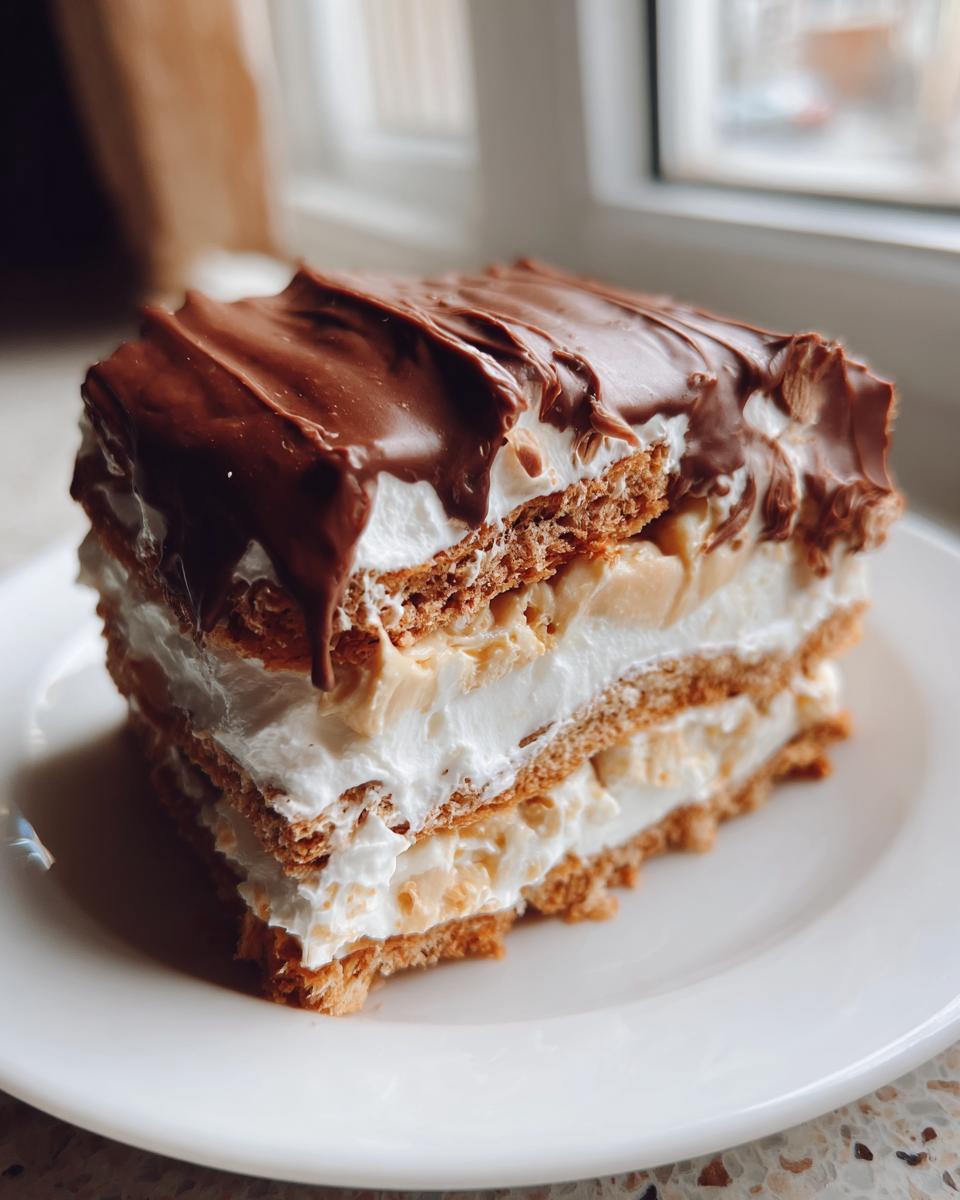
Think about how much fun you can have. You can double up on the chocolate—use chocolate pudding *and* chocolate whipped topping for a decadent experience. Or, you can go bright and tangy! If you love citrus, you absolutely have to try a key lime kick in place of the vanilla pudding. For an even bolder change, check out how I approach flavor profiles when I make my poke cakes—the idea of layering flavors remains the same.
But if we’re talking citrus, my favorite little side project is working on a bright, zesty version. If you’re looking for a lighter feel, especially when the weather warms up, you should definitely look into making a Lemon Eclair Cake. It swaps the vanilla for lemon pudding, and maybe you even dash some lemon zest into that final whipped topping layer. It tastes like sunshine!
Serving Suggestions for Your Layered Pudding Dessert
Once this gorgeous layered pudding dessert sets up perfectly and you pull that plastic wrap away, it looks pretty impressive all on its own, doesn’t it? But if you want to dress it up for those big potlucks or holiday tables, I have a couple of super simple tricks up my sleeve. We don’t want to cover up that amazing chocolate shell, though!
The best supporting actor for this cake is fresh fruit. Seriously, a scattering of bright, colorful berries—think raspberries or sliced strawberries—cuts through the richness of the chocolate and cream perfectly. If fresh berries aren’t in season, a light, gentle dusting of cocoa powder right before serving looks elegant and adds a little extra bittersweet note. Or, if you’ve got a sweet dip on hand, like my whipped honey dip, you could serve a tiny dollop on the side for an extra creamy bite, but usually, this cake stands completely on its own!
Frequently Asked Questions About Eclair Cake
I get so many great questions about this recipe once people try making it! It’s funny how one simple no bake eclair cake can spark so much curiosity. Don’t worry if you have questions; that means you’re invested in making it perfectly! Here are the ones I hear most often about this amazing simple family dessert.
Can I use chocolate pudding instead of vanilla in this eclair cake?
Absolutely, yes! If you’re craving that deep chocolate flavor, go right ahead and swap the instant vanilla pudding for instant chocolate pudding. It transforms the filling, making it a richer, more intense treat. It’s a super easy way to tweak the flavor profile without changing any other steps. You’ll still need that fluffy topping and chocolate glaze, of course!
What is the best way to store leftovers of this creamy chocolate dessert?
Because of all that lovely pudding and whipped topping, this is definitely a refrigerated dessert, always. Store any leftover pieces of this creamy chocolate dessert tightly covered in the fridge. It usually keeps great for about three or four days. Just remember, the longer it sits, the softer the crackers get, which for many people, is actually even better! If you’re not serving it right away, make sure you follow my advice on when to add that final whipped topping layer.
If you need a comforting meal before dessert perfection, you should really check out my recipe for creamy potato leek soup!
Storage and Reheating Instructions for Eclair Cake
Okay, we’ve made this gorgeous, easy dessert, and now we have to talk about keeping it perfect until everyone gets a slice. Since this whole eclair cake is built on creamy layers and soft crackers—which is what makes it such a wonderful no bake summer dessert—storage is pretty straightforward but very important.
First thing first: this cake *must* stay cold. You have to store your leftovers tightly covered in the refrigerator. I mean it—get that plastic wrap tucked right up against the surface, especially that final whipped topping layer, to keep it fresh and prevent any fridge smells from getting in. It’s an icebox cake recipe at heart, so it thrives in the cold!
When stored properly, this cake is fantastic for about three to four days. It’s funny because almost everyone I know thinks it tastes even better on day two after the crackers have had more time to soak up all that vanilla pudding. That slow melding of flavors is pure magic.
Now, here’s the critical warning: please, please, do not try to reheat this! Seriously, don’t even think about it. Reheating a no-bake dessert like this is a recipe for disaster. The heat will melt the pudding into soup, the whipped topping will weep and deflate, and your lovely chocolate glaze will turn into a messy puddle. We want to keep this cool, creamy, and refreshing. If you want something warm, maybe whip up a batch of soup instead!
PrintThe Ultimate Easy No-Bake Chocolate Eclair Cake

Make this easy no-bake eclair cake for a crowd-pleasing dessert that tastes like a classic eclair without turning on your oven. It features layers of graham crackers, creamy vanilla pudding, whipped topping, and a rich chocolate glaze.
- Prep Time: 20 min
- Cook Time: 5 min
- Total Time: 6 hr 25 min
- Yield: 12 servings 1x
- Category: Dessert
- Method: No Bake
- Cuisine: American
- Diet: Vegetarian
Ingredients
- 1 box (11.5 oz) graham crackers
- 2 packages (3.4 oz each) instant vanilla pudding mix
- 3 cups cold milk
- 1 container (8 oz) frozen whipped topping, thawed
- 1 cup powdered sugar
- 1/2 cup milk
- 1/2 cup semi-sweet chocolate chips
- 2 tablespoons butter
Instructions
- Line a 9×13 inch baking dish with plastic wrap, leaving an overhang for easy removal later.
- Arrange a single layer of graham crackers on the bottom of the prepared dish. Break crackers as needed to cover the bottom completely.
- In a large bowl, whisk together the instant vanilla pudding mix and 3 cups of cold milk until the mixture thickens, about 2 minutes.
- Gently fold half of the thawed whipped topping into the pudding mixture until just combined.
- Spread half of the pudding mixture evenly over the graham cracker layer.
- Top the pudding layer with another layer of graham crackers.
- Spread the remaining half of the pudding mixture over the second graham cracker layer.
- Top with a final layer of graham crackers.
- In a small saucepan, combine the powdered sugar, 1/2 cup milk, chocolate chips, and butter. Heat over medium-low heat, stirring constantly until the chocolate is melted and the mixture is smooth. Do not boil.
- Pour the warm chocolate glaze over the top layer of graham crackers, spreading it evenly to cover the entire surface.
- Cover the dish loosely with plastic wrap and refrigerate for at least 6 hours, or preferably overnight, to allow the crackers to soften and the cake to set.
- Before serving, spread the remaining half of the thawed whipped topping over the set chocolate glaze.
- Slice and serve this quick summer dessert cold.
Notes
- For the best texture, chill the cake for a minimum of 6 hours. This allows the graham crackers to absorb moisture from the pudding.
- You can substitute the instant vanilla pudding with instant chocolate pudding for a different flavor profile.
- This dessert is excellent for potlucks because it travels well when kept chilled.
Nutrition
- Serving Size: 1 slice
- Calories: 350
- Sugar: 35g
- Sodium: 300mg
- Fat: 18g
- Saturated Fat: 8g
- Unsaturated Fat: 10g
- Trans Fat: 0g
- Carbohydrates: 45g
- Fiber: 1g
- Protein: 4g
- Cholesterol: 15mg