

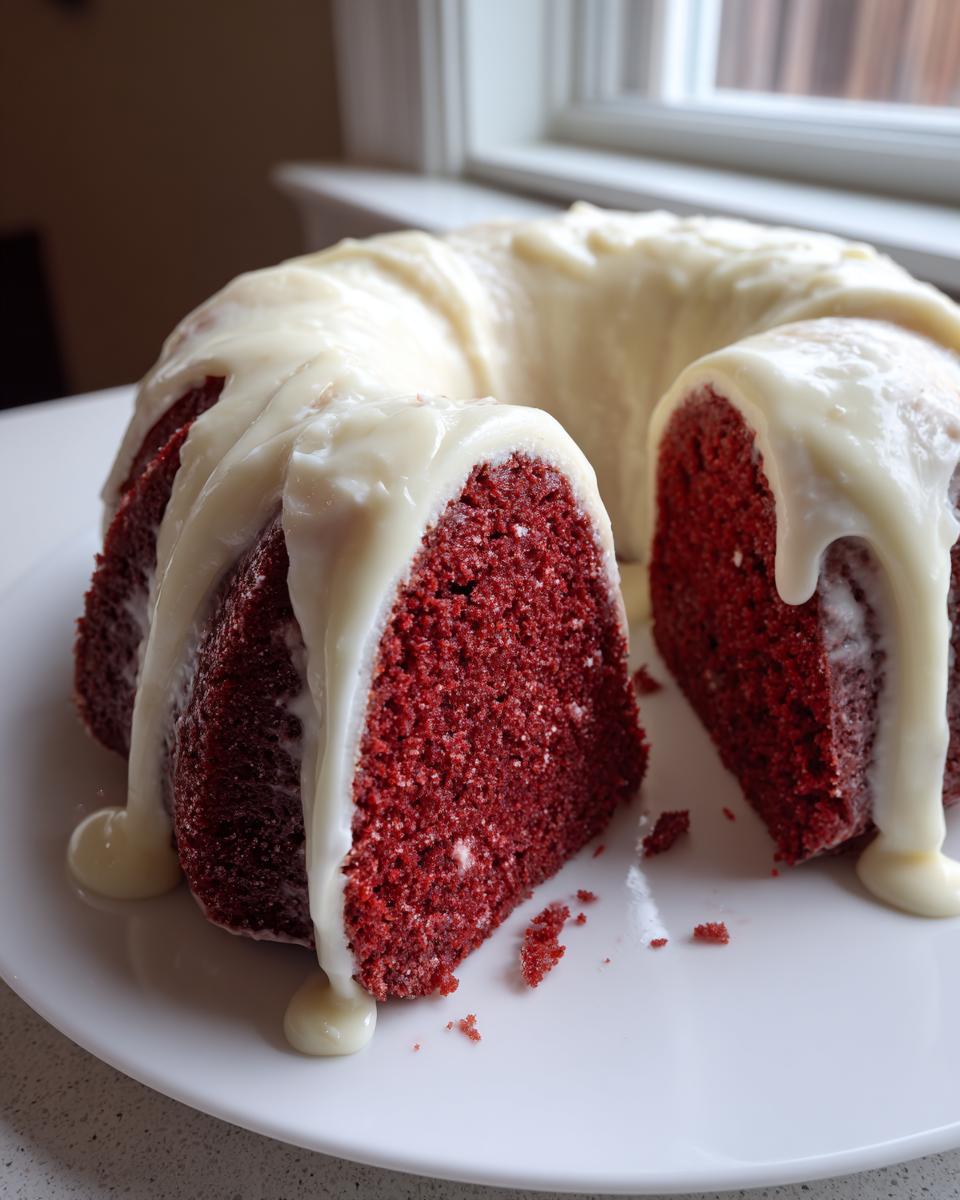
There are certain desserts that just scream “special occasion,” and honestly, nothing pulls off that showstopper vibe quite like a gorgeously glazed Bundt cake. If you’ve ever been let down by a dry, lackluster red cake in the past, trust me, you need this recipe in your life! This is the ultimate red velvet bundt cake that delivers that deep, signature color and an unbelievably moist, velvety crumb every single time. Here at Cooking Zenith, I—Aria Thompson—developed this method specifically because I believe everyone deserves foolproof recipes. I spent countless hours making sure this version of the red velvet bundt cake works perfectly right in your home kitchen, moving it from intimidating bakery quality to simple, reliable home success. If you love impressive desserts, you should also check out my guide for the easy creamy Basque Cheesecake!
- Why This Red Velvet Bundt Cake Recipe Stands Apart
- Gathering Ingredients for Your Red Velvet Bundt Cake
- Step-by-Step Instructions for the Red Velvet Bundt Cake
- Tips for a Showstopper Red Velvet Cake Presentation
- Ingredient Notes and Substitutions for Your Red Velvet Bundt Cake
- Storing and Reheating Your Homemade Red Velvet Dessert
- Frequently Asked Questions About the Red Velvet Bundt Cake Recipe
- Baking Confidence: Mastering Bundt Cake Techniques
- Serving Suggestions for Your Rich Dessert Recipes
- Share Your Red Velvet Bundt Cake Success
Why This Red Velvet Bundt Cake Recipe Stands Apart
Look, I know there are a million red velvet recipes out there. But honestly, most of them turn out looking dull or feeling like chewing on dry sandpaper by the time you slice them. That’s why this particular red velvet bundt cake recipe cuts through all that noise. It’s built on maximizing moisture and achieving that truly vibrant color without tasting like pure dye. It’s my go-to for holiday baking because it stays tender for days—seriously!
- It uses oil instead of all butter, which keeps the crumb incredibly soft and moist even when chilled.
- The buttermilk and vinegar combination creates that perfect subtle tang that cuts through the richness.
- This method guarantees a cake that looks like it came from a fancy bakery window, every time you bake it.
For more foundational tips on baking success, you should definitely check out my best banana bread recipe; these moisture rules apply there too!
Secrets to an Ultra-Moist Red Velvet Bundt Cake
Moisture is everything with a Bundt cake because it bakes for a while and moisture loves to escape! We rely on the oil for tenderness—it coats the flour proteins better than solid fat, making the cake softer. Then we hit it with the buttermilk and vinegar. That acid reacts beautifully with the baking soda, giving us lift, but more importantly, it tenderizes the crumb while keeping it beautifully tangy. That’s the magic trifecta for a truly moist cake.
Achieving That Deep Red Velvet Flavor
Getting that signature color right is half the battle, isn’t it? You need enough coloring to get that deep festive hue, but you don’t want the taste of food coloring taking over. We balance it by using a small amount of unsweetened cocoa powder for that classic chocolate undertone. If you really want to get sophisticated, try adding just a tiny bit of black cocoa powder—it boosts the darkness without adding extra liquid, making the red pop even more beautifully!
Gathering Ingredients for Your Red Velvet Bundt Cake
Okay, before we get into the mixing—which is surprisingly fast, by the way!—we need to talk about getting our supplies ready. This entire bake, from measuring to pouring into the pan, should only take about 20 minutes of your time before it hits the oven, and it makes a beautiful 12 servings! Remember, for this recipe to really shine and give you that bakery-worthy texture, we need to treat our ingredients right, especially the dairy meant for the glaze. Good prep makes for a streamlined baking process, turning this into an Easy Red Velvet Bundt Recipe.
When you’re ready to bake, make sure to have everything measured out, which is what I call my mise en place. If you’re feeling fancy later on and want to try a different topping, I have a great instruction set for my 10-minute smooth vanilla buttercream, but for now, let’s stick to the creamy topping this cake demands!
Cake Batter Ingredients
For the cake itself, we need 1 1/2 cups of vegetable oil and the same amount, 1 1/2 cups, of regular granulated sugar. Make sure you have 2 large eggs ready to go, plus 1 teaspoon of vanilla extract. For our crucial wet duo, grab 1 cup of buttermilk and 1 tablespoon of white vinegar—these are inseparable! You’ll also need 2 tablespoons of vibrant red food coloring, or if you’re feeling adventurous, try 1 teaspoon of black cocoa powder along with a dash of coloring for deeper flavor. The dry stuff includes 2 1/2 cups of all-purpose flour, 1 teaspoon of baking soda, 1 teaspoon of salt, and just 1 level tablespoon of unsweetened cocoa powder.
Best Cream Cheese Glaze for Bundt Cake Components
Now for the star of the show topping! For this lovely, tangy cream cheese glaze, you absolutely must have 8 ounces of cream cheese that has been softened—and I mean genuinely softened, not just sitting on the counter for five minutes! Pair that with 1/2 cup of unsalted butter, also softened to that perfect, creamy stage. Then whisk in 3 cups of powdered sugar and 1 teaspoon of vanilla extract. You might need 1 to 2 tablespoons of milk, but only add it slowly when you are trying to thin it out later!
Step-by-Step Instructions for the Red Velvet Bundt Cake
Alright, now that we have all those beautiful ingredients ready, let’s get this gorgeous red velvet bundt cake into the oven. This process is really straightforward, but timing is everything, especially with that pan prep! Remember, my goal is always to show you clear baking techniques so you feel completely confident, just like checking out this classic Red Velvet Bundt Cake inspiration online.
Preparing the Pan and Mixing the Batter
First things first: heat up that oven to 350°F (175°C). Seriously, don’t touch the batter until that oven is humming at the right temp! Next, we need to abuse the Bundt pan. I mean it—grease and flour it thoroughly! Use softened butter or a non-stick spray that contains flour. If this cake sticks, you’ll cry, and we don’t want any tears staining this rich dessert. After the pan is prepped, whisk your oil and sugar together, then beat in those eggs one by one, followed by the vanilla. Don’t rush this part; we want a good start to that smooth base texture.
Combining Wet and Dry Mixtures for the Red Velvet Bundt Cake
In a separate spot, mix up your buttermilk, vinegar, and the red color until you have a uniform, beautiful crimson liquid. Then, whisk your dry ingredients—flour, soda, salt, cocoa—in a third bowl. Now, here’s where you need to listen carefully to keep that tender crumb cake recipe promise: add the dry stuff and the liquid stuff to the oil mixture alternately. Start and finish with dry! Mix only until you *just* see the flour disappear. If you beat this batter for too long once the flour is in, you’ll develop gluten and end up with a tough cake. We want velvety, not bouncy!
Baking and Cooling Procedures
Pour that bright red batter evenly into your perfectly prepared Bundt pan. Slide it into the preheated oven and let it bake for about 45 to 55 minutes. This time can shift based on your oven, so start checking around the 45-minute mark. Test doneness by inserting a wooden pick near the center; if it comes out with just moist crumbs clinging to it—not wet batter—you’re golden! Let the cake rest in that hot pan on a wire rack for 15 minutes. No less! This lets the structure set up before you attempt the flip. If you want more easy baking guides, check out my easy moist pumpkin bread recipe for timing tips.
Making and Applying the Tangy Cream Cheese Glaze
While the cake cools, whip up that tangy glaze! Beat your softened cream cheese and butter until they are completely smooth—use an electric hand mixer if you have one for this part! Gradually beat in the powdered sugar and vanilla. You’re aiming for that perfect thick, pourable consistency for the best Red Velvet Cake with Icing Drip effect. If it’s too stiff, add milk just one tablespoon at a time until it drizzles elegantly. Wait until the cake is fully cooled before you drizzle this on; trust me, warm cake melts the cream cheese right off!
Tips for a Showstopper Red Velvet Cake Presentation
Okay, you’ve baked the moistest cake ever—now we need to make it look like the stunning centerpiece it deserves to be! Getting that perfect presentation on a Bundt cake is all about controlling the flow of that creamy topping you worked so hard on. This is where we turn it into a true Showstopper Red Velvet Cake without needing complex piping bags or fancy tools.
This cake is intensely festive just based on its color, which is perfect for any Holiday Bundt Cake Ideas you might have cooking! If you need some inspiration for quick, easy desserts, take a peek at my Chocolate Eclair Cake Recipe. But let’s focus on getting this beauty decorated perfectly!
Perfecting the Glaze Drip
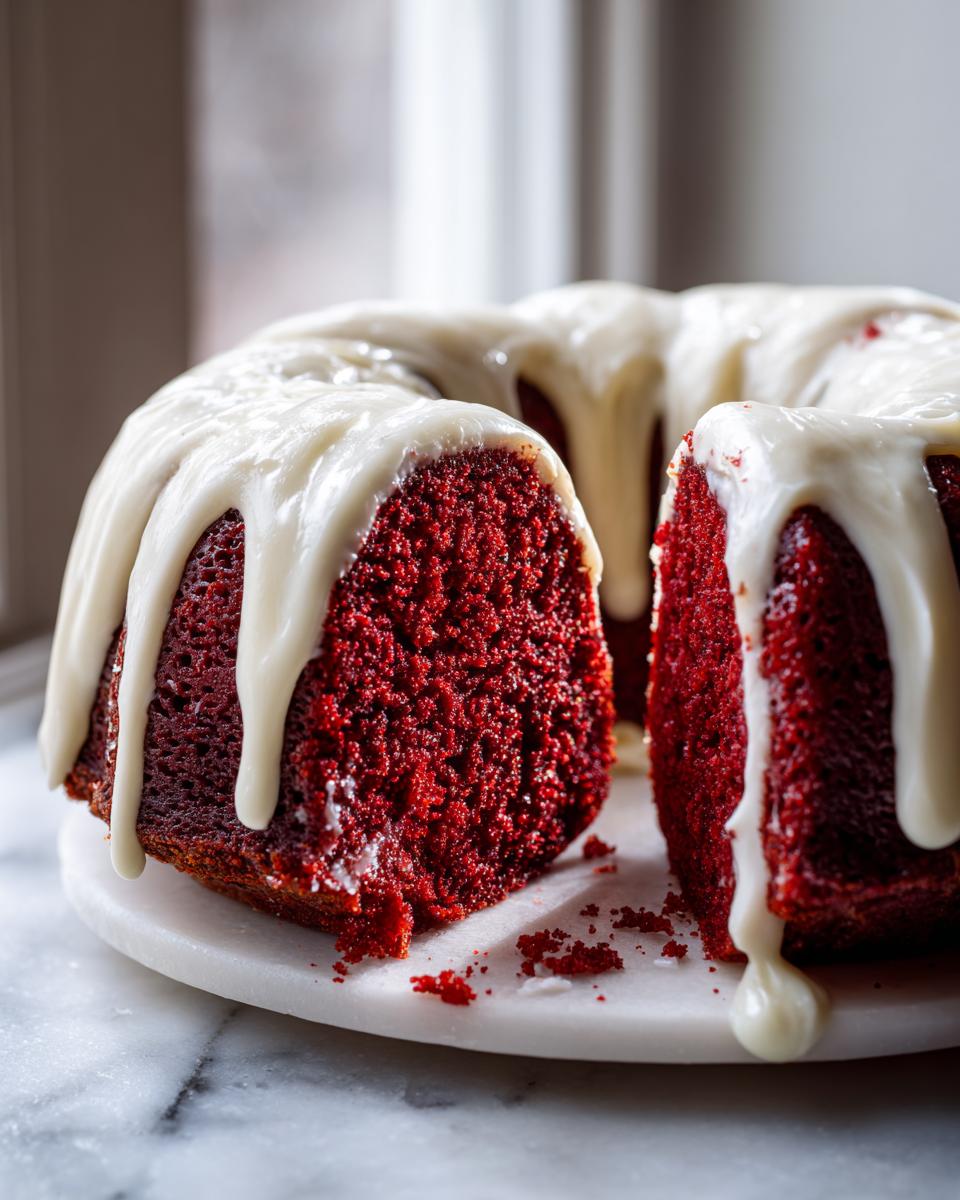
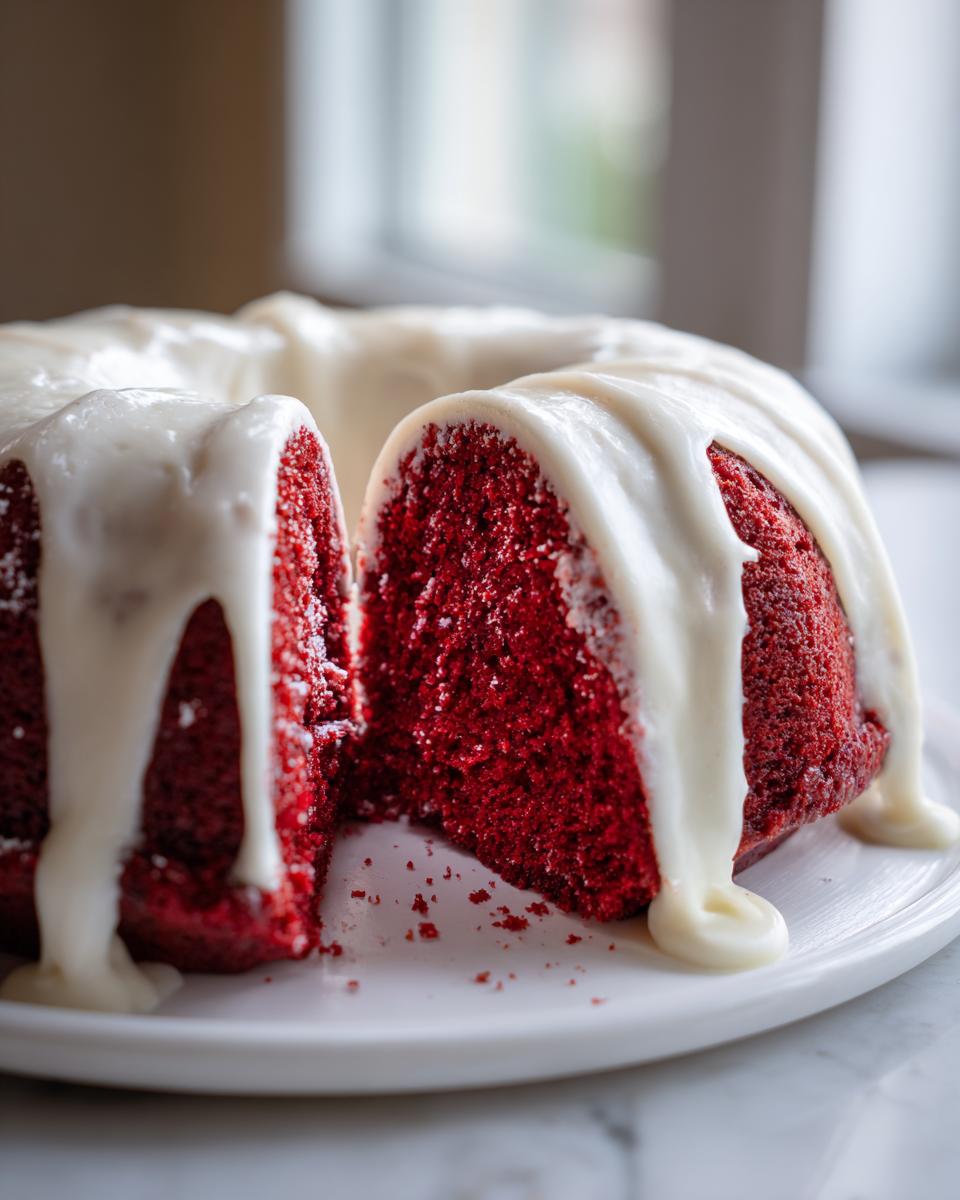
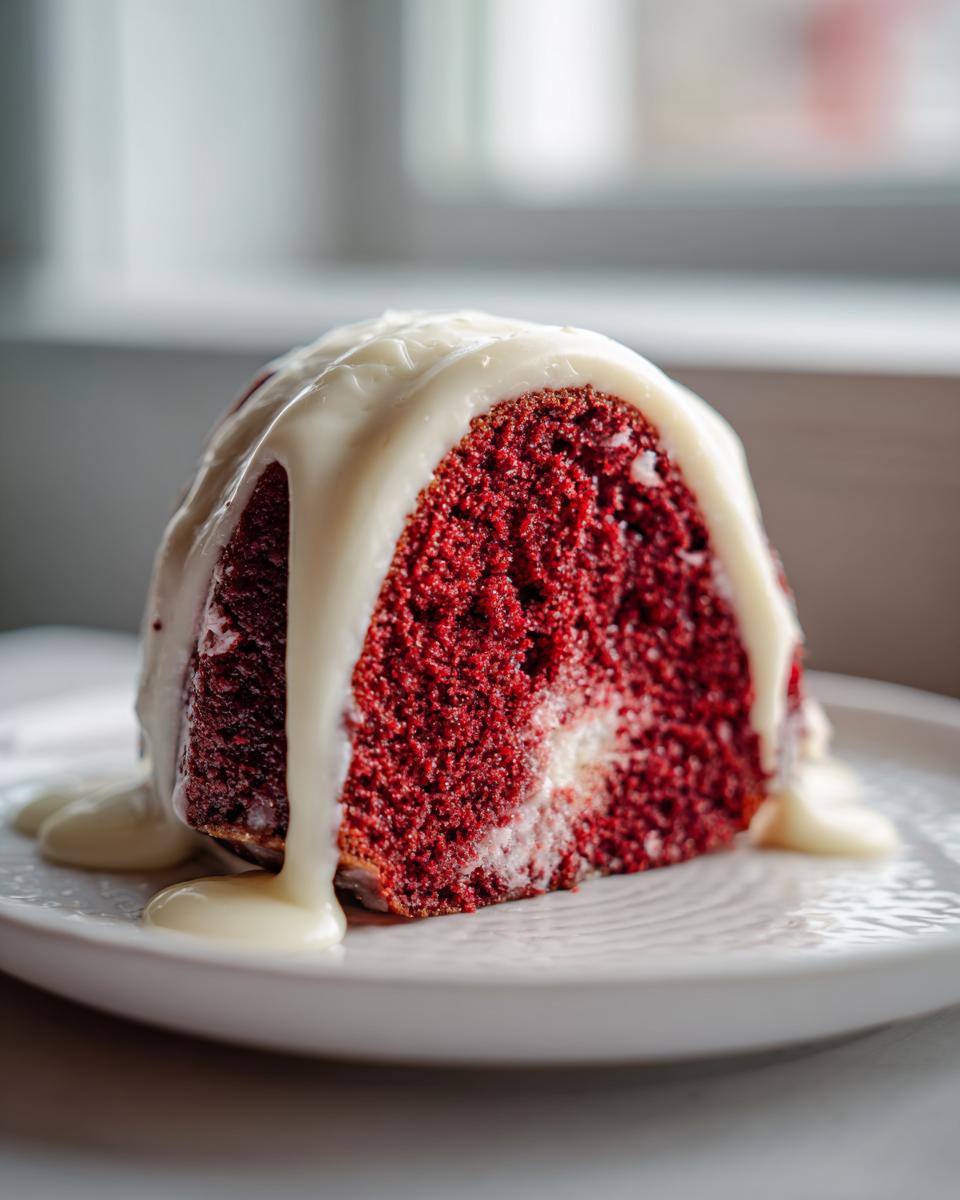
The trick to that gorgeous, cascading drip down the fluted sides is temperature! Your cake needs to be completely, totally cool—I mean room temperature cool—before that glaze touches it. If the cake is even slightly warm, the glaze will just soak in or run too fast, leaving you with a flat, dull top. When you mix your glaze, aim for a consistency that is thick enough to coat your spoon but thin enough to gently pour off the edge of the spoon in a slow ribbon. Start pouring your glaze slowly right around the center hole of the Bundt. As it pools, use the back of your spoon or a small offset spatula to gently guide the excess toward the outer edge. Don’t force it; just coax it gently! Gravity and a slightly runny glaze do most of the work for you.
Holiday Bundt Cake Ideas for Garnish
Once the glaze has set up just a little—maybe 10 minutes after dripping—you can add your final flourishes. Keep it simple to let that deep red color shine! If you’re aiming for that Festive Red Cake Baking vibe, a few bright red sprinkles scattered on top of the wet glaze always look fantastic. For a little crunch that complements the cocoa flavor, I love finely chopping some toasted pecans or walnuts and sprinkling them lightly around the top ring. If you’re serving it during winter, try lightly dusting the whole cool cake with powdered sugar using a fine-mesh sieve; it looks like a fresh snowfall! For more ideas on achieving that beautiful drip, check out this Moist Red Velvet Bundt Cake inspiration.
Ingredient Notes and Substitutions for Your Red Velvet Bundt Cake
We’ve successfully mixed and baked our beautiful cake, but what happens when you’re mid-recipe and realize you’re missing one key thing? Don’t panic! This is where practical cooking knowledge comes in handy. Since this is a treasured red velvet bundt cake recipe, we want to make sure any substitutions keep that moisture and velvety texture intact. For more tips on adapting recipes for what you have on hand, I cover that a lot for my ultimate moist zucchini banana bread. If you want some holiday inspiration for this cake, check out this Christmas Red Velvet Bundt Cake idea!
Buttermilk Alternatives for Moisture
This is the most common question I get! If you open your fridge and see no buttermilk, don’t run to the store! Buttermilk is vital here because that acid helps tenderize everything, keeping the cake soft. The fix is so easy: just take 1 cup of whole milk—use whole milk, please, no skim here!—and stir in 1 tablespoon of white vinegar or fresh lemon juice. Let that sit on the counter for about five minutes until it curdles slightly. See? Instant buttermilk substitute. It works like a charm to keep our cake moist.
Achieving Deep Color: Cocoa Powder vs. Coloring
The color balance is tricky business! We use both cocoa powder for flavor and coloring for looks. If you feel like your red hue isn’t deep enough after adding the food coloring, remember that little trick I mentioned? Adding just 1 teaspoon of black cocoa powder alongside your regular cocoa powder is my little secret. Black cocoa is totally different from standard cocoa; it’s super alkalized and gives that classic, dark background color that really makes the red frosting pop against the crumb. It also amps up that rich, slightly earthy chocolate note that makes you call this a true Velvety Red Cocoa Cake!
Storing and Reheating Your Homemade Red Velvet Dessert
Alright, the hard part is over! You’ve got this stunning, moist cake ready, and you want to make sure it lasts long enough to enjoy all week. Since we used that beautiful, tangy cream cheese glaze, storage is slightly different than with a plain cake. That glaze has real dairy in it, so we have to be smart about keeping it fresh and safe.
For the best texture and flavor, this cake really wants to be at room temperature. The oil we used keeps the crumb soft, but when it gets cold in the fridge, even moist cakes can firm up a bit more than we like. However, because of that delicious cream cheese topping, I always recommend covering slices loosely with plastic wrap or storing them in an airtight container in the refrigerator if you plan on keeping them for more than two days.
If you do chill the cake, please remember my advice: never serve it straight from the fridge! Pull your slice or layer out about an hour before you plan to eat it. Letting it come back up to room temperature undoes that chilling stiffness and brings back that signature velvety softness. If you’re in a hurry to warm up a slice, you can zap it for just 10 seconds in the microwave, but go easy—we don’t want it hot, just slightly softened. For other great make-ahead ideas that save you time later, you might want to look at my easy make-ahead cheesy egg bake recipe!
Frequently Asked Questions About the Red Velvet Bundt Cake Recipe
I get so many questions when people fall in love with this recipe, and honestly, that’s the best compliment! It’s fantastic that you want to make sure your red velvet bundt cake turns out perfectly—that’s the spirit of great home baking! Here are the top things I hear from folks getting ready to bake this showstopper.
How can I make this red velvet bundt cake taste like the Nothing Bundt Cake version?
Oh, everyone wants that copycat magic! The secret to getting close to that famous bakery cake isn’t really in the cake itself—it’s all about the frosting-to-cake ratio and texture. Nothing Bundt Cakes have a very thick, almost fudgy layer of topping, right? For our version, here’s what you do: make the standard glaze, but don’t thin it out too much with milk. You want it thick enough so that when you pour it, it doesn’t immediately run all the way down the sides. You should dollop it on top and help it fall naturally—don’t push it! Keep your cake dense and moist using the oil/buttermilk combo we discussed, and you’ll be incredibly close to that decadent experience!
Can I use yogurt instead of buttermilk in my red velvet bundt cake?
You absolutely can! When you don’t have buttermilk, yogurt is a fantastic stand-in because it still has the necessary acidity and thickness. If you are using plain yogurt (Greek yogurt is too thick), you should thin it down slightly with water or milk until it’s about the same consistency as regular buttermilk. I usually swap the 1 cup of buttermilk for about 2/3 cup of yogurt added to 1/3 cup of water or milk. Mix it up until it pours nicely, and then proceed with the recipe as written. Since yogurt is often thicker, just check your batter consistency before adding the last bit of dry ingredients!
What is the best way to ensure a tender crumb cake recipe result?
If there is one thing you take away from this entire chat, make it this: Do not overmix the batter once the flour goes in! Seriously, that’s the number one killer of a tender crumb. Once you alternate the dry and wet mixtures, you are just guiding everything together. Mix only until you no longer see streaks of white flour. Stop right there! If you keep whipping it, you develop gluten strands, which makes the cake tough and chewy rather than soft and velvety. It’s counterintuitive because we always think more mixing equals more combined, but not with cake! Also, make sure you aren’t using old baking soda; that chemical reaction needs fresh ingredients to properly lift the batter!
If you want to see even more foolproof baking translated for the home cook, you have to check out my guide on the easy one-bowl vegan banana bread recipe. And for more visual inspiration on that copycat style, this Copycat Nothing Bundt Red Velvet Cake guide is great!
Baking Confidence: Mastering Bundt Cake Techniques
Baking in a Bundt pan is honestly a bit different than baking in a regular round pan, and getting that perfect release is the key to keeping your beautiful design intact! This cake’s elegant shape is part of the draw, right? We want those lovely swirls to pop out perfectly onto the serving plate. Mastering this technique moves you from nervous beginner to totally confident baker in my book. We put in the work mixing and flavor balancing; we certainly don’t want sticky pans ruining the presentation!
If you’re looking to dive into more mastery in your kitchen, I’ve got a whole guide on starting your sourdough starter from scratch, but for now, let’s talk release, because a stuck cake is heartbreaking!
Preparing Your Bundt Pan for Release
Here’s the deal: you cannot be lazy when prepping the pan for a rich batter like this. Simple buttering won’t always cut it. The best thing you can do is use a baking spray that already has the flour mixed in—those are a lifesaver! If you don’t have that, I highly recommend making a simple cake release paste. It’s just equal parts shortening, oil, and flour mixed together until it looks like thick frosting. Slather that paste all over every single nook and cranny of that metal pan using a pastry brush. Make sure you REALLY get into those crevices. This is a non-stick insurance policy, and it’s completely foolproof. If you want to see how others tackle this, check out this Red Velvet Bundt Cake advice.
Serving Suggestions for Your Rich Dessert Recipes
Now that you have this gorgeous, deep red cake cooling and the tangy glaze ready to pour, the next big question is, what do you serve it alongside? This Homemade Red Velvet Dessert is so robust and flavorful on its own, it really doesn’t need much help, but a perfect pairing can take it from great to absolutely memorable!
Since the cake has that beautiful cocoa richness and the glaze brings in the tang, I always lean toward beverages that complement those notes. A simple, strong cup of hot coffee is my absolute favorite pairing. The bitterness of a good dark roast cuts through the powdered sugar in the frosting perfectly, making each bite taste richer. A really quality Earl Grey tea is another winner if you prefer something lighter.
If you want to add a little something fresh to the plate, keep the garnishes simple so they don’t compete with that stunning red color. A few fresh raspberries scattered around the plate add a pop of color and just a touch of acidity that brightens up the whole slice. You could also serve it alongside a small scoop of vanilla bean ice cream, though honestly, between the moist cake and the creamy glaze, I usually find that’s more whipped cream than cake!
If you need a good breakfast companion for the morning after, you have to check out my recipe for creamy stovetop apple cinnamon oatmeal. It’s the perfect cozy contrast to the leftover rich slice!
Share Your Red Velvet Bundt Cake Success
Wow, we made it! You’ve taken the plunge and baked what I absolutely guarantee is the most marvelous, ultra-moist red velvet bundt cake you’ve ever made at home. Doesn’t that feeling when you slice into it and see that perfect velvety crumb just make your day?
This is honestly my favorite part of sharing these recipes—I love seeing your kitchen creations! I really hope this recipe gave you the confidence to keep elevating your everyday baking. Now, I need to hear all about it!
Please take a moment to leave a star rating right here on the recipe card. Your feedback helps other bakers feel confident trying this recipe out. And if you took a gorgeous picture of your drizzled cake, tag me on social media! Show off that hard work—it is a real showstopper, after all. I always share my favorites!
If you want to explore another deeply satisfying, rich bake, you absolutely have to try my easy garlic parmesan meatloaf recipe—just kidding! Stick to dessert for now, but seriously, let me know in the comments below how your red velvet bundt cake turned out and if you used any fun garnishes on that glaze!
PrintClassic, Ultra-Moist Red Velvet Bundt Cake with Tangy Cream Cheese Glaze
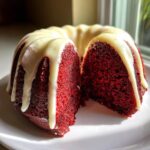
Bake a show-stopping, ultra-moist Red Velvet Bundt Cake from scratch. This recipe gives you the signature deep red color and rich cocoa flavor, topped with a simple, tangy cream cheese glaze. It is an elegant, easy dessert perfect for any holiday or special occasion.
- Prep Time: 20 min
- Cook Time: 50 min
- Total Time: 1 hour 10 min
- Yield: 12 servings 1x
- Category: Dessert
- Method: Baking
- Cuisine: American
- Diet: Vegetarian
Ingredients
- 1 1/2 cups vegetable oil
- 1 1/2 cups granulated sugar
- 2 large eggs
- 1 teaspoon vanilla extract
- 1 cup buttermilk
- 1 tablespoon white vinegar
- 2 tablespoons red food coloring (or 1 teaspoon black cocoa powder plus coloring)
- 2 1/2 cups all-purpose flour
- 1 teaspoon baking soda
- 1 teaspoon salt
- 1 tablespoon unsweetened cocoa powder
- 8 ounces cream cheese, softened
- 1/2 cup unsalted butter, softened
- 3 cups powdered sugar
- 1 teaspoon vanilla extract
- 1–2 tablespoons milk (for thinning glaze)
Instructions
- Preheat your oven to 350°F (175°C). Grease and flour a 10-cup Bundt pan well.
- In a large bowl, whisk together the vegetable oil and granulated sugar until combined. Beat in the eggs one at a time, then mix in the vanilla extract.
- In a separate small bowl, mix the buttermilk, white vinegar, and red food coloring until the color is uniform.
- In a medium bowl, whisk together the flour, baking soda, salt, and cocoa powder.
- Gradually add the dry ingredients to the wet ingredients, alternating with the buttermilk mixture, beginning and ending with the dry ingredients. Mix only until just combined; do not overmix to keep the crumb tender.
- Pour the batter evenly into the prepared Bundt pan.
- Bake for 45 to 55 minutes, or until a wooden pick inserted into the center comes out clean.
- Let the cake cool in the pan on a wire rack for 15 minutes before inverting it onto the rack to cool completely.
- Prepare the glaze: In a medium bowl, beat the softened cream cheese and butter until smooth. Gradually beat in the powdered sugar and vanilla extract until fully incorporated. Add milk one tablespoon at a time until you reach a thick, pourable consistency.
- Once the cake is completely cool, drizzle the cream cheese glaze over the top, allowing it to drip down the sides for a showstopper look.
Notes
- For the deepest red color without using excessive liquid, consider replacing some of the red food coloring with 1 teaspoon of black cocoa powder.
- Buttermilk is key for moisture; if you do not have buttermilk, mix 1 cup of whole milk with 1 tablespoon of white vinegar or lemon juice and let it sit for 5 minutes before using.
- Do not overmix the batter after adding the flour; this prevents a tough cake and helps achieve that velvety texture.
Nutrition
- Serving Size: 1 slice
- Calories: 480
- Sugar: 55g
- Sodium: 320mg
- Fat: 28g
- Saturated Fat: 10g
- Unsaturated Fat: 18g
- Trans Fat: 0g
- Carbohydrates: 58g
- Fiber: 1g
- Protein: 4g
- Cholesterol: 65mg