
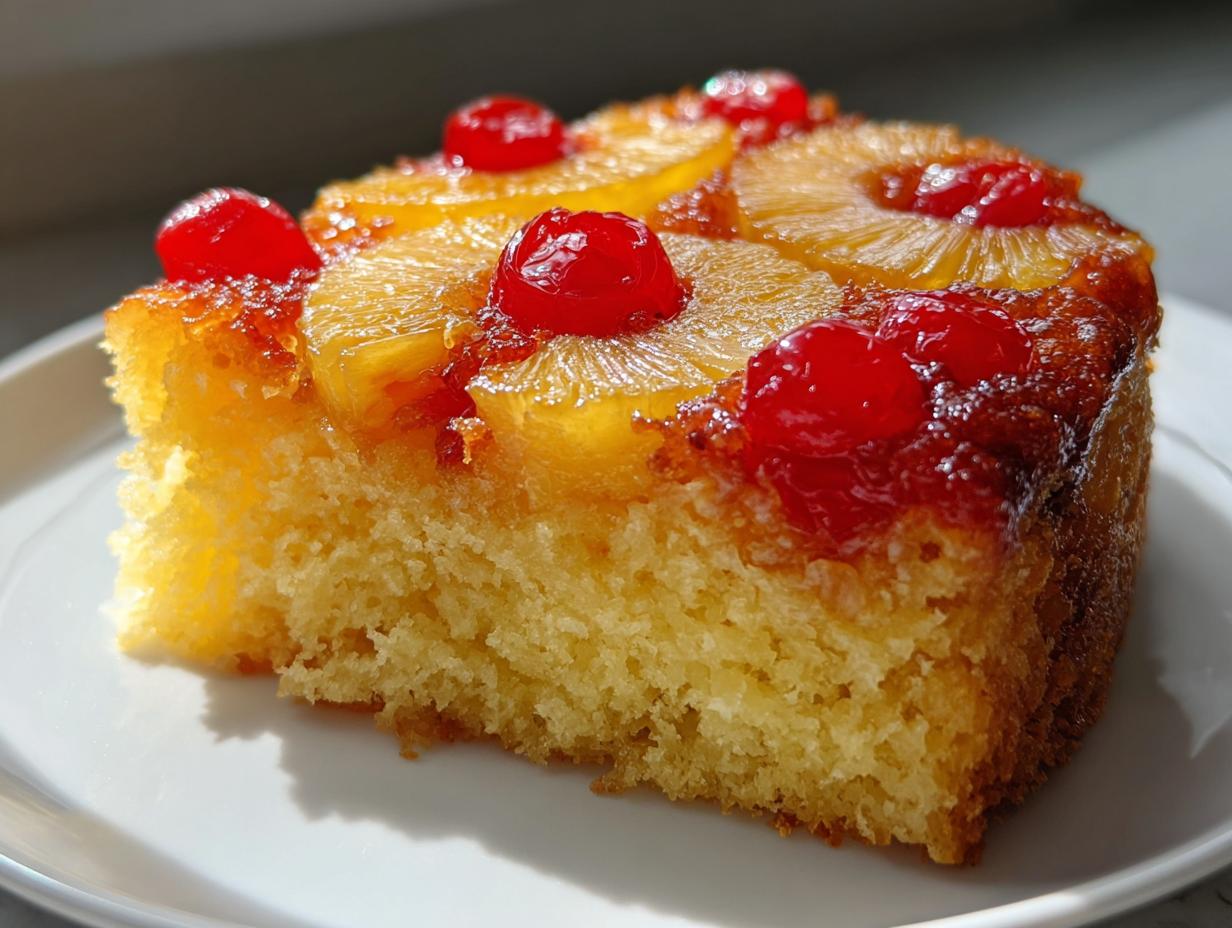
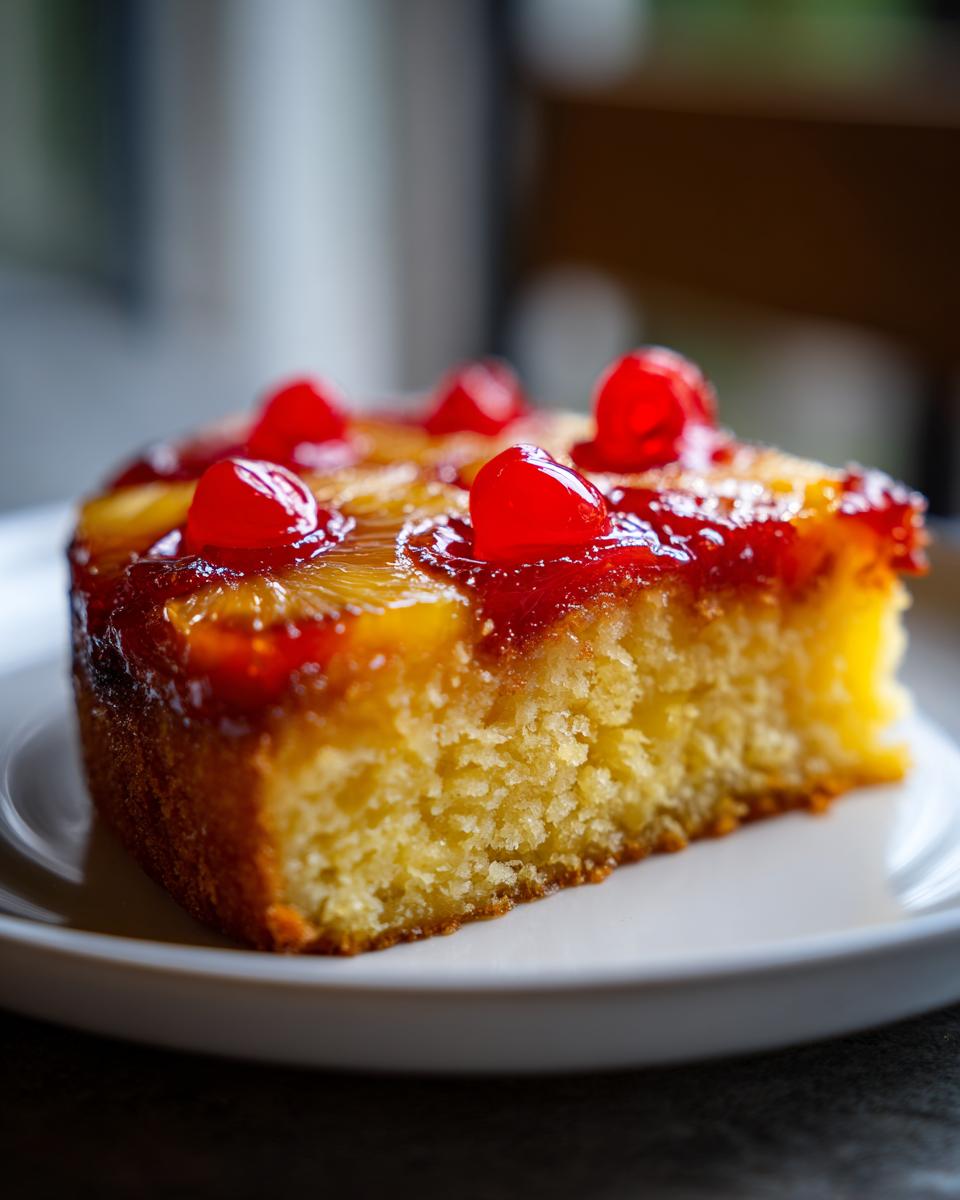
Oh my gosh, do you ever just crave those desserts that instantly transport you back to childhood parties and family potlucks? I know I do! That’s why I spent ages perfecting the Pineapple Upside Down Cake. Forget those dry, overly sweet versions you sometimes find; this one is different.
We’re making this classic pineapple cake completely from scratch. I promise you, the result is unbelievably moist, rich, and soaked in that gorgeous, buttery caramel topping. Aria Thompson totally gets this—she obsessively masters those fantastic, recognizable American dishes, and this recipe is proof that simple, classic flavors are the best flavors. Get ready for the best fruit cake you’ve ever baked!
- Why This Classic Pineapple Upside Down Cake Recipe Stands Out
- Ingredients for the Best Pineapple Cake Ever (From Scratch)
- Step-by-Step Instructions for Your Pineapple Upside Down Cake
- Variations: Mini Pineapple Upside Down Cakes and Pineapple Bundt Cake
- Tips for Success with Your Retro Fruit Cake
- Storage and Reheating Instructions for Pineapple Upside Down Cake
- Frequently Asked Questions About This Tropical Cake Recipe
- Estimated Nutritional Data for Pineapple Upside Down Cake
- Share Your Perfect Pineapple Upside Down Cake
Why This Classic Pineapple Upside Down Cake Recipe Stands Out
When you’re making something this nostalgic, you want it to be perfect, right? This homemade version isn’t just another fruit cake; it’s designed to taste exactly how you remember, only better! Trust me, the effort you put into this from scratch recipe pays off huge.
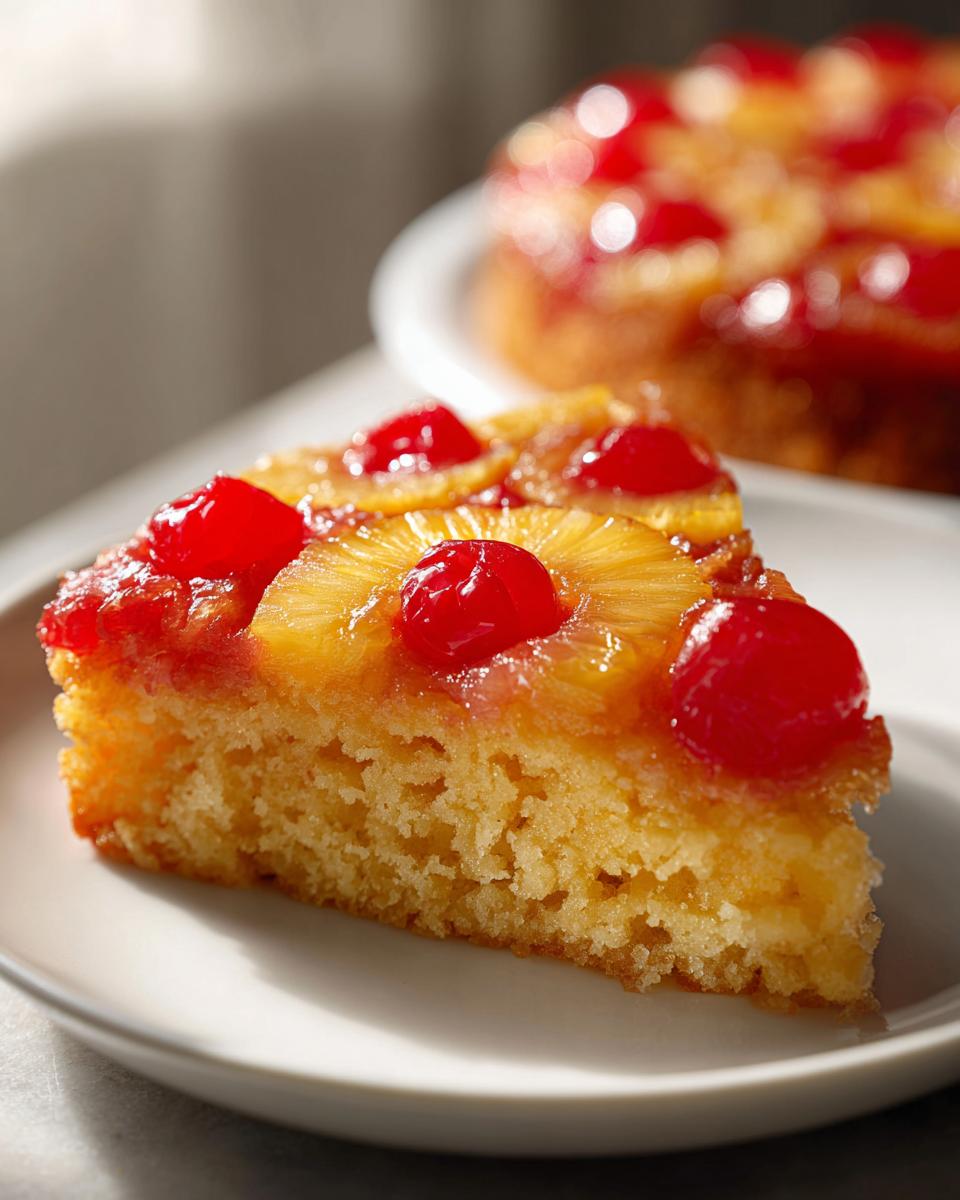
- It delivers a truly Moist Pineapple Cake texture, thanks to that little bit of reserved pineapple juice in the batter.
- The topping achieves a deep, shiny caramelization that store-bought versions just can’t touch.
- This is a genuinely Buttery Pineapple Cake; the base is rich and tender, not dry or crumbly.
- It’s beautiful! It’s the ultimate crowd-pleaser for any gathering, holiday, or just because you deserve a tropical escape.
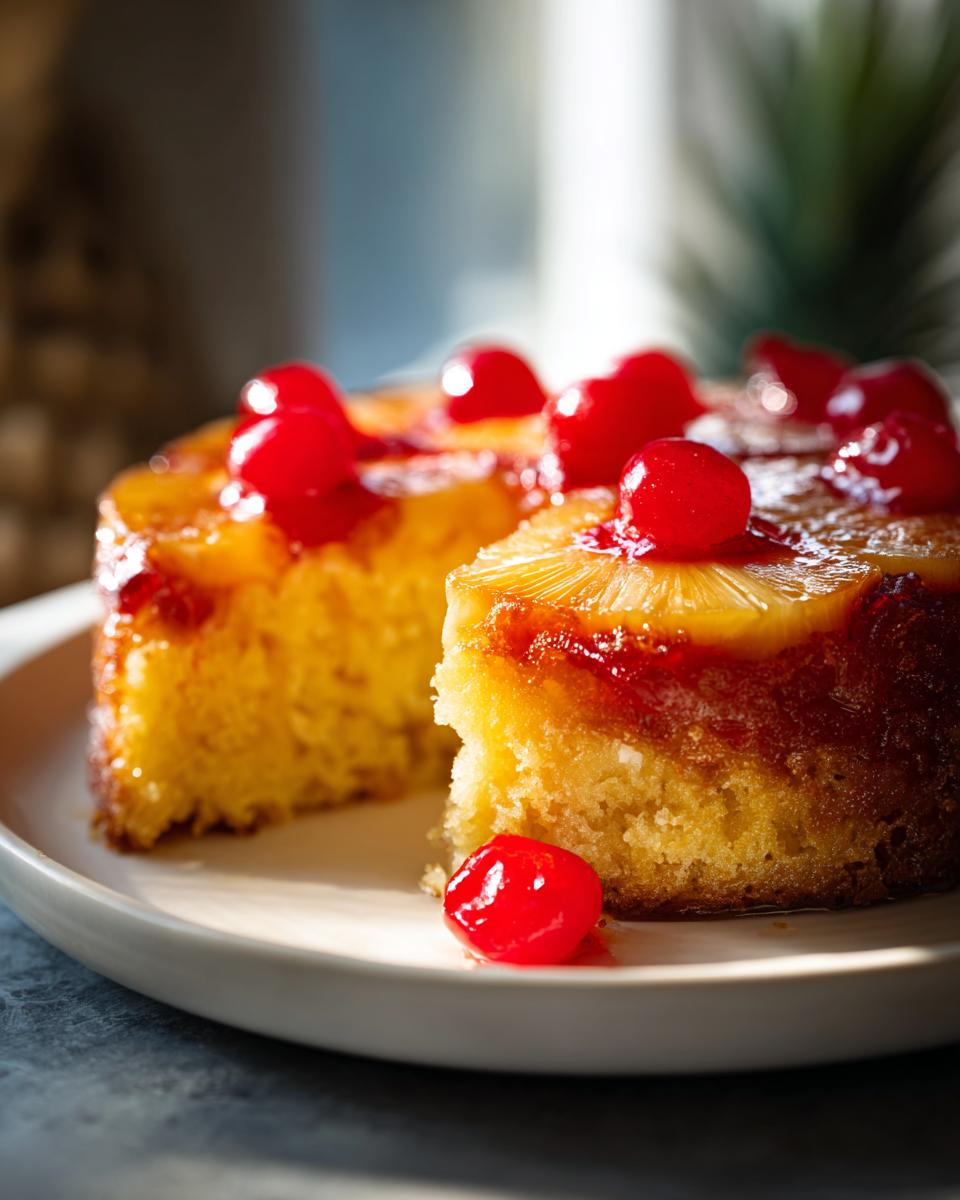
The Secret to Perfect Caramelized Pineapple Cake Topping
Forget just scattering sugar in the pan! The trick here is step two: you melt the butter and brown sugar together *first* until it’s a lovely, thick syrup. This process ensures uniform coverage across the bottom of the pan. When it bakes, it boils down into the most amazing, sticky, rich caramel that coats every single piece of fruit beautifully. You end up with a stunning, glossy top!
Achieving a Tender, Fluffy Crumb for Your Pineapple Upside Down Cake Recipe
This is where people often mess up their Pineapple Upside Down Cake Recipe. Since the topping is so heavy, you must treat the cake batter gently! We alternate the dry ingredients with the milk mixture slowly. If you dump everything in at once or mix too long, you develop the gluten, and then you’ve got a tough cake instead of a fluffy, tender crumb. Mix just until you see no streaks—that’s it!
Ingredients for the Best Pineapple Cake Ever (From Scratch)
Okay, so here’s the lineup for our Pineapple Upside Down Cake From Scratch. It looks like a lot, but it’s super basic pantry stuff, and we’re going to keep it organized so you don’t get confused when you’re layering! Read the descriptions carefully; those little details matter a whole bunch when you’re aiming for that perfect, moist cake.
For the Caramel Topping
- 1/2 cup unsalted butter (this is for melting in the sauce)
- 3/4 cup packed light brown sugar (make sure it’s packed tight!)
- 1 (20 ounce) can pineapple slices, drained (and save that juice!)
- 10 maraschino cherries, drained (pat them dry just a little bit)
For the Cake Batter
This is where we build the structure for this amazing Tropical Cake Recipe.
- 1 1/2 cups all-purpose flour
- 1 1/2 teaspoons baking powder
- 1/2 teaspoon salt
- 1/2 cup (1 stick) unsalted butter, softened (it needs to be soft for creaming!)
- 3/4 cup granulated sugar
- 2 large eggs (make sure they aren’t cold, let them sit out!)
- 1 teaspoon vanilla extract
- 1/2 cup milk
- 1/4 cup reserved pineapple juice (this is the secret weapon for moisture!)
Step-by-Step Instructions for Your Pineapple Upside Down Cake
Okay, here we go! This is the fun part where everything comes together into that iconic look. Seriously, follow these steps exactly, especially around the heat management and the flip, and you will have the best pineapple cake ever. I linked my guide on French bread earlier, but honestly, getting this flip right takes more focus than kneading dough!
Preparing the Caramel Base and Fruit Arrangement
First thing: crank that oven up to 350°F (175°C). And here’s a weird instruction you absolutely must follow: do NOT grease your 9-inch round cake pan. We need the topping to stick just a bit so it peels off cleanly later! Over medium heat in a small saucepan, get that first 1/2 cup of butter melted. Whisk in the brown sugar until it’s smooth and syrupy, then pour that glorious mixture right into the bottom of your ungreased pan. Now comes the artistry! Arrange your drained pineapple slices neatly over the caramel. Pop one drained maraschino cherry right in the middle of every ring. That’s the look we want for this entire pineapple upside down cake!
Mixing the Moist Pineapple Cake Batter
While that caramel base is waiting, whisk your dry ingredients—flour, baking powder, and salt—in a bowl. Set that aside. In a bigger bowl, you need to beat that other 1/2 cup of softened butter with the granulated sugar until it’s genuinely light and fluffy—about three minutes with an electric mixer. Beat in the eggs one by one, mixing well after each addition, followed by the vanilla. Now, the gentle part: mix your milk and reserved pineapple juice in a small cup. You’re going to alternate adding the dry mix and the liquid mix to the sugar/butter. Start and end with the dry stuff. Watch closely, and stop mixing the moment those streaks disappear. Overmixing makes tough cake; we want fluffy!
Baking and Inverting the Classic Pineapple Cake
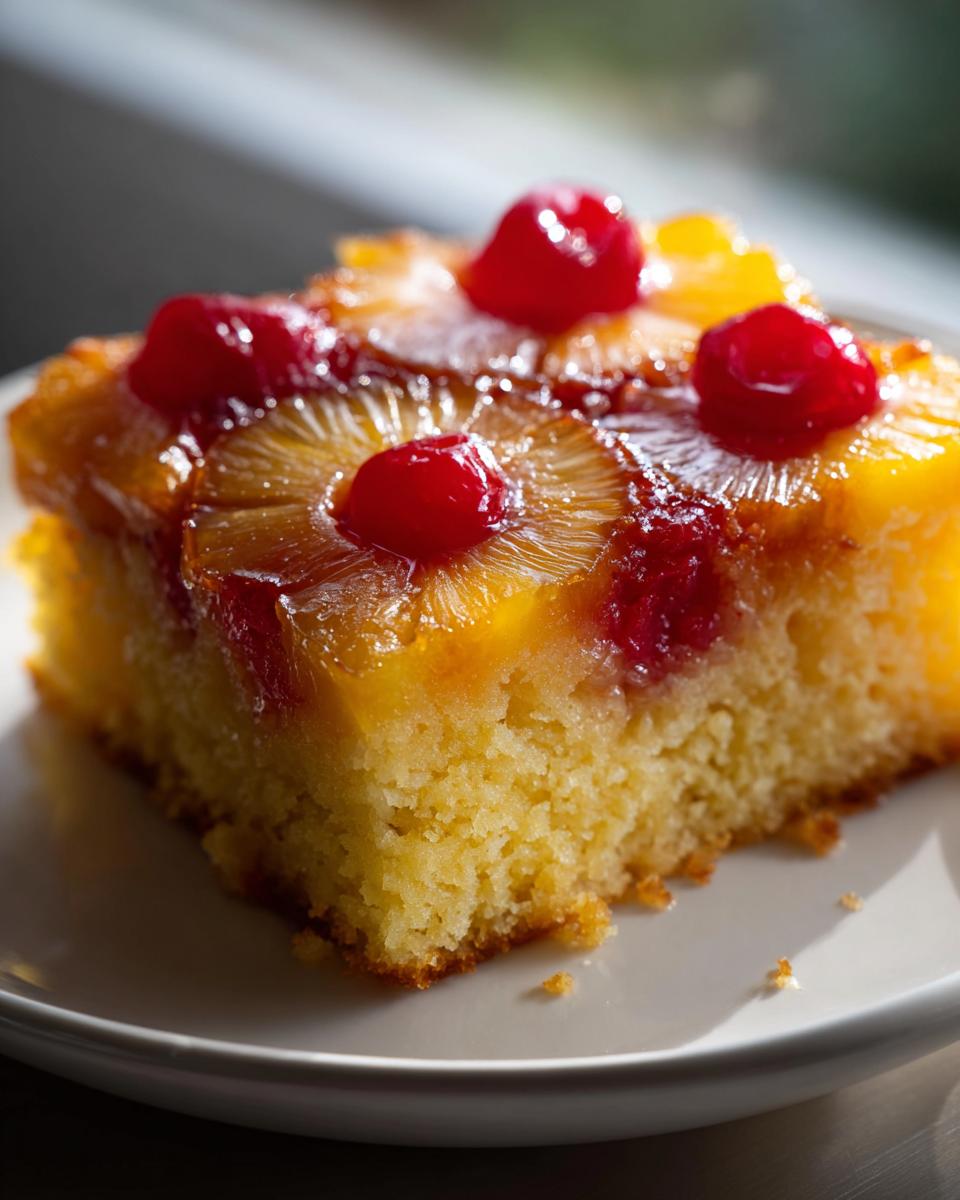
Gently spoon your beautiful batter right over the fruit layer. Spread it carefully so you don’t mess up that pretty pineapple lineup. Bake it for about 35 to 40 minutes until that toothpick trick comes out clean. Now for the crucial moment! Take it out, set it on a rack, and do nothing for exactly 10 minutes. Seriously, set a timer. After ten minutes, put your serving plate upside down over the pan, grab both sides firmly, and flip it quickly and confidently onto the plate. Lift the pan up slowly. If any little bit of pineapple sticks to the bottom, don’t panic! Just use a small spatula and gently nudge it back into place on the cake. Let it cool completely before slicing, though!
Variations: Mini Pineapple Upside Down Cakes and Pineapple Bundt Cake
You know, as much as I love making the giant classic Pineapple Upside Down Cake, sometimes you just need smaller things! This recipe is so flexible, which is one of the reasons it’s such a classic. Based on the notes I dug out of the recipe card archives, you can easily pivot this into individual treats or a more decorative shape. I shared my favorite cheesecake adaptation last year, but these smaller fruit versions are just as fun.
Making Individual Mini Pineapple Upside Down Cakes
If you need party food or just want to stop yourself from eating the whole cake in one sitting (oops!), you have to try making these tiny treats. Prepare your muffin tins using paper cups—this makes the cleanup way easier. You’ll put just a teaspoon or two of your brown sugar butter mixture in the bottom of each cup, followed by a tiny slice of pineapple and a cherry. Then, spoon the cake batter right over the top. Because they are so small, they bake way faster! Keep an eye on them; they are usually done in about 20 to 25 minutes. They look so elegant when you invert them for serving! For the best look, check out the tips they have over at Mini Pineapple Upside Down Cakes for presentation ideas.
Tips for a Stunning Pineapple Bundt Cake
Say you want that gorgeous floral shape a Bundt pan gives you—you totally can do that! Just remember that big, deep pan style needs more time for the heat to penetrate to the center. You’ll pour all your topping and layer the fruit just like normal in the Bundt pan, but you need to add about 10 to 15 minutes to the baking time listed in the main instructions. It might take closer to an hour! Always check that toothpick in the center area, just to make sure it’s not gooey in the middle. For guaranteed release, especially with a fancy bundt pan, you might want to check out the pan release trick I mentioned above, even though the topping should help it come out!
Tips for Success with Your Retro Fruit Cake
Even though this is a classic recipe, mastering the little details makes all the difference! I want your Retro Fruit Cake to come out looking picture-perfect and tasting unbelievably moist every single time you bake it. Since we aren’t using fresh pineapple (canned offers that perfect uniform texture we need), the key is to pump up the caramel flavor elsewhere. If you want an even deeper, richer caramel flavor than the standard brown sugar provides, try substituting maybe a tablespoon of that brown sugar for molasses in the topping mixture. It gives a wonderful, unexpected richness that truly elevates the whole dessert. For related baking tips on controlling moisture, check out how I keep my spice cake ultra-moist!
Storage and Reheating Instructions for Pineapple Upside Down Cake
Now, this is the tough part: having leftovers of this glorious Pineapple Upside Down Cake!
The good news is that because the topping is made up of cooled caramel and fruit, this cake actually travels and stores really well, much better than a lot of fluffy white cakes do. You absolutely want to let the cake cool completely before you even think about covering it up. If you cover a warm cake, you’re just setting yourself up for a gross, soggy topping situation, and nobody wants that gooey mess.
Once it’s totally cooled, you have a couple of options depending on how quickly you plan to eat it all!
- Room Temperature Storage: If you plan on finishing the cake within two days, you can keep it at room temperature. Always cover it tightly with plastic wrap or just place a cake dome over it. Keep it away from direct sun or anywhere warm. The sugar in the caramel acts as a natural preservative, which is handy!
- Refrigeration: If it’s a hot day, or if you need to keep it longer than two days (which I doubt will happen!), pop it in the fridge. Make sure the pan is securely covered or transfer a slice to an airtight container. It can last up to five days this way.
Warming Up Your Slice
When you want to eat that slice later, especially straight from the fridge, you’ll want to warm it slightly to bring back that buttery flavor.
My favorite way is short bursts in the microwave. Zap it for about 10 to 15 seconds. That’s enough to soften the caramel topping just slightly without completely turning the cake texture weird. If you have a whole slice left and want to be fancy, you can wrap it loosely in foil and warm it in a 300°F oven for about 8 minutes. Either way, it tastes like sunshine!
Frequently Asked Questions About This Tropical Cake Recipe
I know when I see a new recipe, I always have a few little burning questions, especially if I’m trying to save time! This tropical cake recipe is fantastic from scratch, but sometimes life happens, right? Here are the things you asked me most often about getting that perfect Pineapple Upside Down Cake.
Can I use Box Mix Pineapple Upside Down Cake instead of from scratch?
Oh, absolutely you can take that shortcut! I totally get it. If you decide to use your favorite yellow or even white box mix, you still need to make my caramel layer exactly as written. That’s the part you can’t skip! Just prepare the topping in the pan, then follow the directions on your box for the cake batter, but swap out the liquid it calls for with a mix of milk and some of your reserved pineapple juice. It’s a great way to make an Easy Pineapple Dessert when you’re short on time.
How do I add caramel or rum flavor to my pineapple upside down cake?
This is one of my favorite ways to customize! For a richer, deeper flavor that leans into that true Caramelized Pineapple Cake profile, I recommend using dark brown sugar instead of light brown sugar for the topping. It adds so much complexity! If you want a little grown-up kick, carefully drizzle about one tablespoon of good quality dark rum right over the pineapple and cherry layer just before spooning the batter on top. Oh wow, it smells incredible baking! It’s perfect when you’re making this for an adult gathering. If you’re looking for more ways to spice up your morning, I have some great easy breakfast recipes I think you’d enjoy too!
Estimated Nutritional Data for Pineapple Upside Down Cake
I always like to give a heads-up about what’s in the final bake, even though I’m just a home cook and not a registered dietitian! Please remember this is an estimate based on the ingredients list above for this rich, buttery pineapple cake. Since we’re making this completely from scratch, it’s going to be a bit decadent, but totally worth it for a special occasion dessert.
This information is calculated per serving, assuming the recipe yields 8 slices. If you cut your slices smaller, the numbers change, of course!
- Serving Size: 1 slice
- Calories: approximately 380
- Sugar: 35g (Hello, delicious caramelized goodness!)
- Fat: 18g
- Saturated Fat: 11g
- Carbohydrates: 54g
- Protein: 4g
For a closer look at balancing things out, I often whip up some of my quick lunch ideas during the week to make up for the weekend indulgence! But for this amazing, colorful, retro fruit cake, these numbers are just part of the celebratory joy.
Share Your Perfect Pineapple Upside Down Cake
Well, friend, we made it! We took simple ingredients and turned them into what I firmly believe is the Best Pineapple Cake Ever. I hope you’re smelling that beautiful, warm, buttery pineapple aroma right now!
The final step is always hearing from you. Once you’ve had a chance to try this classic out—and trust me, you need to make this incredible Easy Pineapple Dessert for your next gathering—I want to know how it went! Did your caramel flip cleanly? Did you add a little extra vanilla? Let me know in the comments below!
It means the world to me when you rate the recipe using the five-star system right here on the page. It lets other bakers know that this recipe is solid gold, just like we know it is! If you’ve got any twists or turns—maybe you tried a rum reduction or baked it in a specialty pan—don’t keep it secret! Drop your feedback below, or feel free to reach out through my contact page if you have super specific questions. Happy baking!
PrintClassic Pineapple Upside Down Cake From Scratch
Make this classic pineapple upside down cake from scratch for a moist, buttery, and nostalgic dessert. This recipe creates a rich, caramelized topping that appeals to everyone.
- Prep Time: 20 min
- Cook Time: 40 min
- Total Time: 1 hour 5 min
- Yield: 8 servings 1x
- Category: Dessert
- Method: Baking
- Cuisine: American
- Diet: Vegetarian
Ingredients
- 1/2 cup unsalted butter
- 3/4 cup packed light brown sugar
- 1 (20 ounce) can pineapple slices, drained (reserve juice)
- 10 maraschino cherries, drained
- 1 1/2 cups all-purpose flour
- 1 1/2 teaspoons baking powder
- 1/2 teaspoon salt
- 1/2 cup (1 stick) unsalted butter, softened
- 3/4 cup granulated sugar
- 2 large eggs
- 1 teaspoon vanilla extract
- 1/2 cup milk
- 1/4 cup reserved pineapple juice
Instructions
- Preheat your oven to 350°F (175°C). Do not grease a 9-inch round cake pan.
- In a small saucepan over medium heat, melt the 1/2 cup of butter. Stir in the brown sugar until it dissolves and forms a thick syrup. Pour this mixture evenly into the bottom of your ungreased cake pan.
- Arrange the pineapple slices over the brown sugar mixture in the pan. Place one maraschino cherry in the center of each pineapple ring.
- In a medium bowl, whisk together the flour, baking powder, and salt. Set this dry mixture aside.
- In a large bowl, beat the softened 1/2 cup of butter and granulated sugar with an electric mixer until the mixture is light and fluffy. This takes about 3 minutes.
- Beat in the eggs one at a time, mixing well after each addition. Stir in the vanilla extract.
- In a small bowl, whisk together the milk and the reserved pineapple juice.
- Gradually add the dry ingredients to the wet ingredients, alternating with the milk mixture. Begin and end with the dry ingredients, mixing only until just combined. Do not overmix the batter.
- Gently spoon the cake batter over the pineapple and cherry layer in the pan. Spread the batter evenly.
- Bake for 35 to 40 minutes, or until a toothpick inserted into the center comes out clean.
- Remove the cake from the oven and let it cool in the pan on a wire rack for 10 minutes.
- Place a serving plate upside down over the cake pan. Carefully and quickly invert the cake onto the plate. Lift the pan away slowly. If any topping sticks, gently place the fruit back onto the cake.
- Let the cake cool completely before slicing and serving.
Notes
- For a richer caramel flavor, use dark brown sugar in the topping mixture.
- If you prefer individual servings, prepare this recipe as Mini Pineapple Upside Down Cakes using muffin tins lined with paper cups. Adjust baking time down to 20-25 minutes.
- To make this a Pineapple Bundt Cake, prepare the topping in the bundt pan and increase the baking time by about 10-15 minutes, checking for doneness.
Nutrition
- Serving Size: 1 slice
- Calories: 380
- Sugar: 35g
- Sodium: 250mg
- Fat: 18g
- Saturated Fat: 11g
- Unsaturated Fat: 7g
- Trans Fat: 0.5g
- Carbohydrates: 54g
- Fiber: 1g
- Protein: 4g
- Cholesterol: 85mg