
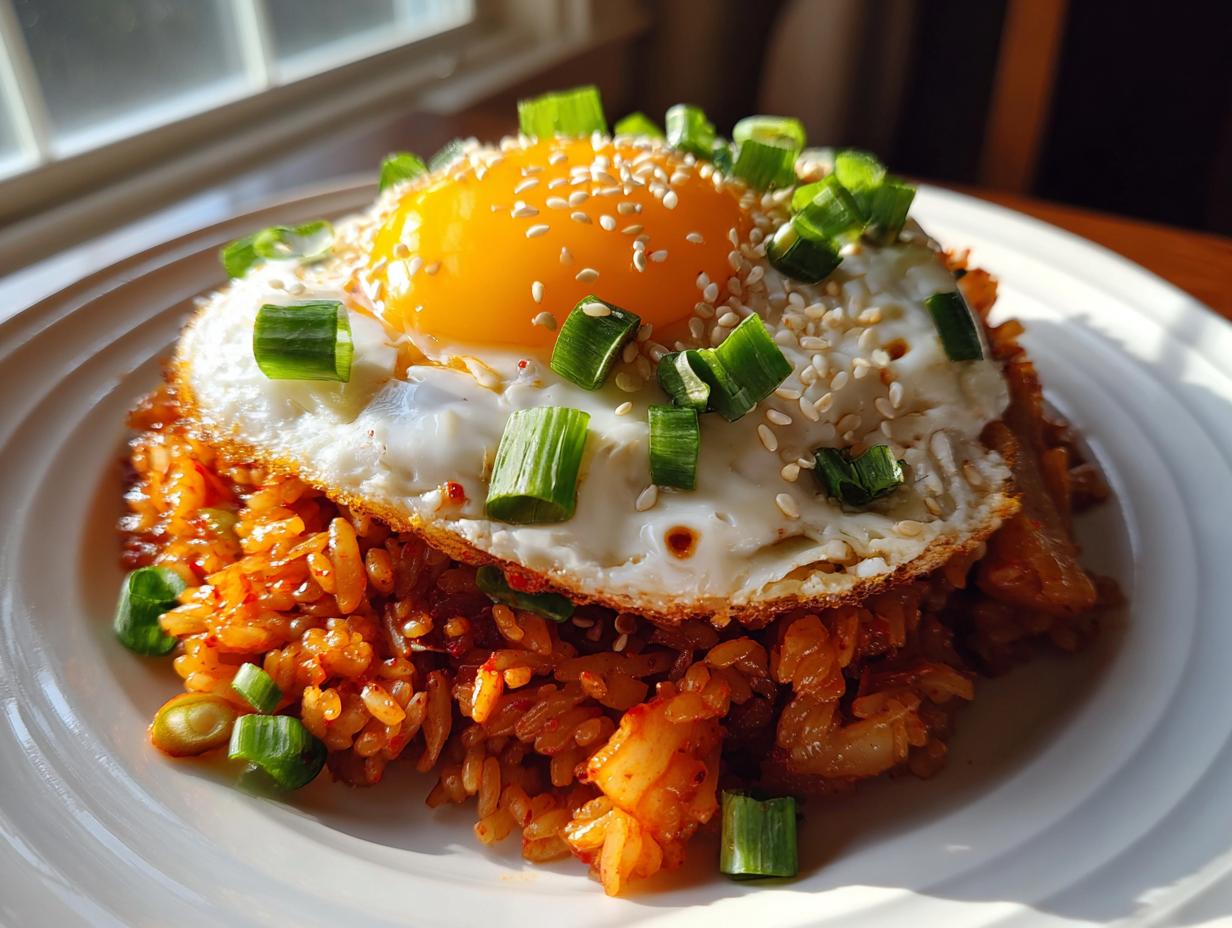
We’ve all been there: it’s 6:30 PM, you’re tired, and the thought of a complicated recipe feels like climbing a mountain. That’s exactly why I developed this Kimchi Fried Rice. I wanted a true Korean comfort food that didn’t demand thirty minutes of active cooking time. Trust me, this is your new secret weapon for those crazy evenings. This isn’t just any fried rice; this is The Ultimate 15-Minute Kimchi Fried Rice, and the secret to achieving that wonderful, slightly charred texture is using rice that’s already chilling in your fridge.
At Cooking Zenith, my goal is always to build your confidence by proving that amazing flavor shouldn’t take all night. This particular simple weeknight dinner delivers that signature savory, spicy punch you expect from authentic Bokkeumbap in less time than it takes to decide on takeout. We’re going to focus on speed and texture here, I promise you won’t be disappointed!
- Why This Quick Kimchi Fried Rice is Your New Weeknight Korean Dinner Staple
- Gathering Ingredients for Flavorful Fried Rice
- How to Make Kimchi Fried Rice: Your 15-Minute Guide
- Tips for Success Making Perfect Kimchi Fried Rice
- Ingredient Notes and Substitutions for Easy Kimchi Fried Rice
- Customizing Your Weeknight Korean Dinner: Variations
- Storing and Reheating Leftover Kimchi Fried Rice
- Frequently Asked Questions About Bokkeumbap Recipe
- Share Your Savory Kimchi Rice Creations
Why This Quick Kimchi Fried Rice is Your New Weeknight Korean Dinner Staple
I truly believe that having this recipe in your back pocket changes everything about Tuesday nights. Seriously, when you need a Weeknight Korean Dinner that feels exciting but requires almost no effort, this Easy Kimchi Fried Rice is the answer. We aren’t just making dinner; we’re getting dinner on the table faster than delivery can get to your door!
Here is why this specific method of making Bokkeumbap Recipe will become your favorite go-to:
- Speed is King: We are targeting a total time of 15 minutes here. If you’re looking for a quick healthy lunch idea, you can easily scale this down too!
- The Texture Secret: This recipe demands cold, day-old rice. That’s non-negotiable, and it’s what guarantees those delicious little crispy bits in every spoonful.
- Flavor Punch: It hits that perfect trifecta every time: savory, tangy, and spicy. It tastes deep, like it simmered for hours, but it didn’t.
- Total Customization: Whether you have leftover bacon, some chicken breast, or you’re keeping it vegetarian, this Flavorful Fried Rice adapts without complaint.
Gathering Ingredients for Flavorful Fried Rice
Okay, before the oil even hits the pan, we need to talk about what you’re putting IN the pan. Since this is a quick kimchi fried rice, every ingredient counts, and we need them prepped and ready to go in the pan within five minutes flat. I’m not usually a stickler for exact measurements, but for this dish, a few things are absolutely crucial if you want that wonderful, slightly charred texture for your easy homemade teriyaki sauce inspiration or savory seasoning in general. We are building flavor fast here!
Essential Components for Authentic Kimchi Fried Rice
First up, you need kimchi that’s past its prime—the older and more sour, the better! That deeply fermented flavor is what makes this Spicy Rice Bowl sing. Don’t forget the juice; we use that liquid gold for seasoning. And please, please use cold, day-old cooked white rice. If you use warm rice right off the cooker, you’re just going to get a gummy mess, and we want crispy bits, not paste! Finally, grab your gochujang; that’s where the deep, savory heat comes from for this Bokkeumbap Recipe.
Protein and Topping Options for Your Spicy Rice Bowl
While the base is amazing on its own, most people add a protein, and I love sneaking in some leftover bacon grease as the foundational fat for flavor. Chicken works great too, but if you’re going vegetarian, firm tofu is fantastic here. The absolute crowning glory of any proper Fried Rice with Kimchi, though, is the egg. It has to be fried sunny-side up with a runny yolk. That yolk becomes its own rich sauce when you pop it!
How to Make Kimchi Fried Rice: Your 15-Minute Guide
Alright, this is where the magic happens, and I mean that literally because we are moving fast! Remember, we’re aiming for that perfect 20-minute dinner window, so have everything ready to dump in near your stovetop. This whole process is about high heat and continuous movement. Don’t stop to check your phone; we need that heat to stay consistent!
Step 1: Building the Flavor Base
Get your largest skillet or wok screaming hot over medium-high heat. If you’re using bacon grease—and you absolutely should for that savory depth—toss it in until it shimmers. Then, toss in the chopped onion. We’re cooking those just until they start to look soft, maybe two minutes total. Right after that, add your minced garlic. Garlic burns fast, so give it just 30 seconds until you can really smell it, and then we move on!
Step 2: Frying the Kimchi and Protein
Now it’s time for the star ingredient! Throw in your chopped kimchi and any protein you’re using, like bacon bits or chicken. We aren’t just warming them up; we want the heat to coax out the flavor. Stir-fry this mixture hard for about three to four minutes. You’re looking for the kimchi to soften up just a little and maybe even get some nice, beautiful caramelized edges. That caramelization is flavor you can’t fake later!
Step 3: Achieving Crispy Leftover Rice Texture in this Kimchi Fried Rice
This is the step that separates the okay fried rice from the amazing Kimchi Fried Rice. Add your cold, day-old rice straight into that flavorful mess. Use your spatula and break up any clumps immediately. Here’s the trick: keep stirring, but also press sections of the rice firmly against the hot surface of the pan for a few seconds at a time. This direct contact creates the crispy texture we are after. Keep stirring and pressing vigorously for about three minutes until the rice feels nice and separate.
Step 4: Seasoning and Finishing the Savory Kimchi Rice
Time to season the whole bowl! Pour in your kimchi juice (the liquid tin), the soy sauce, and the gochujang. Stir everything together really quickly so that gorgeous red-brown seasoning coats every grain of rice evenly. Let it cook for just one final minute. Then, IMMEDIATELY take the skillet off the heat. Stir in your sesame oil last—it’s delicate and you don’t want to cook that flavor off. Now, quickly fry up your eggs sunny-side up while you scoop the Savory Kimchi Rice into bowls. Don’t forget that runny yolk on top!
Tips for Success Making Perfect Kimchi Fried Rice
Look, I’m not trying to be bossy, but if you want this Easy Kimchi Fried Rice to knock your socks off, you have to listen to the rice rule. Seriously, if you skip using cold, day-old rice, you’re ending up with mush. That’s the secret to getting those fantastic little crispy edges—the cold rice doesn’t steam; it fries!
When you’re adding your seasonings, like the soy sauce and gochujang, taste it before you serve it. Sometimes my kimchi is saltier or spicier than yours might be, so be ready to adjust. Remember, we took the pan off the heat before adding the sesame oil. That’s important! It’s a finishing oil, not a cooking oil, and adding it off the heat preserves that signature nutty aroma. If you like a little extra funk, try tossing in a splash of reserved kimchi juice right at the end before serving. It really kicks up the tangy flavor of your easy cabbage recipe flavors too, honestly!
Ingredient Notes and Substitutions for Easy Kimchi Fried Rice
I know what happens when you get inspired to cook: you look at the recipe, and suddenly you realize you’re out of bacon! Don’t panic. This Easy Kimchi Fried Rice is forgiving, but you have to respect the texture elements. The number one thing I need you to remember, and I’ll probably repeat this a million times, is that cold, day-old rice is mandatory. It acts different under high heat than fresh rice does, and that’s how we get that fantastic slight char.
If you don’t have bacon grease, don’t sweat it. Just swap it out for a high-smoke-point oil like canola or a neutral vegetable oil. If you want to make this a vegetarian meal—which is totally easy to do—just skip the bacon, use the vegetable oil, and toss in some cubed tofu or extra mushrooms when you sauté the onions. It works beautifully! This recipe, whether you turn it into a quick chicken dinner alternative or keep it meat-free, is built for the real world of the home cook.
Customizing Your Weeknight Korean Dinner: Variations
The base recipe for this Kimchi Fried Rice is fantastic, but I love playing around once I have the essentials down. Since speed is key for this coconut lime chicken skillet recipe counterpart, keep any additions simple! If you want to shift up the protein, ground pork or even quick-cooking shrimp work wonderfully; just make sure they are cooked through right when you add the kimchi.
Here’s a fun twist for something wildly different: once your rice is seasoned and everything is hot, try mixing in about a quarter cup of shredded mozzarella or Monterey Jack cheese right at the very end. It turns into this amazing, stretchy, cheesy fusion dish that pairs shockingly well with the spice! Just make sure it’s off the heat so the cheese melts beautifully instead of burning.
Storing and Reheating Leftover Kimchi Fried Rice
Even though this Kimchi Fried Rice is lightning fast to make, sometimes you get lucky and have leftovers! It keeps really well, but you absolutely must store it correctly to maintain that texture. Pop any leftovers into an airtight container right away and stick them in the fridge. You’ve got about three days before you should finish it up.
Now, reheating is key. Please, please, for the love of crispy rice, avoid the microwave if you can! The microwave just steams the rice and brings back the mushiness we worked so hard to avoid. Instead, toss your leftover rice back into that hot skillet—maybe add just one tiny splash of the kimchi juice—and stir-fry it over medium-high heat for about three to four minutes. It crisps right back up! This simple trick ensures your second serving of this easy chicken pot pie casserole alternative tastes just as good as the first time around.
Frequently Asked Questions About Bokkeumbap Recipe
It’s totally normal to have questions when you’re trying a new super-fast recipe like this! I’ve gathered the ones I get asked most often regarding speed and texture to make sure your first attempt at this Kimchi Fried Rice is perfect. I want you to feel totally confident jumping into this Easy Korean Cooking!
Can I use fresh rice instead of leftover rice for Kimchi Fried Rice?
Oh, honey, that’s the biggest mistake you can make! The answer is a firm no. If you use rice that was just cooked, it’s too moist. When you toss it into the hot pan, it releases all that steam and moisture, and instead of getting those fantastic little crispy brown bits, you end up with mushy, wet rice—and nobody wants that gummy texture in their Kimchi Dinner Ideas! Cold, day-old rice is what lets the grains separate and truly fry up in the skillet. It’s essential for achieving that best texture!
How do I make this Quick Kimchi Fried Rice vegetarian?
This is so simple to adapt! We just skip the bacon and use 1 tablespoon of vegetable oil instead of the grease for your fat base. If you skip the protein entirely, it’s still incredibly flavorful, but if you want that hearty texture, toss in some cubed firm tofu or extra sliced mushrooms along with your onions. Make sure the gochujang you buy doesn’t have any hidden fish products if you’re strictly vegan, otherwise, you’re all set! It’s a great option for a Vegetarian Kimchi Fried Rice!
What is the best way to control the spice level in this Fried Rice with Kimchi?
If you are sensitive to heat, this is the place to manage it. The majority of your heat is coming from two places: the gochujang and the actual kimchi juice you pour in. For a milder Spicy Rice Bowl, use just half a teaspoon of gochujang instead of the full teaspoon listed, and be conservative with the kimchi juice—maybe just one tablespoon instead of two, or even skip the juice altogether and just rely on the flavor from the sautéed kimchi itself. You can always add more spice later, but you can’t take it out once it’s stirred in! Just remember, if you ever need a little something sweet to balance out powerful spice, my easy cinnamon butter recipe is my secret weapon, though maybe not for tonight’s savory dinner!
Share Your Savory Kimchi Rice Creations
That’s it! You’ve just mastered a true Korean comfort flavor in under 15 minutes. See? I told you that you weren’t intimidated by this recipe! Now I want to hear all about it.
If this delightful 20 Minute Dinner saved your evening, please do me a huge favor and come back here and drop a rating. Five stars if you loved the crispy rice texture! Seriously, those ratings help other home cooks like you who are stressed on a weeknight see that this recipe is the real deal.
If you snapped a photo of your beautiful Savory Kimchi Rice topped with that perfect runny egg, tag me on social media! I absolutely love seeing how you customize my recipes. Maybe you used shrimp, or maybe you tried that cheesy fusion idea—show me what you cooked up! Your experiences using this best homemade onion dip from scratch inspiration really inspires the next recipe I develop for you!
PrintThe Ultimate 15-Minute Kimchi Fried Rice: Crispy Leftover Rice for Busy Weeknights

Make this easy Kimchi Fried Rice, or Bokkeumbap, in under 15 minutes using leftover rice. This recipe delivers bold, savory, and spicy Korean comfort food perfect for a quick weeknight dinner.
- Prep Time: 5 min
- Cook Time: 10 min
- Total Time: 15 min
- Yield: 2 servings 1x
- Category: Dinner
- Method: Stir-Frying
- Cuisine: Korean
- Diet: Vegetarian
Ingredients
- 2 cups cold, day-old cooked white rice
- 1 cup chopped aged kimchi
- 2 tablespoons kimchi juice
- 2 tablespoons bacon grease or neutral oil
- 1/2 cup chopped onion
- 1 clove garlic, minced
- 1/4 cup chopped cooked protein (optional, such as bacon or chicken)
- 1 tablespoon soy sauce
- 1 teaspoon gochujang (Korean chili paste)
- 1 teaspoon sesame oil
- 2 large eggs
- 1 green onion, sliced (for garnish)
- Toasted sesame seeds (for garnish)
Instructions
- Heat the bacon grease or oil in a large skillet or wok over medium-high heat.
- Add the chopped onion and cook for 2 minutes until softened. Add the minced garlic and cook for 30 seconds until fragrant.
- Add the chopped kimchi and the optional cooked protein. Stir-fry for 3 to 4 minutes until the kimchi softens slightly and starts to caramelize.
- Add the cold rice to the skillet. Break up the rice clumps with your spatula and stir-fry vigorously for 3 minutes, pressing the rice against the hot pan to achieve some crispiness.
- Pour in the kimchi juice, soy sauce, and gochujang. Stir quickly to coat all the rice evenly. Cook for 1 minute.
- Remove the skillet from the heat. Stir in the sesame oil.
- In a separate small pan, fry the two eggs sunny-side up or over easy, keeping the yolks runny.
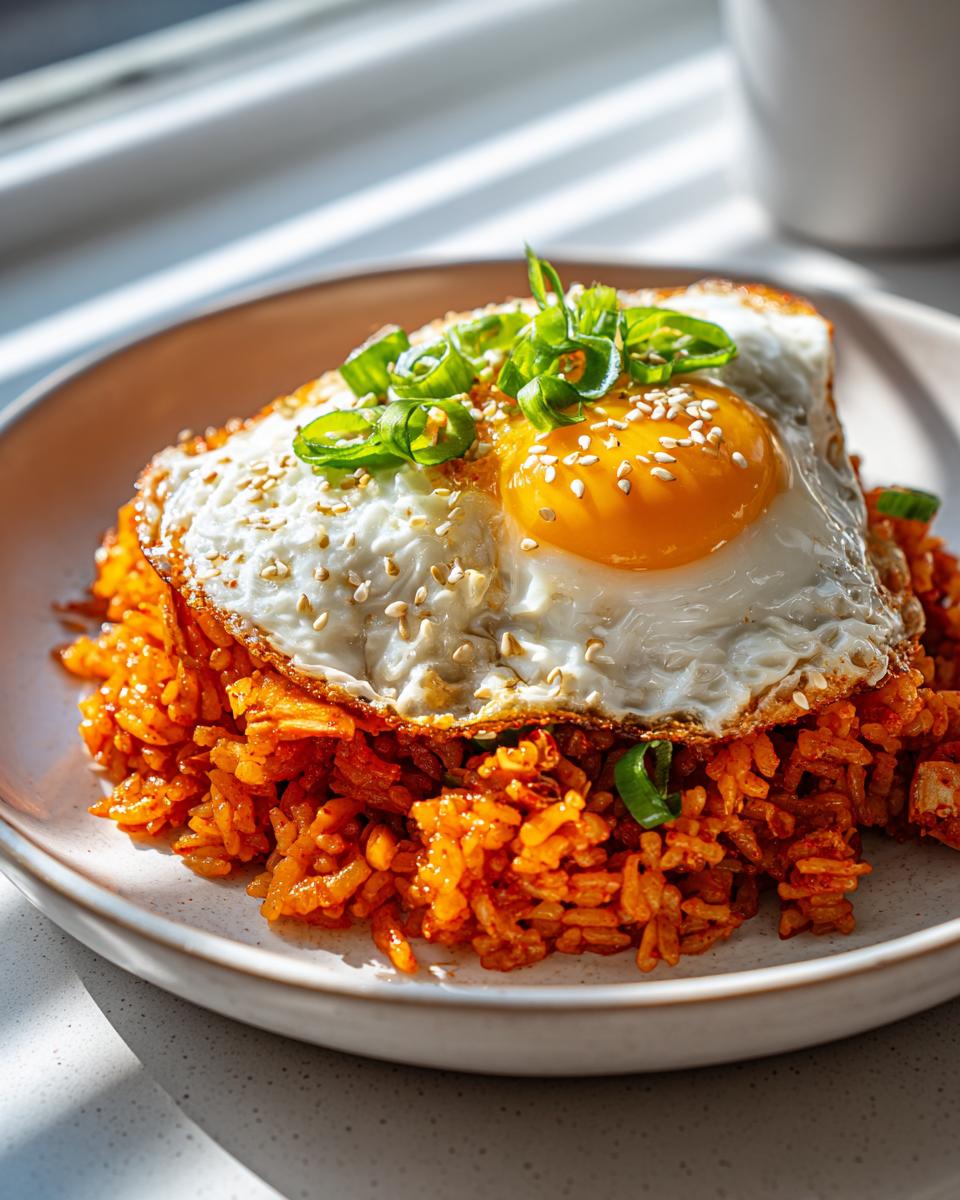
- Divide the kimchi fried rice into serving bowls. Top each serving with a fried egg. Garnish with sliced green onion and toasted sesame seeds.
Notes
- Using cold, day-old rice is key for achieving the best texture in fried rice; it prevents the dish from becoming mushy.
- If you skip the bacon grease, use a high smoke-point oil like canola or vegetable oil.
- For a vegetarian version, omit the bacon and use 1 tablespoon of vegetable oil instead of bacon grease. Add 1/2 cup of firm tofu cubes or mushrooms for texture.
- Adjust the amount of gochujang to control the spice level of your savory kimchi rice.
Nutrition
- Serving Size: 1 serving
- Calories: 450
- Sugar: 5
- Sodium: 950
- Fat: 20
- Saturated Fat: 7
- Unsaturated Fat: 13
- Trans Fat: 0
- Carbohydrates: 55
- Fiber: 3
- Protein: 18
- Cholesterol: 250