
Oh, listen, when the air gets crisp and the lights start twinkling, nothing—and I mean *nothing*—beats a glass of truly spectacular **homemade eggnog**. Forget those thin, overly sweet cartons from the grocery store aisle! When I first started Cooking Zenith, my whole goal was to take those deeply comforting, traditional holiday flavors and make them incredibly simple for you. This *homemade eggnog* recipe is my absolute favorite example of that promise. It’s the **best homemade eggnog** you’ll ever try because it delivers that rich, vacation-in-a-cup texture without needing a professional pastry chef’s degree. Trust me, after you nail this technique, you’ll be a holiday legend. You can peek more about my own kitchen philosophy over at the about page too, but right now, let’s get stirring!
- Why This Is the Best Homemade Eggnog Recipe
- Gathering Ingredients for Your Homemade Eggnog
- Step-by-Step Instructions for Easy Eggnog from Scratch
- Making Your Homemade Eggnog Spiked or Non-Alcoholic
- Chilling and Serving Your Homemade Eggnog
- Tips for Perfect Spiced Eggnog Recipe Results
- Storage and Reheating Instructions for Homemade Eggnog
- Frequently Asked Questions About Homemade Eggnog
- Estimated Nutrition for This Creamy Holiday Drink
- Estimated Nutrition for This Creamy Holiday Drink
Why This Is the Best Homemade Eggnog Recipe
I know everyone calls their recipe the best, but I truly stand behind this one for your holiday gatherings. It just tastes like Christmas in a glass! What makes this the Best Homemade Eggnog? It boils down to texture and simplicity. We get that incredible feel without needing hours of fuss.
- The texture is truly Thick and Rich Eggnog—it coats a spoon beautifully.
- We use real, high-quality dairy, which makes a huge difference in flavor.
- You can easily adjust the spirits, or skip them entirely!
- It’s so much easier than the decades-old methods that require constant stirring over high heat.
Achieving That Thick and Rich Eggnog Texture
The secret to that velvety smooth texture isn’t magic; it’s science, but don’t let that scare you! We temper our egg yolks very slowly into the warm milk. This gentle approach cooks the yolks just enough to create a proper custard base—that’s what locks in the richness and gives you that wonderful Thick and Rich Eggnog consistency. If you follow the slow-pour rule, you’ll never end up with scrambled eggs, I promise!
Gathering Ingredients for Your Homemade Eggnog
Okay, let’s talk about what you need for this amazing homemade eggnog. Honestly, this recipe is fantastic because it sticks to the ‘Elevate Your Everyday Cooking’ philosophy—we’re using simple stuff you probably already have, but we’re treating it right! This batch is perfect for about six of us gathered around the fireplace, but you can totally double it if you have a big party coming up. When you use real ingredients, you just skip straight to the spectacular flavor zone!
Here’s what you need to pull together this classic.
Ingredient Notes and Substitution Options
Because we want this to be the *Best Homemade Eggnog*, a few ingredients deserve a little extra attention. Don’t panic about the list; it’s really straightforward once you break it down!
- Egg Yolks: You absolutely need six large yolks here. Don’t worry about the whites for this specific recipe; they’re not doing us any favors in terms of texture when we want that *Thick and Rich Eggnog*.
- Sweetener Swap: I love maple syrup—it adds such a complex, almost caramel note! But if you run out, you can definitely use 3/4 cup of dark brown sugar instead. Just make sure it’s packed well.
- Spirits Talk: The recipe calls for a cup, which is optional, of course! Bourbon tends to give a wonderfully warm, vanilla flavor that pairs beautifully with nutmeg. Rum is classic, leaning sweeter. Brandy is sophisticated. You pick what feels right for your crowd that year.
- Making It Kid-Friendly: If you want a strictly Non Alcoholic Eggnog, just ditch the spirits entirely! You can compensate slightly by stirring in a tiny splash of almond extract or a half teaspoon more vanilla when you add the other extracts. It keeps those amazing spices front and center.
Step-by-Step Instructions for Easy Eggnog from Scratch
Alright, this is where the magic happens! Don’t let the word ‘custard’ spook you; this process is surprisingly fast. If you manage your time well, you can get the prep done in about 15 minutes and the cooking takes maybe 10 minutes. Seeing how simple this whole **Easy Eggnog from Scratch** process is makes me realize why I ditched store-bought years ago. We’re making a Creamy Holiday Drink the right way.
First things first: grab your yolks, sugar, maple syrup, and salt. Whisk them hard in a bowl until they lighten up and get nice and thick. It should look pale yellow—almost creamy itself!
Tempering the Eggs: A Crucial Step for Homemade Eggnog
This is the most important part, so pay close attention! If you just dump the hot milk into the yolks, you’ll end up with sweet scrambled eggs, and trust me, that’s not the vibe we’re going for. Tempering means we gently raise the temperature of those cold egg yolks so they don’t seize up when they hit the heat.
Here’s how I do it every time: Get your saucepan with the milk and cream warmed up until steam is rising, but *not* boiling. Now, grab a ladle and while whisking the egg mixture like crazy—non-stop whisking is the key here—pour in just a tiny stream of that hot milk. Maybe a half cup at first. Keep whisking! Once you’ve added about a cup of the hot liquid, your yolks should feel warm to the touch. Now they are ready to join the rest!
Cooking the Custard Base for a Velvety Smooth Holiday Drink
Pour that warmed-up egg mixture back into the saucepan with the remainder of your milk. Put it back on low heat. We are cooking this low and slow, folks! Don’t walk away! You must stir constantly with a good wooden spoon or a sturdy spatula. You’re waiting for that thickening signal.
The goal is to reach 170°F if you have a thermometer, which is perfect, quick safety assurance. If you don’t have one, here’s my favorite visual cue for that **Velvety Smooth Holiday Drink** texture: Dip the back of your spoon into the mixture, run your finger across the back of the spoon, and if the line holds without the liquids running back together, it’s done! If you let this boil even for a second, the custard breaks, and we aren’t going to let that happen! Take it right off the heat the second it coats the spoon nicely.
Once it’s off the heat, stir in your vanilla, cinnamon, and nutmeg right away. That residual heat will toast the spices perfectly!
Making Your Homemade Eggnog Spiked or Non-Alcoholic
This is the part where we decide if this batch stays family-friendly or gets a little grown-up kick! Since we cooked our base mixture until it was thick and safe, we wait until *after* we take it off the stove to add any spirits. This helps prevent the alcohol from interfering with the custard’s setting process, which is key for perfect **homemade eggnog**.
If you’re making the *Bourbon Eggnog*, pour in your cup of bourbon (or rum, or brandy—whatever you fancy!). Remember, you can always add more later, but taking it out is impossible once it’s in there! Mix that in well, and the warmth from the recently heated custard really wakes up those deep spice notes.
Now, if you are preparing this as a **Non Alcoholic Eggnog** for kids or for work parties, this is the spot to skip the spirits! If you do skip them, I highly recommend adding just a little extra splash of high-quality vanilla extract—maybe another half teaspoon. That little bit of extra depth helps fill out the flavor gap left by the missing booze. You want that full-bodied taste, whether it’s spiked or not! After this step, it’s all about chilling down and waiting impatiently!
Chilling and Serving Your Homemade Eggnog
Okay, now that we’ve whisked and cooked, we have to be patient. I know, I know, the smell alone is intoxicating, but you absolutely cannot rush this step! This is the difference between a warm, slightly thin liquid and that **Traditional Eggnog** that feels luxurious and heavy in your mug. We need time for everything to settle down and really meld together.
You need to get this mixture into an airtight container—a large pitcher works perfectly—and slide it straight into the back of the fridge. I’m telling you right now, you must chill this for a minimum of four hours. Seriously, four hours! If you can manage it, leaving it overnight is even better. Overnight chilling lets the spices really bloom into the dairy fat and thickens the whole thing up naturally, making it that gorgeous, **Velvety Smooth Holiday Drink** we talked about.
When you finally bring it out, it might look a touch separated or just really thick where the whisking didn’t quite get even. Don’t fret! Here’s my favorite little trick to make it look like it came right out of a fancy holiday advertisement: Dump it all into your blender!
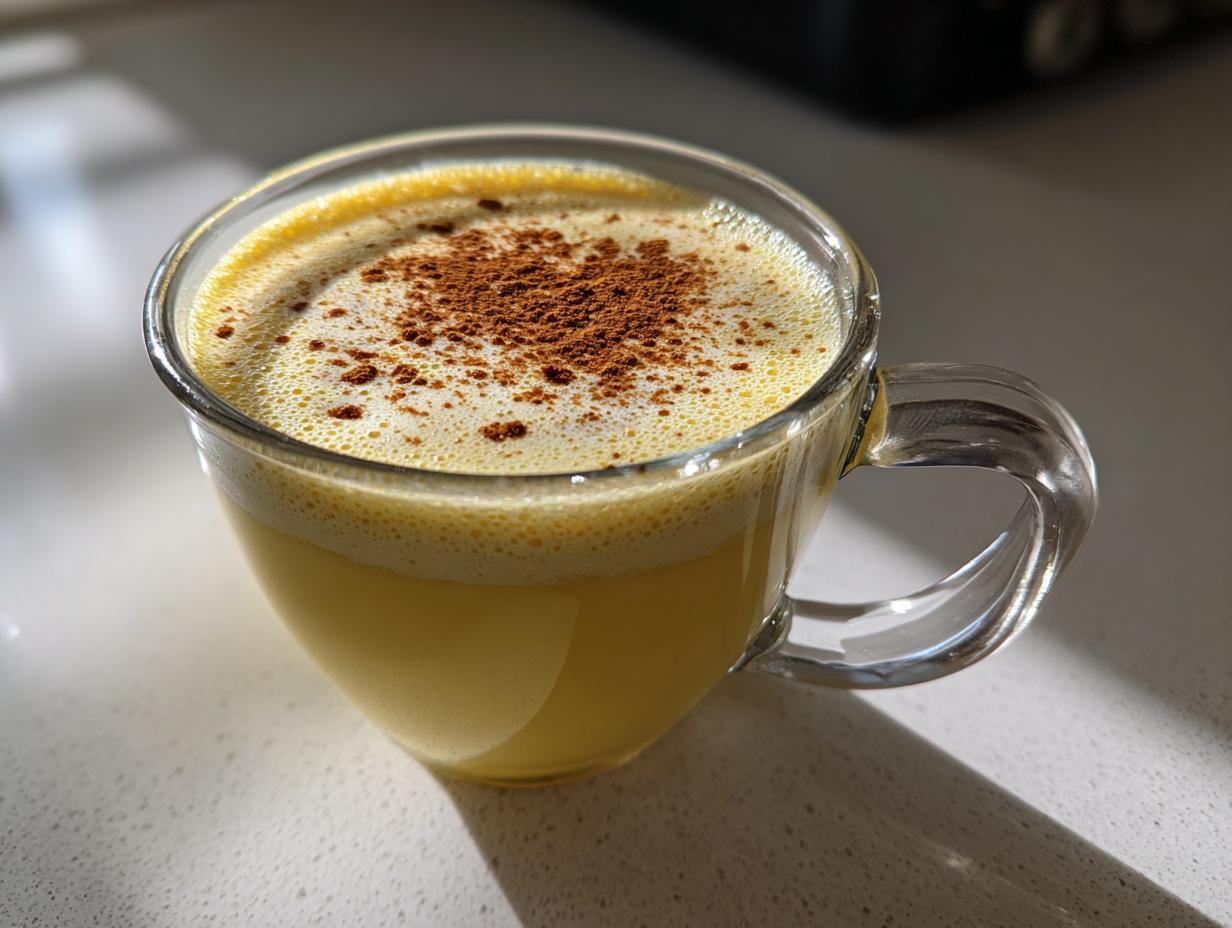
Give it a quick ten-second blitz—just enough to re-emulsify everything and make it perfectly smooth again. This little blend right before serving is the final secret weapon for the Best Homemade Eggnog. Pour it into nice little glasses, dust generously with fresh, freshly grated nutmeg—and stand back to accept the praise. You made this! Isn’t that the best feeling?
Tips for Perfect Spiced Eggnog Recipe Results
Even though this **Spiced Eggnog Recipe** is easy, a couple of little habits can take it from great to absolutely legendary. My biggest piece of advice, which I learned the hard way trying to rush things before Christmas parties, is about your spices. Don’t reach for that dusty old jar of ground nutmeg sitting in the back of your cupboard!
Freshly grated nutmeg is non-negotiable here, folks. It has such a brighter, warmer, and sharper flavor that just pops against the creamy dairy. A little microplane grater is your new best friend; grate that nutmeg right over the mixture and over the top of your served glasses. It makes the whole kitchen smell like magic!
Also, remember the chilling time is part of the recipe, not an optional break. Don’t skimp! If you’re stocking up for guests like I often do before the holidays kick off, store it in the coldest part of your fridge. For more great traditional ideas, check out some methods over at this classic compilation. A happy eggnog is a well-chilled eggnog!
Storage and Reheating Instructions for Homemade Eggnog
Okay, now that you’ve made this incredible homemade eggnog, we need to talk about keeping it safe and delicious! Since this is made with farm-fresh dairy and real egg yolks, we treat it with respect. We aren’t messing around with those preservatives they use in the store-bought stuff.
The most important rule here is airtight containers. Seriously, use the best sealable pitcher or mason jars you have. Air is the enemy of freshness, and we want this to taste like holiday magic for as long as possible. If you made a big batch of this *Thick and Rich Eggnog*, it should last beautifully in the back of the fridge for about five to seven days.
If you added alcohol, that actually acts as a natural preservative, so you might get closer to the seven-day mark safely, but I usually try to get it finished before then because, well, it disappears too fast!
Can I freeze homemade eggnog?
You know, I get asked this a lot, especially around New Year’s when we’re trying to stretch the holiday vibes. And here’s the honest answer: I really don’t recommend it. Freezing messes with the beautiful emulsion we worked so hard to create when we tempered those eggs. When eggnog thaws, it often separates badly, becoming grainy or watery, and that perfect creamy texture is gone. If you absolutely must save it, transferring it to an ice cube tray *before* adding any alcohol speeds up freezing and thawing, but be prepared to blend it aggressively later.
If I need to serve it warm, what’s the best way?
Look, traditionally, eggnog is served ice-cold. It’s a *Creamy Holiday Drink*, and that chill really emphasizes the nutmeg and the spice notes! But I get it—sometimes you’re hosting on a chilly evening and guests just want warmth, or maybe you added too much ice to something that didn’t chill quite long enough.
If you absolutely must warm it up, treat it like you are making crème anglaise all over again. Put the required serving amount into a small saucepan. Keep the heat on the absolute lowest setting possible—we’re talking “barely there.” You need to stir it constantly, and I mean constantly, until it’s just warm to the touch. If it gets hot enough to simmer or boil, you’ll curdle the eggs, and you’ve basically just made egg drop soup with spices, which is… not good. Warm it gently, serve it immediately, topped with fresh nutmeg, and enjoy that Winter Warmer Drink vibe!
Frequently Asked Questions About Homemade Eggnog
I always get flooding emails and messages right before the holidays with questions, which tells me you all are serious about making the *Best Homemade Eggnog*! It’s great that you’re thinking through the details before you start mixing. Here are the things I hear most often about achieving that perfect **Spiced Eggnog Recipe** at home.
Is it safe to make homemade eggnog without cooking the eggs?
Oh, absolutely not! Please, please don’t try to make *homemade eggnog* without cooking the custard base. Cooking is the secret to making this a safe, truly Creamy Holiday Drink. Remember how we cooked that mixture until it coated the back of our spoon, aiming for 170°F? That heating process, even though it’s gentle, is what pasteurizes the egg yolks enough to eliminate any concerns about salmonella. If you try skipping that step, you’re taking a big risk with your guests. Cooking is non-negotiable for a truly safe, well-textured **Traditional Eggnog**!
Can I make this *Bourbon Eggnog* recipe ahead of time?
Yes! In fact, I encourage you to make this recipe a full day ahead! Chilling overnight is what transforms this from “great **Easy Eggnog from Scratch**” into the most luxurious, Velvety Smooth Holiday Drink you’ve ever had. The spices, the cream, and the alcohol marry together overnight beautifully.
Here’s the slight catch: If you are making a very large batch and know you might not drink it all within four days, you can chill the *base* mixture (milk, cream, yolks, spices, sweetener) for up to 24 hours *before* adding the spirits. Mix in your bourbon, rum, or brandy the morning you plan to serve it. This way, the alcohol flavor stays bright right up until serving time. If you mix it all in the night before, it’s still fantastic, but it’s just something to keep in mind for maximum fresh flavor!
What if I don’t have whole milk? Can I use 2% or skim?
I would strongly suggest against it if you truly want that famously **Thick and Rich Eggnog** texture! The high fat content in the whole milk and heavy cream is crucial for that mouthfeel. If you use lower fat milk, your eggnog will end up thin and watery, no matter how well you cook the custard. If you must substitute the whole milk, try using half-and-half instead—it won’t be quite as rich, but it’s much closer than using skim milk, which just won’t work for the texture we want!
How can I make this *Non Alcoholic Eggnog* taste deep even without the spirits?
That’s a great question for planning bigger family events! The spirits add complexity, not just buzz. If you are leaving out the alcohol, I recommend boosting the spice profile just slightly. When you add the cinnamon and nutmeg off the heat, add just a tiny pinch more of both. Also, use a full teaspoon of high-quality vanilla extract, or try adding a quarter teaspoon of almond extract. Almond extract brings a subtle background note that tricks your brain into thinking there’s something deeper happening in the flavor profile. It’s a fantastic trick for a wonderful **Non Alcoholic Eggnog**!
If you try this recipe and have any other burning questions about technique or substitutions, please feel free to reach out to me directly through the contact page! I love hearing how your holiday baking goes.
Estimated Nutrition for This Creamy Holiday Drink
If you are tracking calories or sugar, I wanted to give you a general idea of what you are digging into with this deliciously rich **Creamy Holiday Drink**. Keep in mind that because we use maple syrup, high-fat dairy, and a full cup of spirits in the base recipe, it is definitely an indulgent treat—but totally worth it for the holidays!
Please remember these are estimates based on the recipe as written, especially including the spirits. If you make a Non Alcoholic Eggnog, your calories and carbs will shift slightly downward, mostly due to the alcohol content being eliminated.
- Serving Size: 1 cup
- Calories: 450
- Sugar: 35g
- Fat: 30g (mostly saturated fat from the cream/milk)
- Protein: 10g
This is definitely a rich seasonal pour, so enjoy it responsibly after you finish wrapping those presents!
Estimated Nutrition for This Creamy Holiday Drink
If you are tracking calories or sugar, I wanted to give you a general idea of what you are digging into with this deliciously rich **Creamy Holiday Drink**. Please remember these are estimates based on the recipe as written, especially including the spirits. If you make a **Non Alcoholic Eggnog**, your calories and carbs will shift slightly downward, mostly due to the alcohol content being eliminated. This is a decadent treat for your holiday gatherings!
- Serving Size: 1 cup
- Calories: 450
- Sugar: 35g
- Fat: 30g (mostly saturated fat from the cream/milk)
- Protein: 10g
This is definitely a rich seasonal pour, so enjoy it responsibly after you finish wrapping those presents!
PrintCreamy Homemade Eggnog Recipe

Make rich, thick, and creamy homemade eggnog from scratch. This easy recipe uses simple ingredients and warm spices, perfect for holiday gatherings. You can serve it spiked with bourbon or non-alcoholic.
- Prep Time: 15 min
- Cook Time: 10 min
- Total Time: 4 hr 25 min
- Yield: 6 servings 1x
- Category: Dessert Drink
- Method: Stovetop Cooking
- Cuisine: American
- Diet: Vegetarian
Ingredients
- 6 large egg yolks
- 3/4 cup granulated sugar
- 1/4 cup maple syrup
- 1/4 teaspoon salt
- 1 quart whole milk
- 1 pint heavy cream
- 1 teaspoon vanilla extract
- 1/2 teaspoon ground nutmeg, plus more for garnish
- 1/4 teaspoon ground cinnamon
- 1 cup bourbon, rum, or brandy (optional)
Instructions
- In a medium bowl, whisk the egg yolks, sugar, maple syrup, and salt until the mixture is pale yellow and thick.
- In a large saucepan, combine the whole milk and heavy cream. Heat over medium heat until steam rises and small bubbles form around the edges. Do not boil.
- Slowly pour about one cup of the hot milk mixture into the egg yolk mixture while whisking constantly to temper the eggs.
- Pour the tempered egg mixture back into the saucepan with the remaining milk mixture.
- Cook over low heat, stirring constantly with a wooden spoon or heatproof spatula, until the mixture thickens enough to coat the back of the spoon (about 170°F). Do not let it boil.
- Remove the saucepan from the heat. Stir in the vanilla extract, nutmeg, and cinnamon.
- If using alcohol, stir in the bourbon, rum, or brandy now.
- Pour the eggnog into a pitcher or airtight container. Chill in the refrigerator for at least 4 hours, or until completely cold and thickened.
- Serve cold, garnished with a sprinkle of fresh nutmeg.
Notes
- For a non-alcoholic version, omit the spirits entirely.
- If you prefer a thicker texture, chill the eggnog overnight.
- You can use a blender to mix the final chilled eggnog for extra smoothness before serving.
Nutrition
- Serving Size: 1 cup
- Calories: 450
- Sugar: 35g
- Sodium: 80mg
- Fat: 30g
- Saturated Fat: 18g
- Unsaturated Fat: 12g
- Trans Fat: 1g
- Carbohydrates: 38g
- Fiber: 0g
- Protein: 10g
- Cholesterol: 250mg