
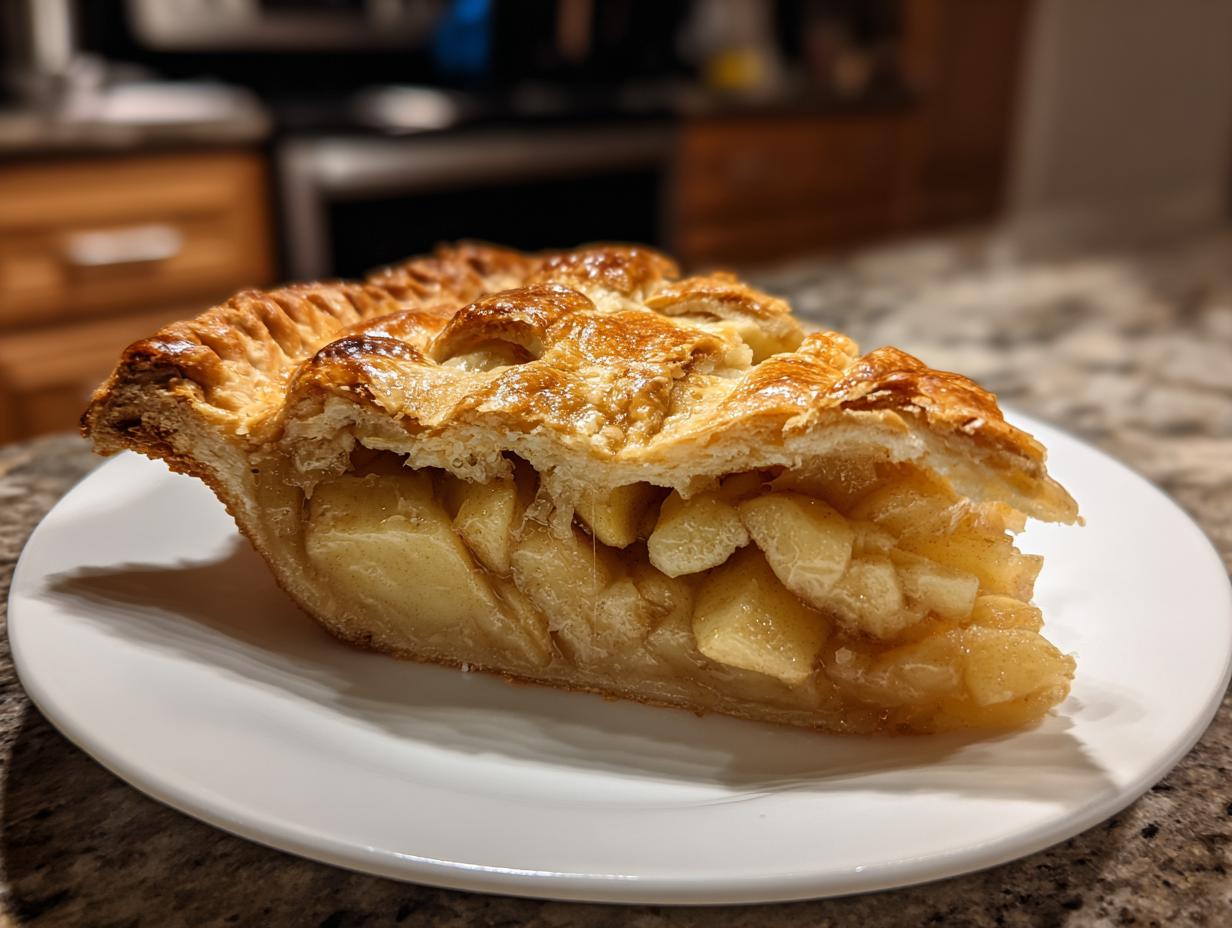
There’s just something about that first slice of pie cooling on the counter. That aroma—sweet apples mingling with warm cinnamon—it just pulls everyone into the kitchen, doesn’t it? For years, I struggled with apple pie. The crust was tough, or worse, the filling turned into sweet soup after baking. It felt like a culinary mountain I couldn’t climb. But trust me when I say that problem is solved! This **homemade apple pie** recipe is the one that finally made me confident. We cracked the code on that perfectly flaky, buttery crust and the sweet-tart filling that stays tender, never mushy. It took me weeks testing different techniques, but I finally perfected this classic apple pie recipe, and now I’m sharing my secret with you.
- Why This Homemade Apple Pie Recipe Guarantees Success (E-E-A-T)
- Ingredients for the Ultimate Homemade Apple Pie
- How to Make the Flaky Pie Crust for Your Homemade Apple Pie
- Assembling the Double Crust Homemade Apple Pie
- Baking Instructions for the Perfect Homemade Apple Pie
- The Critical Cooling Period for Your Homemade Apple Pie
- Tips for a Better Homemade Apple Pie Experience
- Storing and Serving Your Classic Apple Pie Recipe
- Frequently Asked Questions About Homemade Apple Pie
Why This Homemade Apple Pie Recipe Guarantees Success (E-E-A-T)
When I finally nailed this **homemade apple pie**, it was because I stopped treating the ingredients like suggestions and started treating them like rules—the good kind of rules, though! This recipe works because it addresses the three main failures everyone runs into: a soggy bottom, a tough crust, or a runny filling. We use flour both in the crust *and* lightly in the filling mixed with the sugars, which is crucial for setting up that perfect sauce consistency. If you ever look at my other fall baking recipes, like my famous apple crumb cake, you’ll see I take moisture control seriously!
The crust, as you’ll see later, demands that the butter stay icy cold. Those little frozen pockets of butter create steam during baking, which equals flaky layers—it’s science, but it feels like magic! Mastering these small, targeted steps is what separates a decent pie from the best apple pie from scratch you’ll ever make.
The Secret to the Best Apples for Pie
We absolutely must use a blend of apples here. If you only use Granny Smith, it can be too tart and break down too quickly. If you use only sweet apples, you lose that necessary structural integrity. My go-to combo for the ultimate apple dessert is Granny Smith for the necessary tartness and Honeycrisp for that perfect sweet crunch.
Listen, the thickness matters! You need to slice them uniformly at about 1/4-inch thick. If they are too skinny, they turn to mush; too thick, and they stay hard in the center. Keep them uniform, toss them with the spices, and let them sit while you deal with the dough. It builds flavor and moisture balance right from the start.
Ingredients for the Ultimate Homemade Apple Pie
I know you’re eager to get baking, but pause right here! Before we make any magic happen—especially with that buttery pie crust recipe—we need our players lined up. Gathering everything first is part of making this an easy homemade pie. You might notice I’m very specific about the state of a few ingredients, especially anything going into the dough. That’s because cold ingredients = flaky results! This isn’t just a grocery list; it’s a game plan for your classic apple pie recipe success.
For the Flaky Pie Crust
For the absolute flakiest crust you’ve ever seen, you need to treat these ingredients gently. Remember, if the butter melts before it hits the oven, you’ve lost the flaky layers. No arguments!
- 2 1/2 cups all-purpose flour
- 1 teaspoon salt
- 1 cup (2 sticks) unsalted butter, very cold and cut into small cubes
- 1/2 cup ice water, plus more if needed
For the Cinnamon Apple Filling
This mix is where the classic apple pie flavor really bursts through—that perfect balance of sweet and spice that makes it a quintessential comfort food baking item. The flour here works overtime to thicken the juices naturally released by the fruit.
- 6 large Granny Smith apples, peeled, cored, and sliced 1/4-inch thick
- 2 large Honeycrisp apples, peeled, cored, and sliced 1/4-inch thick
- 3/4 cup granulated sugar (you can tweak this slightly if your apples are unusually sweet!)
- 1/4 cup packed light brown sugar
- 1/4 cup all-purpose flour (this is our secret weapon against runniness!)
- 1 teaspoon ground cinnamon
- 1/4 teaspoon ground nutmeg
- 1/8 teaspoon ground allspice
- 1 tablespoon lemon juice
- 1 tablespoon unsalted butter, cut into small pieces (for dotting the top)
And don’t forget the final touches that make the top pretty! You’ll need 1 large egg beaten with 1 teaspoon water for the egg wash, and coarse sugar if you like that satisfying crunch on top.
How to Make the Flaky Pie Crust for Your Homemade Apple Pie
Okay, let’s get to the real core of why this is the best **homemade apple pie**—the crust! This is where so many people get discouraged, but I promise you, if you follow this simple flour-and-butter wrestling match, you will have success. Remember all those very cold ingredients we gathered? Now is the time they earn their keep. Toss your flour and salt into a big bowl. Then, introduce those tiny cubes of butter. Your mission here is to work that butter into the flour. You can use a pastry blender if you have one, or honestly, just use your fingertips. I prefer my hands because I can feel when it’s ready!
You are looking for coarse crumbs that still have visible, pea-sized chunks of butter. Those chunks are everything! They are the steam bombs waiting to happen in the oven that create those beautiful, flaky layers. Now, slowly drizzle in the ice water, tablespoon by tablespoon. Stop mixing the second the dough just begins to hold together. Seriously, stop! Overmixing is the enemy of flaky pastry—it develops gluten and turns your crust tough. If you ever struggle with texture on other baked goods, remember this rule; it applies everywhere, even in my recipes! Once you can press a piece together and it holds its shape, divide it in half, form two flat disks, wrap them tight, and let them chill in the fridge for at least an hour. This dough needs a long rest before we can roll it out for our homemade apple pie.
Assembling the Double Crust Homemade Apple Pie
The dough is chilled, the apples are spiced—now we build this beautiful **homemade apple pie**! Pull one chilled disk out and give it a very gentle roll on a clean, lightly floured surface until you have a circle about 12 inches across. Don’t panic about perfection here; edges can always be tucked. Carefully drape that dough over your 9-inch pie plate. I like to leave about an inch of overhang for now; we’ll trim and seal later. Now, spoon in all those glossy, spiced apples. Make sure the pile is even, and then take that final tablespoon of cold butter, cut it into tiny pieces, and dot those pieces right over the apple mound. This little bit of extra fat melts beautifully and adds richness right where you need it. I love making this pie so much, it reminds me how fun it is to play with pastry, just like when I create my strawberry rhubarb pie recipe!
Take your second dough disk and roll that out too. Lay it right over the top of the filling. You need to seal the deal! Trim the top crust overhang so it matches the bottom overhang, then pinch the edges together, folding them inward and crimping them however you like—I usually just press down really firmly with my index finger and thumb all the way around. This seal keeps all those heavenly juices inside where they belong! Finally, grab a sharp knife and cut a few slits right in the center of the top crust. These are vent holes; the steam needs to escape, or your **double crust apple pie** might just try to rocket off your counter!

Egg Wash and Finishing Touches
Don’t skip this part if you want that gorgeous bakery sheen! In a tiny dish, whisk up one egg with just a teaspoon of water—that’s your egg wash. Brush this lightly but thoroughly over the entire top crust. This is what gives it that deep, beautiful golden color while baking. If you’re feeling extra festive, sprinkle some coarse sugar over the top before it goes into the oven. That sugar melts and hardens into tiny, crispy jewels. It elevates the whole look of your **classic apple pie recipe** instantly, making it truly irresistible!
Baking Instructions for the Perfect Homemade Apple Pie
Alright, the assembly is done, and now we wait for the magic! To get that perfect lift and that gorgeous golden color on your homemade apple pie, we start hot and then turn it down—this is my go-to trick for most of my baking recipes. Preheat your oven to a roaring 425°F (220°C) and pop that pie onto a baking sheet first. That sheet is crucial; it catches any drips so you don’t burn your oven! Bake it hard for just 15 minutes at that high heat. This initial blast sets the crust structure quickly, which is vital for a flakey crust!
After those 15 minutes, immediately drop the temperature down to 375°F (190°C) for another 40 to 50 minutes. You’re looking for the crust to turn deep golden, but the real giveaway that you know how to make apple pie successfully is the filling: it needs to be bubbling thick through those vents you cut. If those pretty edges of your crust look like they are getting dark too fast—and they often do—just take some strips of aluminum foil and gently wrap them around the edges. This shields the crust while the center finishes cooking. Don’t pull it out until you see that thick bubble! This baking method is key to getting that beautiful look you see in every great classic apple pie recipe online.
The Critical Cooling Period for Your Homemade Apple Pie
Okay, I know this part is torture. You pull that perfect, steaming, golden dome out of the oven, and your stomach is rumbling. But hold the phone! This step is non-negotiable if you want that amazing, set apple pie filling. You absolutely must let your pie cool on a wire rack for at least three to four hours. If you try to slice it hot, all that thick, beautiful liquid inside will immediately run out all over your plate. This downtime is essential for the flour thickener to finish its job and for the apples to settle down. Trust me, waiting pays off big! I promise that slice tastes so much better when it actually holds its shape.
Tips for a Better Homemade Apple Pie Experience
We’ve covered the major steps for getting that perfect structure, but let’s talk about the little things—the things that take your creation from good to the definitive best apple pie from scratch! The number one thing I stress in all my baking, whether it’s this pie or my coffee cake, is temperature control. If your butter or water gets warm while making the crust, you are heading for a tough texture instead of that beautiful flaky crust you want. Keep it cold!
Also, let’s re-emphasize the apples. You need that blend of tart and sweet—Granny Smith and Honeycrisp are your best friends for a flavorful homemade apple pie filling. If you’ve followed this far, you’ve mastered the tricky bits, and this pie is going to be phenomenal. You can see friends who have tackled this recipe rave about the results over on The Food Charlatan‘s corner, too!
Making the Homemade Apple Pie with Crumble Topping Variation
I absolutely adore the traditional double crust apple pie look, but sometimes you just want that crunchy texture all over! If you’re craving an apple pie with crumble topping, it’s the easiest swap ever. Skip rolling out that second disk of dough entirely. Instead, make a simple streusel topping—usually just flour, brown sugar, butter, and an extra sprinkle of cinnamon whisked together until crumbly.
Spread that crumble mixture evenly over your apple filling before baking—you don’t need the egg wash for the topping, just a light sprinkle of sugar if you wish. It gives you a completely different, but equally delicious, texture experience!
Storing and Serving Your Classic Apple Pie Recipe
Now that you’ve successfully navigated the bake and the mandatory cool-down, let’s talk about how to enjoy every last bit of this masterpiece. Honestly, this classic apple pie recipe is so good it rarely lasts long enough to worry about storage, but when it does, keep it simple!
Because our filling sets up so perfectly, you can safely keep the pie covered on the counter at room temperature for a full day. After that, moving it to the fridge is smart, just cover the top loosely so the crust doesn’t get totally soggy. When you reheat a slice—and you absolutely should reheat it—a quick 15 minutes in a low oven (around 300°F) brings that crust right back to life.
For the ultimate moment, you have to serve this with a scoop of high-quality vanilla ice cream. Or maybe a dollop of whipped cream! If you wanted to get really fancy, you could even top it with a swirl of vanilla frosting, but plain ice cream lets the spiced apples really shine. It’s the perfect ending to any meal and truly seals the deal on an ultimate apple dessert.
Frequently Asked Questions About Homemade Apple Pie
I know sometimes even the most detailed recipe can leave you with one last little burning question, especially when you’re attempting something as nostalgic and important as the perfect homemade apple pie. That’s totally normal! I’ve rounded up the few things that friends always ask me after they try this recipe for the first time. Don’t worry, we’ll make sure your next attempt at this classic apple pie recipe is absolutely flawless.
Can I use pre-made pie dough for this homemade apple pie?
Oh, I totally get the appeal of saving time! Look, can you use store-bought dough? Absolutely, you can. This recipe is structured to be an easy homemade pie, but if you swap out the crust for something pre-made, I need to be honest with you: the results won’t be the same. Remember all that fuss we made about the cold butter and pea-sized crumbs for that flaky pie crust tutorial? That’s what creates those amazing shatteringly crisp layers. Store-bought dough is usually much more tender and less flaky. If you use it, yes, you’ll have pie fast, but you’ll miss that big, buttery crunch that makes this recipe so special. It’s a trade-off between speed and that ultimate homemade texture.
How do I stop my homemade apple pie filling from being runny?
This is the age-old pie baker’s nightmare, right? You slice into it, and all the filling just oozes out, making a glorious mess but totally ruining the slice! There are two big things that guarantee you avoid that runny disaster. First, you must use the specified amount of flour in your filling mixture—that 1/4 cup works like magic to absorb moisture as it heats up. Second, and this is the most important part, you absolutely cannot skip the mandatory 3-to-4-hour cooling time! That sitting time allows the baked juices to thicken into a lovely sauce consistency. If you cut it hot, it will be soup. Patience wins here, I promise!
What is the best way to achieve a golden brown double crust apple pie?
That gorgeous, deep golden shine on your double crust apple pie is all about the egg wash and managing those oven temperatures we talked about. Make sure you use the egg wash—one egg beaten with just a splash of water—and go for an even coating across the entire top crust. That protein browns beautifully. After that initial 15-minute blast at 425°F, when you drop the heat down to 375°F, that’s when it really starts to achieve that lovely, even color.
If the edges are browning too fast before the center is bubbling hot (which often happens first!), don’t be afraid to make a foil shield. Just cut out strips of foil and gently lay them over the crimped edges halfway through baking. This protects them while letting the middle of your homemade apple pie keep cooking until it’s done bubbling. I also have a simple guide on other kitchen hacks that might help you manage oven heat if you find your oven runs hot!
PrintThe Best Homemade Apple Pie with Easy Flaky Crust

Follow this classic homemade apple pie recipe to create a dessert with a perfectly flaky, buttery crust and a sweet-tart, cinnamon-spiced filling that avoids mushiness. This recipe is designed to give you confidence in making the ultimate comfort food from scratch.
- Prep Time: 45 min
- Cook Time: 65 min
- Total Time: 110 min
- Yield: 8 servings 1x
- Category: Dessert
- Method: Baking
- Cuisine: American
- Diet: Vegetarian
Ingredients
- 2 1/2 cups all-purpose flour
- 1 teaspoon salt
- 1 cup (2 sticks) unsalted butter, very cold and cut into small cubes
- 1/2 cup ice water, plus more if needed
- 6 large Granny Smith apples, peeled, cored, and sliced 1/4-inch thick
- 2 large Honeycrisp apples, peeled, cored, and sliced 1/4-inch thick
- 3/4 cup granulated sugar (adjust based on apple tartness)
- 1/4 cup packed light brown sugar
- 1/4 cup all-purpose flour (for thickening)
- 1 teaspoon ground cinnamon
- 1/4 teaspoon ground nutmeg
- 1/8 teaspoon ground allspice
- 1 tablespoon lemon juice
- 1 tablespoon unsalted butter, cut into small pieces (for dotting)
- 1 large egg, beaten with 1 teaspoon water (for egg wash)
- Coarse sugar for sprinkling (optional)
Instructions
- Prepare the Flaky Pie Crust: In a large bowl, whisk together 2 1/2 cups flour and 1 teaspoon salt. Cut in the cold butter using a pastry blender or your fingers until the mixture resembles coarse crumbs with some pea-sized pieces of butter remaining. Gradually add the ice water, one tablespoon at a time, mixing until the dough just comes together. Do not overmix. Divide the dough in half, form each half into a disk, wrap in plastic, and chill for at least 1 hour.
- Prepare the Apple Filling: In a very large bowl, combine the sliced Granny Smith and Honeycrisp apples. In a separate small bowl, mix the granulated sugar, brown sugar, 1/4 cup flour, cinnamon, nutmeg, and allspice. Sprinkle the sugar mixture and lemon juice over the apples and toss gently to coat evenly. Let the mixture sit while you roll out the bottom crust.
- Assemble the Pie: Preheat your oven to 425°F (220°C). On a lightly floured surface, roll out one disk of dough into a 12-inch circle. Carefully transfer the dough to a 9-inch pie plate. Trim the edges, leaving a 1-inch overhang. Pour the apple filling into the crust. Dot the top of the filling with the 1 tablespoon of small butter pieces.
- Top the Pie: Roll out the second disk of dough. Place it over the filling. Trim the top crust overhang to match the bottom. Crimp the edges to seal the top and bottom crusts together. Cut several slits in the top crust to allow steam to escape. Brush the top crust evenly with the egg wash and sprinkle with coarse sugar, if using.
- Bake the Pie: Place the pie on a baking sheet to catch any drips. Bake at 425°F (220°C) for 15 minutes. Reduce the oven temperature to 375°F (190°C) and continue baking for another 40 to 50 minutes, or until the crust is golden brown and the filling is bubbling thickly through the vents. If the edges brown too quickly, cover them loosely with foil.
- Cool Completely: Remove the homemade apple pie from the oven and place it on a wire rack. You must let the pie cool for at least 3 to 4 hours before slicing. This allows the filling to set properly, preventing a runny slice.
Notes
- For the flakiest crust, keep all ingredients, especially the butter and water, very cold.
- Use a mix of sweet and tart apples, like Granny Smith and Honeycrisp, for the best flavor balance in your cinnamon apple filling.
- If you prefer a different topping, you can substitute the top crust with a simple streusel or crumble topping.
Nutrition
- Serving Size: 1 slice
- Calories: 450
- Sugar: 35g
- Sodium: 250mg
- Fat: 25g
- Saturated Fat: 15g
- Unsaturated Fat: 10g
- Trans Fat: 0g
- Carbohydrates: 58g
- Fiber: 3g
- Protein: 5g
- Cholesterol: 60mg