
Is it even Game Day if you haven’t figured out what amazing, easy finger food you’re going to make? Seriously, feeding a crowd should be fun, not stressful! That’s why I absolutely couldn’t wait to show you my favorite way to tackle this problem: the **grinder sliders**. Forget those fussy, complicated appetizers; these are hands-down the easiest, flavor-packed Italian **grinder sliders** you will ever put together. They capture all that amazing flavor of a deli sub, but baked up hot and melty. Here at Cooking Zenith, Aria Thompson is all about making those classic, rich flavors work for the busy home cook, and these little sandwiches are proof that you can pull off something spectacular with minimal effort. That dedication to simplifying classics is why I love sharing recipes like this one. I hope you check out more of our philosophy over on the About Us page! Trust me, they disappear almost instantly!

- Why These Italian Grinder Sliders Recipe Are Crowd Pleaser Sandwiches
- Essential Ingredients for Perfect Grinder Sliders
- Step-by-Step Instructions for Easy Grinder Sliders
- Tips for Success When Making Grinder Sliders
- Storage and Reheating Instructions for Leftover Grinder Sliders
- Frequently Asked Questions About Italian Grinder Sliders Recipe
- Estimated Nutritional Information for Grinder Sliders
- Share Your Experience Making These Party Appetizer Sliders
Why These Italian Grinder Sliders Recipe Are Crowd Pleaser Sandwiches
If you’re looking for recipes that simplify your hosting duties, you’ve come to the right place. These **Party Appetizer Sliders** are pure genius because they deliver maximum flavor with minimum fuss. They quickly become the stars of any spread, which is why I call them true **Crowd Pleaser Sandwiches**.
- Zero individual assembly required—you bake the whole slab at once!
- They are delicious served hot right out of the oven.
- They reheats beautifully if they actually last that long.
Quick Assembly for Game Day Food Ideas
Honestly, the active prep time is almost nothing. You are just layering things! Since we use pre-sliced meats and cheese from the start, most of the work is done before it even hits the oven. That minimal hands-on time means you aren’t stuck in the kitchen while your guests are having fun. That’s the key to easy **Quick Dinner Sliders** too, when you need a fast family meal.
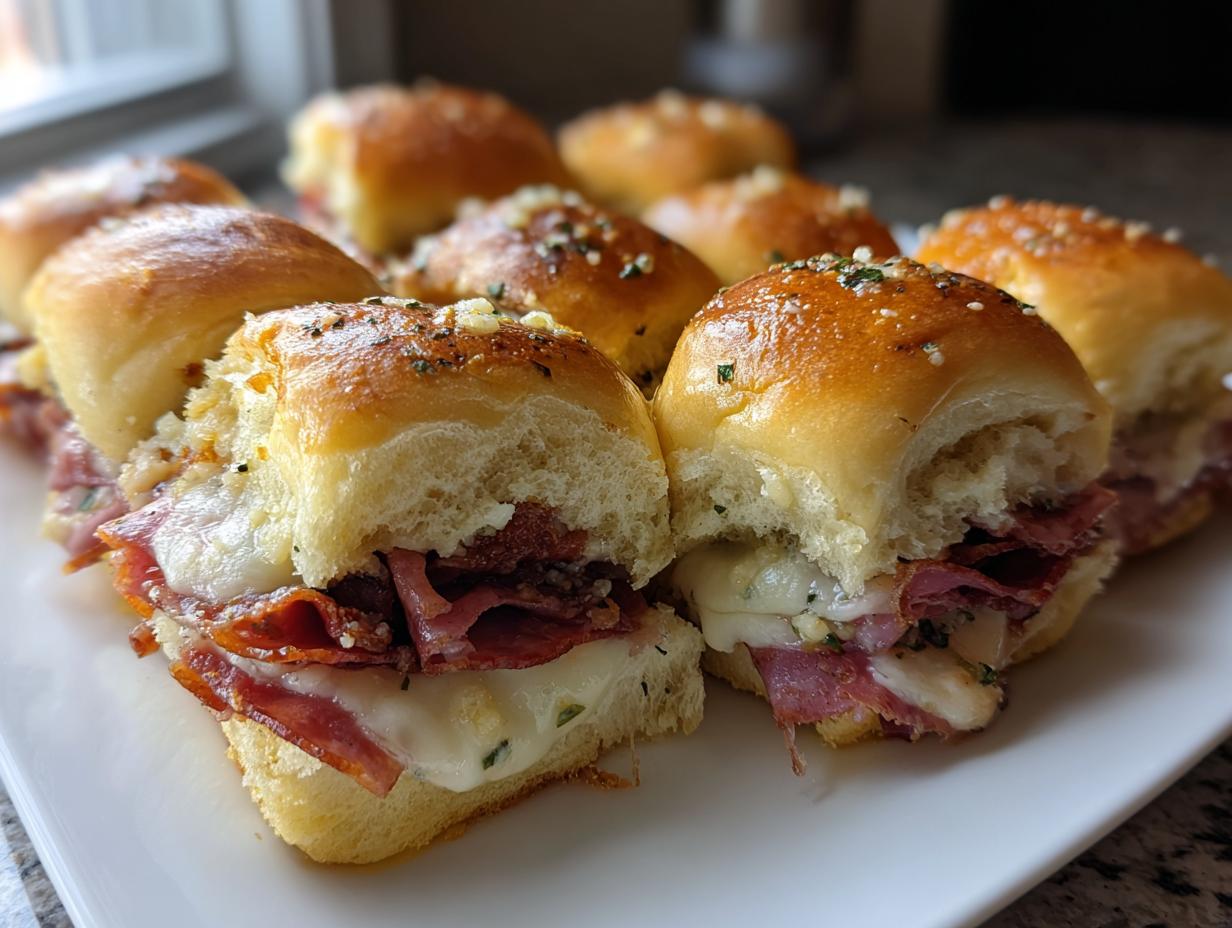
The Flavor Profile of Ultimate Grinder Sliders
What sets these apart from basic ham and cheese? It’s that savory punch! We layer salty, rich deli meats, then drown it all in melted, ooey-gooey provolone. But the real game-changer is that garlicky butter brushed on top—it transforms the whole bake. People always ask me how I get so much flavor into something so small. That mixture creates **The Ultimate Grinder Slider**, I promise you!
Essential Ingredients for Perfect Grinder Sliders
Okay, let’s talk about what goes into these amazing little sandwiches. I truly believe that when you rely on just a few core components, the quality of those components really shines through, you know? This recipe definitely leans into the classic, hot, baked style of **Baked Deli Meat Sliders**, which means we’re going straight for meltiness. The best part is, you don’t need any specialty store trips! Everything here is easy to grab on your regular grocery run. I always pick up my meats fresh from the deli counter; letting them slice it thinly makes all the difference in how well the sandwiches bake up.
The Bread and Cheese Base for Baked Deli Meat Sliders
First up, the buns! You absolutely need those soft, sweet slider rolls. I always use the 12-count packages—you know the ones, usually Hawaiian rolls—because their slight sweetness balances the saltiness of the Italian meats perfectly. Don’t skimp here; these rolls hold up really well to all that hot filling.
For the cheese, it has to be provolone. We are making **Provolone Cheese Sliders**, remember? You want good, fresh slices that melt beautifully without getting greasy. You’ll need a full pound of it because we are layering generously, making sure every single bite has that satisfying cheese pull we all look for!
Crafting the Savory Glazed Sliders Topping
This glaze topping is what gives our **grinder sliders** their signature punch. It’s so simple but adds that fantastic aromatic depth. You just melt down some butter—real butter, please!—and whisk in grated Parmesan cheese, garlic powder, dried Italian seasoning, and a pinch of salt. That mix gets brushed right over the top rolls before baking. It soaks right in while they bake, creating those glorious little golden brown, slightly crispy edges. It’s the secret, truly!
Optional Tangy Slaw Topped Sliders Components
Now, some people like their grinder sandwiches topped with a fresh crunch right after they come out of the oven. If you want that authentic, crisp texture, you’ll want to quickly mix up finely chopped onion and shredded iceberg lettuce. This gives you those fantastic **Tangy Slaw Topped Sliders**!
If you want to make it even more like a real, tangy slaw instead of just veggies, you can toss those fresh items with just two tablespoons of mayo and a teaspoon of red wine vinegar—just a tiny bit to wake up the flavor. Keep that mix separate until the absolute last second, though, or the rolls will get soggy!
Step-by-Step Instructions for Easy Grinder Sliders
Alright, let’s actually build these beauties! This is the simplest part of the whole process, but getting the layers right is key to making sure every single one of your **grinder sliders** is just as perfect as the next. I promise you, this whole thing comes together faster than ordering takeout. Because we’re baking this whole slab together, it truly feels like a giant, amazing **Sheet Pan Sandwich Recipe** that we just slice up later. Pay close attention to that two-stage baking; it makes a huge difference in the cheese melt versus the bun crispness!
Preparing the Rolls and Oven Setup
First things first, warm up that oven to 350 degrees Fahrenheit. You don’t want them cold! Grab your 9×13 inch baking dish and give it a good grease—I usually use a little cooking spray, just to be safe. Now for the most satisfying part: take your entire package of those sweet rolls and slice them horizontally all the way through, but try your best to keep them connected! Lay the bottom half snugly into your greased pan. See? Already halfway done!
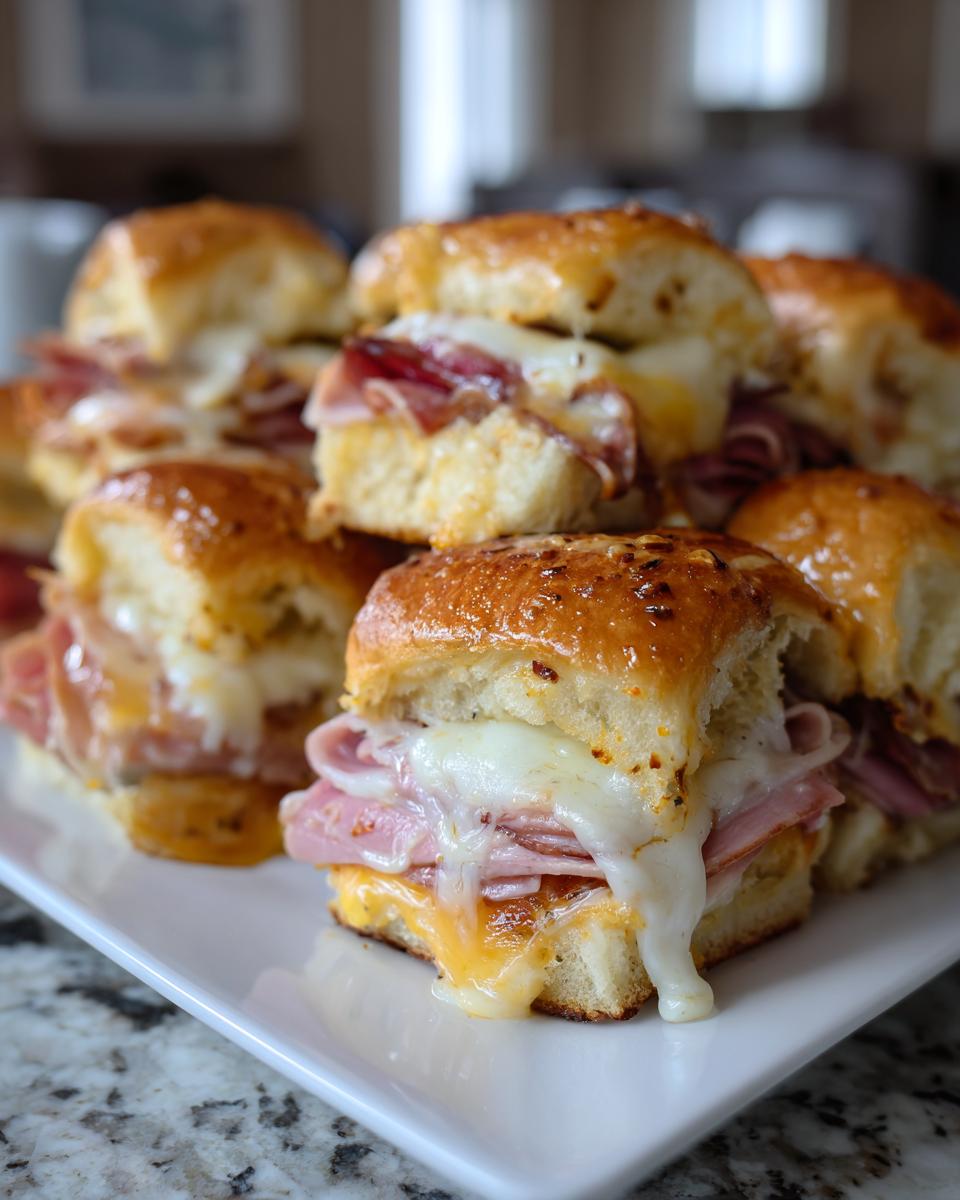
Layering the Meats and Provolone Cheese Sliders
This is where the Italian flavor really kicks in. Layer your meats evenly right over that bottom layer of bread. I always do ham first, then the salami, and finish with the pepperoni right in the middle. Make sure everything overlaps just a little bit so you don’t end up with any sad, meatless bites. After the meat mountain is built, spread that whole pound of provolone slices right over the top of everything. Cover that masterpiece with the top half of the buns and give the whole thing a gentle, encouraging press down with your hands.
Applying the Garlic Butter Glaze and Baking
Time to bring out the flavor bomb! Whisk up your melted butter, Parmesan, garlic powder, Italian seasoning, and salt until it’s all combined into that glorious glaze. Brush that mixture evenly over the tops of the rolls—get into the crevices! Then, cover the whole pan tightly with aluminum foil. Slide it into the oven and bake it for exactly 15 minutes. This steams things up nicely and melts the cheese. After 15 minutes, pull the foil off and bake for another 5 to 10 minutes until those tops are perfectly golden brown. Don’t skip the uncovered bake time!

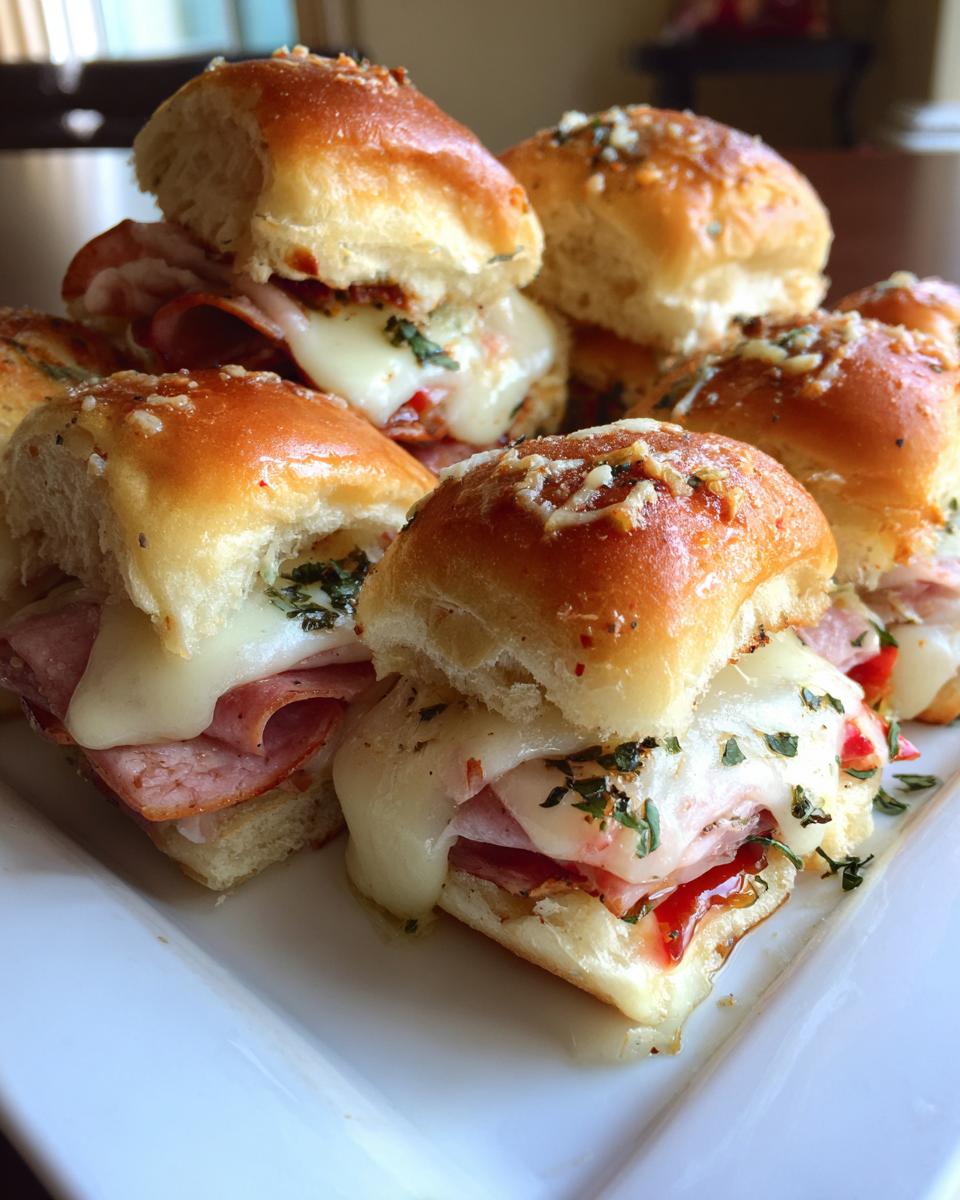
Resting and Serving Your Bite Sized Italian Subs
This step is HARD but vital: let the tray rest outside the oven for a full 5 minutes. This lets the cheese settle a little bit so it doesn’t all run out when you slice. Once resting, use a sharp knife to cut them into 12 individual **Bite Sized Italian Subs**. If you are using that optional fresh topping mix we talked about, scatter the lettuce and onion lightly on top of each individual slider right as you hand it to your guests. Serve them immediately while they are hot and gooey!
Tips for Success When Making Grinder Sliders
You’ve done all the layering and brushed on that killer glaze, but sometimes things just don’t brown up the way we want them to, right? Don’t worry, I’ve got a couple of little tricks I’ve learned over making a few hundred of these **grinder sliders** that will guarantee your next batch is perfect. We want that slight crispness on top, not just steamed bread!
Expert Tip for Achieving Golden Brown Tops on Grinder Sliders
If you pulled the foil off and your tops look a little pale after that final 5 to 10 minutes in the oven, don’t panic! This is where you can use your broiler, but you have to be babysitting it like crazy. Slide the rack up just a little higher, and watch it like a hawk. Seriously, that beautiful texture can go from golden to burnt in about 30 seconds. You just want a quick flash—maybe 45 seconds to a minute—just enough to get those edges perfectly toasted. That’s the trick to gorgeous **Hot Sandwich Sliders**!
Ingredient Notes and Substitutions for Mini Italian Subs
Look, I love this recipe locked down with ham, salami, and pepperoni, but you can feel free to mix up the deli meats if you want to make **Mini Italian Subs** that suit your taste. If you don’t have ham or you prefer turkey breast, go for it! You can swap the provolone for Swiss if you like something a little milder, though the provolone melts better for me.
And remember that tip for a little extra kick? If you happen to have some pepperoncini peppers, slice them up and tuck them right in there with the provolone. Adds a fantastic brine and heat that just makes these sandwiches sing. It really elevates them!
Storage and Reheating Instructions for Leftover Grinder Sliders
Okay, let’s be real for a second: these **grinder sliders** are truly at their absolute peak quality about five minutes after they come out of the oven when that cheese is still stretching and the buttery glaze is perfectly soaked in. They really aren’t meant to be leftovers, if you catch my drift! But hey, sometimes life happens, or maybe you intentionally made a double batch for lunch the next day. No judgment here!
If you do manage to have any left, wrap the remains tightly in aluminum foil or place them in a good, airtight storage container. Keeping the air out is key here. They usually last great in the fridge for about three days. I’ve definitely snuck one on day four and it was okay, but three days maximal freshness is my honest advice.
Reheating them is where you have to be careful so you don’t turn them into a soggy mess. The microwave is fastest, sure, and it works in a pinch—just zap it for 20 to 30 seconds until warm. But if you want them to revive that lovely toasted top texture we worked so hard to achieve, use the oven!
I take the leftovers, pop them onto either a small baking sheet or an oven-safe plate, and heat them at about 325 degrees for 8 to 10 minutes. That low heat warms everything through without steaming the bread too much. If the tops look really sad, sprinkle just a tiny squeeze of water over the tops right before putting them back in; it helps bring back a little steaminess without making them wet. They won’t be quite as perfect as fresh, but they are definitely still delicious for a **Quick Dinner Sliders** fix!
Frequently Asked Questions About Italian Grinder Sliders Recipe
I totally expected a few questions about these! When a recipe is this simple and this addictive, people always want to know the fine-tuning details to make sure they get that perfect party platter the first time out. I’ve gathered up the questions I get most often about these **Italian Grinder Sliders Recipe** crowd-pleasers.
Can I make these grinder sliders ahead of time?
Yes, you absolutely can do most of the work ahead, but here’s my big warning about making **grinder sliders**: don’t bake them until you’re almost ready to serve! You want to assemble the whole thing—bottom rolls, all the meats, all the cheese, and brush on that glorious garlic butter glaze—then just cover the whole tray tightly with plastic wrap and stick it in the fridge. When your guests arrive, pop it straight into the oven following the covered bake time. If you bake them and then store them, the steam gets trapped, and you end up with soggy bottoms, which is just sad!
What makes these different from regular baked ham and cheese sliders?
That’s a great question, and it comes down to the filing and the finish! Standard baked sliders often just stick with ham and maybe cheddar or Swiss. For these Italian versions, we specifically use those salty, punchy Italian meats—salami and pepperoni—which bring a totally different flavor. Plus, a true grinder sandwich has that slight tang, so by adding that optional fresh lettuce and onion mix, or even using the pepperoncini, we nail that signature flavor profile. They are definitely distinct from your basic **Melted Cheese Sliders**!
Are these suitable as a Quick Dinner Sliders option?
Oh, absolutely! I make these on busy Tuesday nights all the time when I need something fast but still satisfying. True to form for **Easy Slider Sandwiches**, the total time from starting the assembly to serving is usually under 45 minutes, which is faster than most frozen meals! Pair a couple of these beauties with a simple bagged Caesar salad or some salty potato chips, and you’ve got a winning **Quick Dinner Sliders** night without even breaking a sweat. They are hearty enough for dinner!
Estimated Nutritional Information for Grinder Sliders
Now, before we wrap up, I wanted to share the numbers, just in case you’re tracking things closely! I know that for some folks, these are a big party treat, and for others, they might be a surprisingly satisfying **Quick Dinner Sliders** option, so seeing the breakdown helps plan everything out. I pulled these estimates based on using the exact ingredients and amounts listed earlier in this recipe for these amazing **grinder sliders**.
Remember, this is just a general guideline based on average product sizing. If you use super thick-cut salami or an extra-large roll, those numbers will shift a bit. Also, if you skip the optional slaw topping, you save a few calories, naturally!
- Serving Size: 1 slider
- Calories: 350
- Fat: 19g
- Saturated Fat: 9g
- Carbohydrates: 25g
- Sugar: 6g
- Protein: 20g
- Sodium: 950mg (Yes, it’s a bit high, but we are using deli meats, after all!)
Because we are loading these up with provolone and savory meats, they pack a serious protein punch for such a small bite! That’s why they are such great **Game Day Food Ideas**—they stick with you! Keep in mind these values don’t account for any extra butter you might use when prepping the pan, or if you decide to add those spicy pepperoncini peppers. Cook smart, but enjoy every delicious bite!
Share Your Experience Making These Party Appetizer Sliders
And that’s it, my friends! You are now armed with the easiest and most flavor-packed recipe for **grinder sliders**—perfect for your next gathering. When you make these amazing **Party Appetizer Sliders**, I genuinely want to know what you think!
Did everyone devour them? Did you stick with my garlic parmesan glaze, or did you try making that tangy slaw topping? Don’t keep all that genius to yourself! Please hit those star ratings below and let me know how these turned out for you. Seriously, nothing makes me happier than seeing you successfully elevate your everyday cooking!
Drop all your questions, successes, or any clever modifications you tried in the comments. If you snapped a picture of your finished tray of **Easy Slider Sandwiches**, tag me! And if you want to send a private note or ask a direct question, you can always get in touch through the Contact page. Happy baking, and enjoy watching these disappear!
PrintEasy Italian Grinder Sliders with Garlic Butter Glaze

Make these simple, baked Italian Grinder Sliders using Hawaiian rolls, deli meats, and provolone cheese, finished with a savory garlic parmesan butter topping. They are perfect for parties or quick family meals.
- Prep Time: 15 min
- Cook Time: 25 min
- Total Time: 40 min
- Yield: 12 servings 1x
- Category: Lunch
- Method: Baking
- Cuisine: American
- Diet: Vegetarian
Ingredients
- 1 package (12 count) sweet slider rolls (like Hawaiian rolls)
- 1/2 pound thinly sliced ham
- 1/2 pound thinly sliced salami
- 1/2 pound thinly sliced pepperoni
- 1 pound provolone cheese, sliced
- 1/2 cup unsalted butter, melted
- 2 tablespoons grated Parmesan cheese
- 1 teaspoon garlic powder
- 1 teaspoon dried Italian seasoning
- 1/4 teaspoon salt
- 1/4 cup finely chopped onion (optional, for topping)
- 1 cup shredded iceberg lettuce (optional, for topping)
Instructions
- Preheat your oven to 350 degrees Fahrenheit. Lightly grease a 9×13 inch baking dish.
- Slice the entire package of slider rolls horizontally, keeping the rolls connected. Place the bottom half of the rolls in the prepared baking dish.
- Layer the meats evenly over the bottom rolls: place the ham, then the salami, and finally the pepperoni.
- Top the meat layers with the sliced provolone cheese, covering the entire surface of the rolls.
- Place the top half of the rolls over the cheese layer. Gently press down on the top half.
- In a small bowl, whisk together the melted butter, Parmesan cheese, garlic powder, Italian seasoning, and salt to create the glaze.
- Pour or brush the butter glaze evenly over the top of the assembled sliders.
- Cover the baking dish tightly with aluminum foil.
- Bake for 15 minutes.
- Remove the foil and bake for another 5 to 10 minutes, or until the cheese is fully melted and the tops of the rolls are golden brown.
- Remove from the oven and let the sliders rest for 5 minutes before slicing them into individual sandwiches.
- If using, mix the chopped onion and shredded lettuce together. Serve the sliders immediately, topping each individual slider with a small amount of the fresh lettuce and onion mixture.
Notes
- For a spicier kick, add a layer of sliced pepperoncini peppers with the cheese.
- If you prefer a tangy slaw topping instead of plain lettuce and onion, toss the shredded lettuce and onion with 2 tablespoons of mayonnaise and 1 teaspoon of red wine vinegar before serving.
- These sliders reheat well in the microwave for quick leftovers.
Nutrition
- Serving Size: 1 slider
- Calories: 350
- Sugar: 6
- Sodium: 950
- Fat: 19
- Saturated Fat: 9
- Unsaturated Fat: 10
- Trans Fat: 0.5
- Carbohydrates: 25
- Fiber: 1
- Protein: 20
- Cholesterol: 55