
Oh, if you’re anything like me, there’s just nothing better than diving into those old-school, nostalgic baking treasures that whisper stories of Christmases long ago! Forget complicated cakes; we’re talking about cookies that practically bake themselves—well, almost! I’m completely obsessed with the recipe I’m sharing today: the incredible forgotten cookies. These aren’t your standard drop cookies; they are magic meringues that set up in the cooling oven overnight. As a home cook creating recipes for other home cooks, just like Aria taught us here at Cooking Zenith, I promise this vintage dessert is both easy and mind-blowing. Get ready for the lightest, airiest cookie you’ve ever popped in your mouth!
- Why This Recipe for forgotten cookies is a Nostalgic Must-Try
- Gathering Ingredients for Perfect forgotten cookies
- Step-by-Step Instructions for forgotten cookies
- Tips for Success with Your forgotten cookies Recipe
- Serving Suggestions for forgotten cookies
- Storage and Shelf Life for forgotten cookies
- Frequently Asked Questions About forgotten cookies
- Estimated Nutritional Snapshot for forgotten cookies
- Share Your Vintage Dessert Recipes Experience
Why This Recipe for forgotten cookies is a Nostalgic Must-Try
These are truly Old Fashioned Cookies that bring such a comforting wave of nostalgia. What makes this method so genius is that we don’t babysit these cookies—we forget them! That sounds scary, but trust me, it’s the secret to their incredible texture. It really showcases that confidence in basic ingredients that Aria champions for everyday cooking. If you want something that truly melts in your mouth, you’ve found it! Check out our story to see where this philosophy comes from.
The Magic of Overnight Cooling Cookies
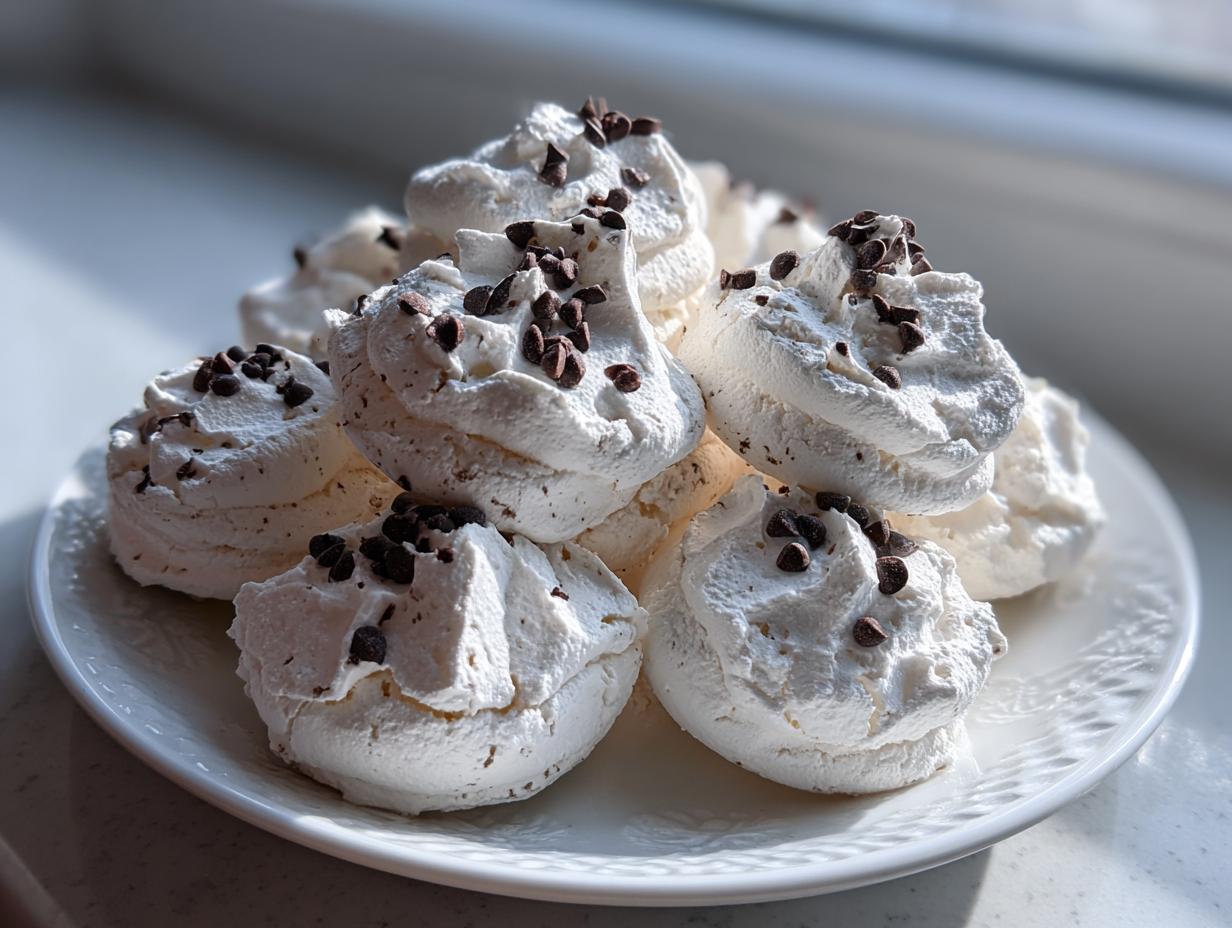
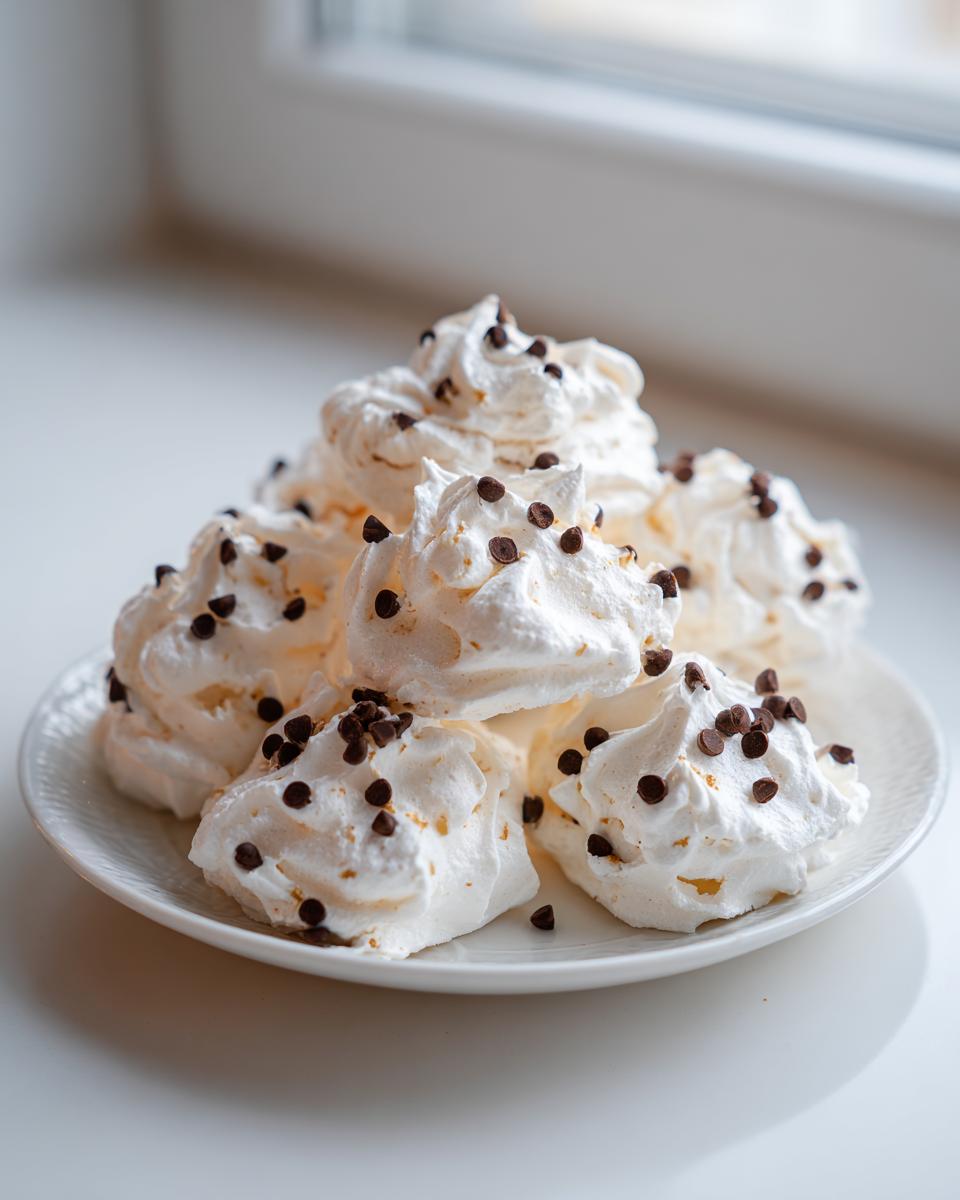
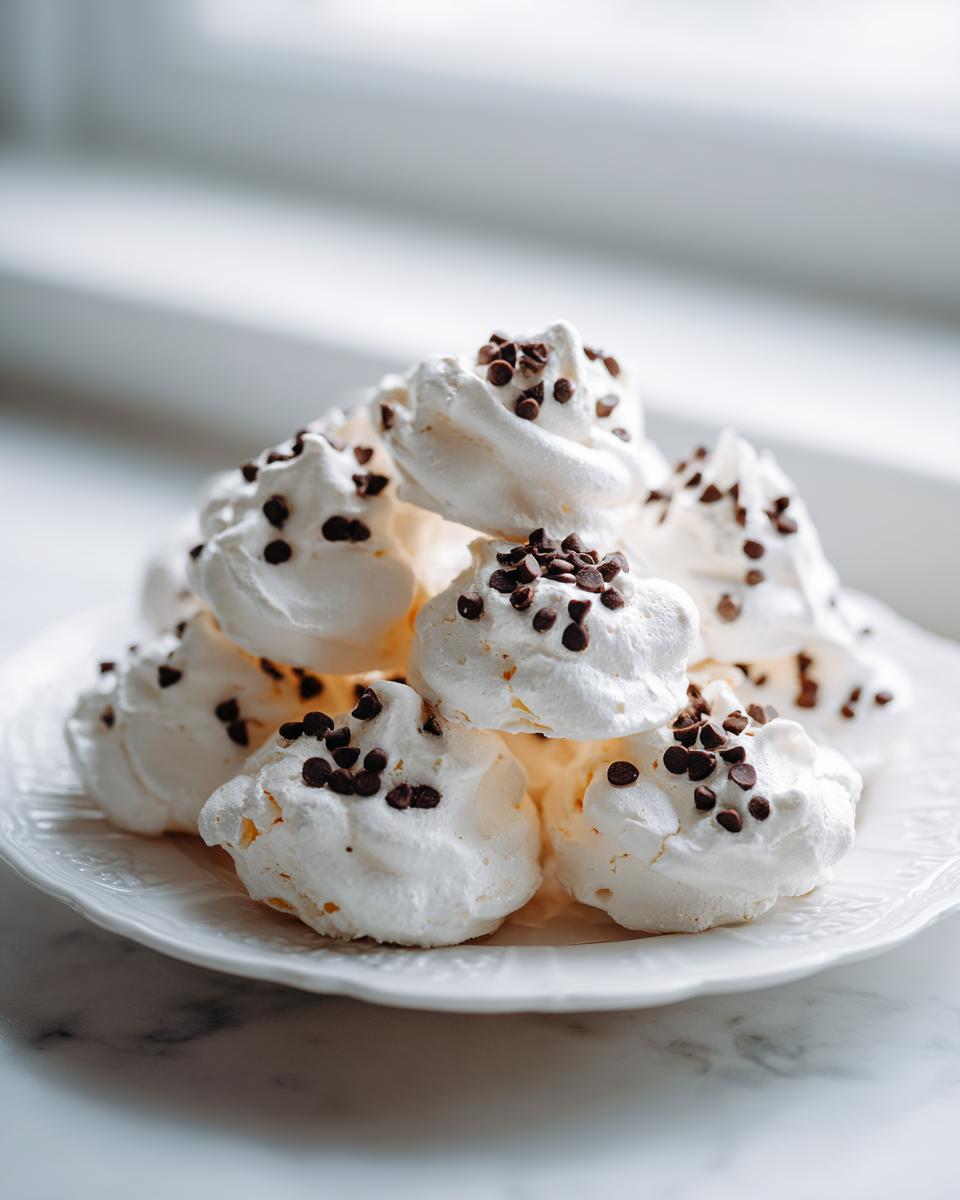
So, how do these become forgotten cookies? It’s all in the cooling! You’ll bake them for maybe five minutes, turn the oven completely OFF, and then just walk away until morning. That slow, steady temperature drop inside the oven allows the meringue structure to dry out perfectly. These Overnight Cooling Cookies develop this light, spectacular crust without ever browning!
Texture Profile: Light and Airy Cookies
When you finally check on them, you’ll find cookies that are crisp right around the edges but shockingly soft inside. They are the definition of Light and Airy Cookies! You take one bite and it just dissolves. It’s such a delicate result from such a simple process; they truly are Melt in Your Mouth Cookies.
Gathering Ingredients for Perfect forgotten cookies
Okay, ingredient gathering time! Since these are meringue cookies, precision matters, but don’t let that stress you out. The most important thing you absolutely must remember is that your four large egg whites need to be at room temperature. Cold egg whites just won’t whip up into that beautiful, stiff cloud we need for these forgotten cookies. Seriously, pull them out of the fridge about an hour before you start mixing.
You’ll need 1 cup of sugar, a touch of vanilla, salt, and cream of tartar—that last one helps stabilize everything beautifully. And of course, we need the mix-ins!
- 4 large egg whites, room temperature
- 1 cup granulated sugar
- 1 teaspoon vanilla extract
- 1/4 teaspoon cream of tartar
- 1/4 teaspoon salt
- 1 cup semi-sweet chocolate chips
- 1/2 cup chopped nuts (optional)
Ingredient Notes and Substitutions
Here’s where my home-cook expertise comes in: before you even touch those egg whites, make sure your mixing bowl and whisk are spotless. Any hint of grease or water will stop the meringue from forming—it’s so fussy, those egg whites! This recipe for Easy Egg White Cookies relies on that perfect, clean start.
If chocolate chips aren’t your favorite—maybe you’re making these for Christmas? You can totally swap them out! Try adding crushed peppermint candy or maybe some dried fruit instead. It keeps the light texture but changes the flavor profile completely. Just fold whatever you choose in gently at the very end!
Step-by-Step Instructions for forgotten cookies
Alright, let’s get down to business! This is where the magic starts, but also where we need a tiny bit of patience while mixing. Don’t rush the meringue; it’s the structure, the whole backbone of these beautiful forgotten cookies. Remember to line those baking sheets with parchment paper first—it makes cleanup a breeze later!
Creating the Meringue Base: The Key to forgotten cookies
We start by whipping those room-temperature egg whites until they get foamy and form what we call soft peaks. Now, don’t stop there! This is the secret to that incredible texture in our Meringue Cookies Recipe. Slowly, I mean *slowly*, start adding that cup of sugar, just one tablespoon at a time. Keep the mixer running! You need to beat this for a good 8 to 10 minutes total until you have stiff, glossy peaks. When you lift the beater, that peak should stand straight up without falling over. Then, gently mix in the vanilla, salt, and cream of tartar until it just disappears.
The Unique Baking and Overnight Cooling Process
Once the chocolate chips are folded in—gently, please, we don’t want to deflate all that air!—spoon out little dollops onto your sheets. Now for the truly bizarre part that makes everyone nervous: Pop the sheets into the oven that you’ve preheated to 350°F. As soon as they are in, turn the oven OFF. Seriously, turn the heat off! Then, you must resist the urge to peek. You close the door and leave them completely undisturbed overnight, aiming for at least 8 hours. This Overnight Cooling Cookies technique is what dries them out perfectly!

Tips for Success with Your forgotten cookies Recipe
Making these ethereal forgotten cookies can feel a little intimidating because we’re dealing with whipped egg whites, but honestly, once you know the tricks, they are so easy! Since these are completely From Scratch Cookie Recipes, taking just a few extra steps ensures they don’t turn into sticky messes instead of meringue kisses.
The most common mistake people make is not beating the sugar in long enough. You *have* to beat those egg whites until they are glossy and stiff. If you stop too soon because your arm is tired, the sugar won’t dissolve properly, and you’ll end up with a cookie that weeps or collapses. Trust me, that extra minute or two of beating is totally worth it for that melt-in-your-mouth finish.
Another point I learned the hard way: humidity is your enemy! If it’s pouring rain outside or incredibly humid, you might want to wait for a drier day. Meringue loves dry heat and hates moisture in the air. If you live somewhere damp, you might need to extend that overnight cooling time just a bit to make sure they truly dry out.
When you finally take them out in the morning, if you notice any sticking, don’t try to pull them apart right away! Let them sit on the counter for about 10 minutes. Sometimes, just a little resting time helps them release cleanly from the parchment paper. You can find some other great vintage ideas over at My Delicious Blog!
Serving Suggestions for forgotten cookies
Once you’ve made these delicate wonders, you have to think about how to serve them up! Since these forgotten cookies have such a wonderful, light reputation, they pair beautifully with richer flavors to balance them out. They are absolute stars during the holidays, making them genuine Holiday Cookie Classics.
Forget just setting them on a plate—let’s give them the presentation they deserve! Because they are so airy and sweet, they have this charming, old-fashioned look that fits right into any spread. I always think about Christmas Baking Traditions when I make these, so I try to serve them alongside something dark and decadent.

Here are a few ways I love to present my batch of forgotten cookies:
- Coffee & Cocoa Bar: These are so light they practically float! They are perfect for dipping into a hot cup of coffee or rich mug of hot chocolate. People grab them like little airy clouds.
- Holiday Cookie Exchange Display: If you’re trading cookies, place them on a tiered dessert stand. Their pale color contrasts beautifully with dark gingerbread or fudgy brownies, making them look elegant and delicate.
- Simple Gifting: Don’t over-complicate it! Fill small cellophane bags with about six cookies, tie the top with a simple red or green ribbon, and boom—instant, high-end-looking gift. Everyone loves getting a bag of these sweet, melt-in-your-mouth treats.
They never last long once they are on display, so prepare yourself for compliments!
Storage and Shelf Life for forgotten cookies
Okay, now for the moment of truth: you’ve successfully waited all night, and your beautiful forgotten cookies are ready! Since these are meringue-based—which means they are practically pure sugar and air—storage is super important if you want them to stay delightfully crisp and not turn into sticky sugar puddles overnight. Don’t panic, it’s really easy!
The number one rule, guys, is to protect them from humidity. Humidity is literally the arch-nemesis of meringue. You need an airtight container—I mean seriously airtight. A Tupperware container with a tight seal, or even a cookie tin with a good lid, works perfectly. You want to keep them at room temperature, not in the fridge, because the fridge is a damp environment and that will ruin that lovely, dry snap!
If you’ve followed the recipe exactly, you should have about 3 dozen of these little gems, which is an insane yield for this little effort! Seriously, these forgotten cookies should stay perfect for a good week, maybe even ten days, if you keep them sealed up tight away from any sticky kitchen air or high humidity days.
I always try to line the bottom of my storage container with a paper towel before adding the cookies. It just offers an extra little buffer against any trace moisture that might try to sneak in. Also, try not to stack them too tightly, or you risk breaking those delicate edges. A single layer is best, but if you have to stack, put a piece of parchment paper between the layers. Enjoy these melt-in-your-mouth babies while they’re perfectly airy!
Frequently Asked Questions About forgotten cookies
I always get questions about these cookies before people try them because the method sounds so strange! It’s totally normal to wonder about the timing and the texture, so here are a few things I hear constantly from readers making their first batch of these glorious forgotten cookies.
Can I make forgotten cookies without chocolate chips?
Absolutely, yes! Listen, if you’re not a chocolate fan, or if you’re making them for a specialty event, feel free to skip them. Remember when I mentioned alternatives earlier? You can definitely use crushed peppermint candy if you want a minty twist, or even finely chopped dried cherries or apricots if you prefer fruit. The key is keeping them light—so don’t add anything too heavy that will weigh down that beautiful meringue structure we worked so hard to build up. They are fantastic as plain Meringue Cookies Recipe treats, too!
Why are these called forgotten cookies?
Oh, this is my favorite tidbit! They are called forgotten cookies precisely because you are supposed to forget them! You pop them into the turned-off oven, and then you go to bed or go about your merry business, not thinking about them again until the next morning. It sounds crazy, like an oopsie, but that’s the whole trick! The residual heat slowly dries them out overnight, giving you that perfectly crisp exterior every single time. It’s one of the best parts of baking these Vintage Dessert Recipes!
What is the best way to store these light and airy cookies?
If you want those light and airy cookies to stay crisp, storage is everything! You must keep them in an airtight container at room temperature. I mean it—airtight! If you leave them out on a plate, even for a few hours, the humidity in the air will rush in and make them soft and chewy, and that’s just not what we want for a true forgotten cookie experience. Keep them sealed up tight, check out my tips on contacting me if you have storage issues, and maybe take a peek at what other folks are doing over at Dessert for Two while you’re at it!
Estimated Nutritional Snapshot for forgotten cookies
Now, I’m definitely not a nutritionist—I’m a home cook who loves butter and sugar, you know how it is! But since you want the whole scoop when it comes to these magical forgotten cookies, I jotted down some estimates based on the ingredients for one cookie. Keep in mind that since we are dealing with pure egg whites and sugar, the percentages lean heavily toward the sweet side. These are just estimates, so take them with a grain of sugar, okay?
This data is calculated for one cookie, assuming you get about 3 dozen servings from the recipe, and includes the chocolate chips but not the optional nuts.
- Calories: ~75
- Fat: ~1.5g (Mostly saturated fat from the chips!)
- Carbohydrates: ~15g
- Protein: ~1g
- Sugar: ~15g (Yep, they are sweet!)
They are incredibly light, which is why the calorie count stays relatively low compared to a dense chocolate chip cookie, but remember, they are essentially crystallized egg white and sugar—pure delight! They are a fantastic, lighter option when you’re looking for Simple Dessert Ideas that just melt away.
Share Your Vintage Dessert Recipes Experience
So, that’s it! You have the full roadmap to making the most delightful, nostalgic forgotten cookies that truly live up to their name. I sincerely hope that when you try this recipe, you get that perfect feather-light, crisp exterior and that delightfully soft interior that makes these such amazing Vintage Dessert Recipes.
Now, you know I have to ask—I live for hearing how everyone else’s baking turned out! Did yours stay perfectly crisp? Did you go rogue and use pecans or M&Ms instead of chocolate chips? I want to hear all the details!
Please, take a moment to come back down here and leave a rating and a comment below. Telling me about your texture results—that crucial “melt-in-your-mouth” factor—helps other home cooks gain the confidence to try them too. And if you’ve got a special time you plan to serve these, like a big cookie exchange or a cozy night in, share that with us too! It helps keep these wonderful, old-fashioned baking traditions alive.
If you’ve got questions on best practices, feel free to look over our privacy notice here at Cooking Zenith, but honestly, the best way to get answers is just by asking in the comments! Happy baking, friends, and may you never forget how truly easy and magical these cookies are!
PrintThe Ultimate Vintage Forgotten Cookies Recipe

Make these nostalgic, light, and airy meringue cookies that crisp on the outside and melt in your mouth inside. They require a unique overnight cooling process for the best texture.
- Prep Time: 20 min
- Cook Time: 0 min (Oven is off)
- Total Time: 8 hr 20 min (Includes overnight cooling)
- Yield: About 3 dozen 1x
- Category: Dessert
- Method: Meringue Baking
- Cuisine: American
- Diet: Vegetarian
Ingredients
- 4 large egg whites, room temperature
- 1 cup granulated sugar
- 1 teaspoon vanilla extract
- 1/4 teaspoon cream of tartar
- 1/4 teaspoon salt
- 1 cup semi-sweet chocolate chips
- 1/2 cup chopped nuts (optional)
Instructions
- Preheat your oven to 350 degrees Fahrenheit. Line two large baking sheets with parchment paper.
- In a clean, dry mixing bowl, beat the egg whites with an electric mixer until soft peaks form.
- Gradually add the granulated sugar, one tablespoon at a time, beating well after each addition until stiff, glossy peaks form. This should take about 8 to 10 minutes.
- Beat in the vanilla extract, cream of tartar, and salt. Mix until just combined.
- Gently fold in the chocolate chips and chopped nuts, if using, using a spatula. Do not overmix.
- Drop rounded tablespoons of the meringue mixture onto the prepared baking sheets, spacing them about 1.5 inches apart.
- Place the baking sheets into the preheated oven. Immediately turn the oven off. Do not open the oven door.
- Leave the cookies in the turned-off oven overnight, or for at least 8 hours, allowing them to cool and dry completely.
- In the morning, remove the cookies from the oven. They should be crisp and dry. Store them in an airtight container at room temperature.
Notes
- For the best results, ensure your mixing bowl and whisk attachments are completely free of any grease or water before starting the meringue.
- If you prefer a different flavor, substitute the chocolate chips with crushed peppermint candy or dried fruit.
- These cookies are often called ‘Forgotten Kisses’ due to their texture.
Nutrition
- Serving Size: 1 cookie
- Calories: 75
- Sugar: 15
- Sodium: 10
- Fat: 1.5
- Saturated Fat: 1
- Unsaturated Fat: 0.5
- Trans Fat: 0
- Carbohydrates: 15
- Fiber: 0.5
- Protein: 1
- Cholesterol: 0