
Sometimes you just crave that fresh, perfectly seasoned bite of Korean food, but you certainly don’t have an hour to spend chopping vegetables and worrying about complex sauces. I get it! That’s why I’m sharing my absolute favorite tuna kimbap recipe, specifically the spicy version. Trust me when I say this homemade version, packed with the perfect spicy tuna mayo filling, beats anything you grab on the go. This is the Cooking Zenith philosophy in action: making extraordinary flavor simple for your Tuesday night dinner. Best part? In just about 15 minutes, you’ll have vibrant, flavorful Korean seaweed rice rolls ready to enjoy. It’s the perfect solution when you need **quick Korean lunch ideas**. For more speedy solutions like this, check out my guide on quick healthy lunch ideas.
- Why This Homemade Tuna Kimbap Recipe Beats Store-Bought
- Essential Ingredients for Flavorful Tuna Kimbap
- Step-by-Step Instructions for Perfect Tuna Kimbap
- Expert Tips for the Best Tuna Kimbap Recipe
- Make Ahead Party Snacks and Storage for Tuna Kimbap
- Serving Suggestions for Spicy Korean Finger Food
- Understanding Tuna Kimbap Nutrition
- Frequently Asked Questions About Making Tuna Kimbap
- Share Your Homemade Tuna Kimbap Creations
Why This Homemade Tuna Kimbap Recipe Beats Store-Bought
Look, store-bought **tuna kimbap** is fine when you’re desperate, but it’s never going to have that pop of real freshness. When you make this **Homemade Kimbap recipe** yourself, you control everything! That’s the secret to the best Tuna Kimbap recipe, honestly. I insist on using Japanese Kewpie mayo for the filling because that little bit of extra tang and richness just transforms the whole experience. You get superior texture and you can pack in more vegetables if you want to make these vibrant lunchbox ideas even healthier.
Quick Korean Lunch Ideas Ready in 15 Minutes
When I say 15 minutes, I mean it, provided you have cooked short-grain rice ready to go! That’s the only trick to this whole process. Because this **tuna kimbap** is so fast, it transforms from a weekend project into a genuinely simple Tuesday night dinner or a lifesaver when you need to pack work lunches. It’s about bringing extraordinary flavor home without breaking your schedule.
Essential Ingredients for Flavorful Tuna Kimbap
Getting the right ingredients is really the backbone of making these flavorful Korean seaweed rice rolls stand out. I’ve broken down the Kimbap ingredients list below so you know exactly what goes where. Don’t skip the seasoning on the rice; even though we’re focusing on the spicy tuna, that seasoned base is what keeps the whole roll tasting authentic and delicious.
For the Rice Seasoning
You absolutely need short-grain rice here—the stickiness is non-negotiable for rolling! For about 2 cups of cooked rice, you’ll mix in:
- 1 teaspoon of sesame oil
- 1 teaspoon of sesame seeds
- 1 teaspoon of salt
My tip is to mix this gently while the rice is still warm; don’t smash it mushy, just coat those grains evenly!
Crafting the Spicy Tuna Mayo Filling
This is where the magic happens for those **Spicy Tuna Mayo rolls**! We want that creamy, zesty kick. For the filling, grab:
- One 5.3 oz can of tuna packed in oil, drained well
- 2 tablespoons of green onion, finely chopped—make sure it’s really fine!
- 2 tablespoons of Japanese mayo (if you can find **Kewpie mayo tuna filling**, use it!), or regular mayo in a pinch
- 1 tablespoon of sriracha sauce
If you prefer less heat in your **Spicy Tuna Kimbap**, just pull back on the sriracha. You can always add more later!
Other Components for Your Tuna Kimbap
To wrap it all up and add those final flavor notes, you’ll need a few other things:
- 2 sheets of nori (or gim, that’s the roasted seaweed)
- 4 perilla leaves, stems removed and patted dry. These add a wonderful, subtle herbaceousness!
- A final brush of 1/2 teaspoon sesame oil and a sprinkle of sesame seeds for the outside coating.
These last touches really nail that authentic **Chamchi Kimbap tutorial** quality.
Step-by-Step Instructions for Perfect Tuna Kimbap
Alright, let’s get rolling! Since we aren’t cooking anything for today’s **tuna kimbap**, the process moves really fast. Once you have your rice ready, this is almost done within a half hour, which is amazing for making these **quick Asian meal prep** wonders.
Preparing the Rice Base
This is Step 1, and it’s deceptively important. Take your 2 cups of short-grain rice that you’ve already seasoned (remember the salt, sesame oil, and seeds?). Spread it out evenly on your nori sheet, but you have to leave about an inch clear at the very top edge. That top edge is our sticky seal later on. Mix the rice with your hands, but be super gentle! We want fluffy, separate grains, not a gummy smash for our simple weeknight dinners.
Mixing the Signature Spicy Tuna Mayo
Next up, the star of the show—our filling! This is Step 2. In a small bowl, dump in your drained tuna, your finely chopped green onion, your Japanese mayo, and that sriracha. Mix this really vigorously so it becomes a cohesive, creamy, and slightly fiery mass. This is what makes the **Spicy Tuna Kimbap** so addictive, so don’t skimp here!
Kimbap Rolling Technique Guide
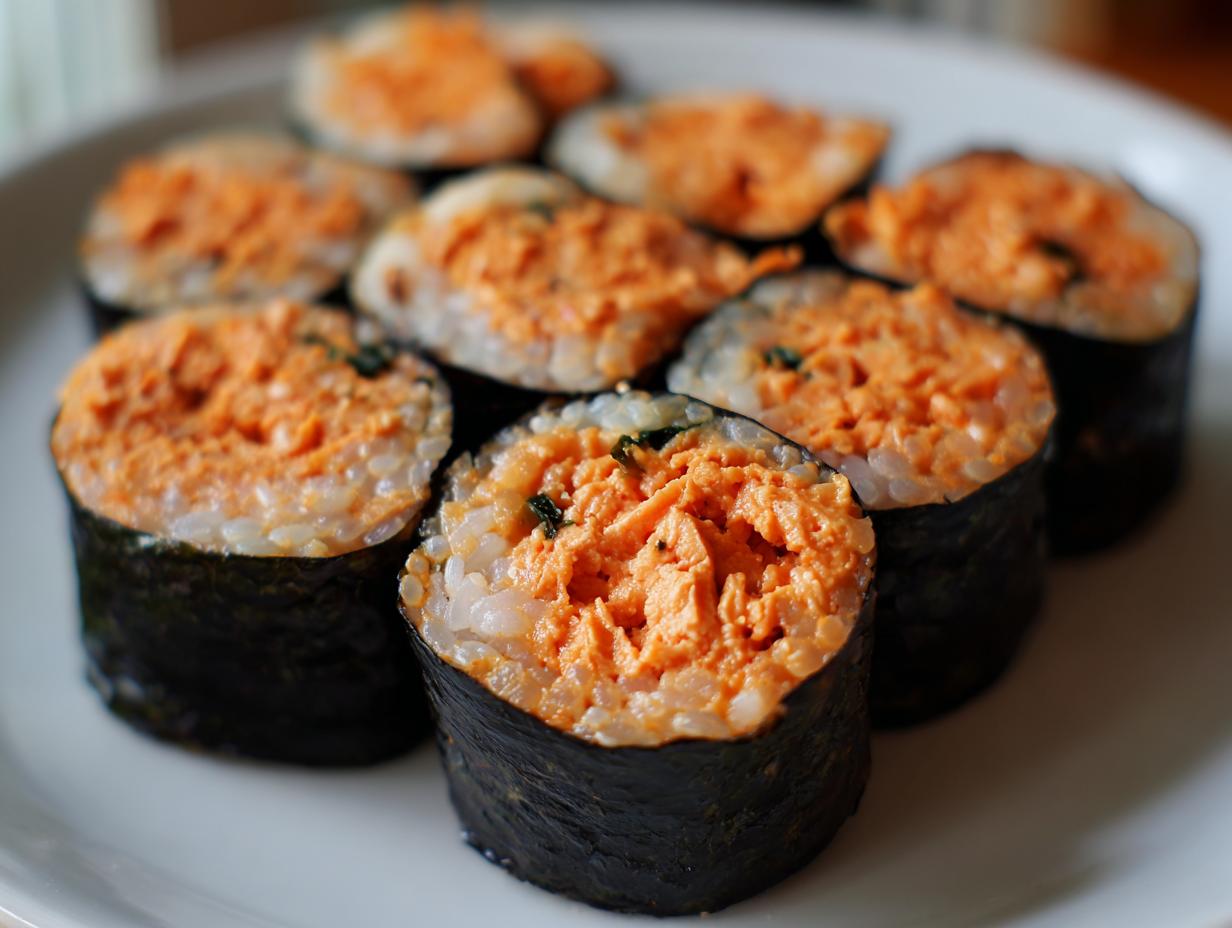
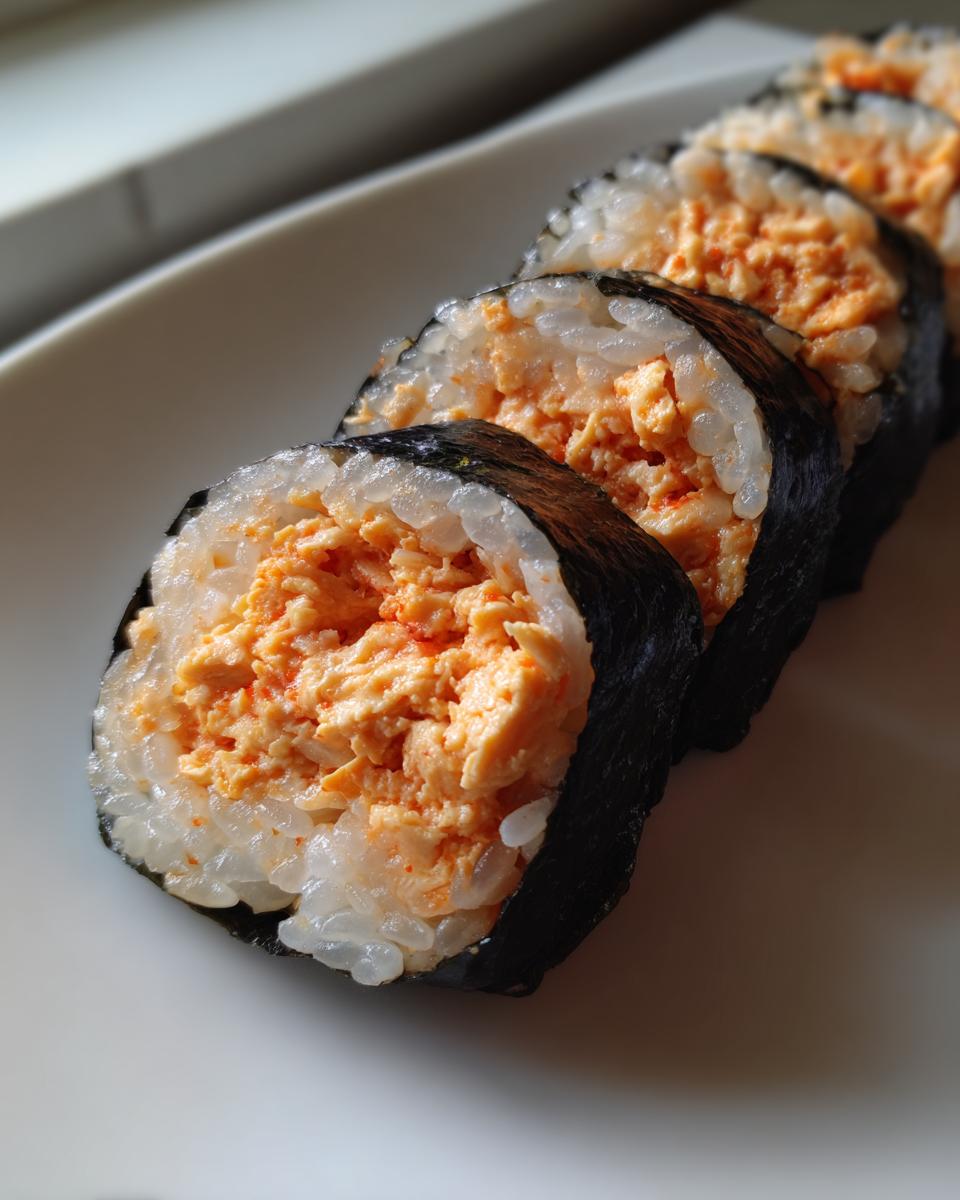
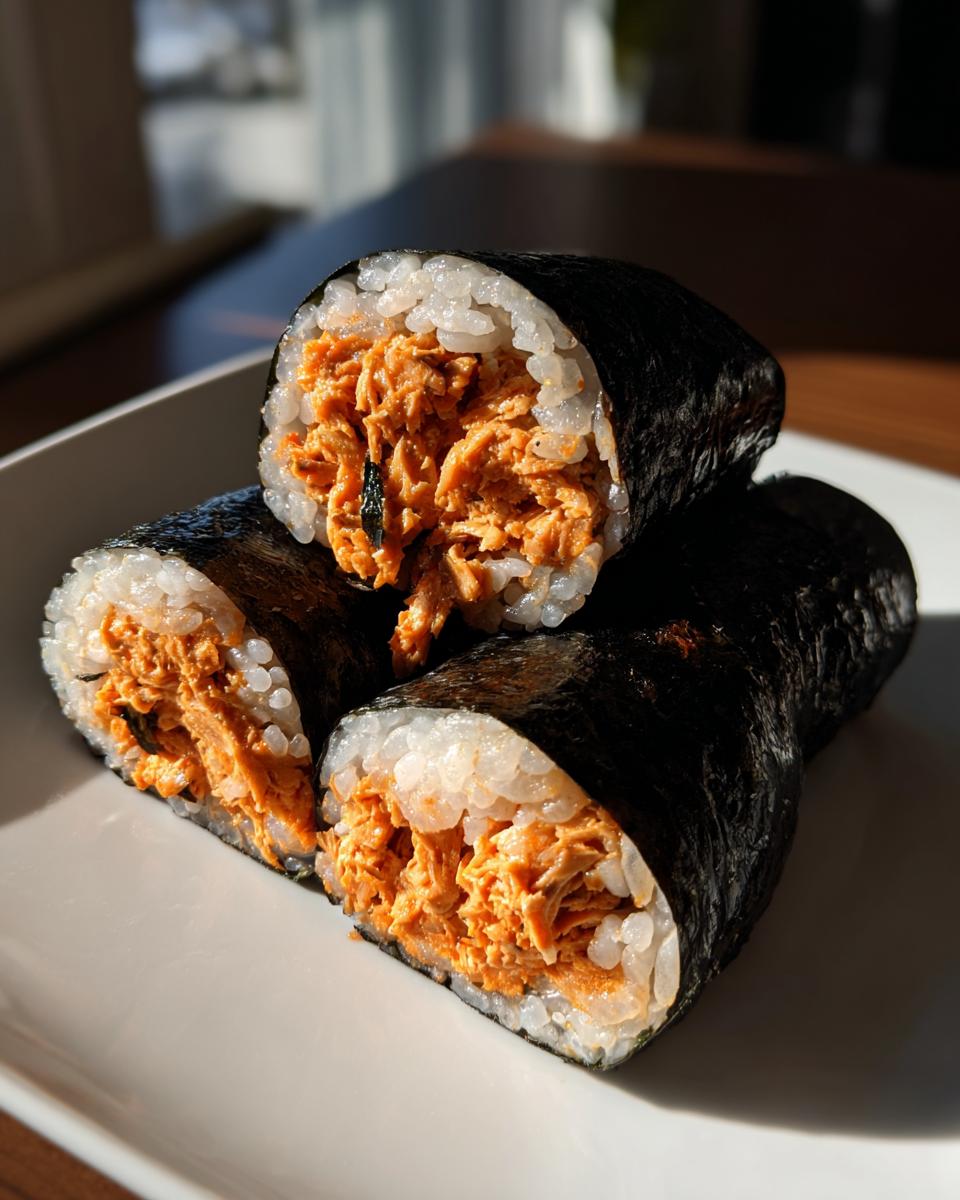
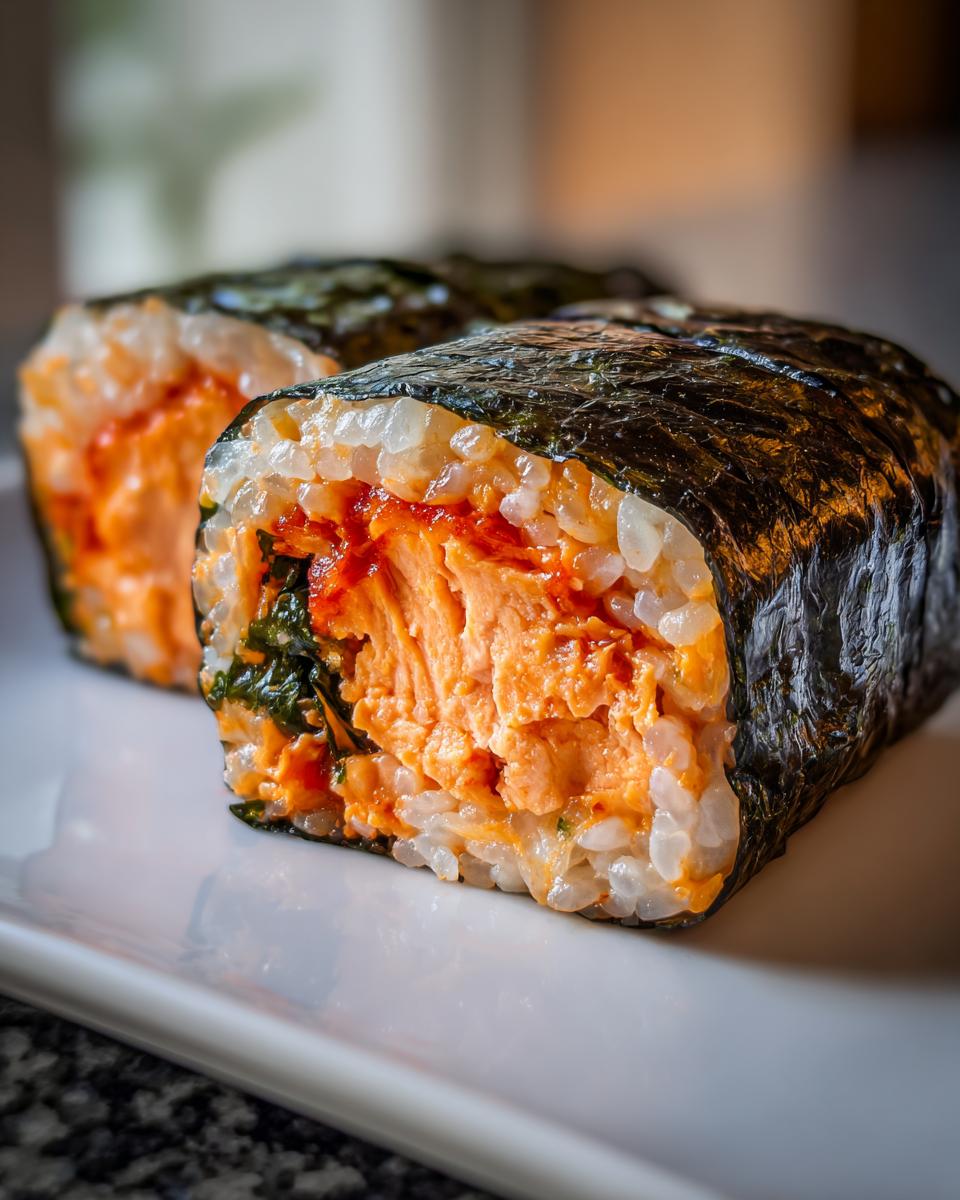
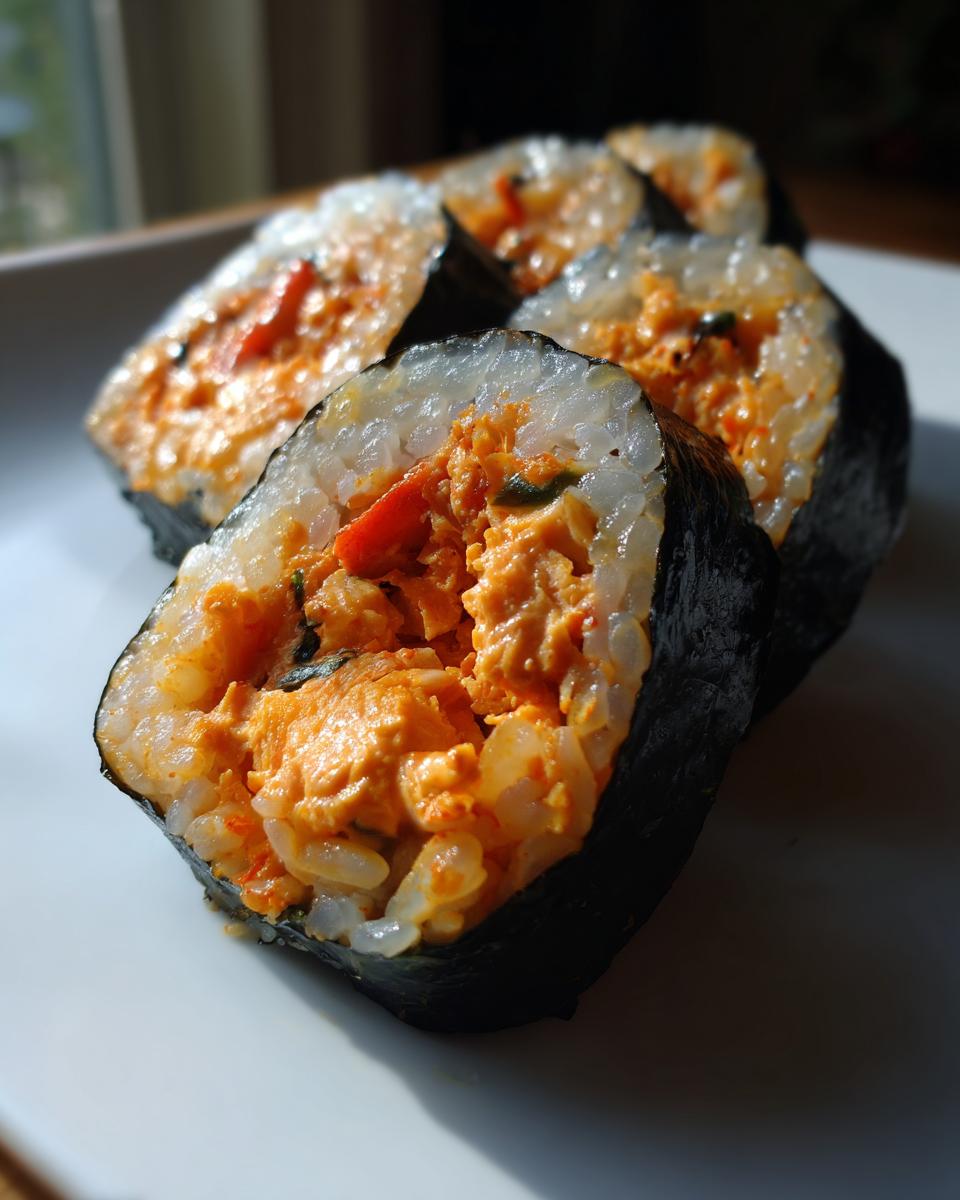
Now for the fun part that makes you feel like a pro! Step 3 starts with laying your nori shiny-side down on the mat. I sometimes use a tiny spray of water on the bare edge of the nori just to make sure it seals nicely. Layer those 4 perilla leaves on top of the rice near the bottom, then spoon half of your **Spicy Tuna Mayo rolls** filling right over them. For the actual rolling—Steps 5 and 6—start tight at the bottom, use your mat to keep the pressure even, and push the rice and filling inward as you go. Moisten that bare edge with water to seal it shut. This is key to a successful Kimbap rolling technique guide.
Finishing and Slicing Your Tuna Kimbap
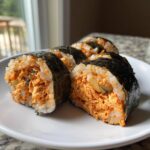
Once you have your two gorgeous rolls, gently brush the outside of the seaweed with that last bit of sesame oil and shower it with those extra sesame seeds. This stops them from getting dry and adds a great aroma. Finally, for Step 7, you must use a sharp knife dipped in water between *every* cut. Seriously, I stress this! It prevents the rice from sticking and tearing your beautiful handiwork. Slice them into those perfect bite-sized pieces, and you’re done serving up those **fresh vegetable rice rolls**!
Expert Tips for the Best Tuna Kimbap Recipe
I love sharing these little tricks that take a good recipe and make it truly foolproof. Making **tuna kimbap** is simple, but these expert tips ensure you get that fantastic texture and flavor balance every single time. When I test recipes here at Cooking Zenith, I always write down the ‘do not change’ parts, and these are key for making the **Easy Tuna Gimbap** shine.
Ingredient Substitutions for Easy Tuna Gimbap
If you can’t find exactly what the recipe calls for, don’t panic! We can always improvise. For instance, if you’re out of sriracha, swapping it for gochujang is a great move. Gochujang will give you a slightly deeper, fermented heat rather than the bright zing of sriracha. It’s still going to make incredible **Spicy Tuna Mayo rolls**, just with a slightly different flavor profile. Also, if you absolutely can’t source perilla leaves, you can skip them. Don’t sweat it! Just know that you might lose a little bit of that herbaceous crunch. You can substitute them with a crisp piece of lettuce if you want to maintain some green filler in your **no-cook tuna Kimbap fillings**. Remember, the goal is delicious **Korean seaweed rice rolls**, and we can certainly achieve that even with a few tweaks!
One thing I’ve learned while testing different versions (especially when skipping the leafy greens) is that sometimes adding a tiny bit of crisp vegetable, like very finely julienned carrot or cucumber, right next to the tuna helps absorb any excess moisture from the filling. This keeps your nori from getting soggy too quickly. It’s a small addition, but it really helps if you’re making these ahead of time! For more reliable make-ahead ideas, take a peek at my guide on easy leftover turkey pot pie recipe, which relies on similar texture management.
Make Ahead Party Snacks and Storage for Tuna Kimbap
I love serving up **tuna kimbap** when I have guests because they look so vibrant on a platter! They are fantastic **make ahead party snacks**, but you have to treat them right so they don’t go limp. You can totally assemble the rolls a few hours ahead of time, maybe even up to four hours. If you do this, wrap the whole roll tightly in plastic wrap before slicing, and keep it in the fridge. That keeps the moisture locked in and stops the rice from drying out too much.
However, if you’re asking me, the absolute best experience for any **Korean seaweed rice roll** is when it’s fresh, maybe an hour or so after you’ve sliced it. If you need to prep them fully the night before, I’d advise slicing them right before serving, or you might notice the nori softening a bit. For the very best dip pairing for your party spread, you have to try my recipe for Cowboy Caviar, the Best Quick & Easy Party Dip!
Serving Suggestions for Spicy Korean Finger Food
These **Spicy Tuna Kimbap** rolls are so vibrant and punchy on their own, but serving them with a cooling side really balances out that lovely heat. Since they already pack a wonderful flavor profile—making them a top contender for your next batch of **spicy Korean finger food**—you don’t need much fuss!
If you are looking for something to dip them into, please don’t overthink it! A simple mixture of soy sauce, a tiny splash of rice vinegar, and just a couple of drops of toasted sesame oil works perfectly. It highlights the filling instead of overpowering it. If you want something much more comforting to make this a complete, easy dinner, this works amazingly well alongside a warm bowl of soup.
I frequently pair my **tuna kimbap** with my super speedy Easy Egg Drop Soup recipe – 10 minutes. The light, savory broth is the perfect, subtle companion to the rich, spicy roll. It keeps the whole meal feeling light, which is exactly what you want from a **flavorful seaweed sushi alternative**. It’s just delicious, simple comfort food!
Understanding Tuna Kimbap Nutrition
Making something incredibly tasty doesn’t mean it has to weigh you down, and that’s why people often look at this **tuna kimbap** as a great option for a **healthy seaweed rolls recipe**. I’ve loved seeing all the excitement around sharing these beautiful rolls at parties or packing them for work lunches without guilt! As the founder of Cooking Zenith, I want to empower you with knowledge about what you’re eating, even when the meal comes together in 15 minutes.
Based on the ingredients listed for this spicy version, here are the estimated nutritional values for one serving (about 6 pieces). Remember, these numbers are just a starting point, so if you load up on extra mayo or use different tuna than specified, your totals might shift a bit! If you swap ingredients like using white rice instead of the short-grain, or if you skip the perilla leaves, the final tally will change. For more ideas focused on lighter eating, you should definitely check out my list of healthy snack ideas.
Here’s the breakdown based on our standard 2-roll yield:
- Calories: About 280 per serving (6 pieces)
- Fat: Approximately 12 grams total (remember, some fat comes from the healthy tuna oil and mayo)
- Carbohydrates: Around 30 grams (mostly from the rice)
- Protein: A solid 14 grams to keep you full!
See? These **Korean seaweed rice rolls** are wonderfully balanced for a light meal or snack. They offer satisfying protein and carbs without being overly heavy, which is why they work so well for everything from quick dinners to party spreads. Cook with confidence, knowing you are feeding yourself something vibrant!
Frequently Asked Questions About Making Tuna Kimbap
I always get a ton of questions after people try making their first batch of **tuna kimbap**! It’s such a rewarding recipe, but rolling can be tricky the first few times. Don’t worry, that’s what I’m here for! I want your **Chamchi Kimbap tutorial** experience to be a total success. If you have more questions after trying this recipe, please feel free to reach out here.
Can I use regular mayonnaise instead of Kewpie mayo in my tuna kimbap?
Oh, that’s a great question! You absolutely can use regular mayonnaise if that’s what you have on hand. Please do! However, I always suggest Kewpie mayo for the **Spicy Tuna Kimbap** because it’s made with just egg yolks, which gives it a richer, slightly more luxurious, and tangier flavor profile that truly elevates the filling. Regular mayo will taste great, but it’s just not *quite* as punchy.
What is the best way to slice kimbap without squishing the roll?
This is the number one frustration people have when trying to get those pretty, Instagram-worthy slices! The secret lies entirely in your knife. You must use a very sharp knife—and I mean razor sharp—that hasn’t been used to chop anything else yet. More importantly, you need to dip the knife blade in water before you make *every single cut*. Wipe it clean, dip it, slice cleanly through the nori and rice. That little bit of water prevents the rice from sticking to the blade and compacting the roll as you saw through it. It makes slicing so much easier!
Is this spicy tuna kimbap recipe suitable for a quick Asian meal prep?
Yes, it’s fantastic for meal prep, especially if you’re looking for satisfying and flavorful **quick Asian meal prep** ideas! The key is how you store it. If you assemble the rolls completely and slice them ahead of time, store them in an airtight container in the fridge with just a barely damp paper towel over top to keep the rice from hardening up too quickly. They are best eaten within 24 hours, but honestly, they lose a tiny bit of structural integrity after about 12 hours, so try to wrap the *whole* unsliced log if you are prepping more than a day out. They still taste wonderful!
Share Your Homemade Tuna Kimbap Creations
Now the moment of truth! You’ve seasoned the rice, you’ve mastered the spicy tuna mayo filling, and you’ve conquered the roll. You’ve made the best **tuna kimbap**! I genuinely want to know how it turned out for you. In my book here at Cooking Zenith, we build community by sharing our wins, even the quick ones like this 15-minute powerhouse. You can always read more about our mission on the About Us page!
Please take a moment to leave a rating below! Did this recipe surprise you with how fast it came together? Were you able to get those clean slices we talked about? Hearing your feedback helps me ensure this interpretation of the classic **Chamchi Kimbap** works beautifully in home kitchens everywhere.
And if you snapped any beautiful pictures of your finished **Spicy Tuna Kimbap**—maybe they’re rolled up for a vibrant lunchbox or arranged prettily for a party platter—I would absolutely love to see them! Tag me on social media, or if you want to dive deeper into how others have personalized their rolls, check out the incredible inspiration over at Spicy Tuna Kimbap Rolls. Happy cooking, and thank you for trusting me with your kitchen journey!
PrintEasy 15-Minute Spicy Tuna Kimbap (Korean Seaweed Rice Rolls)
Make homemade Tuna Kimbap that tastes better than store-bought. This recipe focuses on the popular Spicy Tuna Mayo filling and is ready quickly, making it perfect for lunchboxes or quick dinners.
- Prep Time: 15 min
- Cook Time: 0 min
- Total Time: 15 min
- Yield: 2 rolls (about 12 pieces) 1x
- Category: Snack
- Method: Rolling
- Cuisine: Korean
- Diet: Vegetarian
Ingredients
- 2 cups cooked short grain rice
- 1 teaspoon sesame oil for rice
- 1 teaspoon sesame seeds for rice
- 1 teaspoon salt for rice
- 2 sheets nori or gim (roasted seaweed)
- 4 perilla leaves, washed and dried, stems removed
- 1/2 teaspoon sesame oil to coat kimbap
- 1/2 teaspoon sesame seeds to sprinkle on kimbap
- For the Spicy Tuna Mixture:
- 5.3 oz canned tuna in oil, drained
- 2 tablespoons green onion, very finely chopped
- 2 tablespoons Japanese mayo (Kewpie mayo recommended)
- 1 tablespoon sriracha sauce (adjust for heat)
Instructions
- Prepare the rice: In a bowl, combine the cooked short grain rice with 1 teaspoon sesame oil, 1 teaspoon sesame seeds, and 1 teaspoon salt. Mix gently until everything is evenly distributed.
- Make the spicy tuna filling: In a separate bowl, combine the drained canned tuna, finely chopped green onion, Japanese mayo, and sriracha sauce. Mix well until you have a creamy, cohesive spicy tuna mayo filling.
- Prepare the nori: Lay one sheet of nori, shiny side down, on a bamboo rolling mat. Brush lightly with a few drops of water to help it stick later, if needed.
- Layer the rice: Spread about one-third of the seasoned rice evenly over the nori, leaving about a 1-inch border clear at the top edge.
- Add fillings: Place 2 perilla leaves near the bottom edge of the rice. Spoon half of the spicy tuna mixture in a line across the perilla leaves.
- Roll the kimbap: Starting from the bottom edge, use the mat to tightly roll the kimbap away from you, pressing gently to compact the filling. Moisten the clear edge of the nori with a little water to seal the roll shut.
- Repeat: Repeat steps 3 through 6 with the second sheet of nori and the remaining ingredients.
- Finish and slice: Brush the outside of each finished roll lightly with the remaining 1/2 teaspoon of sesame oil and sprinkle with sesame seeds. Use a sharp, damp knife to slice each roll into bite-sized pieces. Serve immediately or pack for a quick Asian meal prep.
Notes
- For a less spicy version, substitute gochujang for sriracha or reduce the amount of hot sauce.
- If you do not have perilla leaves, you can omit them or substitute with a thin slice of crisp lettuce or spinach for texture.
- For best results when slicing, use a knife dipped in water between each cut to prevent the rice from sticking.
Nutrition
- Serving Size: 6 pieces
- Calories: 280
- Sugar: 3
- Sodium: 450
- Fat: 12
- Saturated Fat: 2
- Unsaturated Fat: 10
- Trans Fat: 0
- Carbohydrates: 30
- Fiber: 1
- Protein: 14
- Cholesterol: 25