
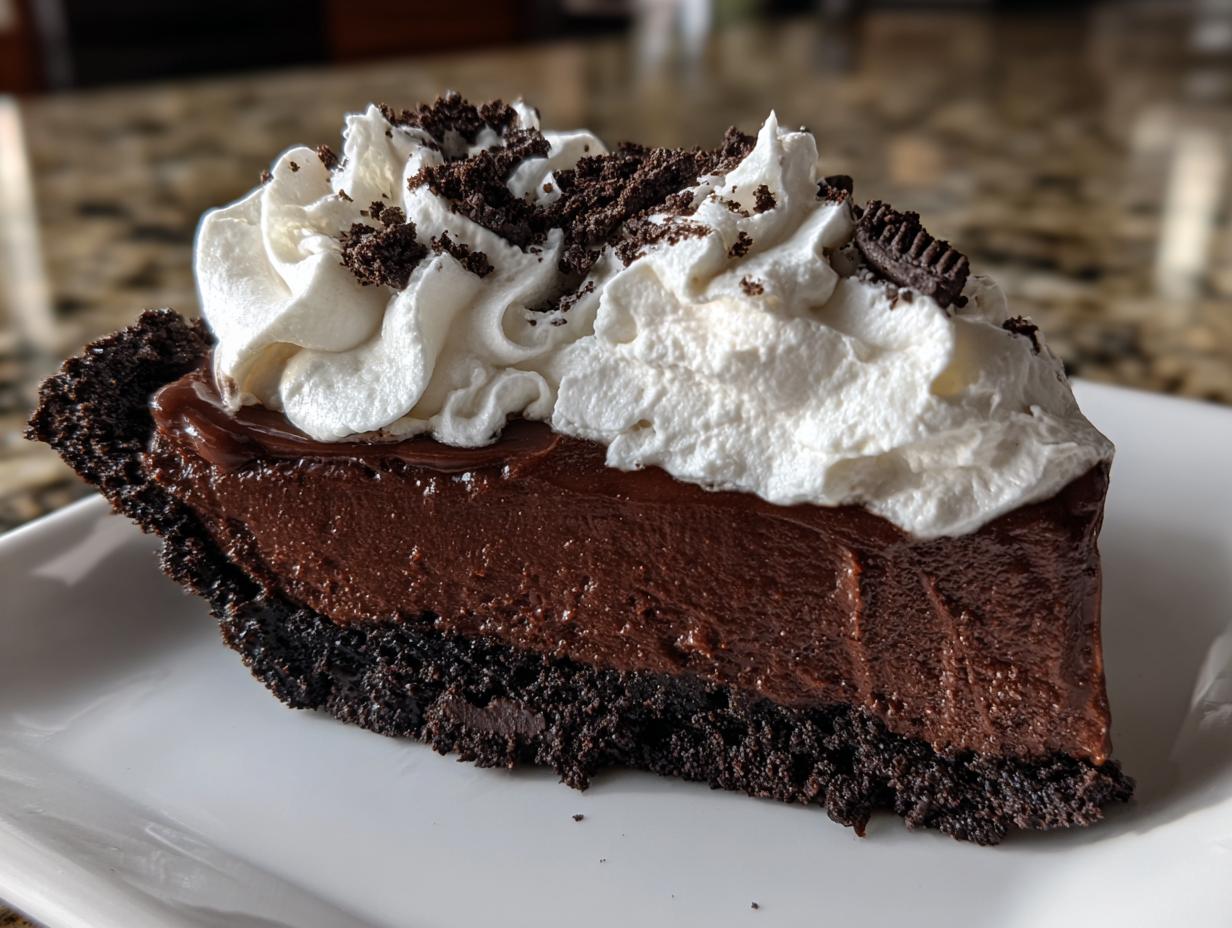
Okay, deep breaths, friends! I totally get it. The week leading up to Christmas dinner feels like a marathon where the finish line is always the dessert table, and suddenly you realize you need something show-stopping that doesn’t require you to babysit the oven while the turkey’s getting cold. That’s where this recipe swoops in like a culinary Santa Claus! I’m Aria, and trust me, I know kitchen stress. That’s why I perfected this unbelievably rich **Christmas chocolate cream pie**. It’s velvety, it’s deep, dark, and decadent, and best of all? You make it almost entirely the day before! We are kicking tradition up a notch without adding an ounce of last-minute panic to your holiday schedule.
- Why This Christmas Chocolate Cream Pie Recipe Works for the Holidays
- Gathering Ingredients for Your Christmas Chocolate Cream Pie
- Step-by-Step Instructions for the Christmas Chocolate Cream Pie
- Tips for a Flawless Holiday Chocolate Pie Recipe
- Making Your Christmas Chocolate Cream Pie Look Festive
- Storage and Serving Instructions for Your Make Ahead Pie
- Frequently Asked Questions About This Holiday Chocolate Pie Recipe
- Estimated Nutritional Data for This Christmas Chocolate Cream Pie
- Share Your Festive Creations
Why This Christmas Chocolate Cream Pie Recipe Works for the Holidays
Listen, the holidays are about togetherness, not standing over a stovetop stressing about a crust that might shrink. That’s why this specific **Christmas chocolate cream pie** is my MVP for any festive table. It ticks off all the boxes for **easy holiday pie recipes** without sacrificing that deep, luxurious chocolate flavor everyone craves. It’s simply divine, and it waits for you!
- It’s a champion of **make ahead Christmas desserts**; the chilling time is crucial for setting.
- The filling is smooth, rich, and uses simple pantry items—no fussy tempering required for the main custard!
- That crunchy crust ensures every slice stays perfect, even after a day in the fridge.
Perfect for Planning: Make Ahead Christmas Desserts
This is my biggest selling point! You treat this pie like a project for December 23rd, not Christmas Eve. The chilling time of at least four hours, but preferably overnight, is non-negotiable for that tight, sliceable texture. When you take this creamy creation out on Christmas morning, your oven is completely free for roasting potatoes or keeping dinner warm. It’s pure strategic cooking joy!
The Ultimate Oreo Crust Chocolate Cream Pie
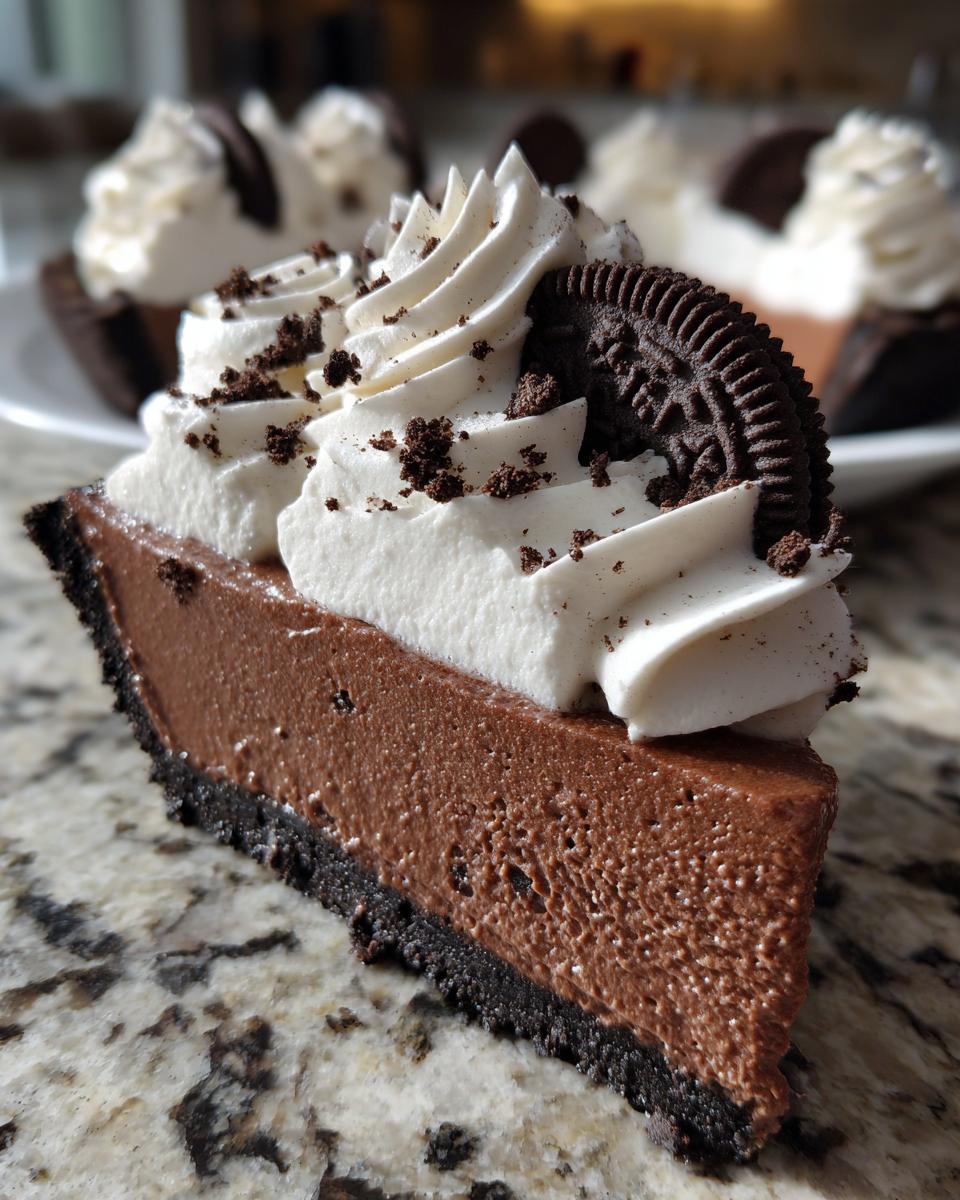
Everyone on Pinterest loves a good cookie crust, and the **Oreo crust chocolate cream pie** variation is the best for a chocolate environment. It bakes up crisp and holds its structure beautifully when poured over with the thick custard. You get that amazing textural fight—a sandy, buttery crunch against that silky, cool chocolate. It just screams indulgence!
Gathering Ingredients for Your Christmas Chocolate Cream Pie
Alright, let’s talk substance! Making a fantastic **holiday chocolate pie recipe** starts with respecting the ingredients. Here at Cooking Zenith, we believe that elevating your everyday cooking means starting with quality stuff, even for a simple crust. Don’t just grab anything; we’re building the foundation for a true showstopper here. Getting these few items together is where the real magic starts, and honestly, it’s half the fun of planning ahead!
For the No-Bake Oreo Crust
We use Oreos, of course, but here’s a small secret: scrape out most of the white filling! We want the dark, sturdy cookie part for structure and intense chocolate flavor. You’ll need:
- 1 1/2 cups chocolate wafer cookie crumbs (about 30 Oreos, filling removed)
- 6 tablespoons unsalted butter, melted
- 1/4 cup granulated sugar
- 1/4 teaspoon salt
For the Rich Chocolate Filling
This is the heart of the pie, the decadent part that sets up perfectly in the fridge. The cornstarch is your best friend here; it’s what makes this a nearly **no fail chocolate cream pie** because it guarantees a thick set without any guesswork!
- 1/2 cup granulated sugar
- 1/2 cup unsweetened cocoa powder
- 1/4 cup cornstarch
- 1/4 teaspoon salt
- 1/4 teaspoon cream of tartar (this helps stabilize everything, don’t skip it!)
- 2 cups whole milk
- 2 large egg yolks
- 2 tablespoons unsalted butter, cut into pieces
- 1 teaspoon vanilla extract
For the Whipped Cream Chocolate Pie Topping
Keep this stuff COLD! Seriously, chilled heavy cream beats room temperature cream nine times out of ten. For the fluffiest topping on your **whipped cream chocolate pie**, ensure your bowl and beaters are frosty!
- 2 cups heavy whipping cream
- 1/4 cup powdered sugar
- 1 teaspoon vanilla extract
- Optional: Chocolate shavings or holiday sprinkles for garnish
Step-by-Step Instructions for the Christmas Chocolate Cream Pie
Don’t let the list of steps intimidate you! I promise, once you see it in action, you’ll realize this is just smart assembly, not tough baking. We’re building layers of perfection here. If you’re nervous about the custard, remember that the science behind this filling is what keeps it stable, so follow along! If you want to read a little more about how we build recipes here at Cooking Zenith to give you that ultimate confidence, you can always check out our story here.
Baking and Cooling the Oreo Crust
We start by getting that base nice and firm! Preheat your oven to 350°F (175°C). In a bowl, mix your cookie crumbs, 6 tablespoons of melted butter, the little bit of sugar, and your salt. You want this mixture to feel like wet sand—damp, but not sloppy. Press it *really* firmly into your 9-inch pie plate. Use the bottom of a drinking glass to really compact it on the bottom and push it up the sides. Bake it for exactly 10 minutes. This step is non-negotiable because it sets the crust so your filling doesn’t turn it soggy later. Let it cool completely on a rack before you even think about pouring in that filling!
Mastering the Thick Chocolate Filling Base
Now for the main event! In your saucepan—remember, medium heat only, we don’t want scorched chocolate—whisk together your dry ingredients: the sugar, cocoa powder, cornstarch, salt, and that little pinch of cream of tartar. Get them totally combined before adding the milk. Whisk in the 2 cups of milk until it’s liquid satin. Now, bring this mixture up to heat, stirring constantly. Seriously, don’t walk away! We need it to boil and thicken up significantly. Once it hits a good boil, keep stirring and let it bubble gently for a full minute. That minute activates the cornstarch! Then, pull it right off the heat.
Tempering Eggs: The Key to Smooth Filling
We have to wake up those egg yolks gently so they don’t curdle when they hit the hot stuff. Whisk your 2 egg yolks really well in a separate little bowl. Now, slowly, drizzle about 1 cup of that hot chocolate mixture into the yolks while beating them constantly with your whisk. I mean trickle, trickle, trickle! If you dump it, you’ll end up with chocolate scrambled eggs—and nobody wants that in a **Christmas chocolate cream pie**.
Once those yolks are warm and happy, pour that tempered mixture back into the main saucepan.
Put the whole thing back on medium heat and stir constantly for just one more minute until it thickens again, right up to a very thick stew-like consistency. Don’t let it boil aggressively again! Pull it immediately. Stir in your remaining 2 tablespoons of butter and the vanilla. Wow, that smells incredible already!
Assembling and Chilling the Christmas Chocolate Cream Pie
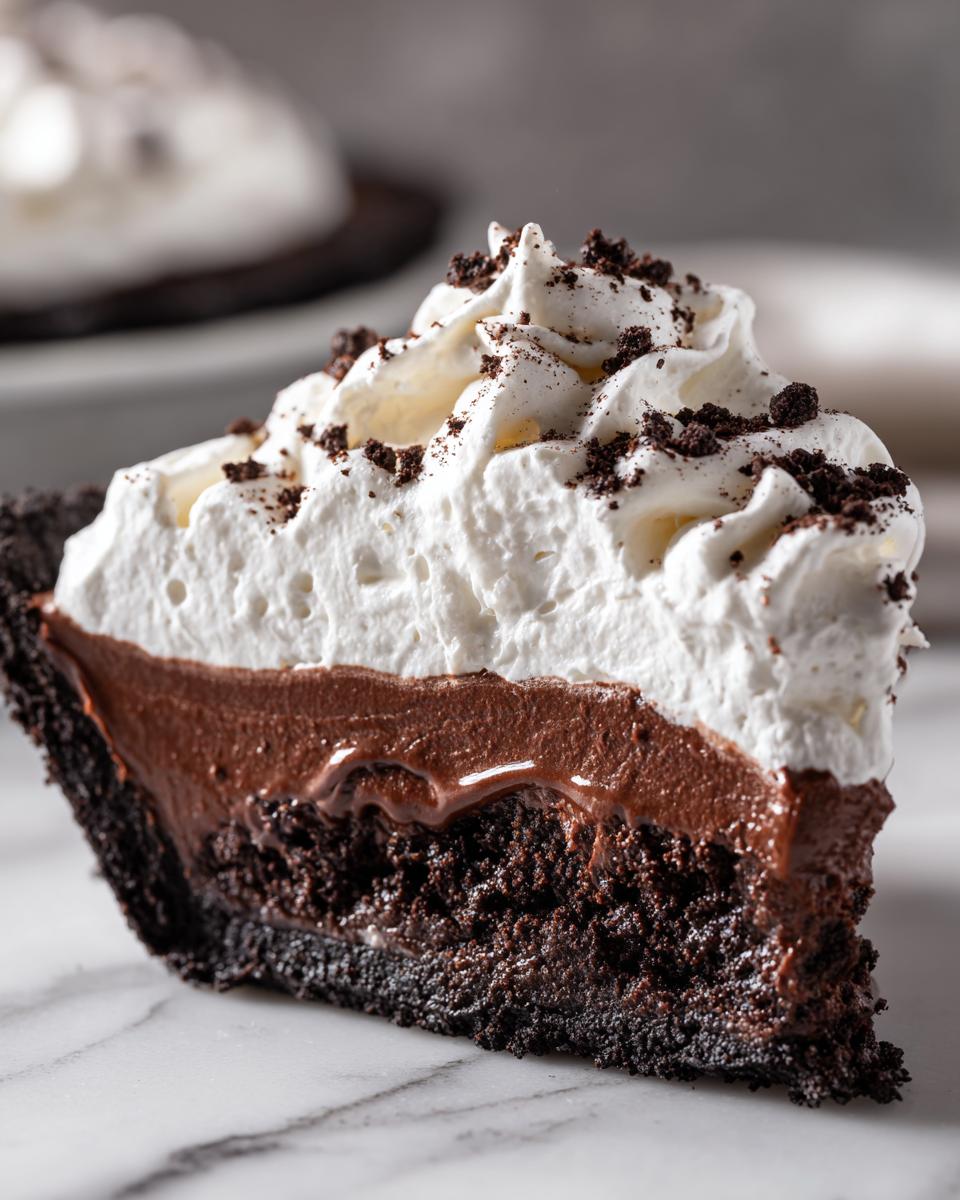
Spoon that gorgeous, hot filling right into your cooled Oreo crust. Here’s the trick to keeping that beautiful, glossy top: grab a sheet of plastic wrap and press it directly onto the surface of the chocolate filling, making sure there’s no air gap. This stops that weird, slightly rubbery skin from forming while it chills. Tuck the whole thing into the fridge. I tell everyone minimum 4 hours, but if you’re planning ahead for your **make ahead Christmas desserts** spread, leave it overnight. The crust will absorb just enough moisture to be perfect, and the filling will be absolutely solid and ready for its crowning glory.
Tips for a Flawless Holiday Chocolate Pie Recipe
I want your first time making this **Christmas chocolate cream pie** to be absolutely perfect, which is why we need to talk about a few little expert tricks. Getting that custard right and the topping light is key to its success as one of the best **easy holiday pie recipes**. These details turned my recipe from “pretty good” to that dish everyone talks about!
Achieving Stiff Peaks on Your Whipped Cream
If your whipped cream ends up looking soupy, it’s usually because the ingredients or tools were warm. Don’t let that happen! For the best results on your **whipped cream chocolate pie**, pop your mixing bowl and the whisk attachment into the freezer for about 15 minutes before you begin whipping. Seriously, it makes a huge difference. When you start whipping that cold heavy cream with the powdered sugar, watch it carefully. Stop beating the second you take the whisk out and the peak stands straight up without flopping over. Overbeating turns it into butter, and we definitely don’t want that texture contrast to fail!
Ingredient Substitutions for Your Christmas Chocolate Cream Pie
Life happens, and sometimes you realize you’re out of Oreos right when you want to bake! If you find yourself needing to swap out the crust, you can absolutely use graham crackers instead. Just remember that the graham cracker crust needs an extra little boost of chocolate flavor to compete with the Oreo base; you’ll just mix in 2 tablespoons of your cocoa powder right in with the crumbs and butter. If you’re low on cocoa powder, quality dark chocolate chips melted down with a little more milk can work in a pinch, but you might need a touch more cornstarch to compensate for the thickness. It’s still an amazing **festive Christmas dessert idea**, just tweaked for your pantry!
Making Your Christmas Chocolate Cream Pie Look Festive
We’ve done the hard work—the chill time is up, the custard is firm, and that cloud of whipped cream is ready to sit on top. Now, this is the fun, zero-stress part that makes it perfect for Pinterest photos! Since this whole pie is a fantastic **festive Christmas dessert idea**, we need to make it sparkle a little bit. This is where you get to play artist after the serious measuring is done.
Remember those optional garnishes? Let’s use them! Once you spread that beautiful whipped cream—try to make some nice swirls and peaks with the back of your spoon—you immediately want to think about texture contrast. Nobody wants a naked white mountain on their chocolate base!
Creating Chocolate Curls and Shavings
If you want those dramatic, elegant curls, grab a bar of nice dark chocolate—the kind you’d actually want to eat. You need the chocolate to be just slightly softened, so let it sit on the counter for maybe ten minutes, no more. Take a vegetable peeler, or even a sharp paring knife, and gently run it down the edge of the chocolate bar. Watch those delicate shavings fall right onto your pie! If they come out too chunky, your chocolate was too cold. If they melt straight away, it was too warm. It’s a tiny learning curve, but once you get it, you can cover the entire top surface!
Using Holiday Sprinkles for Quick Color
For the kids, or if you’re short on time, sprinkles are your best friend. Don’t just scatter them randomly, though! Think about color. If you use red and green nonpareils, try concentrating them in a neat little ring around the outer edge of the pie top. This frames the entire **Christmas chocolate cream pie** beautifully. Or, if you want to skip the chocolate curls entirely, you can dust a very thin layer of cocoa powder first on the whipped cream, and then strategically place shiny gold or silver sanding sugar right in the center. It catches the light, and it looks so classy while still being lightning fast to put together!

Because this pie is kept chilled right until serving, the whipped cream stays firm and the decorations look freshly applied. That’s the beauty of these **make ahead Christmas desserts**—everything looks perfect when it comes out of the fridge!
Storage and Serving Instructions for Your Make Ahead Pie
We’ve made it! The pie is decorated, and it’s time to let it rest. Since this is our star **make ahead Christmas dessert**, storage is super simple. Keep the finished pie—with the whipped cream and decorations all on top—covered loosely in the refrigerator. The cold temperature keeps that luscious whipped cream firm and the chocolate custard dense and sliceable. You can safely keep this pie good in the fridge for up to three days, though honestly, it rarely lasts that long in my house during the holidays!
When it’s time to serve, make sure you take it out about 15 minutes before you plan to slice it. We aren’t reheating this, of course, but letting it sit on the counter briefly softens the whipped cream just a tiny bit so it’s easier to cut through. That perfect, chilled texture is what makes slicing your **Xmas chocolate cream pie** so clean! Enjoy watching everyone dig in!
Frequently Asked Questions About This Holiday Chocolate Pie Recipe
I know diving into a recipe like this, even though it’s designed to be easy, can bring up a few questions. That’s totally normal! You want to make sure your **Christmas chocolate cream pie** turns out perfect for your guests. I’ve gathered the most common things I hear from readers when they tackle this **holiday chocolate pie recipe** so you can bake with total confidence. This upfront planning is key to stress-free entertaining!
Can I use a traditional pastry crust instead of the Oreo crust chocolate cream pie base?
That’s a great question, and honestly, the Oreo base is what makes this so incredibly easy to manage as a **make ahead Christmas dessert**! If you absolutely must use a traditional pie crust, you certainly can, but you have to treat it very carefully. You must blind bake it until it’s completely golden brown and cool, cool, cool before adding the filling. If the crust is even slightly warm, the hot custard will make it soggy right away. Then, you’d still need to press plastic wrap onto the filling, but you might want to add the whipped cream topping the day of serving just to keep the pastry super crisp!
How long can I keep the finished Christmas chocolate cream pie refrigerated?
Because we are working with a pure cream topping, I’d push it to a maximum of three days stored tightly covered in the fridge. The chocolate filling itself could probably last a week, but the whipped cream is best enjoyed within 48 hours. If you want the absolute freshest topping for your **Christmas chocolate cream pie**, I suggest making the filling and crust the day before, chilling them fully, and then whipping your cream and assembling the final top layer just a few hours before you plan to serve it. It keeps that topping light as air!
What is the secret to a truly ‘no fail chocolate cream pie’ filling?
If you want that perfectly smooth, thick texture that holds up beautifully when sliced, there are two moments you cannot rush. First, when you are cooking the milk/cocoa/starch mixture, you must let it come to a hard boil and cook for that full minute while stirring. Don’t stop as soon as it thickens! That cooks out the raw starch flavor and ensures it sets properly. Second, remember the tempering step! Go slow when introducing the hot liquid to the egg yolks—that prevents scrambling. Do those two things right, and I promise, you’ll have the most amazing, sliceable **no fail chocolate cream pie**!
Estimated Nutritional Data for This Christmas Chocolate Cream Pie
Now, let’s talk nutrition for a second. Listen, this is decadent holiday food, okay? This **Christmas chocolate cream pie** is built on Oreos, rich custard, and heavy cream, so it’s definitely not a low-calorie treat. But knowing the numbers helps when you’re planning that big **festive Christmas dessert ideas** spread! I always say if you’re going to indulge, know what you’re working with, right?
Keep in mind that these numbers are based on standard ingredient measurements and using the measurements from the recipe card. If you use different, extra-rich chocolate or slightly different cookie brands, those numbers might wiggle a touch. This is always just a good guideline for your **easy holiday pie recipes**!
- Serving Size: 1 slice
- Calories: 450
- Fat: 28g
- Carbohydrates: 48g
- Protein: 5g
See? Rich, but worth every single bite! It packs the flavor punch you expect from a serious **holiday chocolate pie recipe**. Don’t sweat the numbers too much, just enjoy that beautiful slice you made ahead of time!
Share Your Festive Creations
Okay, pie makers, you’ve done the planning, you’ve mastered the tempering, and your stunning **Christmas chocolate cream pie** is chilling perfectly in the fridge! Now comes the best part: sharing the love!
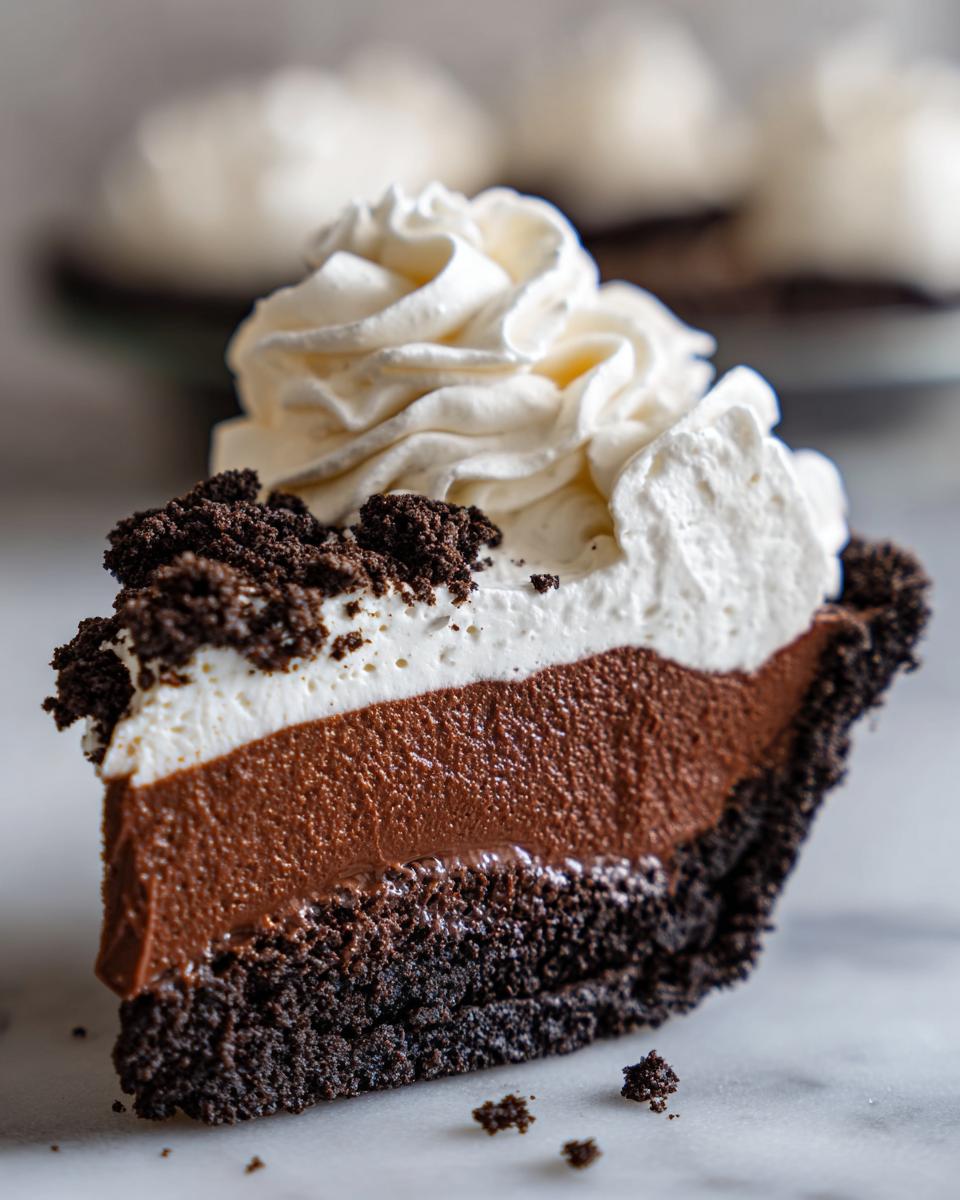
I absolutely live for seeing your successes. When you take that first beautiful slice—seeing the layers of the Oreo crust, the dark filling, and that towering whipped cream—it makes my whole week. Please, please, please come back here and leave a star rating to let other busy holiday bakers know how much you loved this recipe. Knowing that this **no fail chocolate cream pie** saved someone stress is the whole reason I started this in the first place!
Show Us Your Holiday Decor!
Snap a picture of the finished pie! If you went wild with chocolate shavings, or if you opted for those bright holiday sprinkles, I want to see it all. Tag us on Instagram so I can gush over your amazing presentation skills. Seeing how you adapt this recipe into your own **festive Christmas dessert ideas** is so inspiring.
Tell Us Your Best Make Ahead Secrets
What other tricks do you rely on to keep your holidays calm? We’ve all got those secret weapons for **make ahead Christmas desserts**, right? Drop your best tip for prepping ahead in the comments below. Maybe you have an amazing way to make frosting ahead of time, or perhaps you have your own version of that chocolate curl technique. Sharing our favorite **easy holiday pie recipes** and logistics is exactly how we all end up feeling less stressed and more festive. I’m always looking for ways to elevate my everyday, and hearing from you helps me do that!
If you had any trouble at all, or if you need follow-up advice on any step, don’t hesitate to reach out through our contact page. Just hop over to here—I read every message!
PrintMake-Ahead Christmas Chocolate Cream Pie with Oreo Crust

A rich, no-fail chocolate cream pie featuring a crisp Oreo crust and a light whipped cream topping, perfect for holiday planning.
- Prep Time: 25 min
- Cook Time: 15 min
- Total Time: 4 hr 40 min
- Yield: 8 servings 1x
- Category: Dessert
- Method: Stovetop and Chilling
- Cuisine: American
- Diet: Vegetarian
Ingredients
- 1 1/2 cups chocolate wafer cookie crumbs (about 30 Oreos, filling removed)
- 6 tablespoons unsalted butter, melted
- 1/4 cup granulated sugar
- 1/4 teaspoon salt
- 1/2 cup granulated sugar
- 1/2 cup unsweetened cocoa powder
- 1/4 cup cornstarch
- 1/4 teaspoon salt
- 1/4 teaspoon cream of tartar
- 2 cups whole milk
- 2 large egg yolks
- 2 tablespoons unsalted butter, cut into pieces
- 1 teaspoon vanilla extract
- 2 cups heavy whipping cream
- 1/4 cup powdered sugar
- 1 teaspoon vanilla extract
- Optional: Chocolate shavings or holiday sprinkles for garnish
Instructions
- Prepare the crust: Combine the chocolate wafer crumbs, 6 tablespoons melted butter, 1/4 cup granulated sugar, and 1/4 teaspoon salt in a bowl. Press the mixture firmly into the bottom and up the sides of a 9-inch pie plate. Bake at 350°F (175°C) for 10 minutes. Let the crust cool completely.
- Make the chocolate filling: In a medium saucepan, whisk together the 1/2 cup granulated sugar, cocoa powder, cornstarch, 1/4 teaspoon salt, and cream of tartar. Whisk in the whole milk until smooth.
- Cook the base: Heat the mixture over medium heat, stirring constantly, until it thickens significantly and comes to a boil. Boil for 1 minute while stirring. Remove from heat.
- Temper the egg yolks: In a small bowl, whisk the egg yolks. Slowly pour about 1 cup of the hot chocolate mixture into the yolks while whisking constantly.
- Combine: Pour the tempered yolk mixture back into the saucepan with the remaining hot chocolate. Cook over medium heat, stirring constantly, for 1 minute until the mixture is very thick. Do not boil again.
- Finish the filling: Remove the saucepan from the heat. Stir in the 2 tablespoons of butter and 1 teaspoon of vanilla extract until the butter melts and the filling is smooth.
- Chill the filling: Pour the hot filling into the cooled Oreo crust. Press plastic wrap directly onto the surface of the filling to prevent a skin from forming. Refrigerate for at least 4 hours, or until completely cold and set.
- Make the topping: In a large bowl, beat the heavy whipping cream, powdered sugar, and 1 teaspoon vanilla extract with an electric mixer until stiff peaks form.
- Assemble the pie: Spread or pipe the whipped cream evenly over the chilled chocolate filling.
- Decorate and serve: Garnish with chocolate shavings or holiday sprinkles. Keep refrigerated until ready to serve. This pie is best made one day ahead.
Notes
- For a no-fail chocolate cream pie, make sure to temper the egg yolks slowly to prevent scrambling.
- If you do not have chocolate wafer cookies, you can substitute with graham crackers and add 2 tablespoons of cocoa powder to the crust mixture.
- Chill the pie for a minimum of 6 hours for the best texture before slicing.
Nutrition
- Serving Size: 1 slice
- Calories: 450
- Sugar: 45g
- Sodium: 250mg
- Fat: 28g
- Saturated Fat: 16g
- Unsaturated Fat: 12g
- Trans Fat: 0g
- Carbohydrates: 48g
- Fiber: 2g
- Protein: 5g
- Cholesterol: 75mg