
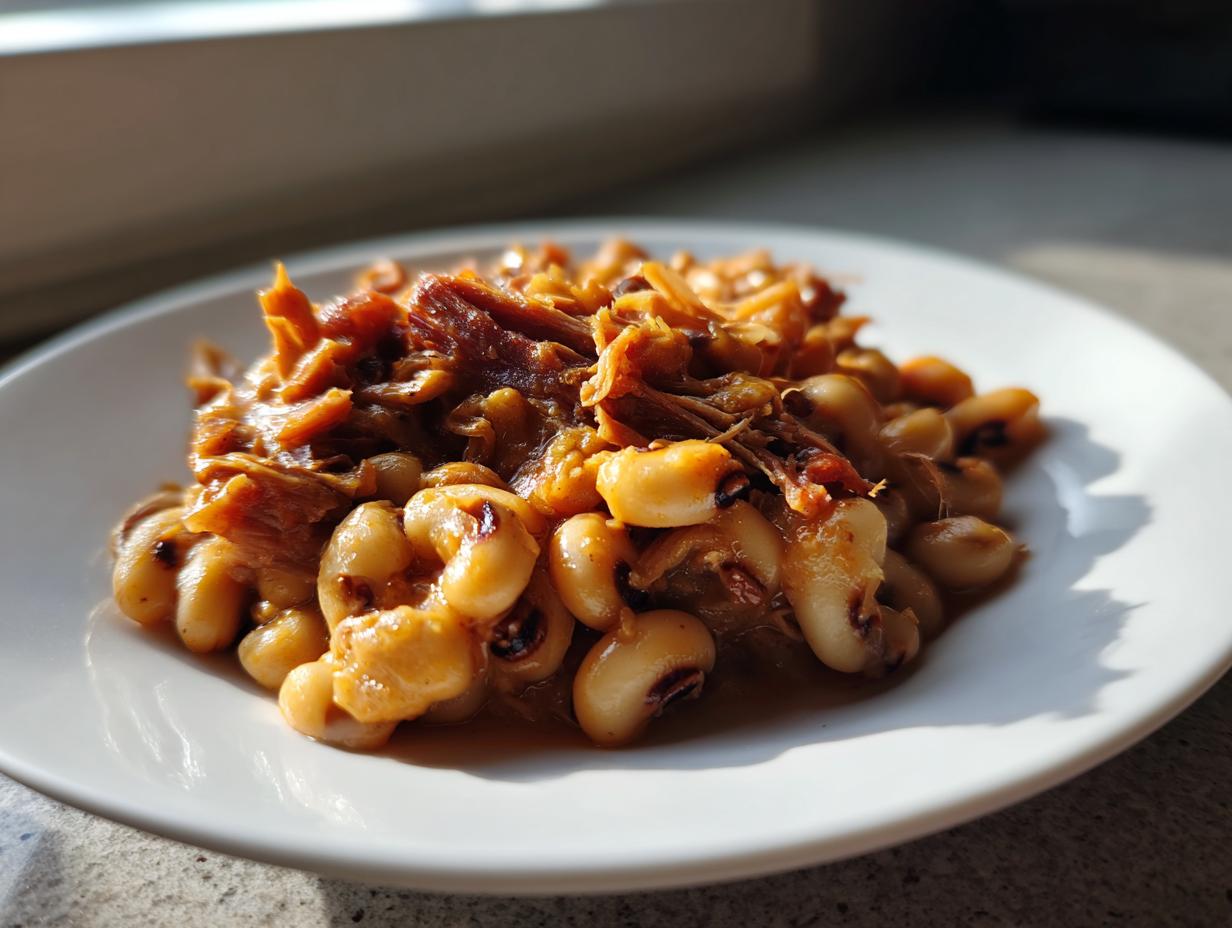
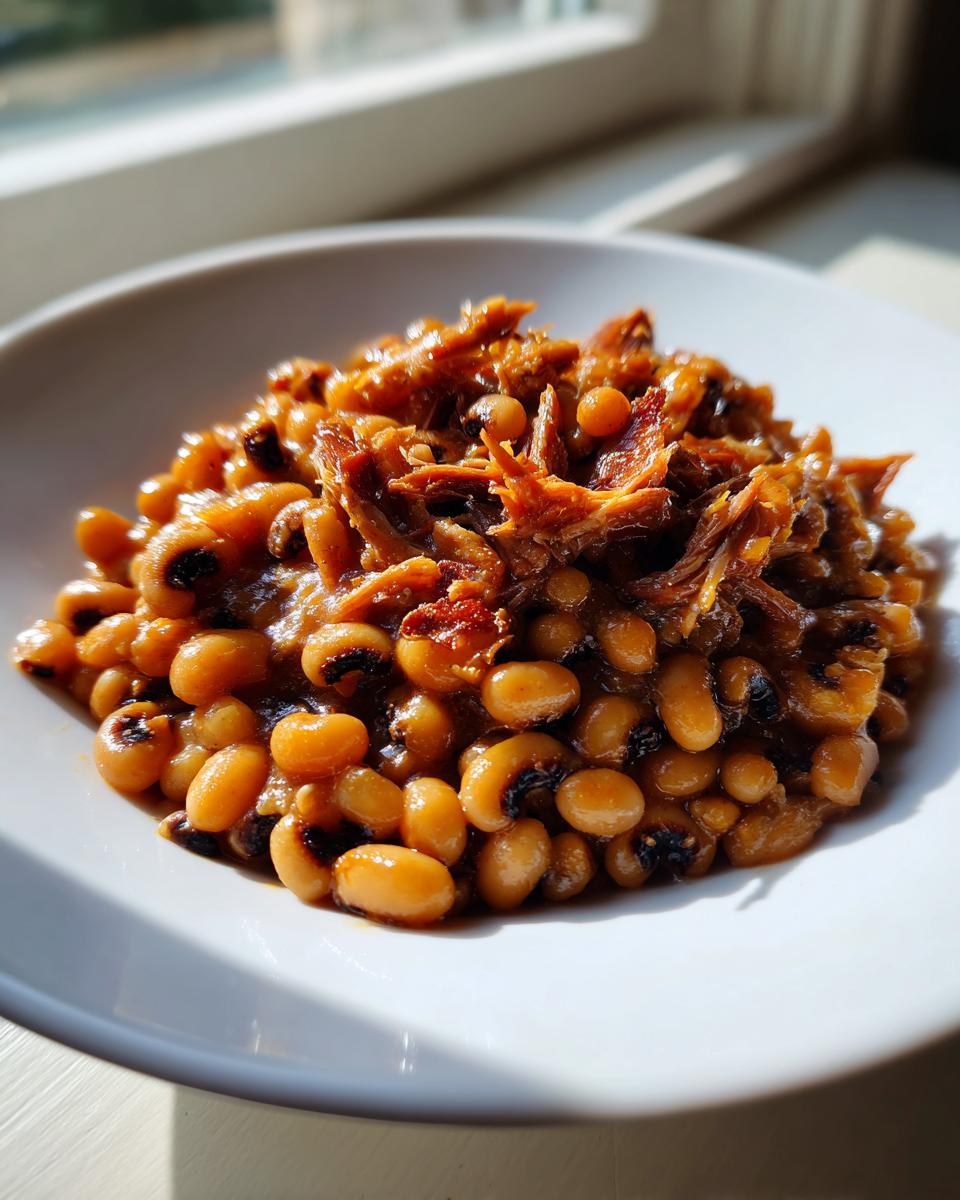
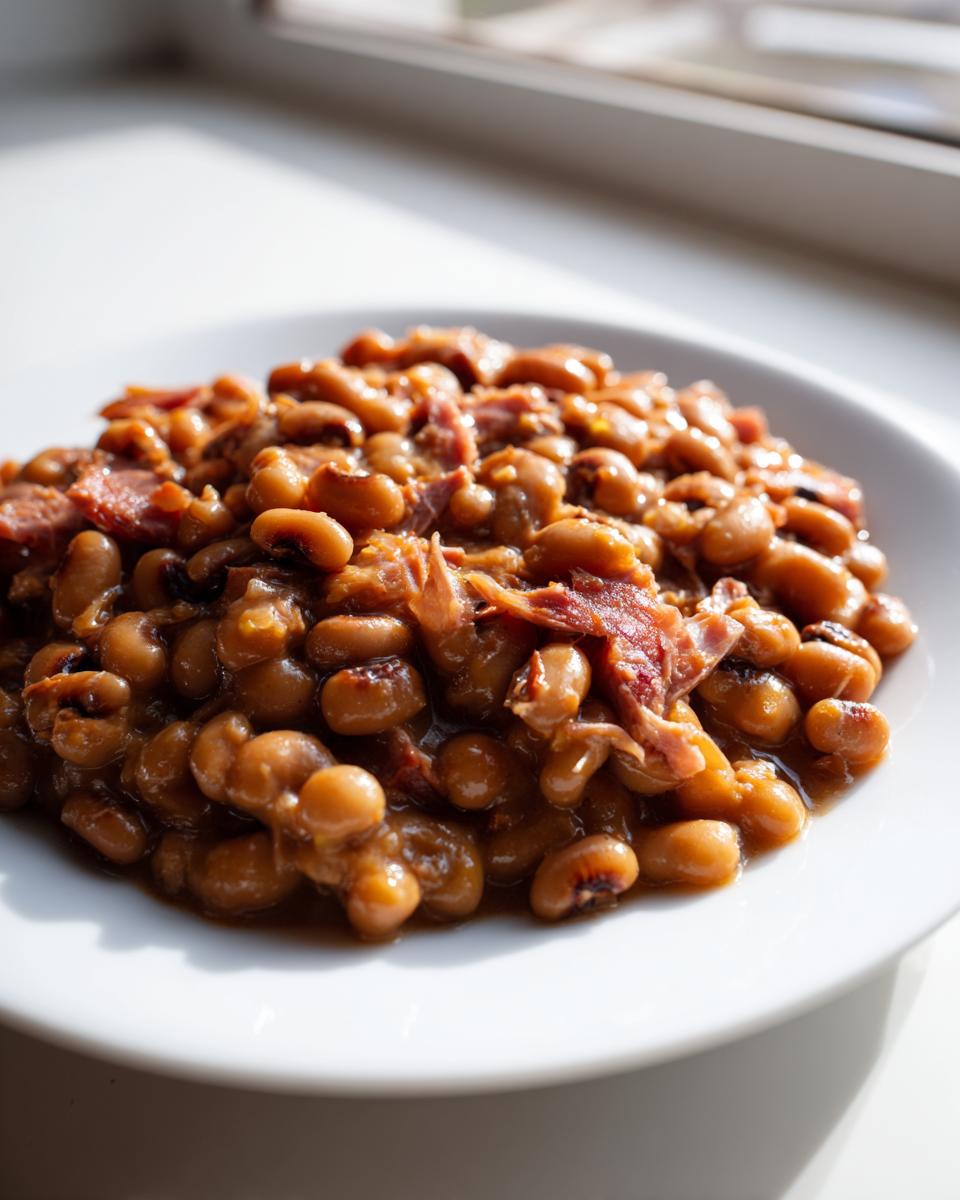
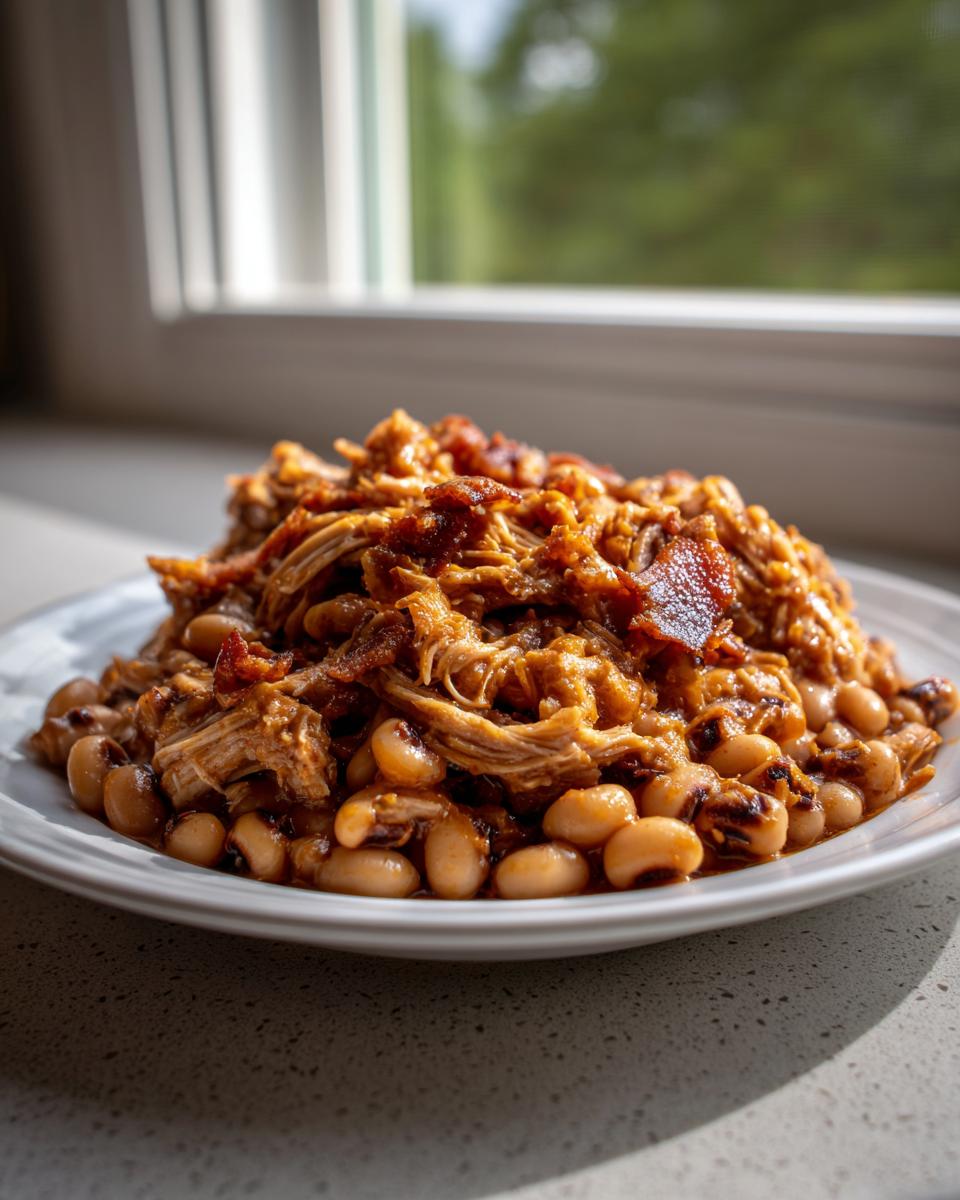
You know, for me, southern food isn’t just delicious; it’s history served warm right in a bowl. And there’s no dish more steeped in tradition and good intention than black eyed peas. Come New Year’s Day, everyone wants luck, but I want flavor that tastes like home. That’s why I swear by this recipe. I’ve taken what I learned watching my family cook and paired it with the thoughtful, practical approach Aria Thompson uses in her kitchen, ensuring you get that unbelievable smoky, creamy texture on the stovetop, no complicated steps needed. Trust me, these aren’t your average beans!
- Why This Southern Black Eyed Peas Recipe is a Keeper
- Gathering Ingredients for Your Black Eyed Peas
- How To Cook Black Eyed Peas on the Stovetop
- Instant Pot Black Eyed Peas Recipe Variation
- Tips for Perfect Traditional Black Eyed Peas Every Time
- Serving Suggestions for Your Black Eyed Peas
- Storage and Reheating Instructions for Flavorful Bean Recipes
- Frequently Asked Questions About Black Eyed Peas
- Estimated Nutritional Data for Black Eyed Peas
- Share Your Comfort Food Classics
Why This Southern Black Eyed Peas Recipe is a Keeper
Look, there are a million ways to cook beans, but these black eyed peas stand out from the crowd. They check every box you could possibly want when you’re craving something hearty and soulful. This is how we do comfort food in the South!
Authentic Flavor Profile
The magic here comes straight from a true Southern Black Eyed Peas Recipe. We aren’t skimping on flavor! That deep, savory smokiness we love? That comes from simmering everything with a good smoked turkey leg or a ham hock. It infuses the entire pot.
Achieving Creamy Black Eyed Peas Texture
You want those perfect Creamy Black Eyed Peas, right? Well, the secret isn’t heavy cream! It’s just letting them simmer low and slow until they’re tender, and then smashing just a small portion against the side of the pot. It thickens the broth naturally.
Perfect for New Year Black Eyed Peas Tradition
If you’re looking for good fortune, this is your dish! We always make sure these are on the table for the New Year Black Eyed Peas tradition. It’s more than just a side dish; it’s genuinely wishing for prosperity in the year ahead.
Gathering Ingredients for Your Black Eyed Peas
Okay, now that we know why we love this recipe, we need to get our supplies ready! Remember, great flavor starts way before the heat turns on. For these hearty black eyed peas, the star ingredient choice is huge for that smoky base. Keep your measurements clear—I always lay everything out on the counter so I don’t miss a thing mid-simmer. Don’t worry; we aren’t relying on a mile-long shopping list here! If you want to peek at other fun ways folks have done their beans, I saw another great recipe for black eyed peas soup that looked interesting too.
Ingredient Notes and Substitutions
The broth and the meat? Non-negotiable for that authentic taste. If you can’t find a smoked turkey leg, using a ham hock works just as beautifully. I’ve even tried chopping up some thick-cut bacon and rendering it down first, using that fat to sauté the onions—wow, talk about flavor! If you are making the Vegan Black Eyed Peas Recipe version (which is totally doable!), you’ll want to skip the meat entirely but absolutely add 1 teaspoon of liquid smoke when you stir in your aromatics later. That little bit of magic keeps the flavor deep and satisfying, even without the meat. Don’t forget that splash of vinegar at the end; it truly wakes everything up!
How To Cook Black Eyed Peas on the Stovetop
Alright, here’s the main event! Getting these black eyed peas tender and full of that deep, savory flavor takes a little patience, but honestly, most of that time is hands-off, letting the magic happen. Remember, this is the classic stovetop way—the original foundation for fantastic Southern Comfort Food Beans. Just follow my lead, and you’ll nail this every single time.
Initial Simmer and Flavor Building for Black Eyed Peas
First thing, always rinse your dried beans well and pick through them for any little stones or bits—better safe than sorry! You’re going to combine the rinsed peas with about six cups of broth or water in a big pot and toss in that smoked turkey leg or ham hock. Bring it to a rolling boil, then immediately drop the heat down, slap a lid on it, and let it just barely bubble for a full hour. That hour is what starts breaking down the tough outer layer and really pushing that smoky goodness into the little beans.
Sautéing Aromatics for Smoky Black Eyed Peas Side Dish
While those peas are getting acquainted with the smoked meat, we build our flavor bomb! Grab a separate skillet and get that olive oil warm over medium heat. Toss in your chopped onion until it starts looking soft—maybe five minutes. Then, hurry up! Add in your minced garlic, smoked paprika, thyme, and that tiny dash of cayenne if you like a little kick. You only cook this mix for about sixty seconds. That quick toast, called blooming, really wakes up those herbs and spices so they pack a punch when they hit the beans.
Finishing and Adjusting Seasoning for Creamy Black Eyed Peas
Once that first hour is up, fish out your meat. Shred every last bit of savory goodness off that bone and put the meat right back into the pot. Now, stir in your sautéed onion/spice mix and that bay leaf. Let it all simmer, partially covered, for another 30 to 45 minutes. Stir every so often so they don’t stick! When they are tender, pull out the bay leaf—we don’t eat those! Taste it, add salt and pepper if you need to, and then here’s the trick for Creamy Black Eyed Peas: take a spoon and gently mash about a quarter cup of the peas against the pot wall. Stir that in! Finally, that tablespoon of apple cider vinegar brightens up the whole pot instantly. Perfect!
Instant Pot Black Eyed Peas Recipe Variation
Now, I know some of you are kitchen gadget wizards, and honestly, I get it—sometimes you just need dinner faster! If you’re looking to speed up the process without losing that fantastic deep flavor, the pressure cooker is your new best friend. Making Instant Pot Black Eyed Peas is a total game-changer when you wake up craving that smoky side dish but don’t have two hours to stand over the stove. It works beautifully!
The main thing to remember here is that the Instant Pot handles the long simmering of the beans and meat all at once. You’re going to combine the rinsed black eyed peas, the broth or water, and your smoked turkey leg or ham hock right inside the liner. Seal it up tight!
Here’s the timing I use for that perfect tender texture: cook it on High Pressure for exactly 15 minutes. Once the time zips off, don’t just pop the valve open, okay? You need to let it sit for a full 10 minutes using Natural Pressure Release (NPR). That slow release is essential for getting the texture just right. After those 10 minutes, you can quickly release any remaining pressure.
What about those yummy aromatics we sautéed before? You can’t do that part inside the main pot when pressure cooking, so you do it separately. Sauté your onions, garlic, and all those spices in the Instant Pot’s sauté function, or in a small skillet on the side. Once the beans are done and shredded, stir in that sautéed mixture, remove the bay leaf, and hit it with that apple cider vinegar boost. Don’t forget to mash a little bit against the side if you want that signature creamy thick texture! It really is that simple to see how easy quick black eyed peas dinner can be!
Tips for Perfect Traditional Black Eyed Peas Every Time
Even though this recipe is straightforward, getting those Traditional Black Eyed Peas absolutely perfect requires a few little moves that separate a good pot of beans from a *great* pot. I learned these through trial and, let’s be honest, a few small kitchen disasters. Trust me, paying attention to these details saves you heartburn later!
The first thing, and I mentioned it briefly, is the picking-over ritual. Never skip this! I once made a huge batch for a holiday party, super excited, only to have someone politely spit out a tiny pebble that nearly chipped a tooth. Oops! Now, I always spread the dried peas out on a clean white towel and look for any tiny clumps or rocks before even rinsing them. It takes two minutes and is honestly the #1 step for worry-free eating.
Here’s a big one concerning salt, which applies to most dried beans: Don’t add much salt during that first long simmer with the smoked meat. Salt can sometimes toughen the skins of the beans, which means they don’t get as tender as they should. I wait until after the meat comes out and everything goes back in to adjust the primary salt content. Then, I add the salt and pepper right alongside the aromatics.
When it comes to texture, remember that final consistency is subjective. Some folks like soup, and others want a thick side dish. If you let them simmer too long, they get mushy mushy. If you pull them too soon, they are slightly chalky. My best advice for getting that perfect balance is to start checking them around the 30-minute mark of the second simmer. Pull out a bean, let it cool for a second, and bite it. It should yield easily but still have a distinct *bean* presence, not dissolve completely. Remember, Easy Black Eyed Peas are about timing, not just tossing things in a pot!
Serving Suggestions for Your Black Eyed Peas
So, you’ve made the most perfect pot of smoky, savory black eyed peas! Congratulations! But seriously, the meal isn’t over yet, honey. These aren’t just meant to sit sadly on the side of the plate all alone. In true Southern style, these Comfort Food Classics need friends—and I mean the *right* friends!
The number one, absolute must-have pairing, no excuses, is a piece of hearty, slightly sweet cornbread. We always use cornbread that isn’t too sweet, something with a bit of grit to it, perfect for mopping up that rich, flavorful broth at the bottom of your bowl. Don’t you dare throw that broth away!
Another traditional partner that makes this a truly complete meal is greens, like collards or mustard greens. When you’ve got your creamy black eyed peas next to tender, slightly bitter greens, you get this perfect balance of richness and earthiness. I’ve seen how folks combine the two on one plate—it’s a work of art. You can even check out some terrific ideas for Black Eyed Peas with Greens if you want to take that tradition up a notch.
And listen, if you’re feeling extra hungry, or maybe you made a big batch just for leftovers, spooning these over a bed of fluffy white rice turns this side dish into a filling powerhouse. Rice soaks up all that smoky seasoning, making it reminiscent of classic Hopin’ John, but much creamier. Serve it hot, serve it proudly, and make sure everyone gets plenty of that broth!
Storage and Reheating Instructions for Flavorful Bean Recipes
This is the part I love most about making big pots of Flavorful Bean Recipes like these: they are even better the next day! Seriously, don’t even try to resist eating them straight out of the fridge the morning after. Those smoky flavors that we worked so hard to build actually deepen and meld beautifully overnight. It’s like the black eyed peas have a little cozy reunion in the refrigerator!
When you’re ready to put them away, make sure they are totally cooled down naturally before you seal them up. I use glass containers because they microwave so nicely later, but any airtight container works fine. You can safely tuck these leftovers into the fridge for about four, maybe five days max. Any longer than that, and I start feeling nervous about the quality, even though beans are pretty hearty.
The Best Way to Reheat Your Black Eyed Peas
Reheating is where you can accidentally ruin that perfect creamy texture if you aren’t careful. If you just blast them on high heat in the microwave, you risk drying out the beans on the top layer while the bottom stays lukewarm. That’s a tragedy!
First, I always advise adding a little splash of liquid back into the pot or container before heating. Water works, but chicken broth is even better if you have some handy. This keeps the peas from turning into a stiff block.
When using the stovetop, which I highly recommend for the best result, use low to medium-low heat. Give it a gentle stir every couple of minutes. You want them heated through slowly, not boiling aggressively. If they look too thick while reheating (which they probably will if you left them overnight), add that extra splash of broth until it looks like the perfect consistency again.
If you *have* to use the microwave, cover the container loosely with a plate or microwave-safe lid to trap some steam. Heat in short 60-second bursts, stirring well between each burst. This helps distribute the heat evenly and keeps them from scorching onto the bottom of the bowl. See? Easy ways to keep these Hearty Bean Recipes delicious for nearly a week!
Frequently Asked Questions About Black Eyed Peas
I get so many questions after folks try this recipe! It’s natural—beans can be tricky sometimes, and everyone wants to make sure they get their luck *and* flavor just right. I’ve gathered the ones I hear most often right here so you can cook with total confidence. Don’t hesitate to reach out if your question isn’t here, but hopefully, these cover what you need to know about these delicious black eyed peas!
Do I need to soak black eyed peas before cooking?
That’s a great question, especially when you’re getting ready for that big New Year Black Eyed Peas meal! For this specific creamy stovetop recipe, soaking isn’t strictly necessary, thank goodness. Our method of a long initial simmer (the first hour, remember?) is enough to soften that dried pea beautifully. Soaking can sometimes make them break down *too* much, which is the opposite of what we want for this texture. Just rinse and pick them over, and you’re good to go!
Can I make a Vegan Black Eyed Peas Recipe using this method?
Absolutely, yes! I already mentioned this swap in the tips section, but it’s worth repeating because so many people ask. You leave out the smoked turkey leg or ham hock entirely. But here is the most important part for that delicious soul food flavor: you *must* replace that smoky depth. Use vegetable broth instead of chicken broth, and when you add your aromatics (the onion, garlic, and spices), be sure to stir in 1 teaspoon of liquid smoke right along with them. That’s how you guarantee you still get that rich, savory flavor in your Vegan Black Eyed Peas Recipe. They turn out lovely and vegetarian!
How long do these black eyed peas last in the refrigerator?
These Southern Comfort Food Beans are just as good on day two as they are on day one. I generally tell people they are good for 4 to 5 days stored in an airtight container like the glass ones I love (check out my thoughts on organization over at my privacy page if you’re curious about my kitchen setup!). Honestly, I think they taste best on day two after all those spices have had extra time to mingle. Just remember to add a little extra liquid when you reheat them!
Estimated Nutritional Data for Black Eyed Peas
Now, let’s talk numbers for a second. I want to be super clear here: I am not a certified nutritionist! I’m just a home cook who likes to keep track of what we’re eating. The nutrition facts I give below are calculated based on the ingredients listed in the recipe above, divided by six servings. So, consider this your best guess—a really good estimate to help you plan your meals, but not a lab-verified guarantee!
When you make these incredible black eyed peas, remember that the sodium content can swing quite a bit depending on how salty your smoked turkey leg or ham hock was. Always taste before you add table salt at the end; that’s my biggest tip for keeping the sodium in check!
- Serving Size: 1 cup cooked
- Calories: 280
- Fat: 5g (Mostly healthy unsaturated fat!)
- Carbohydrates: 45g
- Fiber: 12g (That’s a ton of fiber, folks!)
- Protein: 15g
- Sugar: 2g
- Cholesterol: 20mg
See? Packed with protein and fiber—these aren’t just delicious; they’re genuinely satisfying and keep you full for hours. If you use the vegetarian version with vegetable broth, your cholesterol will be zero, too! If you ever need to reach out with questions about the recipe itself, don’t hesitate to hop over to the contact page. Happy cooking!
Share Your Comfort Food Classics
Now that you’ve got the secrets to tender, smoky, and absolutely perfect black eyed peas simmering on your stove, I want to hear all about it! Cooking Zenith is all about community, and the best part of sharing these recipes is hearing your own twists and successes. Did you use a ham hock or smoked turkey? Did you serve them next to your Grandma’s cornbread?
Please, don’t be shy! Scrolling down to the comments section is like pulling up an extra chair at my kitchen table. Leave me a rating—did these hit the comforting, hearty bean recipe mark for you? Tell me what you thought about the final seasoning or how you managed that creamy texture. I soak up every piece of feedback you send my way!
And if you snapped a picture of your beautiful bowl—maybe next to some dark greens or piled high over rice—I need to see it! Tag us on social media when you serve up these Comfort Food Classics. Sharing photos keeps the tradition alive and inspires the next home cook who might be nervous about tackling beans for the first time. Let’s celebrate this incredible Southern side dish together!
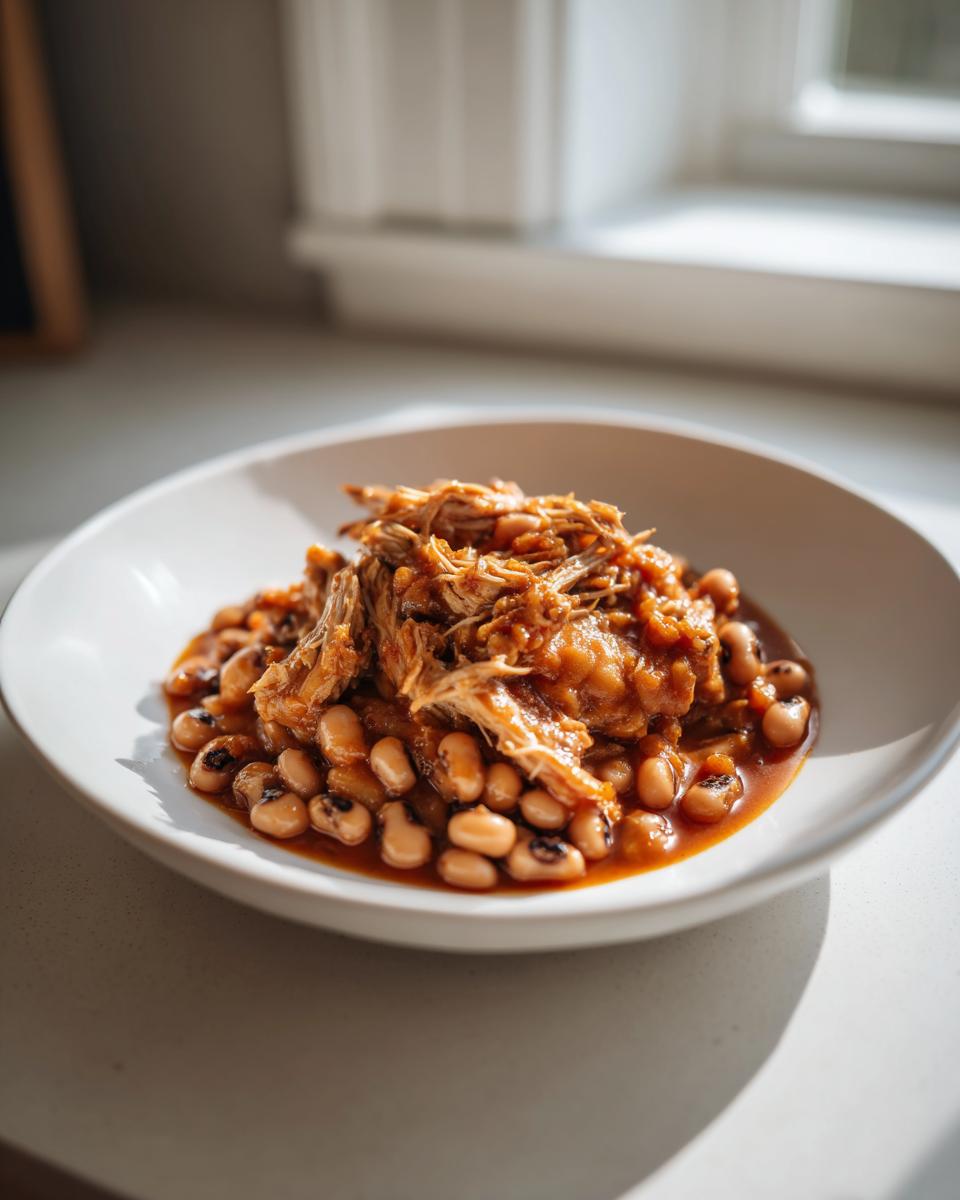
PrintCreamy Southern Black Eyed Peas with Smoked Turkey

Make tender, smoky, and creamy Southern Black Eyed Peas on the stovetop. This recipe uses smoked turkey for flavor and is a classic comfort food side dish.
- Prep Time: 15 min
- Cook Time: 1 hour 45 min
- Total Time: 2 hours 0 min
- Yield: 6 servings 1x
- Category: Side Dish
- Method: Stovetop
- Cuisine: Southern American
- Diet: Low Fat
Ingredients
- 1 pound dried black eyed peas, rinsed and picked over
- 6 cups water or low-sodium chicken broth
- 1 smoked turkey leg or 1 ham hock
- 1 tablespoon olive oil
- 1 medium yellow onion, chopped
- 2 cloves garlic, minced
- 1 teaspoon smoked paprika
- 1/2 teaspoon dried thyme
- 1/4 teaspoon cayenne pepper (optional)
- 1 bay leaf
- 1 teaspoon salt (or to taste)
- 1/2 teaspoon black pepper
- 1 tablespoon apple cider vinegar
Instructions
- Place the rinsed black eyed peas and water or broth in a large pot or Dutch oven. Add the smoked turkey leg or ham hock. Bring to a boil, then reduce heat, cover, and simmer for 1 hour.
- While the peas simmer, prepare the aromatics. In a separate skillet, heat the olive oil over medium heat. Add the chopped onion and cook until softened, about 5 minutes.
- Add the minced garlic, smoked paprika, thyme, and cayenne pepper (if using) to the skillet. Cook for 1 minute until fragrant.
- After the peas have simmered for 1 hour, remove the turkey leg or ham hock. Shred the meat from the bone, discarding the skin and bone, and return the meat to the pot.
- Stir the cooked onion and garlic mixture, bay leaf, salt, and pepper into the pot with the peas.
- Continue to simmer, partially covered, for another 30 to 45 minutes, or until the peas are tender and the liquid has thickened slightly. Stir occasionally to prevent sticking.
- Remove the bay leaf. Stir in the apple cider vinegar. Taste and adjust salt and pepper as needed. For a creamier texture, mash about 1/4 cup of the peas against the side of the pot.
- Serve hot as a side dish, often paired with collard greens or cornbread.
Notes
- For a quicker method, use an Instant Pot. Combine peas, liquid, and smoked meat. Cook on High Pressure for 15 minutes, then allow a Natural Pressure Release for 10 minutes before quick releasing the rest. Sauté aromatics separately and stir in after pressure cooking.
- If you prefer a vegetarian option, omit the meat and use vegetable broth. Add 1 teaspoon of liquid smoke during the last 15 minutes of cooking for a smoky flavor.
- These black eyed peas are excellent served over rice for a complete meal.
Nutrition
- Serving Size: 1 cup cooked
- Calories: 280
- Sugar: 2
- Sodium: 450
- Fat: 5
- Saturated Fat: 1
- Unsaturated Fat: 4
- Trans Fat: 0
- Carbohydrates: 45
- Fiber: 12
- Protein: 15
- Cholesterol: 20