
Do you ever get that intense, deep-down craving for a juicy, perfectly grilled cheeseburger, but you just don’t want the fuss of assembling one? You want that savory ground beef, the tang of the condiments, and that gloriously gooey melted cheese, but in a handheld format? I totally get it! That’s why I developed these **cheesy cheeseburger pockets**. They take everything you love about your favorite burger joint and seal it into a portable, crispy cloud of deliciousness. As someone who built a career translating big ideas into simple action, I promise this recipe cuts through the noise. We’re taking classic comfort food and making it incredibly easy for your busy schedule.
- Why You Will Love These Ultimate Cheesy Cheeseburger Pockets
- Gathering Ingredients for Perfect **Cheesy Cheeseburger Pockets**
- Step-by-Step Instructions for Homemade Burger Pockets Baked
- Baking Your Ultimate Cheesy Pockets to Golden Perfection
- Tips for Making the Best **Cheesy Cheeseburger Pockets** Every Time
- Storage and Reheating **Portable Cheeseburger Snacks**
- Frequently Asked Questions About **Cheesy Cheeseburger Pockets**
- Nutritional Estimates for Your **Cheesy Cheeseburger Pockets Recipe**
- Share Your **Cheesy Cheeseburger Pockets** Creations
Why You Will Love These Ultimate Cheesy Cheeseburger Pockets
Honestly, you’re going to make these so often you’ll need to hide the crescent roll supply! They hit that perfect spot between a satisfying meal and an easy snack. These are pure **Comfort Food Pockets</strong. Here’s why I know you’ll be obsessed:
- They cook up incredibly fast, making them perfect for **Quick Lunch Pockets** when time is short.
- The buttery, crisp crust is the perfect delivery system for a fully loaded burger filling.
- You don’t have to worry about messy toppings or grilling—everything stays safely tucked inside!
Maximum Cheesiness Guaranteed
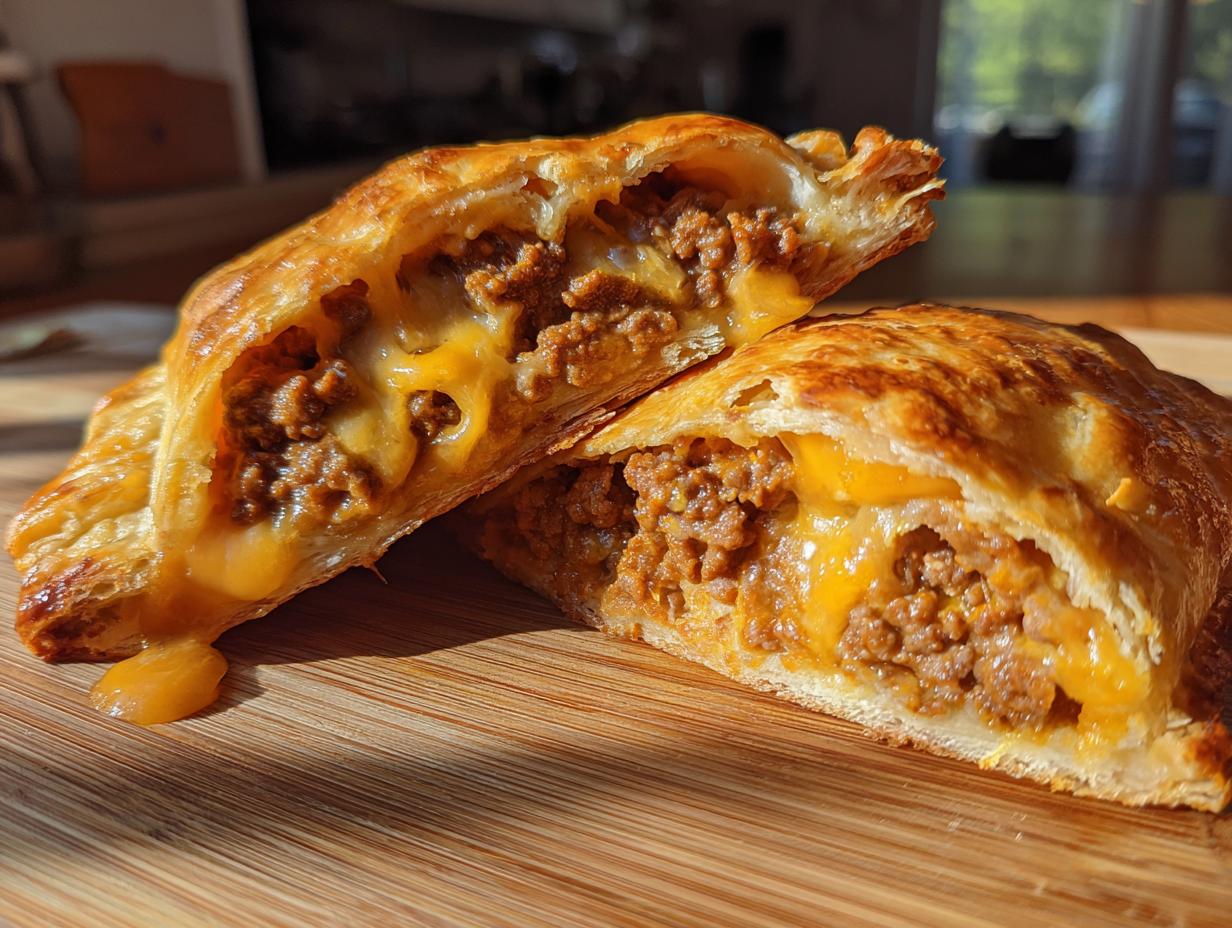
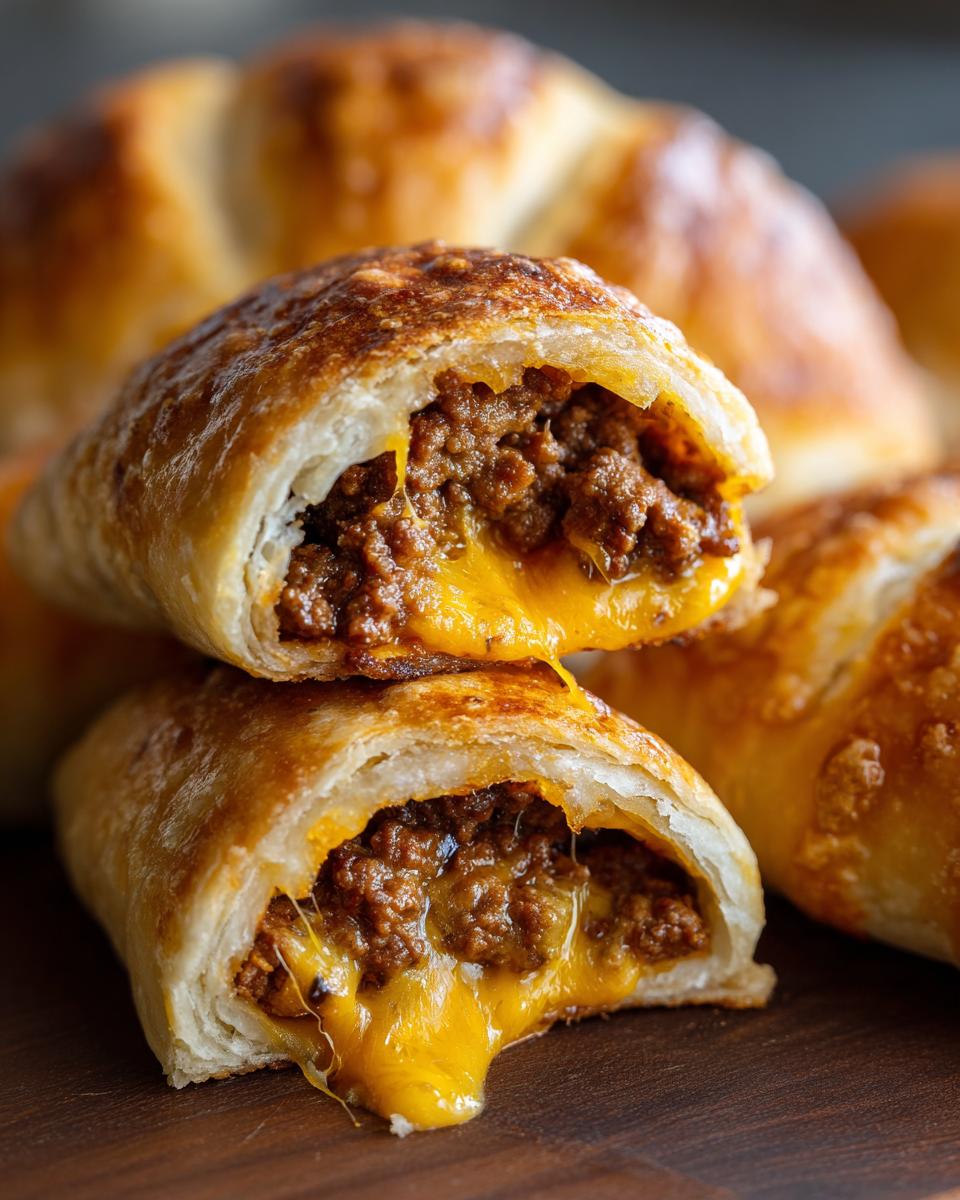
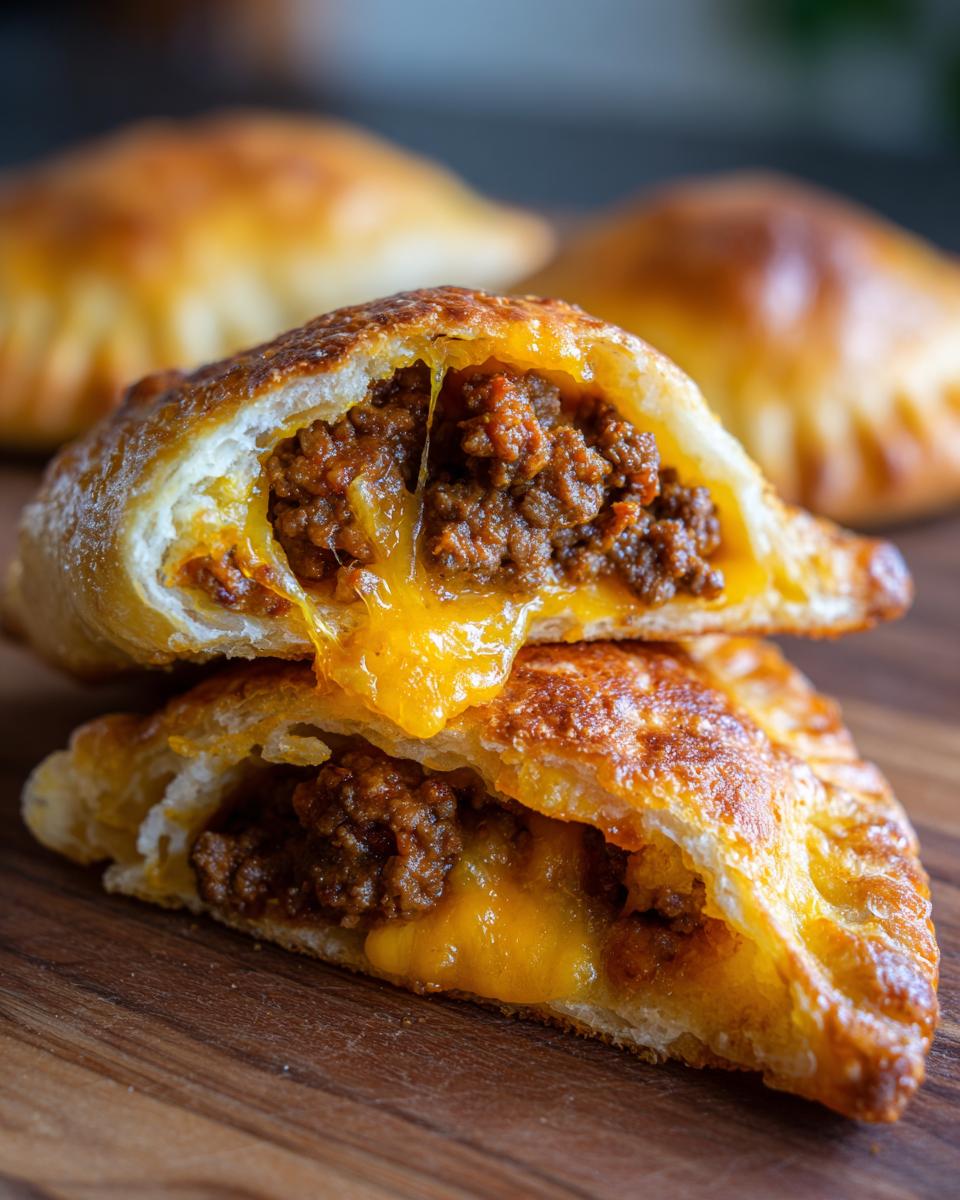
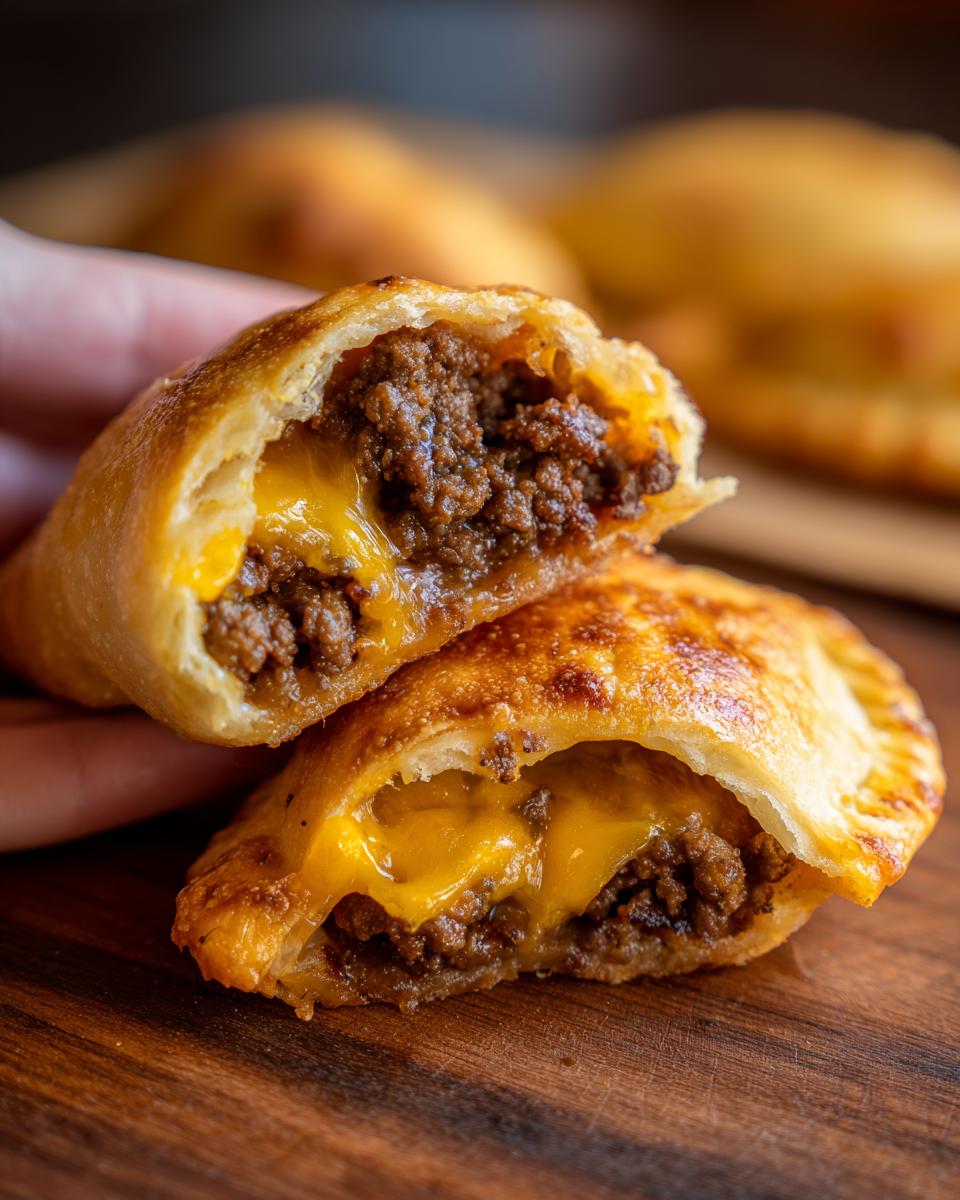
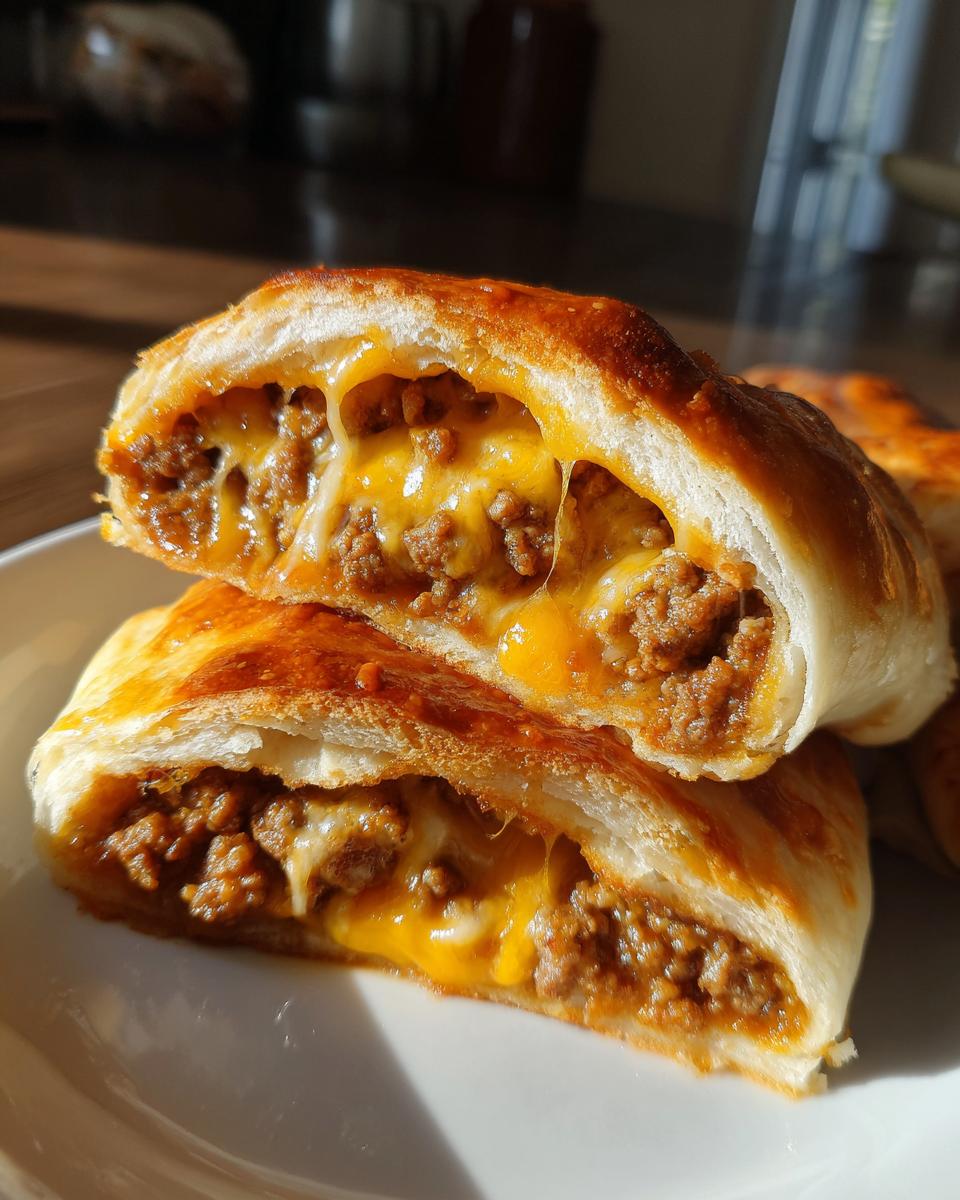
We are talking about **cheesy cheeseburger pockets**, right? So we need the cheese to deliver! I refuse to skimp here. We use a blend: sharp cheddar for that tangy flavor that cuts through the richness of the beef, and creamy American cheese. That American cheese melts down into pure, glorious goo that coats everything. When you bite in, trust me, you get that perfect, stretchy cheese pull.
Simple Dough Makes These **Cheesy Cheeseburger Pockets** Easy
Forget homemade pastry dough! This is where we save time without sacrificing texture. We use refrigerated crescent roll dough, which bakes up flaky and golden every single time. It pulls apart just like a classic hot pocket, but tastes a million times better. This simplicity also means these are fantastic for a **Kid Friendly Ground Beef Meal**—even the little ones can help seal up the edges.
Gathering Ingredients for Perfect **Cheesy Cheeseburger Pockets**
Alright, let’s get organized. Aria always says that great cooking starts with knowing exactly what you need before you turn on the stove. For these **cheesy cheeseburger pockets**, the ingredient list is pretty straightforward, which is exactly why I love them. We start with one pound of ground beef, which we’ll season up nicely. You’ll need one small onion, finely chopped—don’t try to sneak in too much, just enough for that classic savory note! We are piling in the flavor with one teaspoon each of garlic powder and onion powder, plus salt and pepper. And absolutely vital? One tablespoon of Worcestershire sauce for that deep umami. Then, of course, we need that 8-ounce package of refrigerated crescent roll dough, and our winning cheese combination: one cup shredded sharp cheddar cheese and a half cup of creamy American cheese for the ultimate melt.
Ingredient Notes and Substitutions for Your **Cheesy Cheeseburger Pockets**
Now for the fun part—my little pro tips! Make sure everything is mixed well, but don’t worry about the beef mixture being ice cold when you assemble; just make sure it isn’t piping hot, or it will melt the dough before it hits the oven. If you are feeling adventurous and want a slightly flakier, richer crust, a fantastic substitute for the crescent rolls is puff pastry. Just know you might get a few more pockets since puff pastry bakes up lighter! Also, don’t forget the finishing touches. These **cheesy cheeseburger pockets** are incredible dipped into simple ketchup, but for real satisfaction, whip up a quick special sauce or just have some sweet pickle relish ready to go alongside your **cheesy cheeseburger pockets**.
Step-by-Step Instructions for Homemade Burger Pockets Baked
Okay, this is where the magic really happens! Don’t rush this part, but honestly, because we’re using pre-made dough, this whole assembly process flies by faster than you think. Remember, the instructions I’m sharing here are broken down just like I teach things in the kitchen: prep first, then build! Before you even grab the skillet, you need to make sure your oven is ready to go. Preheat your oven to 375 degrees Fahrenheit and line a baking sheet up with parchment paper. Trust me on the parchment paper; it saves you scrubbing later, especially when the cheese tries to escape!
Preparing the Savory Filling for Cheesy Cheeseburger Pockets
First things first, grab your ground beef and throw it into a skillet over medium heat to brown. We need to cook it until it’s totally done, then comes the essential step: drain off every last bit of grease. Soggy beef equals soggy pockets, and we aren’t having that! Once drained, toss in your seasonings—the onion powder, garlic powder, salt, pepper, and that splash of Worcestershire sauce. Let that cook down for about five minutes while the onion softens. Once it smells incredible, pull it off the heat immediately. This is critical: you must let this beef mixture cool down for at least ten minutes before you try to put it near the dough. If it’s too hot, it melts the dough right away, leading to leaks, and nobody wants a sad, leaky pocket.
Assembling and Sealing Your Cheesy Crescent Roll Appetizers
While the beef takes a quick break, unroll your crescent roll dough onto your workspace and separate it carefully into those eight perfect little triangles. Now we build! Spoon about a tablespoon of the cooled beef mix down onto the wide end of each triangle. Then, we layer on the cheese—about a tablespoon of that cheddar/American blend right over the meat. Don’t overstuff them; more than a tablespoon of filling makes it hard to wrap! Now, starting at the wide end, roll that dough up tightly toward the tip, just like you’re rolling a normal crescent roll. Here’s the trick for success: you need to firmly pinch *all* the edges together, especially the seam running down the side as you roll. You want a complete seal. Brush the tops with your beaten egg wash—this is what makes them beautiful and golden brown. If you want to see how I use similar dough techniques for homemade pretzel dogs, check out that recipe!
Baking Your Ultimate Cheesy Pockets to Golden Perfection
Now that you’ve sealed up all those delicious fillings, it’s time for the oven to do the heavy lifting! This is where the waiting game begins, but honestly, 15 to 18 minutes flies by when you can already smell the buttery dough crisping up.
Remember, we set the temperature at 375 degrees Fahrenheit way back at the start. Keep an eye on them through the oven door—that’s the best way to learn how your particular oven behaves. You are looking for a deep, beautiful golden brown color on the pastry. That crust needs to look sturdy and beautifully puffed up, meaning the steam inside has done its job creating those lovely air pockets!
The total baking time is usually around 16 minutes for me, but if you notice the edges look brown before the center looks puffed, you might have overloaded them slightly. Next time, try using just a touch less beef filling! When they come out, the cheese might be bubbling slightly at the sealed edges, which is perfectly fine—it’s just showing off how much goodness is inside. Resist the urge to cut into one immediately! These **savory baked pockets** need a few minutes to rest so the piping hot cheese settles down. If you try to pull one apart piping hot, you’ll get burned fingers and a mess. Let them sit on that baking sheet for at least five minutes before you transfer them to a cooling rack.
Tips for Making the Best **Cheesy Cheeseburger Pockets** Every Time
Figuring out the little secrets that take a recipe from just ‘good’ to absolutely incredible is the best part of cooking, isn’t it? Because I’ve made these **cheesy cheeseburger pockets** more times than I can count, I’ve learned a few tricks that really boost flavor and prevent common pitfalls. My biggest enemy in a filled pocket is that dreaded soggy bottom, but we can beat that!
The absolute number one rule for crispy bottoms is temperature control. Make sure that browned ground beef filling has cooled significantly—at least until it’s just warm to the touch. If hot meat hits cold dough, you start steaming from the bottom up, and we want crispness! Also, drain that fat aggressively; a paper towel-lined plate works wonders to wick away any remaining moisture after you hit it with the Worcestershire sauce.
Flavor-wise, don’t cheap out on the cheese. Use good quality sharp cheddar; the pre-shredded stuff works fine for convenience, but if you grate a block of sharp cheddar yourself, the flavor payoff is huge. For an extra layer of flavor, I sometimes add a teaspoon of mustard powder right into the beef mixture—it mimics that classic burger topping flavor inside the pocket! If you’re looking for more ideas on turning simple ingredients into amazing handheld meals, you should check out my thoughts on making other savory baked pockets!
Storage and Reheating **Portable Cheeseburger Snacks**
Let’s face it, sometimes we make too much of the best things, right? These **cheesy cheeseburger pockets** are definitely one of those times! Luckily, they reheat beautifully, assuming you use the right technique to keep that crescent roll crust from getting sad and soggy.
If you have extras, just let them cool completely on the counter first. That stops condensation from forming inside your storage container. Once cooled, you can pop them into any airtight container. I find they stay genuinely delicious for about three days in the refrigerator—perfect for grabbing a lightning-fast lunch the next day!
Forget the microwave if you want crunch! If you zap these in the microwave, they turn into soft, chewy dough pouches, and that defeats the entire purpose of having a baked pocket. To bring back that golden, flaky goodness, you have two great options.
The oven is my preferred method. Set your oven or toaster oven to 350 degrees Fahrenheit. Pop the cooled pockets right onto a baking sheet—no need to cover them! Heat them for about 8 to 10 minutes. You’ll hear the dough crisping up again, and the cheese inside gets perfectly gooey without overcooking the beef. If you own an air fryer, even better! Toss them in at 350 degrees for about 4 to 6 minutes. They come out tasting almost freshly baked. See? Easy storage means you have **portable cheeseburger snacks** ready all week long!
Frequently Asked Questions About **Cheesy Cheeseburger Pockets**
I know you might have a few lingering questions once you see how simple these are! That’s why I always include this section—because learning the little nuances is how you boost your cooking confidence. These questions come up all the time when people move from making a regular burger to making these incredible handheld versions.
Can I prepare the **Easy Ground Beef Pockets** ahead of time?
Oh yes, you absolutely can! This is a lifesaver for busy weeknights. You can assemble the whole pocket—meat, cheese, sealed edges and all—and place them on the baking sheet. Just make sure to keep them covered tightly in the fridge. The trick is holding off on that final brushing of egg wash. Wait until about 15 minutes before you plan to bake them, apply the wash, and then pop them right into the preheated oven. This keeps the dough looking fresh and golden!
What is the best way to serve these **Stuffed Cheeseburger Pastries**?
While they are fantastic all on their own, since we sealed all the good stuff inside, it’s fun to serve them with dipping sauces on the side! I usually set out little bowls for dipping, which lets everyone customize their own experience. Ketchup is a given, of course, but you can also mix up some mayonnaise, yellow mustard, a dash of pickle juice, and a sprinkle of onion powder to make a super quick special sauce copycat. They also go great with small bowls of chopped pickles or relish on the side!
And just in case you were wondering if you can add toppings inside, yes, you can! Just remember that additions like finely chopped pickles or caramelized onions shouldn’t add too much extra moisture, or you might run into a little leakage. Keep additions minimal if you want to ensure these **quick lunch pockets** stay sealed perfectly.
If you are looking for more quick and tasty meal prep ideas, you can always check out my thoughts on making quick and healthy lunch ideas for later in the week!
Nutritional Estimates for Your **Cheesy Cheeseburger Pockets Recipe**
I always try to be transparent about what goes into our favorite dishes, even the seriously delicious, cheesy ones! Please keep in mind that these numbers are just an estimate, the kind of guideline you’d see on a recipe card. The actual counts can change a bit based on the brand of crescent roll dough you pick or exactly how much grease you manage to drain from your ground beef.
Based on the 8 servings our recipe yields, here’s a general snapshot for one of these amazing **cheesy cheeseburger pockets**:
- Serving Size: 1 pocket
- Calories: 320
- Fat: 18g
- Saturated Fat: 8g
- Protein: 17g
- Carbohydrates: 22g
- Sugar: 2g
- Sodium: 550mg
- Cholesterol: 55mg
See? They aren’t too heavy, especially considering how satisfying they are! With 17 grams of protein, they make a really solid meal. They are great for when you need something decadent but still want to keep track of things moderately. Enjoy every bite of these **Ultimate Cheesy Pockets**!
Share Your **Cheesy Cheeseburger Pockets** Creations
That’s it, folks! Inside that flaky, golden crust is everything wonderful about a classic cheeseburger, made simple and ready to take anywhere. My goal with Cooking Zenith has always been to show you that big, comforting flavors don’t need complicated steps, and I truly believe these **cheesy cheeseburger pockets** nail that promise.
Now that you’ve given these a try, I really want to hear what you thought! Did the sharp cheddar stand up to the American cheese exactly how you hoped? Did you sneak in any secret additions, like a tiny pickle slice or a dash of your favorite hot sauce? The kitchen is your laboratory, so experiment away!
Please take a moment to come back here and rate this recipe—give it a solid five stars if it earned it! And definitely drop your successes, modifications, or any questions you have down in the comments. Connecting with you and seeing how you bring these recipes to life is honestly my favorite part of this whole adventure. It helps me keep improving my guidance for everyone!
If you are buzzing for another quick, satisfying dinner idea that brings the family together without spending hours over the stove, be sure to check out my guide on simple weeknight dinners. Happy cooking, everyone!
PrintUltimate Cheesy Cheeseburger Pockets

Make these portable, baked pockets filled with seasoned ground beef and extra melted cheese using simple crescent roll dough. They are perfect for a quick lunch or satisfying snack.
- Prep Time: 15 min
- Cook Time: 18 min
- Total Time: 33 min
- Yield: 8 pockets 1x
- Category: Lunch
- Method: Baking
- Cuisine: American
- Diet: Low Fat
Ingredients
- 1 pound ground beef
- 1 small onion, finely chopped
- 1 teaspoon garlic powder
- 1 teaspoon onion powder
- 1/2 teaspoon salt
- 1/4 teaspoon black pepper
- 1 tablespoon Worcestershire sauce
- 1 (8 ounce) package refrigerated crescent roll dough
- 1 cup shredded sharp cheddar cheese
- 1/2 cup shredded American cheese
- 1 egg, beaten (for egg wash)
Instructions
- Preheat your oven to 375 degrees Fahrenheit. Line a baking sheet with parchment paper.
- Brown the ground beef in a skillet over medium heat. Drain off any excess grease.
- Add the chopped onion, garlic powder, onion powder, salt, and pepper to the beef. Cook until the onion softens, about 5 minutes.
- Stir in the Worcestershire sauce and remove the mixture from the heat. Let it cool slightly.
- Unroll the crescent roll dough onto a clean surface. Separate the dough into 8 triangles.
- In a small bowl, mix the cheddar and American cheeses together.
- Place about 1 tablespoon of the cooled beef mixture onto the wide end of each dough triangle.
- Top the beef with about 1 tablespoon of the cheese mixture.
- Starting at the wide end, roll each triangle up toward the tip. Pinch the edges firmly together to seal the pocket completely.
- Place the sealed pockets seam-side down on the prepared baking sheet.
- Brush the tops of the pockets lightly with the beaten egg wash.
- Bake for 15 to 18 minutes, or until the dough is golden brown and puffed.
- Let the cheesy cheeseburger pockets cool for a few minutes before serving.
Notes
- For extra flavor, mix 1 teaspoon of mustard powder into the beef mixture.
- You can substitute puff pastry for crescent rolls for a flakier texture.
- Serve these portable cheeseburger snacks with ketchup or pickle relish for dipping.
Nutrition
- Serving Size: 1 pocket
- Calories: 320
- Sugar: 2
- Sodium: 550
- Fat: 18
- Saturated Fat: 8
- Unsaturated Fat: 10
- Trans Fat: 0
- Carbohydrates: 22
- Fiber: 1
- Protein: 17
- Cholesterol: 55