
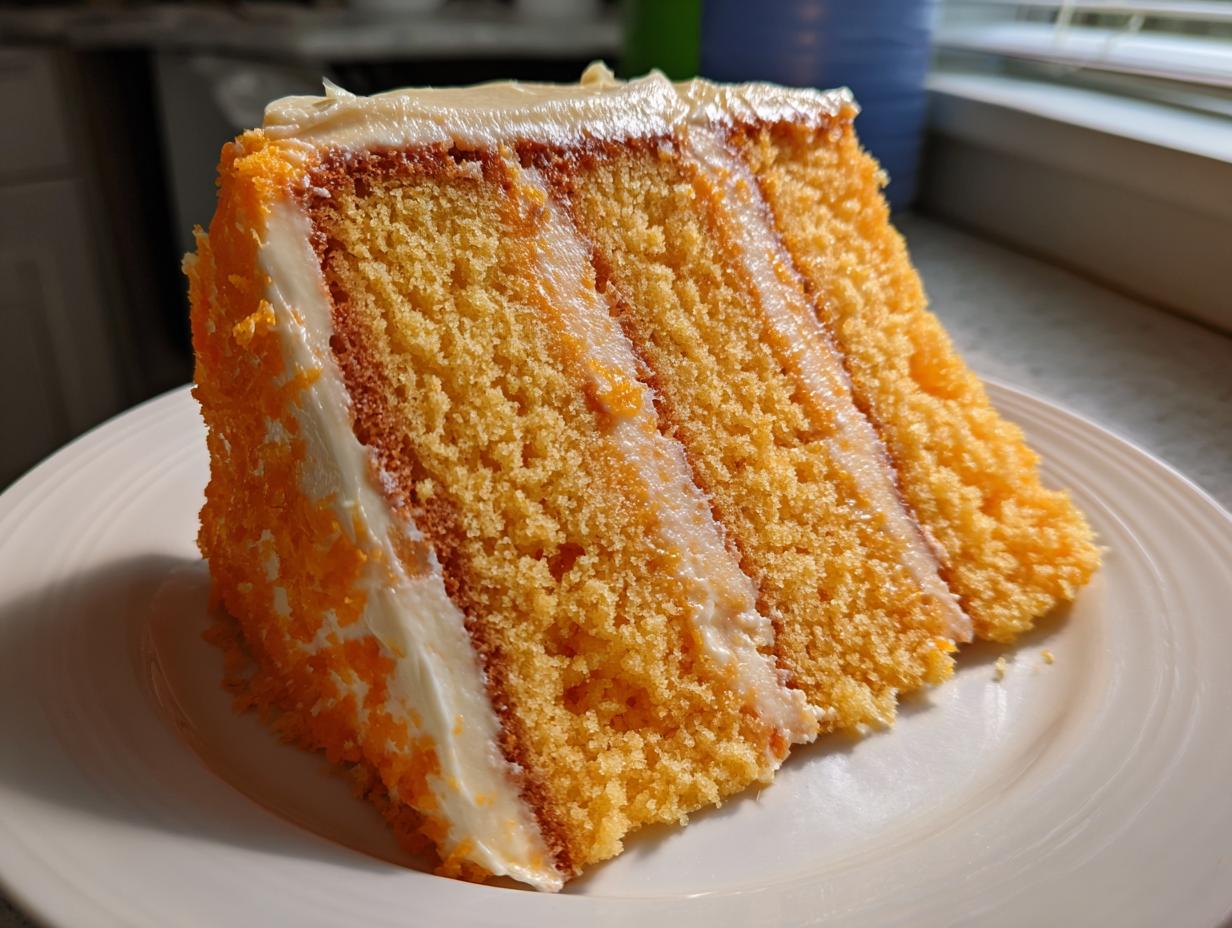
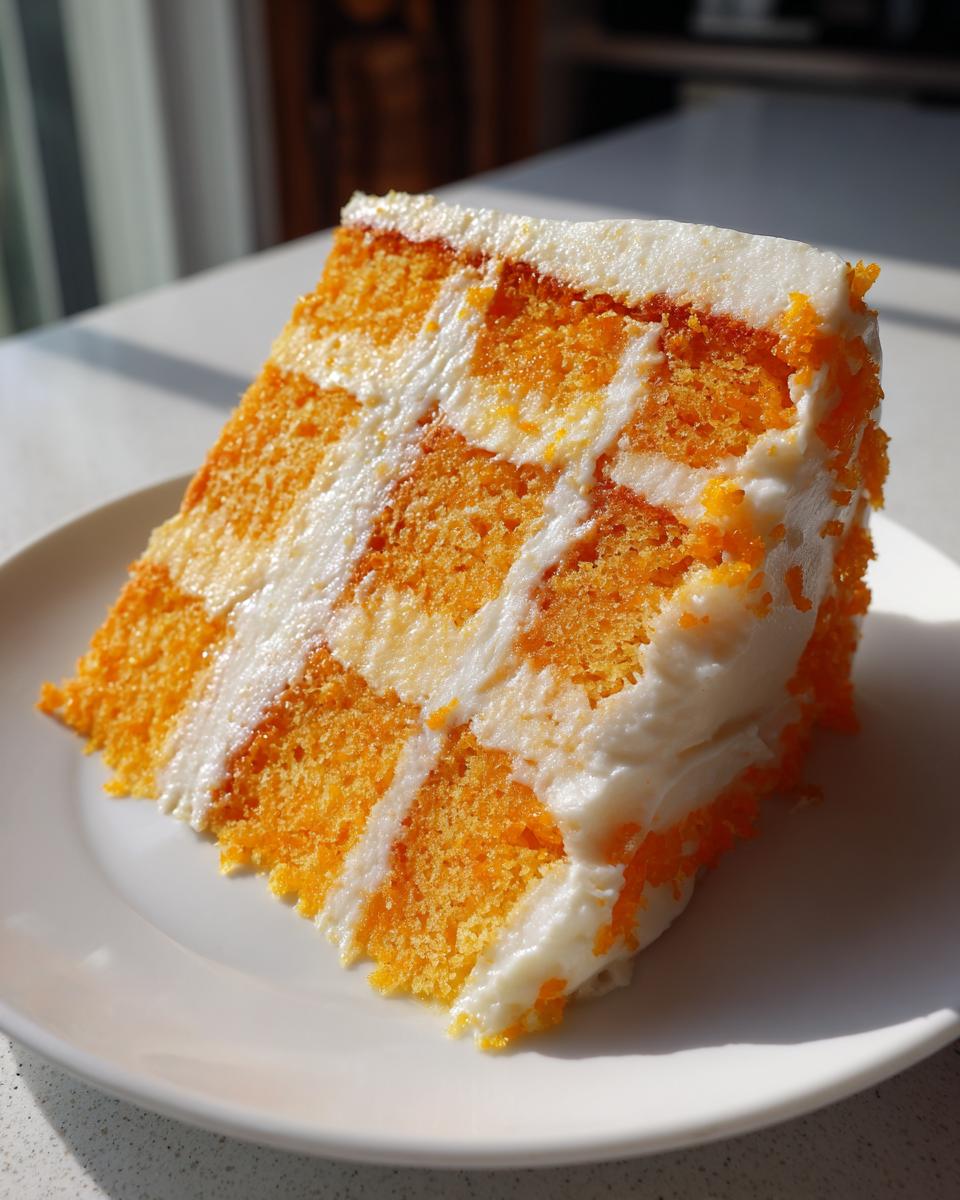
Oh, that feeling when summer hits and you just crave that bright, sunny flavor of an orange and vanilla creamsicle! It takes me right back to childhood popsicle stands. I knew I had to figure out how to bring that nostalgic taste into a real, show-stopping dessert without making a total mess in the kitchen. That’s how the Creamsicle Cake was born here at Cooking Zenith. I wanted something light, refreshing, and genuinely easy, proving that my experience translates into delicious, fuss-free baking for you. This layer cake captures that iconic frozen treat flavor perfectly, making it a guaranteed winner for any gathering you host. If you love bright citrus flavors, you absolutely must check out my recipe for lemon blueberry scones next!
- Why This Creamsicle Cake is Your New Favorite Easy Summer Cake Recipe
- Gathering Ingredients for Your Nostalgic Orange Vanilla Cake
- Step-by-Step Instructions for the Ultimate Creamsicle Cake
- Tips for Success with Your Citrus Layer Cake
- Variations on the Orange Creamsicle Dessert
- Storage and Reheating Instructions for Your Creamsicle Cake
- Frequently Asked Questions About Making a Creamsicle Cake
- Estimated Nutritional Data for This Orange Creamsicle Cake
- Share Your Creamsicle Cake Creations
Why This Creamsicle Cake is Your New Favorite Easy Summer Cake Recipe
If you’re looking for the ultimate **Refreshing Orange Dessert** that doesn’t require hours of fuss, this is it. Honestly, citrus cakes often run dry on me, but I cracked the code on this one. That gelatin soak after baking is the secret weapon! It keeps the cake incredibly moist, even after a full day on the counter. Trust me, this becomes a genuine **Crowd Pleasing Party Cake** instantly.
- It strikes that perfect balance: bright orange tang meets creamy vanilla sweetness.
- It’s surprisingly fast, using a box mix base for speed.
- That fluffy vanilla frosting is the perfect light topping for warm weather.
- It looks vibrant and sunny—perfect for barbecues or picnics!
If you need a simple spread to go with this, you’ll want to try my easy honey butter recipe alongside it.
Gathering Ingredients for Your Nostalgic Orange Vanilla Cake
Okay, now for everyone’s favorite part: pulling out all the yummy things! I’ve kept this recipe designed to be as straightforward as possible, which is why we lean on a trusty white cake mix base. But listen, the flavor payoff still comes from using real citrus. If you want that authentic, bright **Homemade Creamsicle Flavor**, don’t skimp on the fresh juice and zest. That little bit of work makes a massive difference in turning a standard cake into something truly special. You’ll notice the ingredients are split clearly—one section for the cake and the magical soak, and the other for that incredible topping.
When you gather your citrus, remember that the juice really amplifies the orange notes in this **Nostalgic Orange Vanilla Cake**. Speaking of refreshing drinks, if you ever need a homemade batch, my recipe for classic lemonade is fantastic on a hot day!
For the Creamsicle Cake and Orange Soak
These are the components that give us the structure and that signature burst of orange moisture. Don’t skip the orange gelatin; it’s literally holding the moisture in!
- 1 box white cake mix (yes, the box is our friend here!)
- 1 cup all-purpose flour
- 1 teaspoon baking powder
- 1/2 teaspoon salt
- 1 cup granulated sugar
- 1/2 cup unsalted butter, softened
- 3 large eggs
- 1 cup whole milk
- 1/2 cup fresh orange juice, strained if you dislike pulp
- 1 tablespoon orange zest
- 1 package (3 ounces) orange gelatin
- 1/2 cup boiling water
- 1/2 cup cold water
For the Fluffy Creamsicle Frosting
This is where we build that light, creamy layer that mimics the vanilla ice cream part of the treat. Make sure your butter is truly softened—not melted! That’s the key to a beautiful **Fluffy Creamsicle Frosting**.
- 1 cup unsalted butter, softened
- 4 cups powdered sugar
- 1 teaspoon vanilla extract
- 1/4 cup fresh orange juice
- 1/4 cup heavy cream
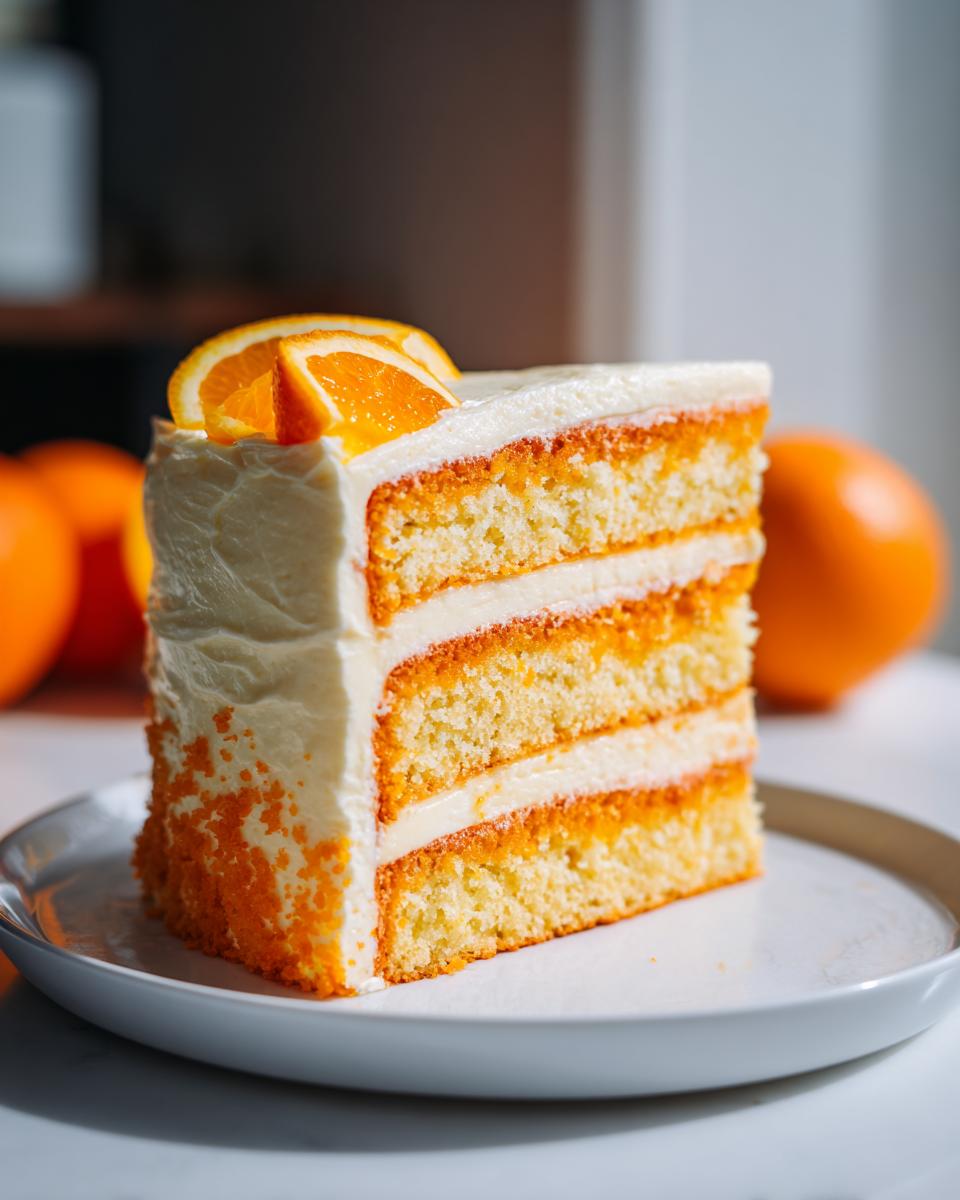
Step-by-Step Instructions for the Ultimate Creamsicle Cake
Alright, let’s get baking! This process is so satisfying because you see the transformation happen right before your eyes. We are moving from simple batter to a soaked, utterly moist **Creamsicle Cake**. Don’t worry if the steps seem broken down; I just want to make sure every single layer turns out right so you get that perfect light texture. Keep your oven ready at 350°F (175°C) and make sure those two 8-inch pans are greased and floured well—no one wants a sticky landing!
Baking the Orange and Vanilla Cake Layers
First up, combine those dry ingredients—the cake mix, flour, baking powder, and salt—and set them aside. In a separate, bigger bowl, you’ll cream the softened butter and sugar together until they look pale and fluffy. Then, eggs go in one by one. Next, mix your wet ingredients (milk, orange juice, and zest) and slowly add those into the dry mixture, alternating if you feel like it, but mostly just mix until *just* combined. Seriously, stop mixing as soon as the streaks disappear! Bake these beauties for about 28 to 32 minutes. Test it with a toothpick; when it comes out clean, they’re done!
Infusing Moisture with the Gelatin Soak
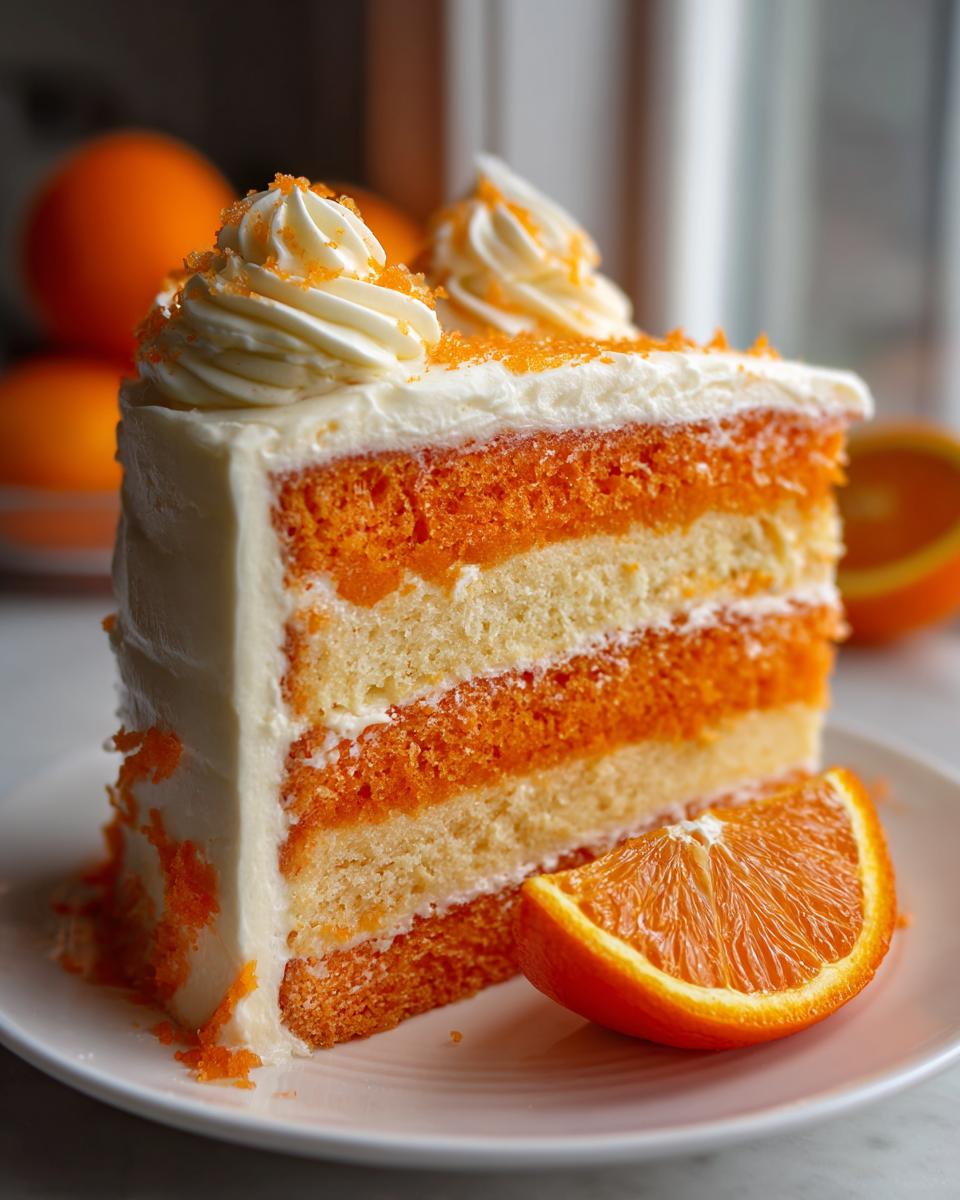
This is the magic step, so pay attention! While the cakes are cooling for just ten minutes in their pans, quickly mix up the soak: dissolve the orange gelatin in boiling water, then stir in the cold water. Now, take a fork—or heck, use a skewer—and poke holes all over the tops of those warm cakes. Don’t be shy; you want them deep! Slowly pour half of that liquid gelatin mixture over each cake. This step is vital because the warm cake sucks up every drop, guaranteeing you get that amazing moistness that holds the **Homemade Creamsicle Flavor** together. Let them cool completely after this soaking business!
Creating the Light and Fluffy Creamsicle Frosting
While the cakes are cooling down, whip up the frosting. Start by beating that softened butter until it’s smooth as silk. Then, slowly add in your powdered sugar. Once that’s incorporated, turn the mixer up high and beat in the vanilla, orange juice, and heavy cream. Keep beating it until it’s truly light and fluffy—this incorporates the air that makes it so delightful on your tongue. If you need extra help getting those perfect cupcakes later, check out my guide on moist fluffy vanilla cupcakes!
Assembling and Chilling Your Creamsicle Cake
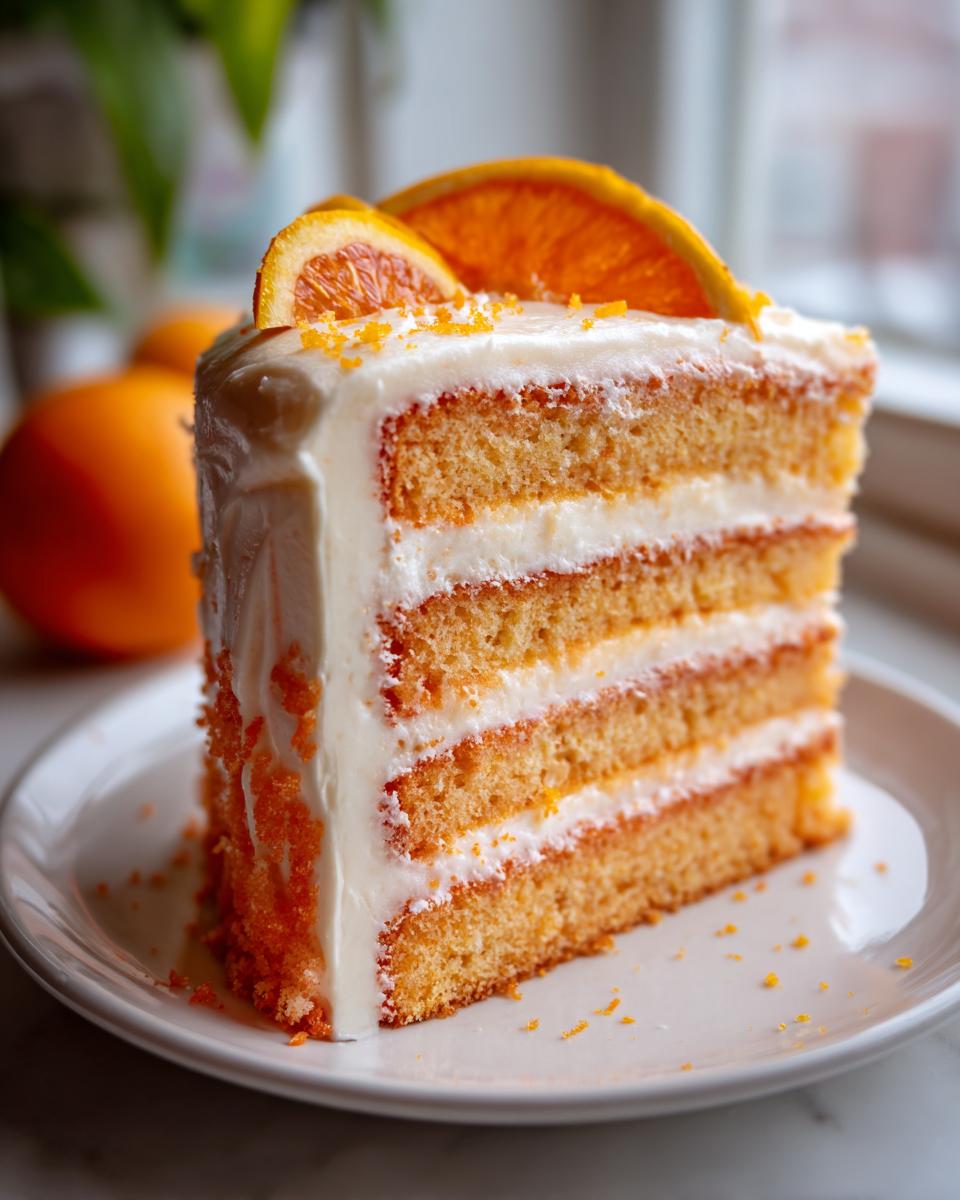
Once those layers are stone cold—and I mean cold or the frosting slides right off—you’re ready to layer. Slather a good amount of that **Fluffy Creamsicle Frosting** between the layers. Frost the top and the sides evenly. Here’s my final, crucial tip: you MUST chill this cake for at least 30 minutes before slicing. It helps the structure set up perfectly after all that beautiful liquid soaking we added. Then, it’s time to eat!
Tips for Success with Your Citrus Layer Cake
Getting that perfect **Vanilla and Orange Cake Flavor** in a citrus dessert can sometimes be tricky, but our method makes it fool-proof. My biggest piece of advice, beyond making sure you get that gelatin soak, is to resist the urge to overmix the batter once you add the wet ingredients. Overmixing develops gluten, and we want light and fluffy, not tough!
Also, don’t forget that vibrant orange color enhances the look; if you want a real ‘look-at-me’ cake, go ahead and add a tiny drop of orange food coloring to the batter or frosting. If you’re in a real hurry or just decided last minute you need a **Refreshing Orange Dessert**, remember the notes: this works wonderfully as a poke cake style in a 9×13 pan! Just pour all that tasty gelatin over the warm cake at once before cooling. If you’re looking for other simple flavor boosters, check out how I make a fantastic small-batch cinnamon roll glaze—similar concept, big flavor payoff!
Variations on the Orange Creamsicle Dessert
Sometimes I don’t want a big, fancy layer cake, even for a **Crowd Pleasing Party Cake**. The beauty of this flavor profile is how adaptable it is! Since we’ve already figured out the tricky part—getting that vibrant orange and creamy vanilla flavor right—we can easily shuffle the presentation without sacrificing taste. This means you can tailor your **Creamsicle Cake** to whatever event you’re making it for.
The easiest switch, and one I love for potlucks, is turning this into a full-blown **Poke Cake with Gelatin**. Instead of baking two layers, you make the recipe in a 9×13 pan. After it comes out of the oven, you poke holes all over and pour the entire batch of gelatin soak over the warm cake. It makes the whole thing super saturated and easy to serve right out of the pan. It’s just as refreshing as the layer cake, but way less fussy!
If you’re looking for something even quicker, we can definitely pivot into **No-Bake Creamsicle Dessert Ideas**. For that, I usually skip the baking entirely. You’d use a simple graham cracker crust (maybe just crushed vanilla wafers and melted butter) pressed into the bottom of a springform pan. Then, you create a rich filling using instant vanilla pudding mixed with a bit more orange juice and maybe some whipped topping folded in for extra lightness. Chill that until firm, and you’ve got a completely different, but equally delicious, **Refreshing Orange Dessert** ready to go.
For any of these variations, especially if you’re testing out a poke cake or a bundt style, make sure to check out my post on my favorite Christmas poke cake—it explains the moisture transfer process in detail so you’ll feel confident adapting any gelatin-soaked recipe!
Storage and Reheating Instructions for Your Creamsicle Cake
Now, this is an important conversation because we want this amazing **Creamsicle Cake** to taste just as good tomorrow as it did today! Because we’re using whole butter and heavy cream in that fluffy frosting, refrigeration is non-negotiable, especially if it’s hot outside. I know nobody *wants* to put cake in the fridge, but trust me here; that creamy layer needs to stay solid and safe!
Store the cake tightly covered in a large cake carrier or directly on the serving plate, wrapped really well in plastic wrap. If you haven’t cut into it yet, it’ll stay beautiful and moist in the fridge for up to four days. If you’ve already sliced into it, you might want to cover the cut edges with a bit of extra frosting to stop them from drying out.
Here’s a practical tip I learned when I make a big batch for friends: If you’re not planning on eating it right away, you can freeze the whole frosted (or even unfrosted!) cake. Just make sure it’s wrapped securely in plastic wrap first, then a layer of foil. It keeps wonderfully for up to two months. When you want to eat it, let it thaw overnight in the fridge. If you’re looking for make-ahead breakfast ideas instead, my cheesy egg bake is genius for busy mornings!
When you take that chilled slice out to serve it, let it sit on the counter for about 20 minutes before you dive in. The cake layers soften up beautifully out of the fridge, and the frosting comes back to that perfect creamy texture.
Frequently Asked Questions About Making a Creamsicle Cake
I get so many questions when folks first try this recipe, and that’s awesome! It means you’re paying attention to the details that make this cake so bright and fresh. Here are the answers to the things I hear most often as you dive into creating this slice of sunshine.
Can I use fresh orange zest or only extract for the Creamsicle Cake?
Oh, please use the fresh zest! If you want that deep, true **Homemade Creamsicle Flavor**, the zest is your best friend. The zest holds all those fragrant oils right on the surface of the fruit. Yes, you need the juice for moisture and tartness, but the zest is where you capture that incredible aroma that screams ‘orange creamsicle.’ An extract just doesn’t cut it for this particular flavor profile. It’s worth the extra minute of grating!
What makes this the Best Orange Cake Recipe for summer?
What sets this apart as the **Best Orange Cake Recipe for summer** is the combination of texture and temperature. It’s light and fluffy thanks to our mix of ingredients, and the gelatin soak keeps it wonderfully cool and moist, even if it sits out for a little bit during a backyard party. It’s not heavy at all; it’s incredibly **Refreshing Orange Dessert** territory. It feels light on the palate, which is exactly what you want when it’s hot outside!
Is it possible to make this a No-Bake Creamsicle Dessert?
Absolutely! If you’re looking for a truly quick **No-Bake Creamsicle Dessert**, we can skip the oven entirely. Instead of baking the layers, press a simple crust made of crushed vanilla wafers and melted butter into the bottom of a springform pan. For the filling, you would combine instant vanilla pudding with a bit more orange juice, fold in some stabilized whipped heavy cream, and let that chill until firm. It gives you the same fantastic flavor without turning on the oven!
If you’re mastering your citrus game, make sure you check out my recipe for no-cook homemade pizza sauce—sometimes a break from the oven is exactly what we need!
Estimated Nutritional Data for This Orange Creamsicle Cake
If you’re tracking macros or just curious about what’s in this sunshine of a cake, I’ve put together the estimated nutritional information below. Remember, because we are using a mix base and homemade frosting, these numbers are just a helpful guide based on the exact ingredients I listed. If you swap heavy cream for milk, things will change a bit, so take these as a general baseline for an **Easy Summer Cake Recipe**!
This data is for one generous slice based on the whole cake yielding 12 servings. It really demonstrates how this cake manages to be rich and flavorful without being overwhelmingly heavy—perfect for your next gathering!
- Serving Size: 1 slice
- Calories: 410
- Sugar: 45g
- Sodium: 280mg
- Fat: 18g
- Saturated Fat: 11g
- Unsaturated Fat: 7g
- Trans Fat: 0.5g
- Carbohydrates: 60g
- Fiber: 1g
- Protein: 4g
- Cholesterol: 65mg
If you want to see how a different recipe comes together, I always encourage checking out my one-pot meals, like this super simple creamy pesto pasta, which uses totally different components but shares that same ‘easy weeknight win’ philosophy!
Share Your Creamsicle Cake Creations
You know, seeing your finished desserts is genuinely the best part of my day here at Cooking Zenith! I put all my heart into simplifying these recipes so you can bring amazing food to your table with confidence. Now that you’ve mastered the **Creamsicle Cake**, I really want to see your beautiful, bright, sunshine-yellow creations!
Did the frosting turn out extra fluffy? Is your family already asking for seconds? Don’t keep that vibrant orange beauty to yourself! Snap a picture once it’s chilled and ready to serve. Tag me on social media—I spend time scrolling through, and I absolutely love seeing how my recipes look in *your* kitchens.
If this recipe brought a little bit of that nostalgic summer joy to your house, please take a moment to leave a rating right here on the page. Let other home cooks know that this is the **Easy Summer Cake Recipe** that delivers on moisture and flavor! It helps me keep creating simple, high-impact recipes like this one.
If you’re looking for another fun, impressive, yet simple bake for your next party, you should snag the recipe for my easy layered pumpkin crunch cake—it’s seasonally different but just as much of a crowd-pleaser!
If you want to see what other bakers are saying about their attempts, check out other folks who loved the flavor profile over at this popular link. Happy baking, everyone, and I can’t wait to see that citrus glow!
PrintEasy Orange Creamsicle Layer Cake

Make this light, moist cake that captures the nostalgic flavor of orange and vanilla. This recipe uses simple ingredients to create a refreshing, crowd-pleasing summer dessert.
- Prep Time: 25 min
- Cook Time: 30 min
- Total Time: 1 hour 55 min
- Yield: 12 servings 1x
- Category: Dessert
- Method: Baking
- Cuisine: American
- Diet: Vegetarian
Ingredients
- 1 box white cake mix
- 1 cup all-purpose flour
- 1 teaspoon baking powder
- 1/2 teaspoon salt
- 1 cup granulated sugar
- 1/2 cup unsalted butter, softened
- 3 large eggs
- 1 cup whole milk
- 1/2 cup fresh orange juice
- 1 tablespoon orange zest
- 1 package (3 ounces) orange gelatin
- 1/2 cup boiling water
- 1/2 cup cold water
- 1 cup unsalted butter, softened (for frosting)
- 4 cups powdered sugar
- 1 teaspoon vanilla extract
- 1/4 cup fresh orange juice (for frosting)
- 1/4 cup heavy cream (for frosting)
Instructions
- Preheat your oven to 350°F (175°C). Grease and flour two 8-inch round cake pans.
- In a large bowl, whisk together the cake mix, flour, baking powder, and salt. Set aside.
- In a separate bowl, cream together the softened butter and granulated sugar until light and fluffy. Beat in the eggs one at a time.
- In a measuring cup, combine the milk, 1/2 cup orange juice, and orange zest. Gradually add the wet ingredients to the dry ingredients, mixing until just combined. Do not overmix.
- Divide the batter evenly between the prepared cake pans. Bake for 28 to 32 minutes, or until a toothpick inserted into the center comes out clean.
- While the cakes bake, prepare the orange soak: Dissolve the orange gelatin in the boiling water. Stir in the cold water.
- Once the cakes are out of the oven, let them cool in the pans for 10 minutes. Poke holes all over the top of each warm cake using a fork or skewer. Slowly pour half of the orange gelatin mixture over each cake. Let the cakes cool completely on a wire rack.
- Prepare the creamy vanilla frosting: Beat the softened butter until smooth. Gradually add the powdered sugar, mixing until combined. Add the vanilla extract, 1/4 cup orange juice, and heavy cream. Beat on high speed until the frosting is light and fluffy.
- Once the cakes are completely cool, place one layer on a serving plate. Spread a layer of frosting on top. Place the second layer on top and frost the top and sides of the entire cake.
- Chill the cake for at least 30 minutes before slicing for the best texture.
Notes
- For an extra bright orange color, you can add a drop of orange food coloring to the batter or frosting.
- If you prefer a poke cake style, use a 9×13 inch pan and pour all the gelatin soak over the warm cake before cooling. Top with frosting after chilling.
- This cake tastes best when served slightly cool, making it a great refreshing summer dessert.
Nutrition
- Serving Size: 1 slice
- Calories: 410
- Sugar: 45g
- Sodium: 280mg
- Fat: 18g
- Saturated Fat: 11g
- Unsaturated Fat: 7g
- Trans Fat: 0.5g
- Carbohydrates: 60g
- Fiber: 1g
- Protein: 4g
- Cholesterol: 65mg