
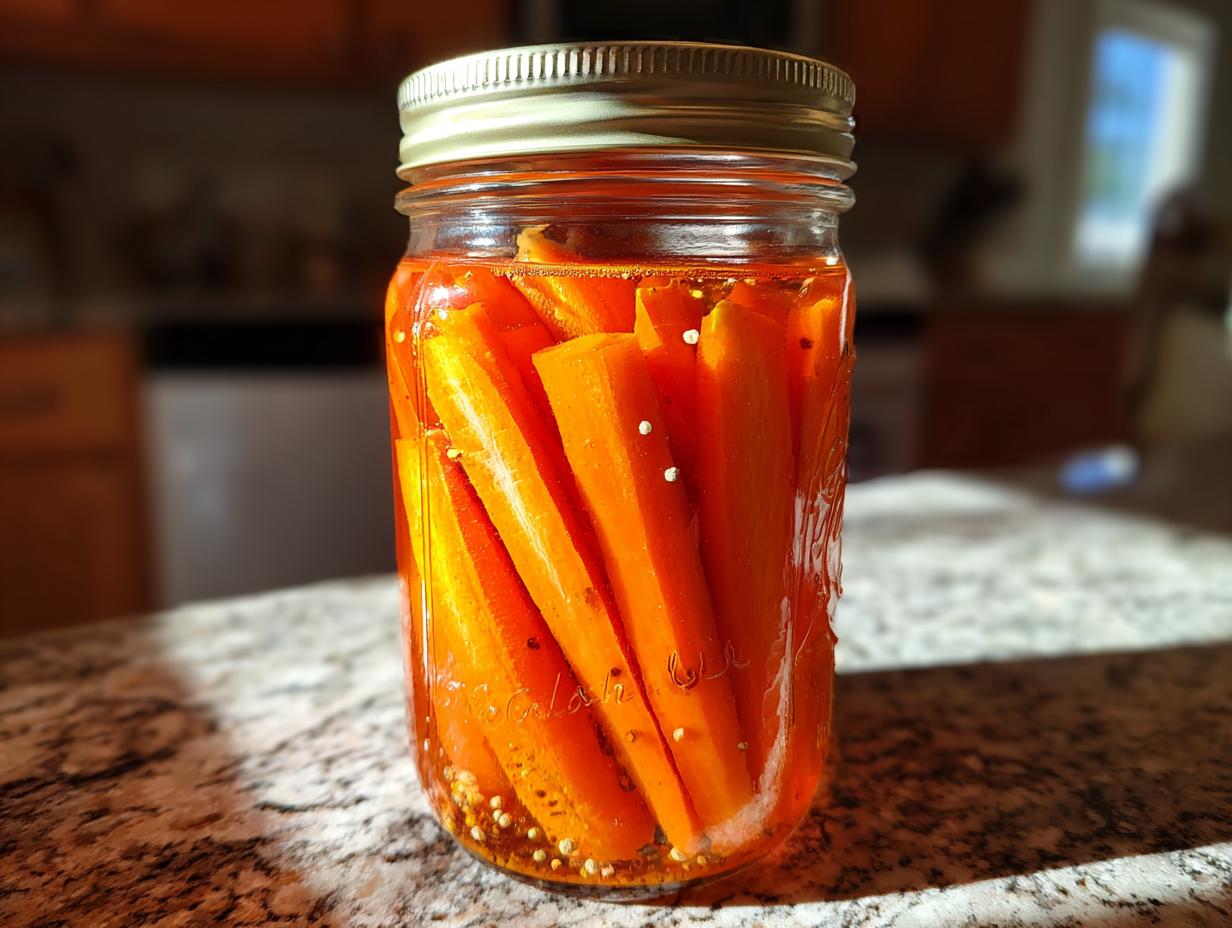
You know, I always thought pickling meant setting aside a whole weekend for scary canning equipment and boiling water baths. My grandmother used to preserve everything, but honestly, I never wanted the commitment! But then I realized how much flavor we were missing when we just chopped carrots raw. These pickled carrots completely changed my tune. I’m talking about the absolute best homemade pickled carrots method because they are refrigerator pickles—fast, incredibly crunchy, and ready before dinner is even over. It’s just brilliant how simple it is to transform a humble vegetable into something bright and tangy. Trust me, you’re going to want to keep a jar of these chilling in your fridge all the time!
- Why You Will Make These Easy Refrigerator Pickled Carrots
- Ingredients for Quick Pickled Carrots
- How to Make Crunchy Pickled Carrots: Step-by-Step Instructions
- Flavor Variations for Spicy Pickled Carrots and More
- Tips for Perfectly Crunchy Pickled Carrots
- How to Use Your Tangy Carrot Pickles
- Storage and Shelf Life for Refrigerator Pickles Carrots
- Frequently Asked Questions About Pickled Carrots
- Nutritional Estimate for Homemade Pickled Carrots
- Nutritional Estimate for Homemade Pickled Carrots
Why You Will Make These Easy Refrigerator Pickled Carrots
I get it—life is busy. That’s why this easy pickled carrots recipe is a game-changer for me. When I need that flavor punch, I don’t have time for processes that take days or require special gear. These refrigerator pickles carrots deliver huge results with almost zero effort.
- They are intensely crunchy. Seriously, the texture is unbelievable!
- No canning needed! Just a simple jar, a quick brine, and the fridge does the rest.
- They take less than 20 minutes of active time. Hello, quick pickled carrots!
- They keep wonderfully, if you can stop yourself from eating them right away.
Ingredients for Quick Pickled Carrots
When it comes to homemade pickled carrots, the beauty is in the simplicity. You likely have most of this on hand already! Just grab your carrots and get ready to make that magic brine. Don’t substitute the vinegar unless you check the acidity—we need that 5% to keep things safe.
- 2 cups carrots, sliced into thin rounds or matchsticks
- 1 cup white vinegar (must be 5% acidity)
- 1 cup water
- 2 tablespoons granulated sugar
- 1 tablespoon kosher salt
- 2 cloves garlic, smashed flat
- 1 teaspoon black peppercorns
- Optional addition: 1/2 teaspoon red pepper flakes for that kick!
How to Make Crunchy Pickled Carrots: Step-by-Step Instructions
This is where the magic happens! Making excellent pickled carrots is all about technique, not complicated cooking. We’re keeping things quick and ensuring you get that satisfying snap every single time. Ditch the canner; this method is so straightforward, you’ll wonder why you ever bought them store-bought!
Preparing the Carrots and Jarring
First things first: you need a clean home for those carrots! I always sterilize my jar just to be extra safe, even though they are refrigerator pickles. Wash your carrots well, then slice them. I switch between thin rounds and matchsticks, but the key is keeping the pieces uniform so they pickle evenly. Pack those beautiful carrots tightly into your jar—tightly enough to hold flavor, but not so tight that air can’t circulate around them when you pour the brine.
Creating the Perfect Brine for Pickled Carrots
Now for the brine. In a saucepan, mix the vinegar, water, salt, and sugar. You just need to heat this mixture gently over medium heat. And here’s a huge tip: you just want the sugar and salt dissolved, folks. Do not bring it to a rolling boil! Boiling off the vinegar changes the acidity we need for our quick pickled carrots. As soon as you see the crystals vanish, kill the heat immediately. It should take just a couple of minutes.
Cooling and Refrigerating Your Homemade Pickled Carrots
Once the brine is off the heat, toss in your garlic and spices. Carefully pour that hot brine over the packed carrots, making sure every single piece is totally submerged under the liquid. Let the jar sit on the counter—uncovered for about 30 minutes—just to bring the temperature down a little. Then, seal it tight and pop it in the fridge. You can sneak a taste in about two hours, but honestly, keep your hands off for a full 24 hours. That’s when the flavor really deepens and you get that truly tangy carrot pickle!
Flavor Variations for Spicy Pickled Carrots and More
The base recipe for these pickled carrots is fantastic on its own—tangy and just salty enough. But that’s where the fun really starts! You can tweak this brine mixture so easily to match whatever savory or spicy mood you’re in. It’s amazing how a few extra additions turn this into something completely different, making it perfect for everything from snacking to being the star carrot garnish ideas.
Making Mexican Pickled Carrots Recipe
If you love heat, you absolutely have to try the Mexican style! This is my go-to for taco night. Just toss one sliced jalapeño right into the jar along with the garlic and peppercorns before you pour in the brine. That little bit of heat makes them the best spicy pickled carrots for topping anything savory.
Achieving Dill Pickled Carrots Flavor
For a more traditional vibe, lean into dill! You can drop in a couple of fresh dill sprigs directly into the jar alongside your garlic. Alternatively, for a stronger flavor that really permeates the mixture, throw in about a teaspoon of dried dill seed when you add the peppercorns. It gives you that classic, savory tang.
Tips for Perfectly Crunchy Pickled Carrots
You want crunch, right? That is the number one thing when it comes to these homemade pickled carrots. If they come out soft, I consider it a failure! The good news is keeping them crisp isn’t hard, but you have to follow a couple of my non-negotiable steps. Texture is everything when you’re aiming for those satisfying crunchy pickled carrots in every bite.
First, thickness matters hugely. If you slice them too thin, they get mushy sitting in the brine. Aim for uniform rounds about 1/8 inch thick, or matchsticks that are sturdy—think more like small fries than slivers. Second, make sure your brine isn’t scorching hot when you pour it over. That flash heat can cook the carrots slightly, which ruins the snap! Heating just until the salt dissolves and then letting it cool slightly before pouring ensures that wonderful raw crunch stays locked in.
How to Use Your Tangy Carrot Pickles
So you have a jar of these gorgeous, vibrant pickled carrots sitting in your fridge. What now? Honestly, I find myself reaching for them constantly because they add such a perfect burst of bright flavor to almost anything savory. They are incredible straight out of the jar, of course, but that’s just the beginning!
These are phenomenal as a simple appetizer pickle, served right next to a sharp cheese or some olives. But for me, they truly shine as a topping. They’re perfect for brightening up a rich sandwich or adding a necessary tang to homemade burgers. If you’re making tacos, you absolutely need these—they are one of my favorite taco toppings recipe staples, especially alongside creamy avocado or spicy meat.
Don’t forget to use them as a versatile carrot garnish ideas! A few stray slices instantly elevate rice bowls or even just a simple plate of scrambled eggs. See? These tangy carrot pickles make everything better.

Storage and Shelf Life for Refrigerator Pickles Carrots
Okay, this is the part about managing expectations! Because we are making these super easy canning free pickles, they have to live in the fridge. That’s what makes them so quick, but it also means they don’t last forever on the shelf like a can would. Once they’ve cooled down, pop that jar into the refrigerator and keep it sealed tight.
You can generally enjoy these crunchy treats for up to three weeks. If you notice the brine getting cloudy or the carrots losing their snap, it’s probably time to let that batch go. But seriously, if you make them well, they rarely last that long in my house!
Frequently Asked Questions About Pickled Carrots
I always get so many questions after I share this recipe because everyone is shocked how easy it is! Making quick pickled carrots shouldn’t be complicated, but sometimes little details trip people up. Here are the things I hear most often when people are trying out their first batch of homemade pickled carrots.
How long until these pickled carrots are ready to eat?
This is the best part about refrigerator pickles! While they are technically safe to eat after about two hours hanging out in that warm brine, I really, really urge you to wait the full 24 hours. The brine needs time to penetrate the carrot and turn it that perfect tangy flavor. If you can wait, the flavor payoff is huge, trust me!
Can I use apple cider vinegar instead of white vinegar?
You certainly could, but you need to be careful! Apple cider vinegar has a slightly different flavor profile—it’s a little sweeter and fruitier than plain white distilled vinegar. If you substitute it, you might need to adjust the sugar down a touch. Always make sure whatever vinegar you use is 5% acidity so your ratio of salt and sugar works correctly in the recipe.
Are these vegan pickled carrots?
Yes, absolutely! These are naturally 100% vegan and gluten-free, which I love because they can be shared with everyone. The brine is just water, vinegar, salt, and sugar, so no animal products are involved at all. It’s a fantastic pickled vegetable recipes option for everyone at the table.
Why do my carrots seem soft instead of crunchy?
Aww, that’s the worst! Soft carrots usually mean one of two things: either you sliced them too thin (remember, thicker pieces hold crunch better!) or you boiled your brine too hard. Boiling causes the cell walls to break down faster. For maximum crunch in your pickled carrots, just heat until the solids dissolve and stop!
Nutritional Estimate for Homemade Pickled Carrots
Now, I’m not a nutritionist or anything, but since these are mostly vinegar and vegetables, they are a light addition to any meal! Keep in mind that because of the salt content needed for pickling, the sodium is a bit higher, but everything else is pretty standard for a veggie side dish. These estimates are based on the recipe breakdown provided, so your exact numbers might shift slightly depending on the brand of vinegar you use.
- Serving Size: 1/4 cup
- Calories: 35
- Sugar: 5g (This is the sugar we added, which balances the vinegar!)
- Sodium: 280mg
- Fat: 0g
- Protein: 0g
Easy Refrigerator Pickled Carrots (Quick & Crunchy)
Make crunchy, tangy pickled carrots at home without canning. This easy refrigerator pickles recipe is ready fast and works well as a taco topping or side dish.
- Prep Time: 15 min
- Cook Time: 5 min
- Total Time: 20 min
- Yield: About 1 pint 1x
- Category: Side Dish
- Method: Refrigerator Pickling
- Cuisine: American
- Diet: Vegan
Ingredients
- 2 cups carrots, sliced into thin rounds or matchsticks
- 1 cup white vinegar (5% acidity)
- 1 cup water
- 2 tablespoons granulated sugar
- 1 tablespoon kosher salt
- 2 cloves garlic, smashed
- 1 teaspoon black peppercorns
- Optional: 1/2 teaspoon red pepper flakes for spice
Instructions
- Prepare the carrots: Wash and slice the carrots into uniform shapes, such as thin rounds or matchsticks. Pack the carrots tightly into a clean, pint-sized jar.
- Make the brine: In a small saucepan, combine the vinegar, water, sugar, and salt. Heat over medium heat, stirring until the sugar and salt fully dissolve. Do not boil.
- Add flavorings: Remove the brine from the heat. Add the smashed garlic, peppercorns, and optional red pepper flakes to the hot brine. Stir briefly.
- Pour the brine: Carefully pour the hot brine over the carrots in the jar, making sure the carrots are completely submerged. Leave about a half-inch of headspace at the top.
- Cool and refrigerate: Let the jar cool on the counter for about 30 minutes. Once cooled, seal the jar tightly and place it in the refrigerator.
- Wait to eat: The carrots will be ready to eat in about 2 hours, but they develop the best flavor after 24 hours in the refrigerator. Store these refrigerator pickles carrots in the fridge for up to 3 weeks.
Notes
- For a Mexican pickled carrots style, add 1 sliced jalapeño to the jar with the garlic and peppercorns.
- For a sweeter profile, increase the sugar to 3 tablespoons for sweet and sour carrots.
- These are naturally vegan pickled carrots and gluten free.
Nutrition
- Serving Size: 1/4 cup
- Calories: 35
- Sugar: 5g
- Sodium: 280mg
- Fat: 0g
- Saturated Fat: 0g
- Unsaturated Fat: 0g
- Trans Fat: 0g
- Carbohydrates: 8g
- Fiber: 1g
- Protein: 0g
- Cholesterol: 0mg