

You know those events—the big game, the sudden potluck invite, or just when you realize you need something impressive on the table *fast*? That’s where I turn to my absolute favorite magic trick: these taco pinwheels. Seriously, if you think making good party snacks takes ages, I’m here to prove you wrong. We are talking about unbelievably cheesy, flavor-packed bites that come together so quickly, you’ll wonder why you ever stressed over appetizers.
As a home cook, I live for that high flavor payoff with minimal fuss, and these tortilla rolls deliver every single time. No oven time, just a tasty filling and a bit of rolling—that’s it! These taco pinwheels are creamy, savory, and exactly what everyone crowds around at a party. I often make a big batch and pair them with my quick easy chili cheese dip; it’s a guaranteed win.
- Why These Easy Cheesy Taco Pinwheels are Your New Favorite Party Snacks
- Ingredients Needed for Perfect Taco Pinwheels
- Step-by-Step Guide to Making Amazing Taco Pinwheels
- Make Ahead Appetizers: Chilling and Storing Your Taco Pinwheels
- Serving Suggestions for These Mexican Inspired Snacks
- Variations: Customizing Your Savory Pinwheel Bites
- Frequently Asked Questions About Taco Pinwheels
- Estimated Nutritional Data for These Cheesy Roll Ups
- Share Your Experience Making These Taco Pinwheels
Why These Easy Cheesy Taco Pinwheels are Your New Favorite Party Snacks
I just love when an appetizer requires almost no effort but gets massive applause. That’s the beauty of these taco pinwheels! They totally satisfy that craving for something savory and familiar without keeping you stuck in the kitchen.
- They are the definition of quick finger foods—truly bite-sized perfection.
- Because they need chilling time, they are amazing make ahead appetizers; I whip them up the day before a party, no problem!
- The cream cheese base keeps them unbelievably flavorful and cheesy, even when served cold.
- They are easy to transport, making them an absolute lifesaver for last-minute gatherings or potlucks.
You often need a dip nearby, so I usually set up a station with these crispy roll ups and my favorite party dip. Trust me, they disappear fast!
Ingredients Needed for Perfect Taco Pinwheels
Okay, let’s talk supplies for making these amazing taco pinwheels. The ingredient list is short, which is why I love them so much for weeknights or last-minute needs. Everything needs to combine into that perfect creamy, savory filling ready for rolling.
- One 8-ounce package of cream cheese—and listen, it has to be softened!
- One cup of cooked ground beef or, hey, use shredded chicken if you have leftovers.
- One standard taco seasoning packet (the dry mix).
- Half a cup of shredded Mexican blend cheese for that melty stretch.
- Four large flour tortillas—the big 10-inch ones work best.
- We also need about one tablespoon of water, just in case.
- Optional goodies: some chopped black olives or green onions.
If you’re whipping up a big batch for a fiesta, make sure you grab that homemade teriyaki sauce recipe later for another appetizer idea!
Ingredient Notes and Simple Substitutions
The success of these savory pinwheel bites starts right here with the quality of what you grab. First off, that cream cheese? It *must* be very soft, not melty, but soft enough to whip up without lumps before we mix everything else in. You want zero resistance there.
If you’re skipping the ground beef, shredded chicken is fantastic; just make sure it’s fully cooked and slightly moist so it blends well. For the optional veggies, green onions add a nice mellow bite, but if you aren’t a fan, leave them out entirely! These taco pinwheels are forgiving like that. Don’t worry about the olives; just toss ’em in if you like that little briny pop of flavor.
Step-by-Step Guide to Making Amazing Taco Pinwheels
Alright, let’s get down to the fun part—assembling these gorgeous taco pinwheels! It’s really just two main stages: mixing the filling and then rolling everything up tight. First, grab your bowl. We need that softened cream cheese, and then you just beat in the taco seasoning until it looks uniform. Don’t rush this little step! If you are looking for something super sweet to serve alongside these savory bites later, you absolutely must try my brownie batter dip!
Next, toss in your cooked meat (I used beef this time, but chicken is great too!), the shredded cheese, and any optional toppings you decided on. Mix it all up until everything looks gorgeous and evenly blended. This mixture should be thick enough that it doesn’t immediately ooze out when you spread it.
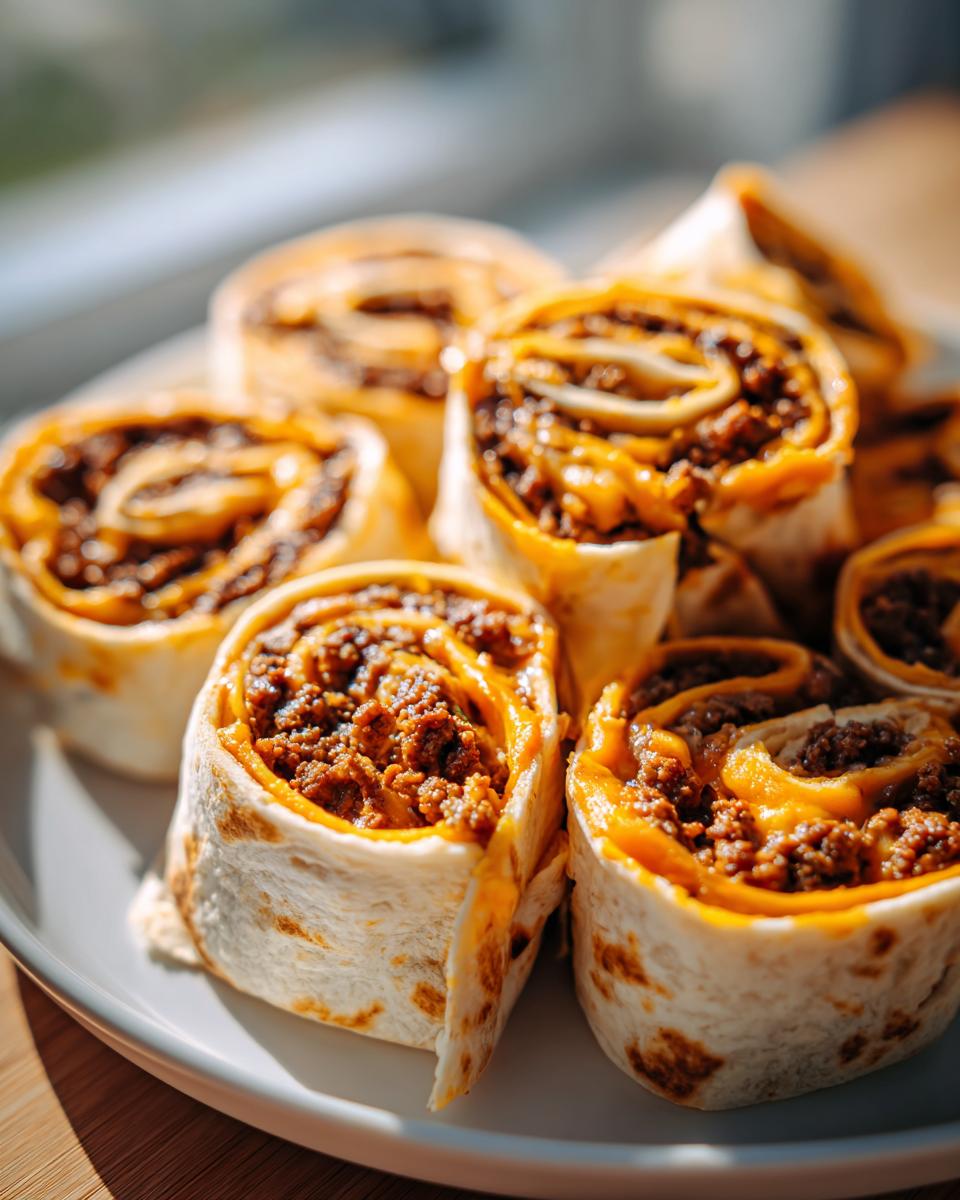
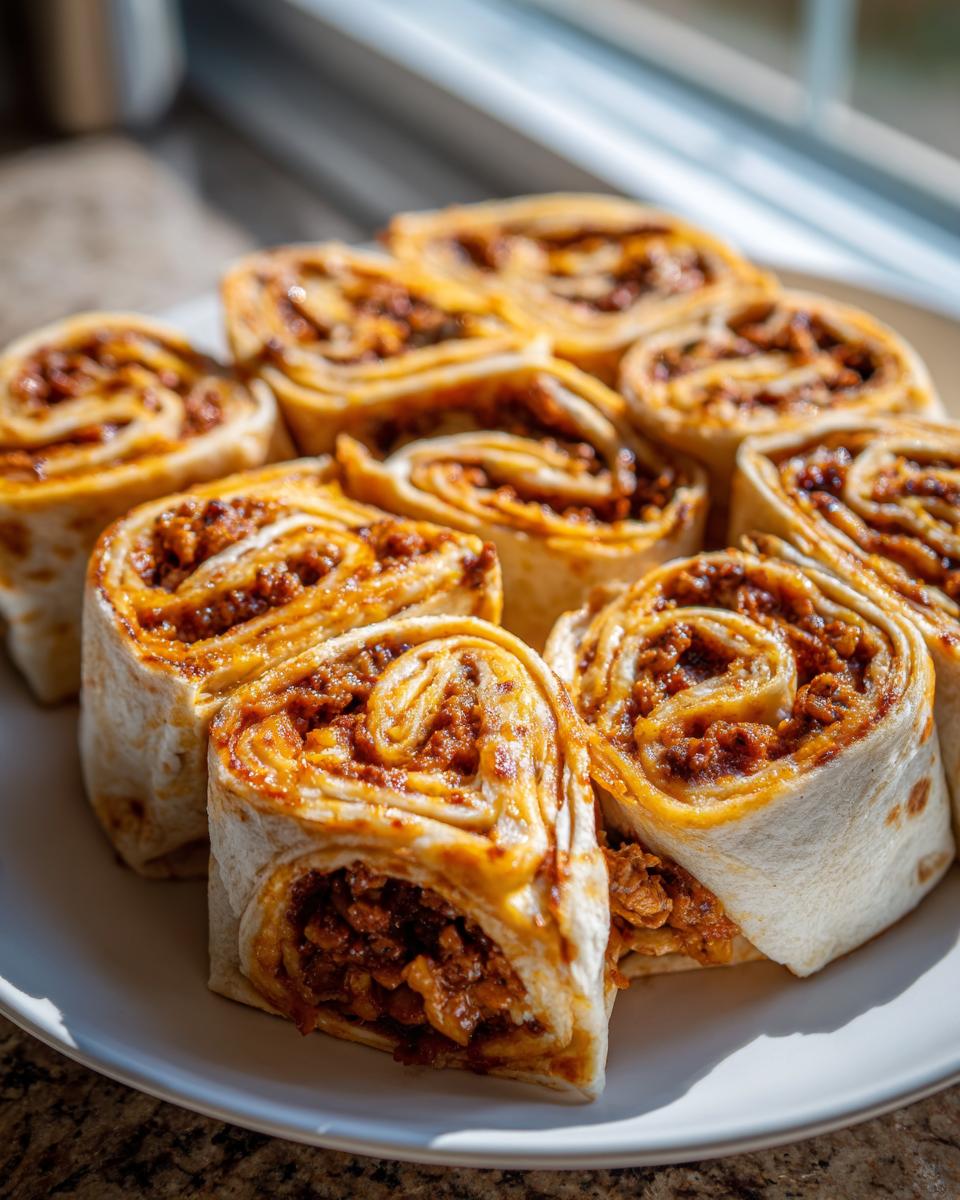
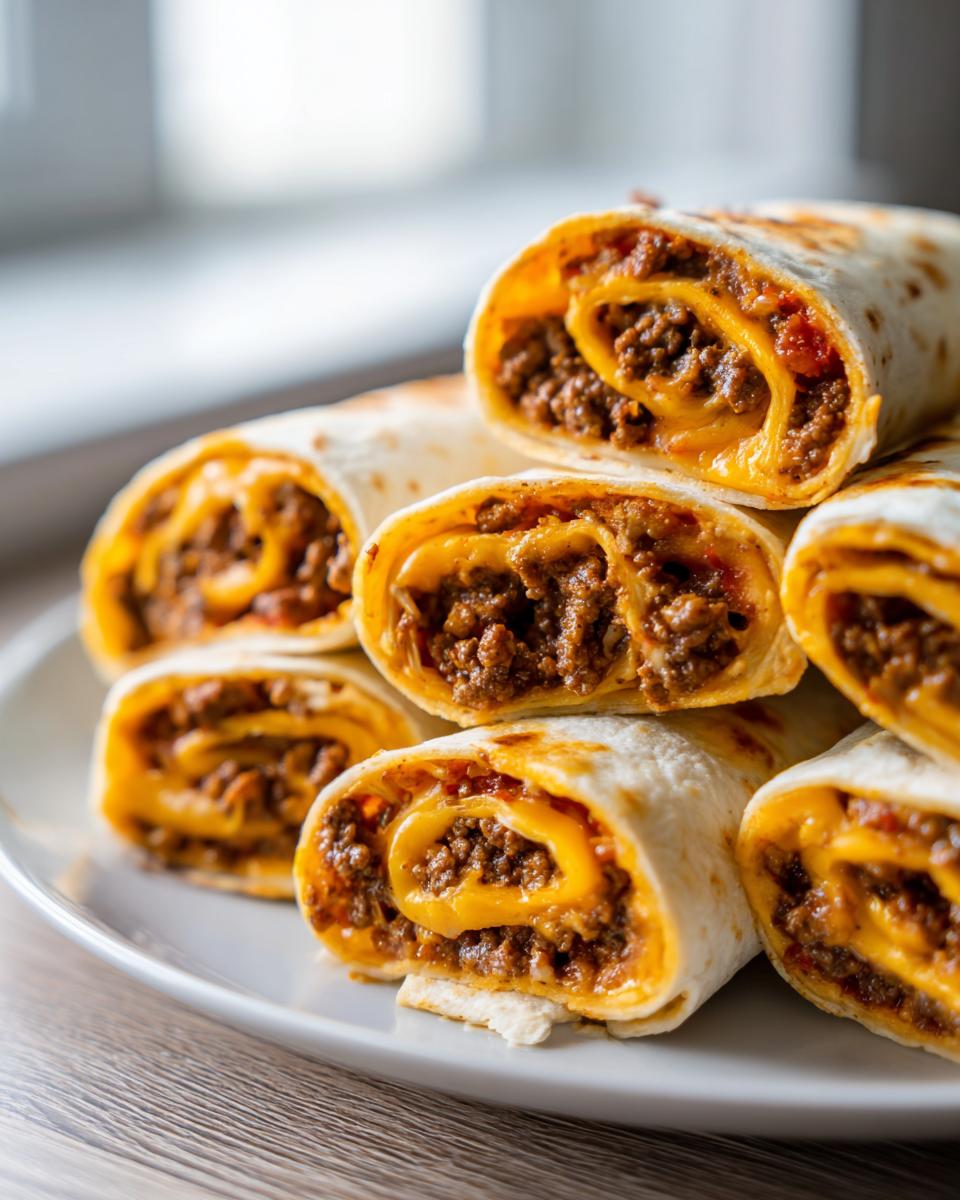
Now, lay out one of those large tortillas. Take about a quarter of your filling and spread it out evenly across the whole surface. Here’s the trick: leave just a tiny border right at the edge so the filling doesn’t squish out when you start rolling. Starting at one side, simply roll that tortilla up as tightly as you possibly can without tearing it. Wrap that log tightly in plastic wrap, and repeat for the others. They absolutely *have* to chill for at least an hour before slicing; that’s how we get those clean, beautiful taco pinwheels!
Expert Tips for Rolling and Slicing Your Tortilla Pinwheels
Rolling technique is everything here! When you start rolling, keep your tension firm right from the get-go. If you roll it loosely, you’ll end up with floppy spirals instead of those perfect, neat bites that everyone loves. Don’t be shy about pressing down gently as you go to make sure the filling stays put.

Once they’ve chilled and are firm—which is non-negotiable, remember?—we slice. Grab your sharpest knife; forget those dull butter knives! Cut the logs into neat little half-inch thick rounds. If the knife sticks, just wipe the blade clean between a couple of cuts, or dip it quickly in hot water. These little Mexican inspired snacks look so much better when they are clean-cut.
Make Ahead Appetizers: Chilling and Storing Your Taco Pinwheels
This is my favorite secret weapon when I’m hosting parties or gearing up for big game days. These taco pinwheels thrive on chilling time! You absolutely must wrap those tightly rolled logs snugly in plastic wrap—no air allowed—and get them into the refrigerator. They need a solid hour minimum to firm up. That chilling process is what locks everything into place, guaranteeing those beautiful, tight slices!
But here’s where they really save the day: you can actually prep these up to 24 hours ahead of time! If you slice them before putting them away, they keep perfectly fine in an airtight container in the fridge for about four hours before serving. However, I usually roll them and leave them whole. Then, about 30 minutes before guests arrive, I slice away. If you want to see another amazing make-ahead delight, check out how I handle my stuffed dates.
Because these are no-bake, they stay wonderfully fresh. Just keep them cool, and you will have the easiest, tastiest taco pinwheels ready to go whenever you need them!
Serving Suggestions for These Mexican Inspired Snacks
So you have your amazing, easy taco pinwheels all sliced and ready to go! Now, what are we serving with them? Since these are so richly flavored with the taco seasoning, they pair perfectly with stuff that’s bright and cool to balance out the savory meat and cheese.
You absolutely have to have salsa—maybe a mild one, maybe a smoky chipotle! Guacamole is a must, obviously. But if you want another quick win for your spread, I always bring out a big bowl of my Cowboy Caviar Dip. These little bites are the ultimate game day food, so set them out right near the big screen!
Variations: Customizing Your Savory Pinwheel Bites
Even though these cheesy roll ups are perfect as they are, I always encourage everyone to get a little creative in the kitchen! I mean, why stick to just one way when you can totally personalize these savory pinwheel bites? My spice cabinet gets a workout when I make these because I love experimenting with different cheeses and proteins.
Switching up the meat is super easy. If I’ve made slow cooker shredded chicken for dinner earlier in the week, those leftovers are instantly repurposed into the filling. You get a slightly lighter texture than ground beef, and it still soaks up all that taco seasoning beautifully. If you’re looking to skip the meat entirely, trust me, black beans are your best friend here. Just smash half a can of rinsed black beans really well and mix them right in with the cream cheese mixture. It makes a hearty vegetarian option that everyone loves.
Texture is important, so don’t be afraid to swap out that standard Mexican blend cheese. Pepper Jack? Absolutely! It adds a little built-in heat. Monterey Jack alone is great if you want it extra gooey. And speaking of heat, if you look back at my notes, I mentioned adding hot sauce—I’m talking about spiking that cream cheese mixture with a teaspoon of Tabasco or even a dash of cayenne before you mix in the meat. Be careful though; a little spice goes a long way when you’re dealing with a concentrated filling like this.
If flavor depth is what you’re after, thinking beyond the taco seasoning packet sometimes helps! Try adding a tiny sprinkle of smoked paprika or even cumin to the mix. It gives the filling this wonderful, complex background flavor that tastes like you spent hours cooking. If you want to try something totally different but equally delicious next time, you need to check out my recipe for goat cheese balls!
Frequently Asked Questions About Taco Pinwheels
It’s natural to have questions when you’re trying out a tried-and-true recipe like these super simple taco pinwheels for the first time! I always try to answer the big things folks worry about below, especially concerning make-ahead party snacks. If you’re planning a big spread, maybe check out my pizza dip recipe too!
Can I bake these taco pinwheels instead of serving them cold?
That’s a great question, especially if you’re used to things like puff pastry bites! For this specific recipe, no baking is required, which is why they are such fantastic appetizers. The whole magic relies on mixing that creamy filling and then chilling it thoroughly. If you skipped that chilling step, slicing them thin would be a nightmare, and you’d end up with a mess, not neat tortilla pinwheels! The chilling process firms up that cream cheese, giving the structure needed to hold those perfect spirals.
What is the best way to keep these party snacks fresh?
Since these are served cold, keeping them fresh mostly means keeping them protected in the fridge. Once you’ve sliced those logs into their individual bites, you need to transfer them to an absolutely airtight container. They stay great like this for about four hours on the counter if the party is in full swing, but for true freshness and best texture, put the platter back in the fridge between serving waves. They keep really well for several days this way!
Estimated Nutritional Data for These Cheesy Roll Ups
Now, I know some of you are tracking macros or just really curious about what’s in that delicious spoonful of filling. Since these are such perfectly bite-sized party food, it’s easy to lose track of how many you grab! Keep in mind that the data below is just an estimate based on the standard ingredients listed—your exact numbers might shift slightly depending on the brand of cheese or if you skip the olives.
For simplicity, I’ve calculated this based on generally 8 servings (yield of 32 pinwheels), meaning the data covers about 4 of these cheesy roll ups.
- Serving Size: 4 pinwheels
- Calories: Approximately 180
- Fat: About 14g (with 7g of that being saturated fat—hello, cream cheese!)
- Carbohydrates: Around 8g
- Protein: Roughly 6g
- Sugar: Very low at only 1g
- Sodium: This is the highest number, sitting around 350mg, so maybe pair these with a low-sodium dip if you are watching salt intake.
It’s pretty good for a savory snack though, especially since they are generally low in sugar! If you’re looking for something else that tastes decadent but is still calculated, you should check out my creamy orzo pasta recipe next; it feels fancy but it’s secretly easy!
Share Your Experience Making These Taco Pinwheels
I really hope you give these easy, amazing taco pinwheels a try the next time you need quick finger foods!
When you make them, please come back and leave me a rating—it helps other home cooks find the best recipes. Tell me what filling additions you tried! Did you go heavy on the olives, or maybe sneak in some extra spice? I’d love to see them, so tag me on social media! If you need another crowd-pleaser idea for later, my snickerdoodle recipe is something special. And feel free to check out where I first saw a similar iteration over at Tasty Colours!
PrintThe Ultimate Easy Cheesy Taco Pinwheels

Make these simple, cheesy taco pinwheels for a crowd-pleasing party snack or game day appetizer. They require minimal prep time and are great for making ahead.
- Prep Time: 15 min
- Cook Time: 0 min
- Total Time: 15 min
- Yield: 32 pinwheels 1x
- Category: Appetizer
- Method: No Bake
- Cuisine: Mexican Inspired
- Diet: Vegetarian
Ingredients
- 1 (8 ounce) package cream cheese, softened
- 1 cup cooked ground beef or shredded chicken
- 1 packet (1 ounce) taco seasoning mix
- 1/2 cup shredded Mexican blend cheese
- 1/4 cup sliced black olives (optional)
- 1/4 cup chopped green onions (optional)
- 4 large flour tortillas (about 10 inches each)
- 1 tablespoon water
Instructions
- In a medium bowl, combine the softened cream cheese and taco seasoning. Mix until smooth.
- Stir in the cooked ground beef or chicken, shredded cheese, olives, and green onions, if using. Mix until all ingredients are evenly distributed.
- Lay one large flour tortilla flat on a clean surface. Spread about one-fourth of the meat and cheese mixture evenly over the entire surface of the tortilla, leaving a small border around the edges.
- Starting from one edge, tightly roll up the tortilla. Wrap the rolled tortilla tightly in plastic wrap.
- Repeat this process with the remaining three tortillas and filling.
- Place the wrapped tortillas in the refrigerator and chill for at least 1 hour, or up to 24 hours, to firm up for easy slicing. This chilling step is key for perfect pinwheels.
- When ready to serve, remove the plastic wrap. Use a sharp knife to slice each log into 1/2-inch thick pinwheels.
- Arrange the taco pinwheels on a platter. Serve immediately with salsa or guacamole for dipping.
Notes
- For a make-ahead appetizer, you can slice the chilled rolls just before serving, or slice them ahead of time and store them in an airtight container in the refrigerator for up to 4 hours.
- If you prefer a spicier flavor, add a teaspoon of hot sauce or a dash of cayenne pepper to the cream cheese mixture.
- These are excellent served cold, so baking is not required for this quick finger food recipe.
Nutrition
- Serving Size: 4 pinwheels
- Calories: 180
- Sugar: 1
- Sodium: 350
- Fat: 14
- Saturated Fat: 7
- Unsaturated Fat: 7
- Trans Fat: 0
- Carbohydrates: 8
- Fiber: 0
- Protein: 6
- Cholesterol: 35