
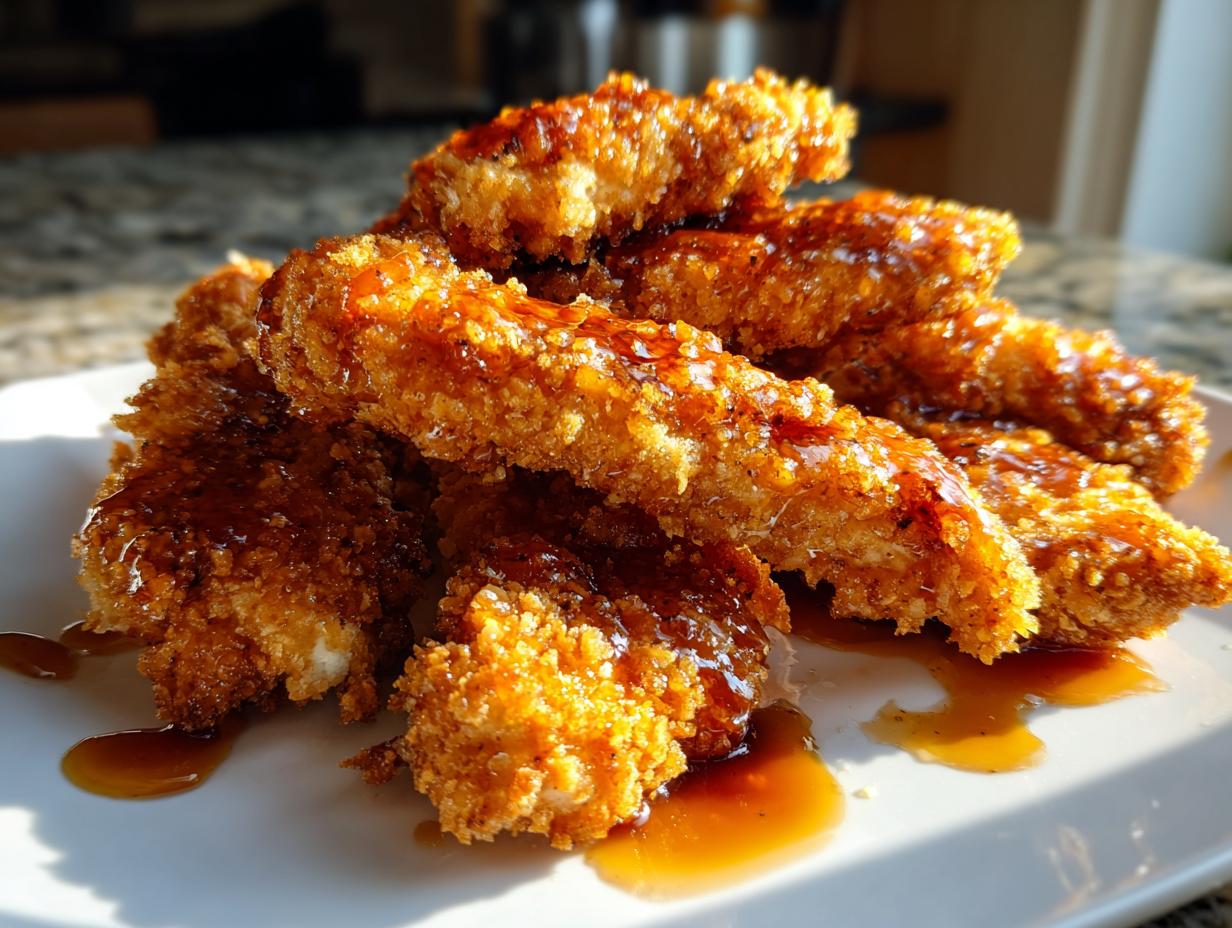
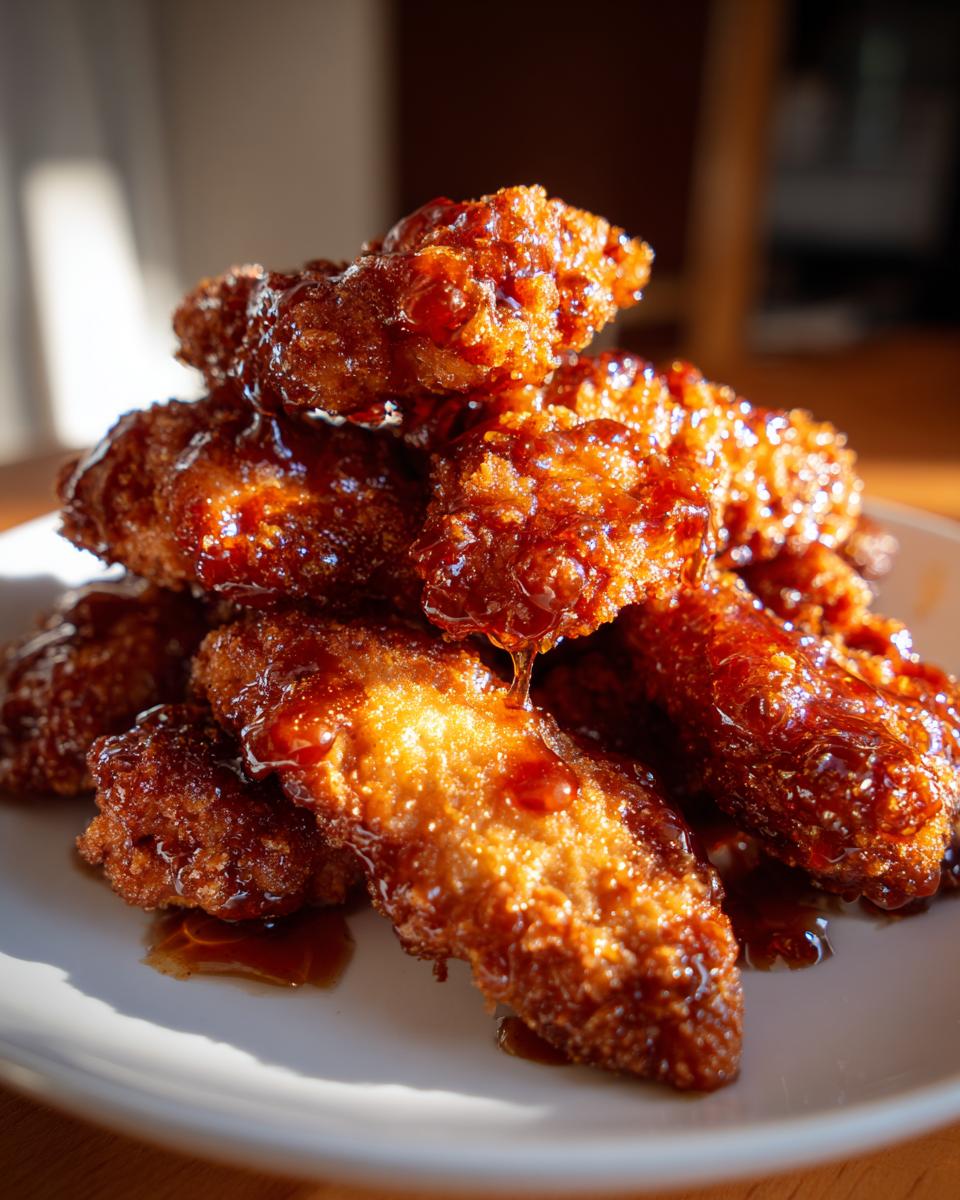
If you’re anything like me, there’s a constant battle in my kitchen happening between needing something fast for a weeknight and needing that incredible, craveable flavor explosion. You know what I mean—that perfect collision between sweet and spicy? Well, friends, I’ve nailed the ultimate answer: our **hot honey chicken tenders**. Forget those sad, soggy versions you’ve tried before; these are different.
This recipe was born right here in my home kitchen because transforming simple ingredients into extraordinary flavor shouldn’t need a whole evening. We rigorously tested the breading process over and over to make sure these tenders stay outrageously crispy, even after they get drenched in that sticky, addictive glaze. Trust me, this **Hot Honey Chicken Tenders Recipe** is about to become your new favorite way to get dinner on the table fast. You can find more easy meals like this when you check out my guide to simple weeknight dinners.
- Why This Hot Honey Chicken Tenders Recipe Delivers Peak Flavor and Crunch
- Gathering Ingredients for Your Hot Honey Chicken Tenders Recipe
- Step-by-Step Instructions for Perfect Hot Honey Chicken Tenders
- Tips for Success Making Hot Honey Chicken Tenders
- Ingredient Notes and Substitutions for Your Simple Chicken Recipe
- Serving Suggestions for Game Day Chicken Appetizers
- Storage and Reheating Hot Honey Chicken Tenders
- Frequently Asked Questions About Making Crispy Chicken Tenders
- Estimated Nutritional Data for Hot Honey Chicken Tenders
- Share Your Hot Honey Chicken Tenders Experience
Why This Hot Honey Chicken Tenders Recipe Delivers Peak Flavor and Crunch
I know the dread—you make something crispy, you add the sauce, and BOOM, it’s soggy five minutes later. Not here! We conquered that challenge so you get that desirable juicy inside crispy outside chicken experience every single time. This method is my ticket to the best sweet and spicy chicken you’ll ever make.
- We nail that sweet and spicy chicken balance so it hits all the right notes.
- It’s quick enough for a weeknight but tastes like you spent hours on it.
- The buttermilk marinade tenderizes the breast meat beautifully before it even hits the heat.
- This recipe always results in better than takeout chicken texture.
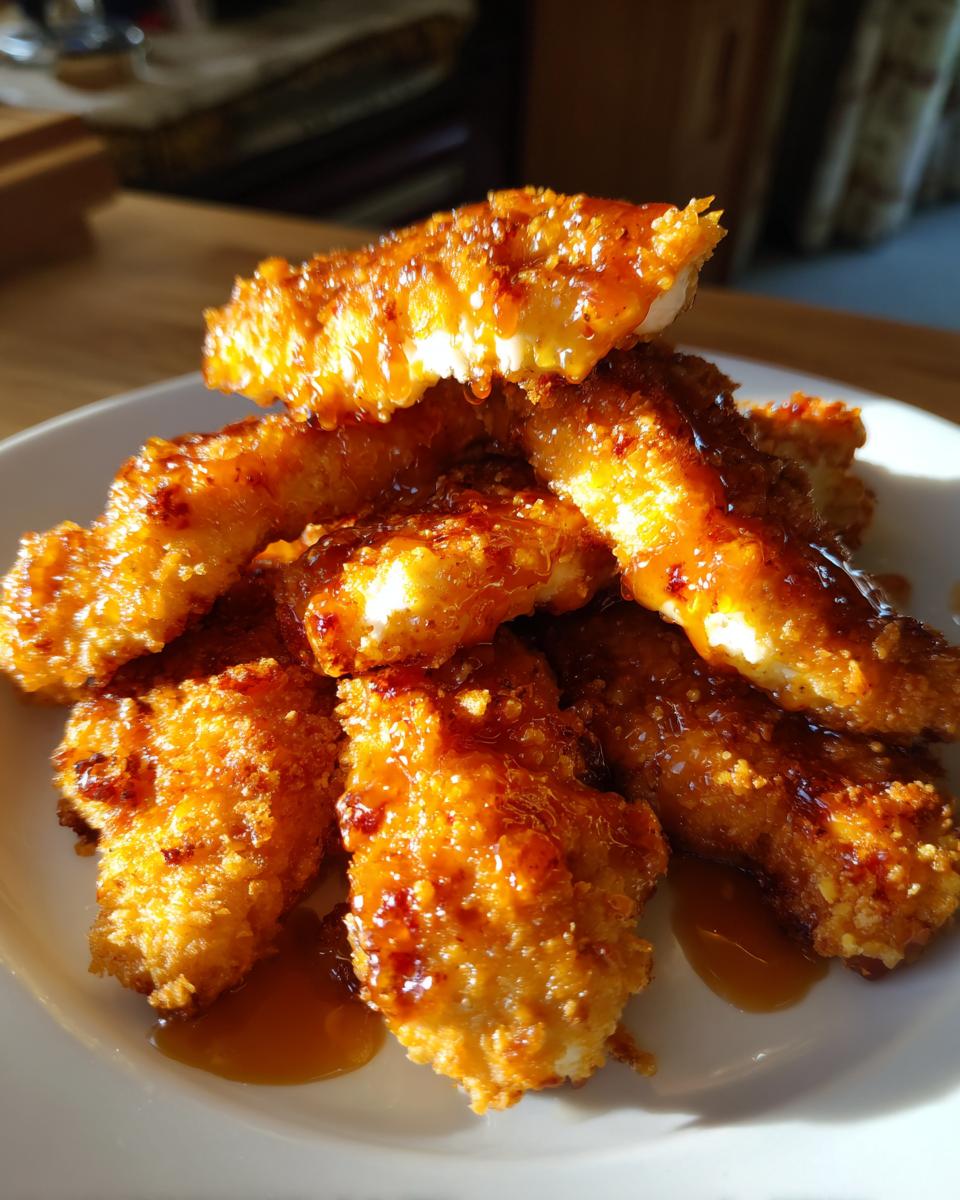
Seriously, the combination of buttermilk soaking the chicken and then that heavy coat of Panko is what locks in the juices and creates a shield against the glaze. If you love this kind of flavor combo, you might also want to check out my buffalo chicken bowl recipe!
The Secret to Crispy Chicken Tenders Every Time
The real magic here is Panko breadcrumbs—they are flakier and lighter than regular breadcrumbs, which means maximum crunch. For the oven method, you simply must use a wire rack set over your baking sheet. That lets air circulate all around the tender, drying out the bottom layer so it stays just as crunchy as the top. Don’t skip that rack if you aren’t using the air fryer!
Gathering Ingredients for Your Hot Honey Chicken Tenders Recipe
Okay, let’s get organized! Getting your ingredients prepped first makes the assembly process fly by. I’ve broken this down so you aren’t scrambling. For the chicken, we need about two pounds of boneless, skinless breasts cut into tenders. Don’t forget the buttermilk for soaking—it’s what makes them so tender!
Then we set up our dredging station with flour, eggs, and that crucial Panko. If you want that next-level flavor, make sure you have everything ready before you start coating those chicken pieces. If you want a great dipping option that is super fast, check out how I make whipped feta dip!
For the Homemade Hot Honey Sauce Glaze
This is the star, obviously! You will need honey, butter, a little apple cider vinegar to cut the sweetness, and of course, hot sauce. My big piece of advice here is: don’t be afraid to taste it! If you crave more kick, definitely add an extra tablespoon of hot sauce. Trust me, you want this glaze personalized!
- 1/2 cup honey
- 2 tablespoons hot sauce (adjust to your tolerance!)
- 1 tablespoon unsalted butter
- 1 teaspoon apple cider vinegar
Step-by-Step Instructions for Perfect Hot Honey Chicken Tenders
This is where the magic happens, but remember, following the order matters! We need tender chicken, a solid crust, and a quick cook time. I’ve broken this down into three main phases. For the initial soaking step, go ahead and let those tenders hang out in the buttermilk bath for at least 30 minutes. Honestly, I find 1 hour yields the best tenderness for this cut of chicken, but if you’re in a major rush, 30 minutes works!
Once marinated, we move straight into the breading assembly line, and then it’s time for cooking. We’ll cover both the air fryer and the oven since I know everyone has different equipment at home. Afterward, we hit them with that gorgeous, glossy glaze right away. If you’re looking for amazing side dishes to go with these, check out my tips for roasted sweet potatoes!
Marinating and Setting Up the Breading Station
First things first, get those tenders soaking in the buttermilk mixture. While they’re marinating, you need to set up three dishes for breading. Dish one: the flour. Dish two: the lightly beaten eggs. And dish three, the heavy hitter: the Panko breadcrumbs. When you dredge the chicken, make sure you dip it lightly in the flour first, and really shake off any excess!
Excess flour gets gummy and breaks off in the oil or air fryer basket. Then, move it quick through the egg, and really press that Panko onto the chicken so it sticks everywhere. Place the fully coated tenders onto that wire rack I mentioned earlier.
Cooking: Mastering the Air Fryer Chicken Tenders or Oven Method
If you’re using the air fryer—my preferred method for speed!—preheat it to 380°F. You absolutely must spray or brush those coated tenders with a little oil before they go in. Cook them in a single layer for about 10 to 12 minutes, flipping them halfway through. We are looking for that perfect internal temperature of 165°F.
For the oven crew, set that temperature a little hotter at 400°F. Lay them on that wire rack over a sheet pan (this is crucial for the bottom crust!). Bake them for 18 to 22 minutes, making sure to flip them halfway so they brown evenly. Both methods aim for that golden, crunchy exterior!
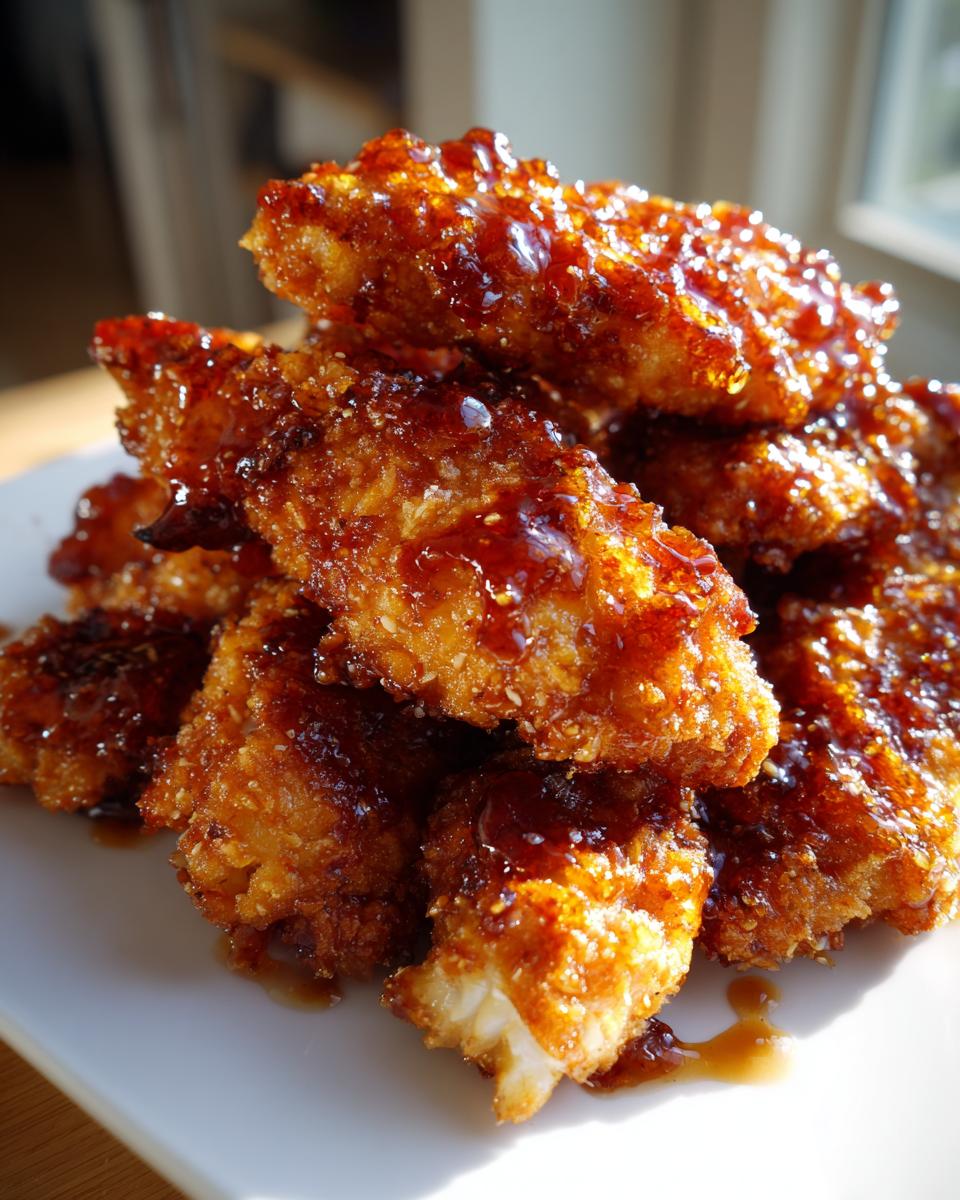
Glazing for the Ultimate Sweet Heat Glazed Chicken Finish
While the chicken is cooking, gently warm up your honey, butter, hot sauce, and vinegar in a small pan until it’s smooth. Do not let this boil, or it gets weird! The instant the tenders come out of the oven or air fryer—and I mean *immediately*—toss them into a big bowl and pour that warm glaze right over the top.
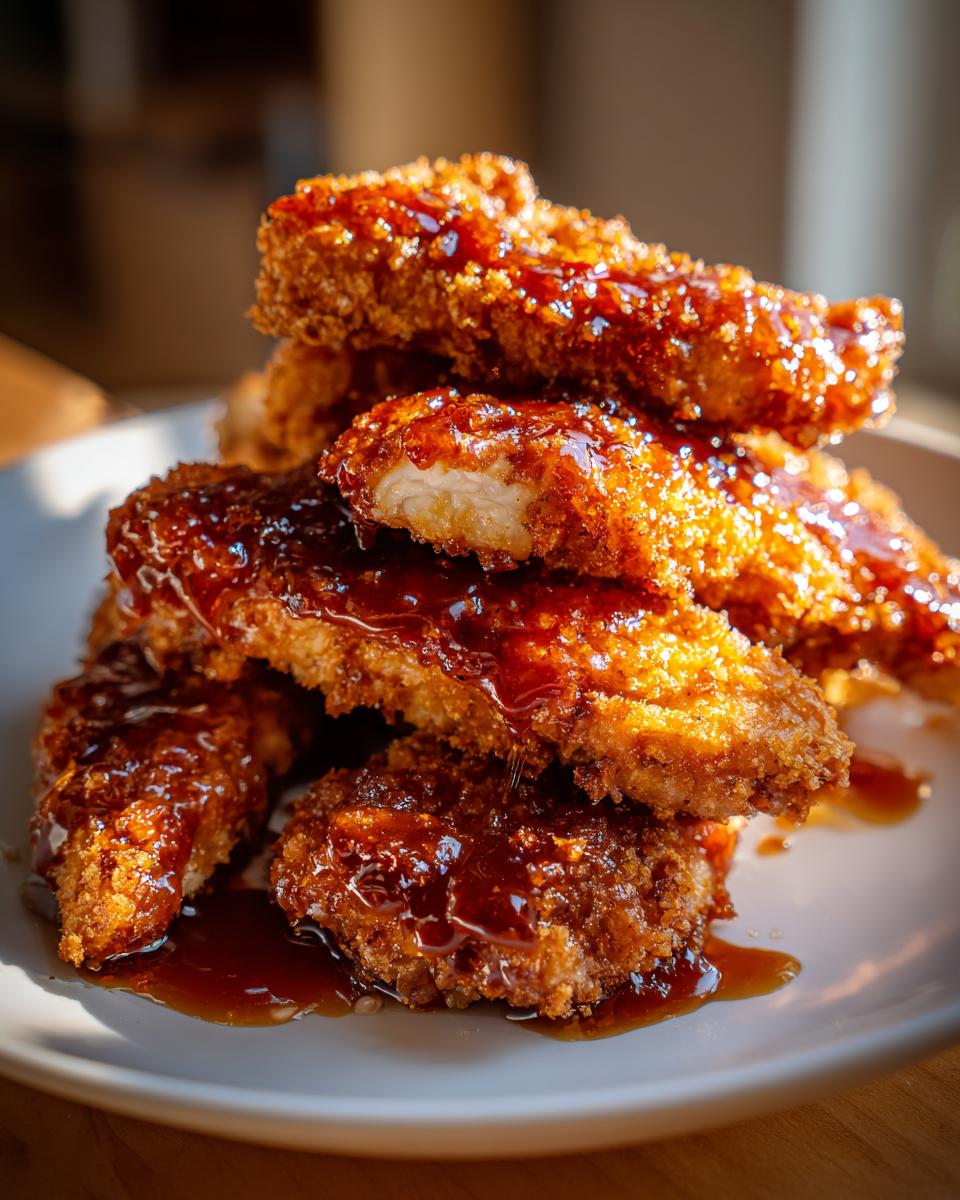
Use a rubber spatula to gently toss them around so every piece gets coated in that amazing sweet heat. You have to work fast here so the glaze melts onto that hot, crisp surface without dissolving the breading right away. Serve these bad boys up right away!
Tips for Success Making Hot Honey Chicken Tenders
Look, making great food comes down to understanding the little details. I learned these tricks over countless batches, and they’re what keep our **hot honey chicken tenders** from turning into sad, sticky messes. The biggest texture tip for the oven method is that wire rack—I can’t stress this enough! It lets air circulate underneath, making sure the bottom doesn’t steam itself into submission while baking. If you are planning for leftovers later, check out how I reuse things in my leftover turkey pot pie recipe for ideas!
When it comes to the glaze, remember we want it smooth, not boiling hot. If you’re finding your glaze isn’t thick enough, just let it simmer gently for an extra minute or two until it reduces slightly. That small simmer deepens the flavor without turning it into hard candy when it hits the chicken.
Ingredient Notes and Substitutions for Your Simple Chicken Recipe
Don’t worry if you don’t have everything perfect on the first go! This recipe is super adaptable. If you need it gluten-free—and a lot of us do these days—it’s an easy swap. Just use a gluten-free flour blend where you would use your regular flour, and look for gluten-free Panko, which you can find in most good supermarkets now. That keeps that crunch factor totally intact!
Now, let’s talk heat. The hot sauce you choose totally controls the final flavor of your glaze. Are you using something mild like standard Frank’s RedHot? You probably want to lean towards the higher end of the hot sauce measurement. If you’re using something super fiery, maybe just start with one tablespoon. You can always add more heat later, but you can’t take it out once it’s in there! These little tweaks help you make it exactly what you want. For more flexibility in your small weekday meals, try looking at my easy breakfast cookie recipe for breakfast prep ideas!
Serving Suggestions for Game Day Chicken Appetizers
Now that you have the best tenders on the block, what do you serve them with? These **hot honey chicken tenders** are perfect as an appetizer for game day gatherings, but honestly, they make a fantastic, quick centerpiece for an easy weeknight chicken dinner too. If you’re serving them as a main dish, I love pairing them with something crisp and cool to balance that heat—think crunchy coleslaw or some roasted veggie sticks.
When I host game days, everyone gravitates toward the sauces! If you need another delicious centerpiece snack, you absolutely have to try my recipe for cowboy caviar. But even with great dips, these tenders shine on their own. A simple ranch or blue cheese dressing is a classic, necessary component for cooling down those sweet, spicy bites!
Storage and Reheating Hot Honey Chicken Tenders
No one likes sad, lukewarm leftovers, especially when the whole point of these **hot honey chicken tenders** was that beautiful crunch! If you have any left over—which is rare in my house, I swear—the absolute best thing you can do is store the glaze separately from the chicken. If they’re already coated when you store them, try to put a little paper towel in the container to wick away any moisture overnight.
When it’s time to reheat them the next day? Don’t even think about the soft heat of the microwave. You want crispness back, right? The air fryer is your best friend here! Pop the cold tenders in the air fryer at about 350°F for just 4 to 6 minutes. That blast of dry heat crisps everything right back up for you. It’s practically magic! For more comfort food ideas that reheat well, you might enjoy my easy tamale pie recipe for another night.
Frequently Asked Questions About Making Crispy Chicken Tenders
I always get questions when people make this recipe, especially around keeping that crunch perfect. Here are the top things I hear about making the best **crispy chicken tenders** at home!
Can I deep fry these instead of baking or air frying?
You totally can! If you want that traditional route, go for it. Deep frying will yield a very fast, professional-level crust. Make sure your oil is at 350°F (175°C) and fry them in batches so you don’t drop the oil temperature. Just remember, deep-fried is usually a little heavier, and since we are coating them in that sticky glaze anyway, the air fryer or oven keeps things lighter!
How do I prevent the glaze from making them soggy?
This is the biggest challenge! The key to avoiding that dreaded soggy texture is timing. You have to glaze them right as they come off the heat—while they are piping hot—and toss them *quickly*. The heat helps the glaze set almost instantly rather than soaking in. Also, serve them right away! If you are bringing them to a party, maybe keep the glaze warm in a small pot nearby and drizzle it on just before serving.
Can I use chicken thighs instead of breast meat?
Absolutely, and it’s delicious! Chicken thighs tend to stay juicier than the breast meat no matter what you do, which is nice. If you use boneless thighs, you might need to cut them into slightly smaller pieces than breast tenders, and perhaps add just a couple of minutes to your cooking time, depending on how thick you cut them. It makes for a richer, more flavorful bite!
Is it okay to make the hot honey ahead of time?
Yes, making the sauce ahead is another great time-saver for a quick dinner idea! You can make the **homemade hot honey sauce** a day or two in advance and keep it stored in the fridge. Just note that when it gets cold, it thickens up quite a bit. Before you glaze the tenders, you must reheat it gently on the stovetop until it’s nicely pourable again. If you need other speedy recipes, check out my post on quick blackened salmon tacos!
Estimated Nutritional Data for Hot Honey Chicken Tenders
Okay, putting nutrition info on comfort food feels a little funny, but I know many of you curious cooks track this stuff! Based on our recipe breakdown, these estimates give you a good idea of what you’re looking at per serving (which we figure is about four tenders).
- Serving Size: 4 tenders
- Calories: 450
- Protein: 45g
- Fat: 15g (with 4g saturated fat)
- Carbohydrates: 35g
- Sugar: 25g
Now, remember, these values are just an estimate! They change wildly depending on what brand of honey you use or how much oil clings to the Panko during the air frying or baking process. It’s always best to use this as a general guideline. If you’re looking for other things to round out your meal, you should check out my guide on easy breakfast cookies for future planning!
Share Your Hot Honey Chicken Tenders Experience
And there you have it—the ultimate hot honey chicken tenders recipe that promises crunch, juice, and that incredible sweet heat you’ve been craving! I truly believe this recipe elevates your everyday cooking, just like we aim to do here at Cooking Zenith.
Now, the kitchen is yours! I absolutely love hearing how you all make recipes your own. Did you amp up the ghost pepper sauce? Did you try using Panko on a different protein? Please, come back here and leave me a rating out of five stars. Tell me what you thought and share any tweaks you made down in the comments below. If you need to get in touch with me directly about the recipe, you can always head over to the contact page. Happy cooking, friends!
PrintThe Ultimate Crispy Air Fryer/Oven Hot Honey Chicken Tenders

Make these hot honey chicken tenders for a weeknight dinner or game day snack. You get juicy chicken coated in a crispy breading, finished with a perfect sweet and spicy hot honey glaze. This recipe works well in the air fryer or oven.
- Prep Time: 20 min
- Cook Time: 20 min
- Total Time: 40 min
- Yield: 4 servings 1x
- Category: Dinner
- Method: Air Frying or Baking
- Cuisine: American
- Diet: Vegetarian
Ingredients
- 2 lbs boneless, skinless chicken breast tenders
- 1 cup buttermilk
- 1 teaspoon salt
- 1 teaspoon black pepper
- 1 teaspoon garlic powder
- 1 teaspoon onion powder
- 1 1/2 cups panko breadcrumbs
- 1/2 cup all-purpose flour
- 2 large eggs, lightly beaten
- Cooking spray or oil for brushing
- For the Hot Honey Glaze:
- 1/2 cup honey
- 2 tablespoons hot sauce (use more for extra heat)
- 1 tablespoon unsalted butter
- 1 teaspoon apple cider vinegar
Instructions
- Prepare the chicken: Place the chicken tenders in a bowl and cover them with buttermilk, salt, pepper, garlic powder, and onion powder. Let the chicken marinate for at least 30 minutes, or up to 4 hours in the refrigerator.
- Set up the breading station: In one shallow dish, place the flour. In a second dish, whisk the eggs. In a third dish, place the panko breadcrumbs.
- Dredge the chicken: Take one tender at a time, dredge it lightly in the flour, shaking off excess. Dip it into the egg mixture, letting excess drip off. Finally, press the tender firmly into the panko breadcrumbs to coat completely. Place coated tenders on a wire rack set over a baking sheet.
- Cook the tenders (Air Fryer Method): Preheat your air fryer to 380°F (195°C). Lightly spray the coated tenders with cooking spray or brush with oil. Cook in a single layer for 10 to 12 minutes, flipping halfway through, until golden brown and cooked through (internal temperature of 165°F or 74°C).
- Cook the tenders (Oven Method): Preheat your oven to 400°F (200°C). Place the coated tenders on a baking rack set over a baking sheet. Lightly spray the tops with cooking spray or brush with oil. Bake for 18 to 22 minutes, flipping halfway, until golden brown and cooked through.
- Make the hot honey glaze: While the chicken cooks, combine the honey, hot sauce, butter, and apple cider vinegar in a small saucepan. Heat over medium-low heat, stirring until the butter melts and the sauce is smooth. Do not boil.
- Glaze the chicken: Once the chicken tenders are cooked, immediately place them in a large bowl. Pour the warm hot honey glaze over the tenders and toss gently until they are evenly coated.
- Serve immediately for the best crispy texture.
Notes
- For the crispiest results in the oven, use a wire rack so air circulates around the bottom of the tenders.
- If you prefer a thicker glaze, simmer the sauce for an extra minute or two until it reduces slightly.
- You can easily make this recipe gluten free by substituting the flour with gluten-free flour and the panko with gluten-free panko breadcrumbs.
Nutrition
- Serving Size: 4 tenders
- Calories: 450
- Sugar: 25
- Sodium: 550
- Fat: 15
- Saturated Fat: 4
- Unsaturated Fat: 11
- Trans Fat: 0
- Carbohydrates: 35
- Fiber: 2
- Protein: 45
- Cholesterol: 140