
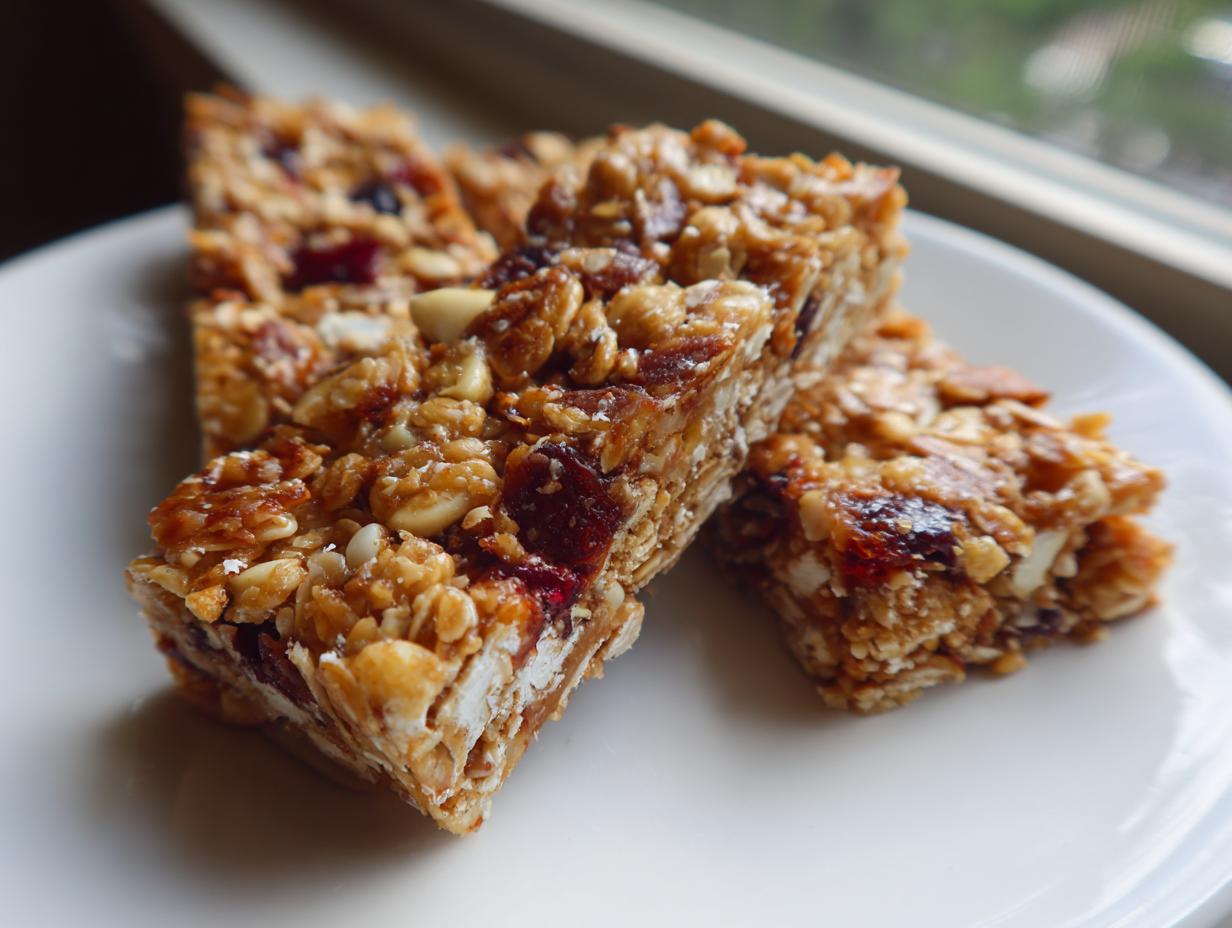
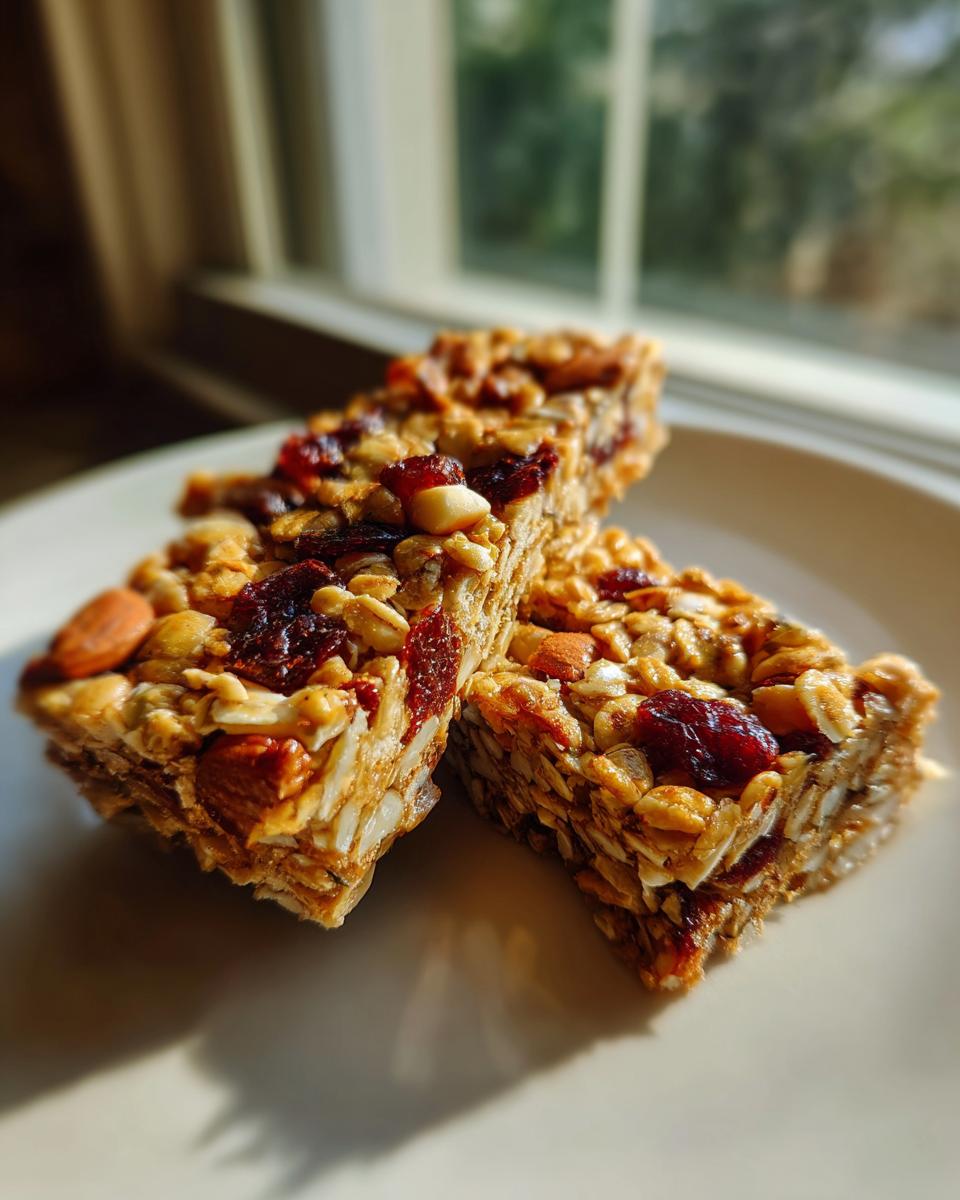
Let’s be honest, those plastic-wrapped snacks you grab on the run just don’t cut it anymore. If you are tired of biting into a bar that tastes like cardboard and sugar, you’ve come to the right place! I’m Aria Thompson, and at Cooking Zenith, we believe extraordinary flavor shouldn’t require spending all day in the kitchen. That’s why I developed this **homemade granola bars** recipe. Trust me, these are guaranteed to be chewy, naturally sweetened with maple syrup or honey, and incredibly easy to customize to your liking. We’re ditching the junk and leaning into wholesome ingredients for the best healthy homemade granola bars you’ve ever sunk your teeth into!
- Why You Will Love These Homemade Granola Bars
- Gathering Ingredients for Your Homemade Granola Bars
- Step-by-Step Instructions for Simple Baked Homemade Granola Bars
- Tips for Success Making Your Homemade Granola Bars
- Customizable Granola Bar Recipe Variations
- No-Bake Option for Easy Granola Bars
- Storage and Serving Suggestions for Homemade Granola Bars
- Frequently Asked Questions About Homemade Granola Bars
- Estimated Nutritional Data for Wholesome Snack Bars Recipe
Why You Will Love These Homemade Granola Bars
I could talk all day about how great these are, but I know what matters to you: taste, texture, and ease! Forget those dry, crumbly bricks of store-bought nonsense. These rise above the rest because they deliver on flavor and function.
- They hold together perfectly, making them ideal for the lunch box!
- They fit right into making **healthy homemade granola bars** that you feel good about.
- They are fantastic **kid friendly snack bars** because they taste like a treat, not a chore.
Chewy Texture Guaranteed
The secret to that perfectly satisfying chewiness isn’t luck; it’s physics! It all comes down to the ratio between your dry ingredients (the oats and nuts) and your wet binder—the honey and fat. We use just the right amount of liquid to coat everything beautifully without soaking the oats completely. This balance ensures they set beautifully but remain soft after baking.
Mastering Natural Sweeteners in Granola Bars
When I say natural sweeteners, I mean steering clear of all those processed corn syrups and artificial junk. We rely on honey or pure maple syrup here. This choice isn’t just healthier; it adds a depth of flavor that white sugar just can’t touch. Learning how to balance the **natural sweeteners in granola bars** is key to their success. It provides the necessary stickiness while giving you that rich, comforting sweetness you actually want in a snack bar.
Gathering Ingredients for Your Homemade Granola Bars
Okay, gathering supplies is half the battle! Getting this list right ensures your trip from box to bar is seamless. The ingredients are simple, which is why this recipe is such a fantastic **homemade granola bars** favorite. Remember, we are aiming for wholesome stuff here, not a trip to the candy aisle. Before you start, check out my guide on easy breakfast recipes for pairing ideas!
Dry Base Components
We start with the foundation! Make sure you grab good old **rolled oats**; the quick-cooking kind just won’t give us the structure we need for a chewy bar. You’ll need 2 cups of those. Then, mix in some crunch—I love using a mix of almonds or pecans, about 1 cup, but they have to be *roughly chopped* so you get texture. Don’t forget the salt (half a teaspoon helps balance the sweetness!) and about half a cup of whatever you love for mix-ins, like dried fruit or some mini chocolate chips.
The Binding Agents for Chewy Granola Bars
These next few items are crucial because they glue everything together and give us those amazing chewy granola bars. You need half a cup of your chosen natural sweetener—honey or maple syrup works wonders here. We gently warm this up with about a quarter cup of melted coconut oil or softened butter. That fat source is serious business; it coats the oats and helps them stick together firmly once they cool down. Lastly, just one teaspoon of vanilla extract ties all those flavors up nicely.
Step-by-Step Instructions for Simple Baked Homemade Granola Bars
Alright, time to put this easy granola bar recipe to work! Don’t feel overwhelmed; this is just mixing and pressing. The real magic happens in the oven and then later, when they cool off. If you want more inspiration for baked oat treats, check out my easy breakfast cookie oatmeal recipe—it uses similar principles!
Preparing the Pan and Dry Mix
First things first, get your oven preheated to 350°F (175°C). Grab an 8×8 inch pan and line it with parchment paper. Make sure you leave some paper hanging over the sides! That overhang is your handle later on. In a big bowl, toss in your 2 cups of rolled oats, the chopped nuts, and that little bit of salt. Give it a good stir so the salt isn’t just sitting in one spot.
Creating the Wet Binder and Combining
Next, we handle the glue. Gently warm up your sweetener (honey or maple syrup) with the melted coconut oil or butter in a small pot or microwave dish until everything is liquid and happy together. Stir that vanilla extract in there. Now, pour this wet mixture over your dry stuff. You have to mix this thoroughly with a spatula. Keep folding it until every single oat and nut looks shiny and evenly coated. Don’t rush this coating part!
Baking and Setting the Homemade Granola Bars
Dump that coated mixture right into your prepared pan. Now this is critical for **homemade granola bars** that don’t crumble: you have to press it down firmly! Seriously press it down hard and flat so it compacts nicely. Bake it for 15 to 20 minutes until the edges look just barely golden. After they come out, wander away! You absolutely must let these cool completely in the pan—like an hour! This step lets the binders set up, giving you crisp, chewy bars instead of a pile of warm oats.
Tips for Success Making Your Homemade Granola Bars
I’ve learned a few things over the years trying to nail the structure of **homemade granola bars**. The secret to bars that don’t fall apart in your hand lies right after they come out of the oven. When I first tried making these, I was too gentle when pressing! My first batch was beautiful coming out, but the second I tried to cut them, it crumbled everywhere. I nearly tossed the whole pan! All it took was adding some real muscle behind my spatula to fix it.
Achieving the Perfect Press
You need to press down with serious force—I mean, press until your arm gets tired! Use the flat bottom of a heavy glass measuring cup to really compact that oat mixture into the pan. You want it dense, but don’t mash it so hard that you break up every single oat flake entirely. We are aiming for firm compaction, which allows the warm liquid binders to fully adhere to everything else. That solid base is what keeps your **homemade granola bars** intact when you slice them later.
Also, don’t try to cut these warm! You think you’re saving time, but you aren’t. As another great cook mentioned regarding their favorites homemade granola bars, patience after baking is everything. Wait until they are totally cool. If you can, pop the whole pan into the fridge for thirty minutes after they cool on the counter. That extra chill time makes slicing a dream!
Customizable Granola Bar Recipe Variations
This is truly where you get to play chef! The beauty of whipping up your **customizable granola bar recipe** at home is that you control every single thing that goes in. Store-bought bars are so rigid, but ours can adapt to whatever you have staring at you from the pantry or what exciting new flavors you want to try out that week. I find that changing up the mix-ins completely changes the vibe!
If you are looking for more ideas on feeding the family this year, check out my thoughts on quick, healthy lunch ideas—bars are always a winner.
Making Chocolate Chip Granola Bars Homemade
Who doesn’t love chocolate? If you want to turn these into **chocolate chip granola bars homemade**, I have a specific tip for you. You might be tempted to toss them in with the oats and nuts before baking, but please don’t! The heat will melt them right into the binder, and they end up looking like a brown smear across your beautiful bar base. Skip them during the mixing stage.
Wait until the bars come out of the oven, and while they’re still piping hot but after you’ve pressed them firm, sprinkle those chips generously across the top. Then, let them cool completely. The residual heat will soften them just enough so they get wonderfully gooey, but they will hold their shape when you slice them!
Quick Swaps for Dietary Needs
Making adjustments for allergies or preferences is so easy here. If you have nut restrictions, swap those chopped almonds and pecans for an equal amount of seeds—pumpkin seeds or sunflower seeds work really well for that crucial crunch factor. For gluten-free folks, simply substitute certified gluten-free rolled oats for the regular ones, and you are good to go!
You can also play with flavors! Try adding a teaspoon of citrus zest, like orange or lemon, into the wet mixture for a bright pop. Or, for an autumnal vibe, throw in a teaspoon of pumpkin pie spice along with your regular cinnamon. Just remember, whatever you swap in, try to keep the total extra volume close to that half-cup mark for the best set.
No-Bake Option for Easy Granola Bars
I totally get it; wanting an **easy granola bar recipe** sometimes means you want zero oven time, especially when it’s scorching outside! Good news: because we use a decent amount of liquid binder (that honey and oil mix), these **homemade granola bars** are perfect for a no-bake version!
The modification is super simple, which makes this recipe a lifesaver for quick meal prep. You skip Step 4 entirely—no preheating, no baking involved. After you mix your wet and dry ingredients until everything is perfectly coated—just like in the baked directions—you move straight to pressing them into the prepared pan.
Here is the key difference: instead of baking to set the bars, you rely on cold! You have to press them down incredibly firmly, maybe even more firmly than you would for the baked version. Then, stick the whole pan into the refrigerator. I usually let my no-bake versions chill for at least two hours, but honestly, three is better. You want them rock solid before you try cutting them.
If you’re looking for other quick, hands-off treats, you have to check out my recipe for easy 3-ingredient no-bake Oreo balls—it follows the same mix-press-chill philosophy. If you want more no-bake ideas, my friend Andi Anne has some fantastic inspiration over at her site, too! No-bake granola bars are the ultimate grab-and-go snack when time is tight!
Storage and Serving Suggestions for Homemade Granola Bars
Now that you’ve made the absolute best **homemade granola bars**, the next challenge is stopping everyone from eating them all in one sitting! Good news: they store really well, meaning we can batch-prep snacks for the whole week. I usually keep mine in a single airtight container right on the counter. If your kitchen is super warm, or if you added a lot of fresh fruit, the fridge is your friend.
They are fantastic straight out of the fridge, but I sometimes let mine sit on the counter for ten minutes to soften up just a smidge before serving. They are amazing topped with a dollop of Greek yogurt—check out my thoughts on simple weeknight dinners for some other easy pairings!
Best Practices for Lunch Box Snack Ideas
When packing these for school or work, the individual wrapping trick is a lifesaver. I cut all my bars first, and then I wrap each one tightly in a small sheet of wax paper or plastic wrap before stacking them in a larger container. This prevents them from sticking together once the ambient temperature rises!
This simple step makes grabbing them for **lunch box snack ideas** so fast in the morning. They hold their shape wonderfully, and no one ends up with sticky crumbs all over their sandwich!
Frequently Asked Questions About Homemade Granola Bars
It’s funny how making something simple can spark so many questions! I always want you to feel completely confident when you’re in the kitchen, especially when working with new recipes. These questions pop up the most when people are getting ready to make their first batch of **homemade granola bars**. Let’s clear up any confusion so your first attempt is a total win!
How do I make these the chewiest granola bars no bake?
Oh, that’s a great question that taps right into wanting the best of both worlds! If you are skipping the oven, you have to compensate with an extra firm press and more chilling time. For the absolute **chewiest granola bars no bake**, make sure your binding agents (the honey/syrup) are room temperature when you mix them in—it helps them spread and stick better. Then, press them into that pan until you think you can’t press anymore, and chill them for at least three hours. A longer chill time lets everything firm up into that chewy block.
Can I use alternative natural sweeteners in these homemade granola bars?
Absolutely, you can swap around the sweeteners, but you have to respect what the binder does! Honey and maple syrup are both liquid, which is important. If you switch to something thicker, like date paste, you might need to thin it out slightly with a tablespoon of warm water or a tiny bit more oil to keep that coating consistency. If you use agave, which is slightly thinner than honey, you might need to chill them slightly longer to set up properly.
What is the best way to store these oatmeal energy bars to keep them fresh?
The best way to store these **oatmeal energy bars** is airtight, plain and simple. If you made the baked version, they are great on the counter for about five days, provided your kitchen isn’t humid. If you plan to keep them longer than a week, or if you made the no-bake variety, absolutely stick them in the fridge. I like to wrap each one individually in wax paper first, pop those wrapped bars into a large zip-top bag, and keep them chilled. They taste great cold!
If you are done talking snacks and suddenly need something heartier, I have a fantastic way to repurpose leftovers for dinner that you will love—check out my easy leftover turkey pot pie recipe!
Estimated Nutritional Data for Wholesome Snack Bars Recipe
When we talk about making **wholesome snack bars recipe** options at home, one of the best perks is knowing exactly what you’re fueling your body with! It’s transparency you just can’t get when you buy pre-packaged stuff. Here is a general breakdown based on using the core ingredients I listed—like rolled oats, mixed nuts, and maple syrup.
Remember, since this recipe is so wonderfully customizable, these numbers will shift depending on whether you load it up with dried fruit or go heavy on the dark chocolate chips! These are just estimates per bar for 12 servings, so take them as a good guideline.
- Calories: Around 220
- Total Fat: About 10 grams, with only 3 grams being saturated fat.
- Carbohydrates: Roughly 30 grams, which includes 3 healthy grams of fiber.
- Protein: A nice little boost of 6 grams to keep you satisfied.
- Sugar: About 10 grams total, mostly coming from our natural sweeteners.
We are aiming for real fuel here, not empty calories. I always say, if you swap out the honey for an extra dollop of peanut butter, you’ll see those fat and protein numbers tick up a bit, and that’s perfectly fine for an on-the-go breakfast bar!
PrintThe Best Chewy, Naturally Sweetened Homemade Granola Bars
Make your own granola bars that are chewy, nutty, and naturally sweetened. This easy granola bar recipe uses wholesome ingredients and is perfect for a healthy snack or on-the-go breakfast.
- Prep Time: 10 min
- Cook Time: 20 min
- Total Time: 1 hour 30 min
- Yield: 12 servings 1x
- Category: Snack
- Method: Baking
- Cuisine: American
- Diet: Vegetarian
Ingredients
- 2 cups rolled oats
- 1 cup mixed nuts (almonds, pecans), roughly chopped
- 1/2 cup mix-ins (e.g., dried fruit, mini chocolate chips)
- 1/2 teaspoon salt
- 1/2 cup natural sweetener (e.g., honey or maple syrup)
- 1/4 cup melted coconut oil or butter
- 1 teaspoon vanilla extract
Instructions
- Preheat your oven to 350°F (175°C). Line an 8×8 inch baking pan with parchment paper, leaving an overhang for easy removal.
- In a large bowl, combine the rolled oats, chopped nuts, and your chosen mix-ins. Add the salt and stir well to distribute the dry ingredients evenly.
- In a separate small saucepan or microwave-safe bowl, gently warm the natural sweetener and melted coconut oil until they are fully combined and liquid. Stir in the vanilla extract.
- Pour the wet mixture over the dry ingredients. Use a spatula to mix everything thoroughly until all the oats and nuts are evenly coated.
- Transfer the mixture to the prepared baking pan. Press the mixture down firmly and evenly into the pan using the bottom of a glass or a spatula. Firm pressing helps create chewy granola bars.
- Bake for 15 to 20 minutes, or until the edges are lightly golden brown.
- Remove the pan from the oven and let the mixture cool completely in the pan on a wire rack. This cooling step is crucial for the bars to set properly.
- Once fully cooled (about 1 hour), use the parchment paper overhang to lift the block out of the pan. Cut into 12 to 16 bars.
Notes
- For a no-bake option, skip the oven step. Press the mixture firmly into the pan and chill in the refrigerator for at least 2 hours before cutting.
- To make these kid friendly snack bars, use mini chocolate chips and dried cranberries as your main mix-ins.
- If you prefer a softer bar, reduce the baking time slightly. For crispier bars, bake closer to 20 minutes.
- Store your homemade granola bars in an airtight container at room temperature for up to one week.
Nutrition
- Serving Size: 1 bar
- Calories: 220
- Sugar: 10
- Sodium: 85
- Fat: 10
- Saturated Fat: 3
- Unsaturated Fat: 7
- Trans Fat: 0
- Carbohydrates: 30
- Fiber: 3
- Protein: 6
- Cholesterol: 0