
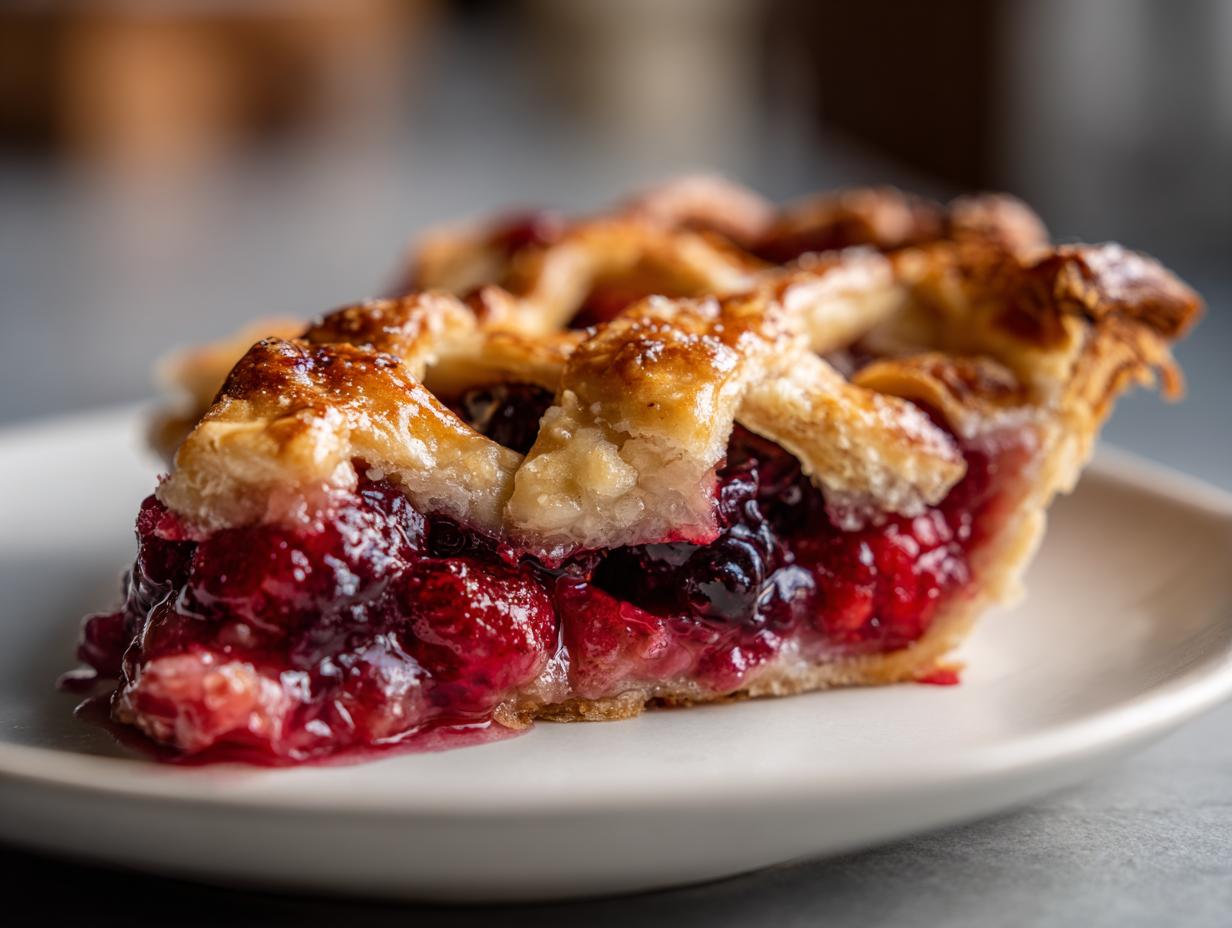
Oh, there is nothing in the world quite like pulling a perfect, golden dessert out of your oven. It’s that moment of pure satisfaction, isn’t it? Well, get ready, because I’m sharing what I genuinely believe is the best berry pie recipe you’ll ever try. Forget those soggy bottoms and runny messes! This Ultimate Mixed Berry Pie guarantees you get that dreamy, flaky, all butter crust pie texture every single time, paired with a thick, totally sliceable berry pie filling. This recipe is the product of years of testing here in Aria Thompson’s kitchen—I’m not a professional chef, and you can read more about my philosophy over at our story—just a home cook obsessed with making comfort food perfect for you!
- Why This is the Best Berry Pie Recipe You Will Ever Make
- Ingredients for Your Ultimate Mixed Berry Pie
- Step-by-Step Instructions for a Homemade Berry Pie
- Tips for Success When Making Your Berry Pie
- Berry Pie Variations: From Classic Summer Pie to Spooky Berry Pie
- Serving Suggestions for Your Elegant Berry Dessert
- Storage and Make Ahead Berry Pie Instructions
- Frequently Asked Questions About Making a Berry Pie
- Estimated Nutrition Data for This Mixed Berry Pie
- Share Your Homemade Berry Pie Creations
Why This is the Best Berry Pie Recipe You Will Ever Make
I know you’ve had a bad berry pie experience. We all have! Soggy bottoms? Filling that runs all over the plate? It’s frustrating when you put in the work. That’s why I’m telling you this best berry pie recipe is different.
This recipe is designed to fight those common problems head-on. We want a gorgeous, golden, sliceable berry pie that holds its shape. Here’s how we nail it every time:
- We skip the shortening and go all-in on butter for flavor and that incredible shingle-like flake.
- We use the perfect amount of cornstarch—just enough to thicken everything without giving you that gummy texture. Trust me on the measurements!
- Patience during cooling is non-negotiable, and I’ll explain exactly why later.
Achieving the Perfect Flaky Pie Crust Tutorial
The crust is everything, right? For the ultimate all butter crust pie, you need that gorgeous contrast of tender and shatteringly flaky. My biggest tip, straight from my own trial and error, is keeping your butter super cold, but not rock-hard.
When you’re cutting it into the flour, you want those butter pieces to stay about pea-sized. If they melt even a little, they blend into the flour too much and you lose the separation that creates those wonderful flaky layers when it bakes. Don’t work the dough too much!
The Secret to a Non-Runny Berry Pie Filling
If you hate soup in your pie plate, this is for you. The answer to how to make berry pie filling that sets up beautifully is all about the cornstarch and the wait time.
The cornstarch acts like a sponge as the berries release their juices. I add a little lemon juice for brightness, but the cornstarch is key to getting that perfect set. However, the biggest trick? You absolutely must let the pie cool for a minimum of four solid hours after it comes out of the oven. Seriously, don’t cut into it early! That resting time is when the filling gels up completely.
Ingredients for Your Ultimate Mixed Berry Pie
Okay, let’s gather our supplies. You know I love keeping things simple, but for this crust, precision matters! Using high-quality, cold ingredients for the dough is the secret handshake for that gorgeous, flaky structure we talked about. I always pull my butter out of the fridge just before I start measuring everything else. I always make sure I have a full cup, which is two standard sticks, ready to go!
For the All-Butter Pie Crust
This is standard stuff, but remember what I said about temperature! Cold, cold, cold is the mantra for a successful flaky pie crust tutorial. If your butter melts before it hits the flour, we’re going to have a tough patch instead of a flaky one.
- 2 1/2 cups all-purpose flour
- 1 teaspoon salt
- 1 cup (2 sticks) cold unsalted butter, cut into cubes
- 1/2 cup ice water, plus more if needed
For the Triple Berry Pie Recipe Filling
This is where the color comes from! Since we want this to be a year round berry pie recipe, I often use a mix of fresh berries when they are perfect at the market, but frozen works beautifully too. Just don’t thaw them first—we want the cornstarch to work its magic on the ice crystals!
- 6 cups mixed berries (strawberries, blueberries, raspberries, blackberries)
- 3/4 cup granulated sugar
- 1/4 cup cornstarch
- 1 tablespoon lemon juice
- 1 teaspoon vanilla extract
- 1 large egg, beaten (for egg wash)
- 1 tablespoon coarse sugar (for sprinkling)
Step-by-Step Instructions for a Homemade Berry Pie
Now for the fun part! Turning those beautiful ingredients into an actual homemade berry pie that smells incredible when it bakes. We’re going to move quickly on the crust to keep things cold, and then we’ll give that filling a good toss before it goes into its buttery home.
Making and Chilling the Flaky Pie Crust
When you mix the flour and the cold butter—and remember we want those pea-sized chunks!—start cutting that butter in right away until it looks crumbly. Then, drizzle in that ice water slowly. I mean slowly. You might not use all the water, and that’s fine! You just want the dough to hold together when you squeeze a chunk between your fingers. Don’t knead it! Just gently press it into two flat disks. Wrap those babies up tight and stick them in the fridge for at least an hour. Chilling them helps the butter firm back up so we get maximum flakiness in the oven.
Assembling and Baking the Berry Pie
Preheat that oven to 400°F (200°C) first thing. While that’s heating, roll out your first disk and settle it into your pie plate. Pour in that mixed berry filling—make sure it’s evenly coated with the sugar mix!
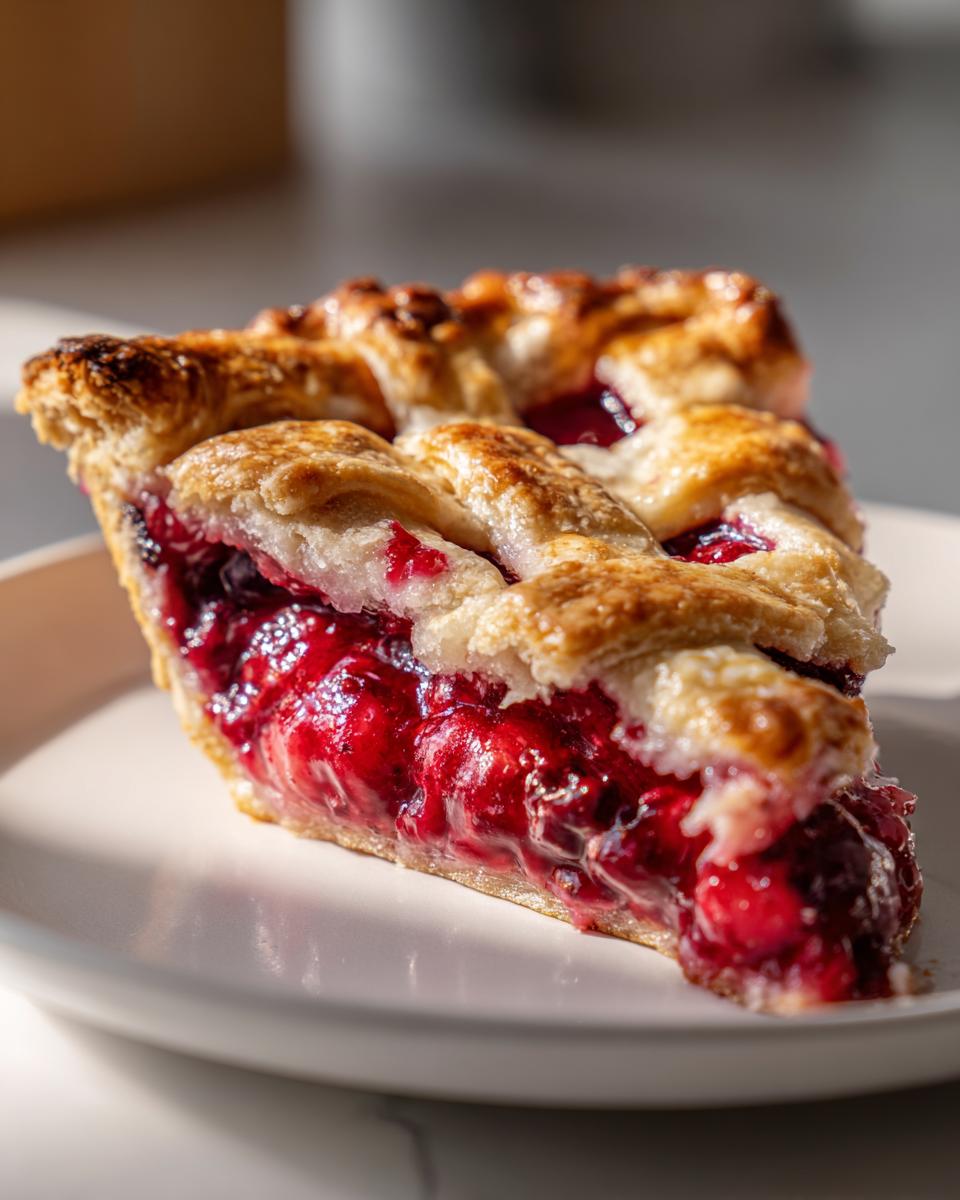
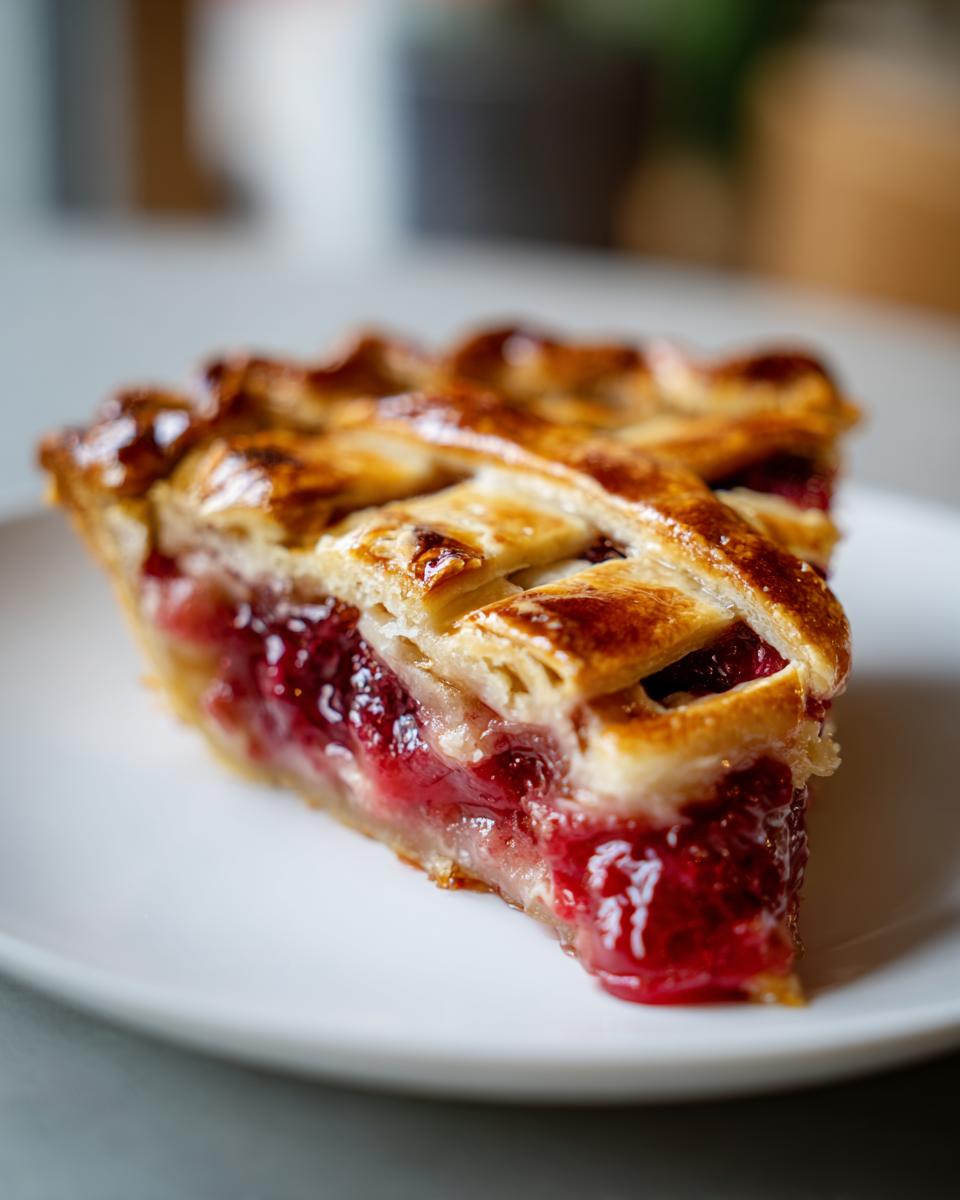
For the top, you can go rustic or try that gorgeous lattice top pie design, which lets a little steam escape. Seal and crimp those edges nice and tight. Give the top a quick brush with that egg wash and a generous sprinkle of coarse sugar for crunch. Now, here’s the temperature trick: bake it hot initially at 400°F for 20 minutes. This sets the crust beautifully! Then, drop the heat down to 375°F (190°C) and bake another 35 to 45 minutes until the juices are bubbling thick.
Don’t even think about cutting it immediately! You need patience if you want that perfect sliceable berry pie. Let it cool completely—I mean 4 hours minimum—so the filling can set up properly. Trust me on the cooling!
Tips for Success When Making Your Berry Pie
Even with the best recipe, sometimes little hiccups happen in the oven. That’s totally normal! Baking is part science, part magic, and part just ‘knowing’ when something looks right. Since I’ve made hundreds of these, I want to share a couple of tried-and-true tricks to ensure your berry pie comes out looking professional.
First up: don’t let a little ice ruin your vibe. If you are doing some frozen berry pie baking—which is perfect for making this an amazing year round berry pie—the general rule is *don’t thaw them*. Just toss those frozen beauties right into the sugar and cornstarch mixture. They will release moisture slowly, which is why you might need that extra 5 or 10 minutes during the second, lower-temperature bake time.
My other major piece of advice is about that gorgeous crust. That initial blast of heat when you start baking—at 400°F—is meant to set the bottom crust fast so it doesn’t get soggy from the berry juices migrating up. But sometimes, even though we put the butter in cold, the edges brown up way too fast! If you notice the crimped edges looking brown or almost burnt after the high-temp blast, just grab a small strip of aluminum foil. Gently fold it around the perimeter of the pie plate, creating a loose ring or shield around the crust. This protects the edges while the center finishes cooking through during that lower 375°F period. It’s a small thing, but it keeps us from wasting that beautiful, flaky texture!

Berry Pie Variations: From Classic Summer Pie to Spooky Berry Pie
While this specific ultimate berry pie recipe is built around that perfect mixed berry blend, one of the most fun things about fruit desserts is how easy they are to customize! This crust works beautifully for almost any fruit you choose, making it a fantastic classic summer pie base, or your go-to for any holiday.
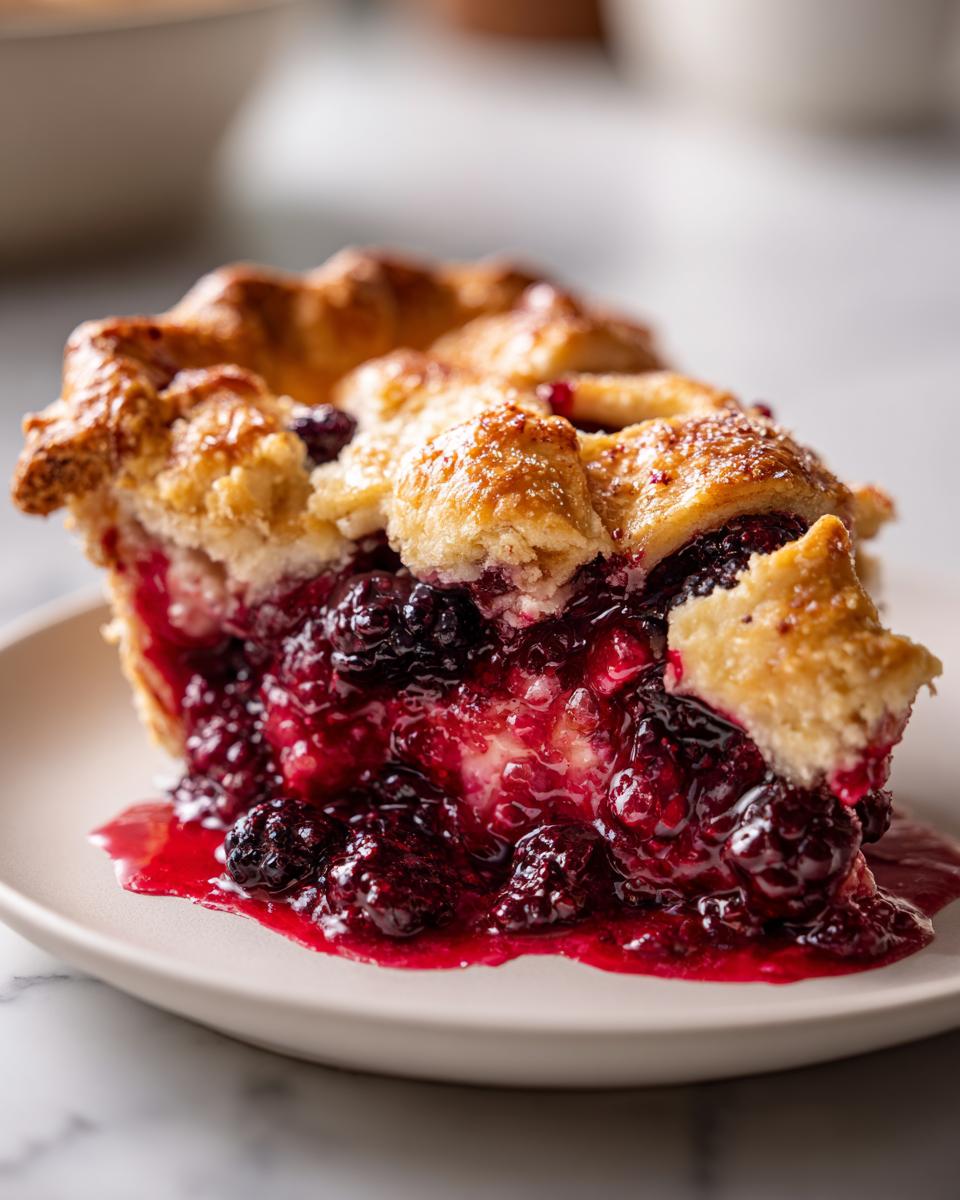
If you’re tired of the standard mix, start playing with your berry combinations to achieve a different flavor profile. Want something truly bracing and exciting? Lean heavily on blackberries and raspberries—they naturally have that wonderful tartness—and maybe dial back the sugar slightly. That creates a fantastic sweet and tart pie filling that cuts through the buttery crust perfectly.
And for the real showstoppers, think about the holidays! Since we made this recipe easy enough to work with frozen berry pie baking supplies, you can certainly make this in the fall or winter. If you’re looking for something super fun for Halloween, you absolutely have to try turning it into a Spooky Berry Pie. It takes zero extra effort in the filling itself!
For the spooky look, skip the lattice top—or make a very simple one—and instead, use cookie cutters to cut out shapes from your second dough round. Ghosts, bats, maybe little Frankenstein heads if you’re feeling ambitious! Place those cutouts evenly over the top of the filling, brush with the egg wash, and bake as directed. I found this fun idea over here for inspiration on timing the spooky cutouts just right. It’s such an elegant dessert that suddenly gets goofy—kids absolutely lose it when I bring out the ghost pies!
Also, don’t forget about a pure strawberry pie in peak season, or maybe swapping out half the berries for sliced rhubarb if you want that really aggressively tangy filling. The versatility of this amazing homemade berry pie means you’ll never be stuck doing the same thing twice!
Serving Suggestions for Your Elegant Berry Dessert
Okay, you’ve mastered the crust, your filling set up perfectly, and you have this stunning, glistening mixed berry dessert sitting on the counter. Now we have to present it, right? This pie is so gorgeous all on its own—especially if you went for that beautiful lattice weave—but a few simple touches can really turn it into something spectacular for a dinner party.
My absolute favorite way to serve any good fruit pie is slightly warm, not piping hot, because everything needs that time to cool down and set. If the pie is barely warm to the touch, that’s perfect. Then, you need a simple companion to cut through all that sweetness. Forget those bland whipped toppings; we are making actual whipped cream here!
For a truly elegant berry dessert, whisk heavy whipping cream with just a tiny splash of vanilla extract and maybe a teaspoon of powdered sugar. Whip it until it has soft, billowy peaks. When you spoon a generous cloud of that homemade cream on top of a slice of berry pie, the contrast in texture—the cold, light cream against the slightly warm, thick berry filling—is just heaven.
If you’re feeling extra fancy, pair it with ice cream. Vanilla bean is a classic for a reason, but have you tried pairing it with something slightly tangy, like a lemon sorbet or even a very mild honey ice cream? The citrus notes really wake up the flavor of the raspberries and blackberries in the mix. Sometimes I even grate a little fresh lemon zest right over the top of the slice before serving. It just adds that little *zing* that makes people ask, “What did you do differently?”
Basically, once you have nailed the technique for this homemade berry pie, serving it is the easy, fun part where you get to show off your creation!
Storage and Make Ahead Berry Pie Instructions
So you made the best berry pie ever, and guess what? You have leftovers! Or maybe you’re a planner like me and you want to bake the crust ahead of time to make your life easier on the big day. I totally get it. Making a great homemade berry pie is worth the effort, but we don’t need to stress ourselves out on serving day!
For making things ahead, the crust is your best friend. You can definitely make the dough disks—remember, your two chilled rounds—up to three days in advance. Just keep them tightly wrapped in plastic wrap in the coldest part of your fridge. You skip the chilling time when you go to roll them out, but let them sit on the counter for maybe 10 minutes so they don’t crack when you roll them. This is a huge win for having a crust ready for that last-minute frozen berry pie baking session!
Storing Your Leftover Mixed Berry Pie
Now, once the pie is baked and cooled (and I hope you waited the four hours for that perfect set!), how do you store the leftovers? Since this is such a juicy dessert, even though the cornstarch helps a ton, I really recommend treating any leftover fruit pie like dairy. It needs refrigeration for safety, especially if it’s humid where you are.
Cover the pie loosely with foil or plastic wrap—don’t seal it tight, or the crust will get soggy—and pop it in the fridge. It’ll stay perfectly fine for three, maybe four days. When you want to eat it, you can eat it cold right out of the fridge, which is surprisingly good, or warm it gently. For reheating, I use an oven temperature around 325°F (160°C) for about 15 minutes. This brings back some of that buttery crust flavor without totally liquefying your beautiful filling.
If you’re curious about baking with pre-frozen ingredients, which is often how I make this happen year-round, check out this resource on frozen berry pie baking techniques. Knowing how to handle those frozen berries is vital for a successful make ahead berry pie!
Frequently Asked Questions About Making a Berry Pie
I always get so many questions after I post anything about fruit pies! You guys are clearly ready to bake, which is awesome. Here are some of the most common things people ask me when they are trying to make their first perfect berry pie or level up their game. If you run into trouble that isn’t covered here, feel free to reach out via our contact page!
Can I use only one type of berry in this berry pie recipe?
You absolutely can! While this recipe is tuned and tested as a triple berry pie recipe—because mixing them gives you that amazing sweet-and-tart complexity—there is nothing stopping you from using four cups of just blueberries or just blackberries. The structure will still work! The one thing you have to watch is the thickener. If you use softer berries, like all raspberries, they release more liquid than firmer berries like blueberries. If you are only using one type, maybe bump that cornstarch up just a tiny bit, maybe just one extra teaspoon, just to be safe, especially if you are doing some frozen berry pie baking!
How long does the berry pie need to cool before slicing?
Oh boy, this is the biggest hurdle! I know everyone wants that first slice right away when the smell of warm baked crust is filling the kitchen. But seriously, you need to resist! The cooling process is just as important as the baking process for getting a beautiful cross-section. If you cut it too soon, you’ll get that lovely soup we talked about. You need a minimum of four full hours on a wire rack for the starches to fully set. This is the absolute secret to getting that show-stopping, perfect sliceable berry pie that looks amazing on the plate. When it’s cooled, it cuts clean, every time.
Estimated Nutrition Data for This Mixed Berry Pie
I always feel a little nervous sharing nutrition facts because honestly, when you’re eating a giant slice of glorious, buttery crust and sweet berries, you’re not *really* looking at the numbers, are you? But, for those of you who track things, I pulled the general estimates for a single serving of this incredible mixed berry dessert.
Remember, these numbers are based on standard ingredient assumptions and dividing the whole pie into 8 generous slices—and my slices are usually pretty generous! If you sneak a bite while testing the filling, those numbers change, naturally. Don’t stress too much over them; just enjoy the magic of this classic summer pie!
- Serving Size: 1 slice
- Calories: 380
- Sugar: 28g
- Sodium: 150mg
- Fat: 22g
- Saturated Fat: 14g
- Unsaturated Fat: 8g
- Trans Fat: 0.5g
- Carbohydrates: 45g
- Fiber: 4g
- Protein: 4g
- Cholesterol: 55mg
Basically, it proves that pure joy sometimes comes with a little butter. If you want to make this an even lighter treat, you could always opt for a crumb topping instead of a whole double crust, but honestly, why would you skip that flaky perfection? Enjoy every single bite, knowing you made an amazing homemade berry pie from scratch!
Share Your Homemade Berry Pie Creations
Well, folks, we made it! Now you have the tools, the technique, and the confidence to bake the absolute best berry pie for your family or friends. I truly hope you enjoyed mastering the ultimate all butter crust pie and that your filling set up perfectly for a gorgeous, clean slice. That’s a major win for any baker!
I’m dying to see what you come up with! Are you sticking to the classic mixed-berry look? Did you try the lattice? Or maybe you went for some spooky cutouts on your classic summer pie? When you finish baking, please, please come back here and leave a comment below telling me how it went! I read every single one, and honestly, hearing about your successes keeps me inspired in the kitchen!
If you shared a photo on social media, tag me! Seeing your gorgeous, golden-brown pies—especially if you used fresh, peak-season berries—makes my whole week. It brings the heart of my kitchen right into yours. And hey, if you have a moment, maybe give this recipe a quick rating at the top of the page. It really helps other people trying to decide if they should tackle this amazing homemade berry pie recipe.
Thank you so much for baking along with me today. I always want you to know that if you have questions about serving or storage, you can always check back here. And of course, if you ever want to peek at my policies—like our privacy policy—you know where to find us. Happy baking, and enjoy that delicious, non-runny slice!
PrintUltimate Mixed Berry Pie with Flaky All-Butter Crust

Bake this mixed berry pie using fresh or frozen berries for a sliceable dessert with a thick, non-runny filling and a flaky, buttery crust. This recipe works well year-round.
- Prep Time: 45 min
- Cook Time: 65 min
- Total Time: 110 min
- Yield: 8 servings 1x
- Category: Dessert
- Method: Baking
- Cuisine: American
- Diet: Vegetarian
Ingredients
- 2 1/2 cups all-purpose flour
- 1 teaspoon salt
- 1 cup (2 sticks) cold unsalted butter, cut into cubes
- 1/2 cup ice water, plus more if needed
- 6 cups mixed berries (strawberries, blueberries, raspberries, blackberries)
- 3/4 cup granulated sugar
- 1/4 cup cornstarch
- 1 tablespoon lemon juice
- 1 teaspoon vanilla extract
- 1 large egg, beaten (for egg wash)
- 1 tablespoon coarse sugar (for sprinkling)
Instructions
- Prepare the pie crust: In a large bowl, whisk together the flour and salt. Cut in the cold butter using a pastry blender or your fingers until the mixture resembles coarse crumbs with some pea-sized pieces of butter remaining.
- Gradually add the ice water, one tablespoon at a time, mixing until the dough just comes together. Do not overmix. Divide the dough in half, form each half into a disk, wrap in plastic, and chill for at least 1 hour.
- Prepare the filling: In a separate bowl, gently combine the mixed berries, granulated sugar, cornstarch, lemon juice, and vanilla extract. Mix until the berries are evenly coated. The cornstarch will thicken the juices during baking.
- Preheat your oven to 400°F (200°C).
- Roll out one disk of dough and fit it into a 9-inch pie plate. Trim the edges.
- Pour the berry filling into the bottom crust.
- Roll out the second disk of dough. Cut strips to create a lattice top design over the filling, or place the full top crust over the filling, cutting vents for steam release. Crimp and seal the edges.
- Brush the top crust or lattice with the beaten egg wash and sprinkle with coarse sugar.
- Bake for 20 minutes at 400°F (200°C). Then, reduce the oven temperature to 375°F (190°C) and continue baking for another 35 to 45 minutes, or until the crust is golden brown and the filling is bubbling thickly.
- Cool the pie completely on a wire rack for at least 4 hours before slicing. This step is crucial for the filling to set and prevent runniness.
Notes
- If using frozen berries, do not thaw them before mixing with the sugar and cornstarch. You may need to add 5-10 minutes to the total bake time.
- For the flakiest crust, keep all ingredients, especially the butter and water, very cold.
- If the crust edges start browning too quickly, cover them loosely with aluminum foil during the last 20 minutes of baking.
Nutrition
- Serving Size: 1 slice
- Calories: 380
- Sugar: 28g
- Sodium: 150mg
- Fat: 22g
- Saturated Fat: 14g
- Unsaturated Fat: 8g
- Trans Fat: 0.5g
- Carbohydrates: 45g
- Fiber: 4g
- Protein: 4g
- Cholesterol: 55mg