
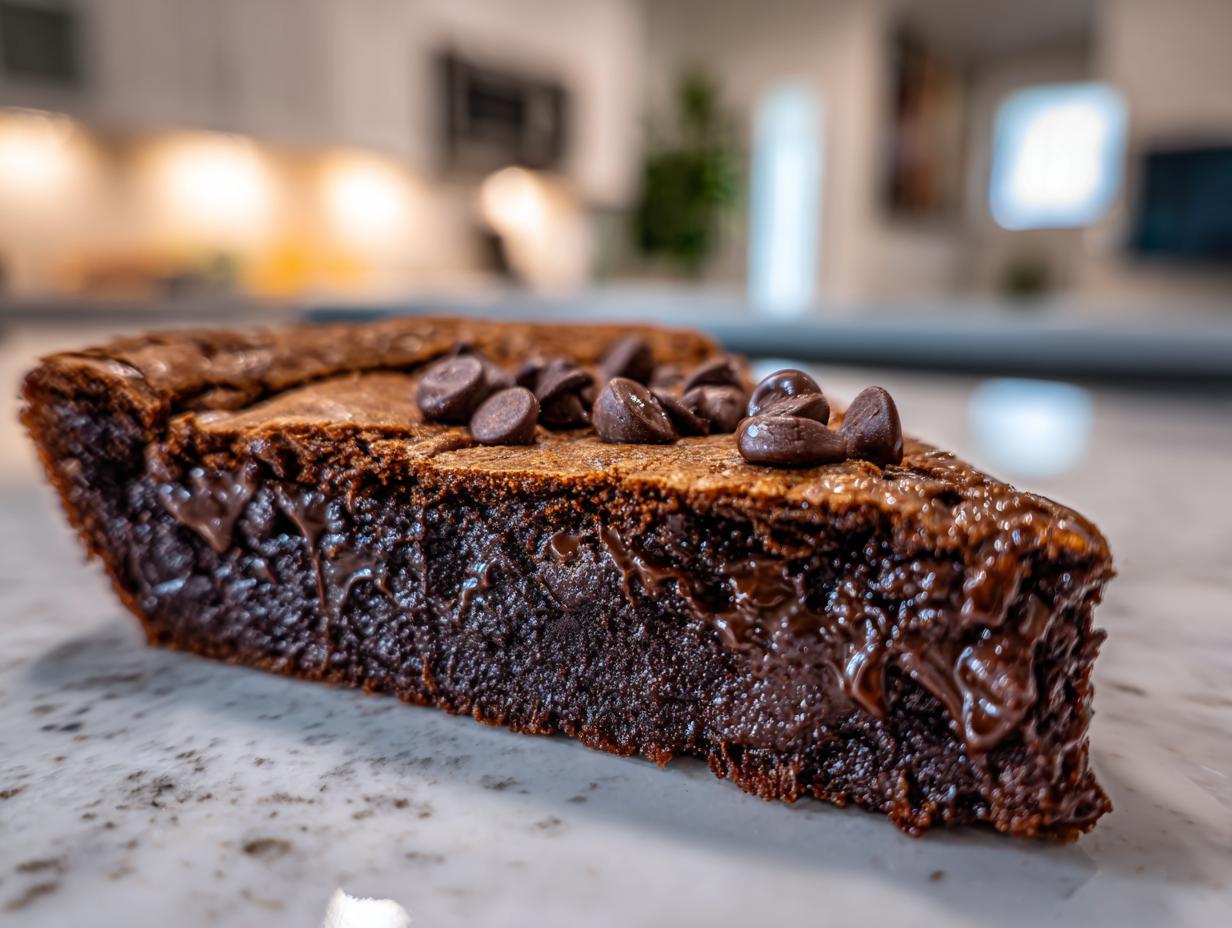
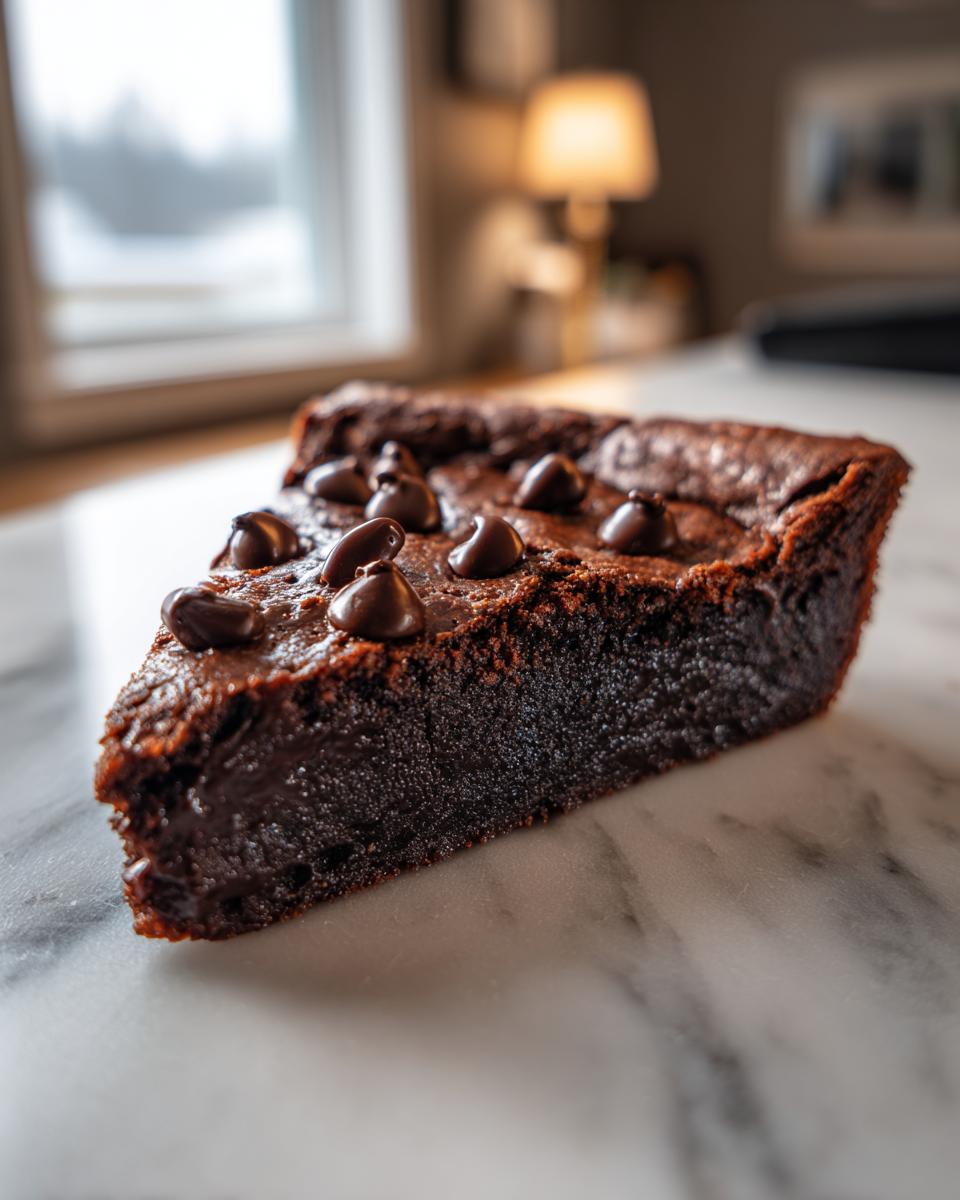
Are you sitting there right now, absolutely desperate for something deeply, obscenely chocolatey? Me too, always! That’s when I reach for my secret weapon: the ultimate gooey **hot fudge pie**. Forget everything you think you know about pie; this isn’t some fruit-filled slice. This is rich, fudgy, and tastes exactly like a warm brownie that decided to retire in a crust. And the best part? We get this decadent chocolate indulgence on the table in under 40 minutes. That’s fast enough for a Tuesday night emergency, but special enough for company. When Aria Thompson developed this recipe—and trust me, she’s a dedicated home cook who obsessed over classic American dishes like this, according to what you can read on the Aria’s story—she wanted pure, unadulterated chocolate satisfaction without the fuss. That’s exactly what we’re getting here!
- Why This Hot Fudge Pie Recipe is Your New Favorite Fudgy Dessert Recipe
- Essential Ingredients for the Ultimate Hot Fudge Pie
- Tips for Perfecting Your Hot Fudge Pie Baking Experience
- Step-by-Step Instructions to Make Hot Fudge Pie
- Serving Suggestions for Your Warm Chocolate Pie
- Storage and Make Ahead Chocolate Pie Tips
- Troubleshooting Common Hot Fudge Pie Issues
- Frequently Asked Questions About This Easy Fudge Pie
- Estimated Nutritional Data for Hot Fudge Pie
- Share Your Decadent Chocolate Dessert Experience
Why This Hot Fudge Pie Recipe is Your New Favorite Fudgy Dessert Recipe
I tell you, once you make this, you’ll retire all those complicated lava cake recipes. This is pure **Fudgy Dessert Recipe** magic in a pie shell, and it delivers exactly what you want when that massive chocolate craving hits. We don’t need complicated steps or fancy French techniques here; we need speed and gooey results. That’s why this recipe quickly became a staple here.
Here is what sets this **Hot Fudge Pie** apart:
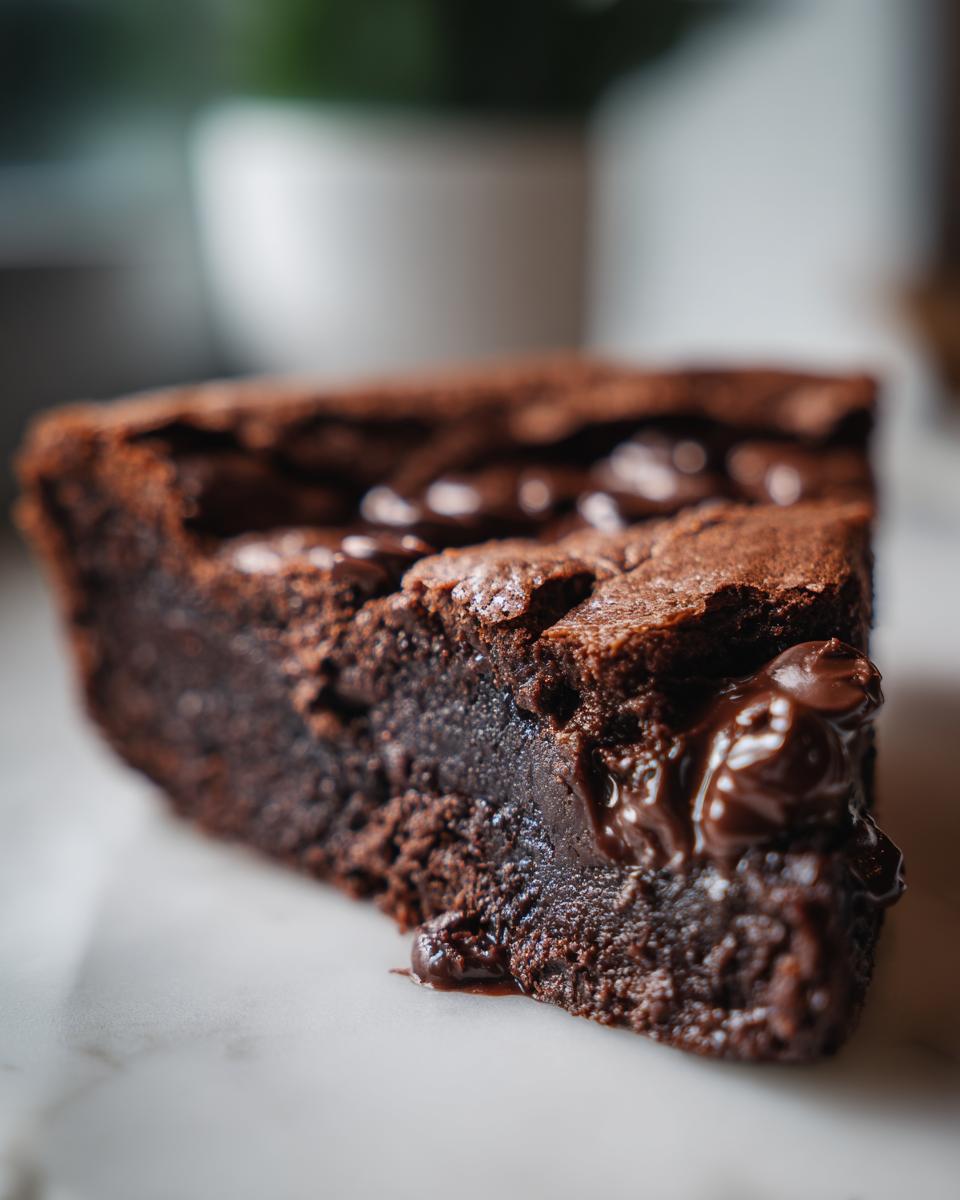
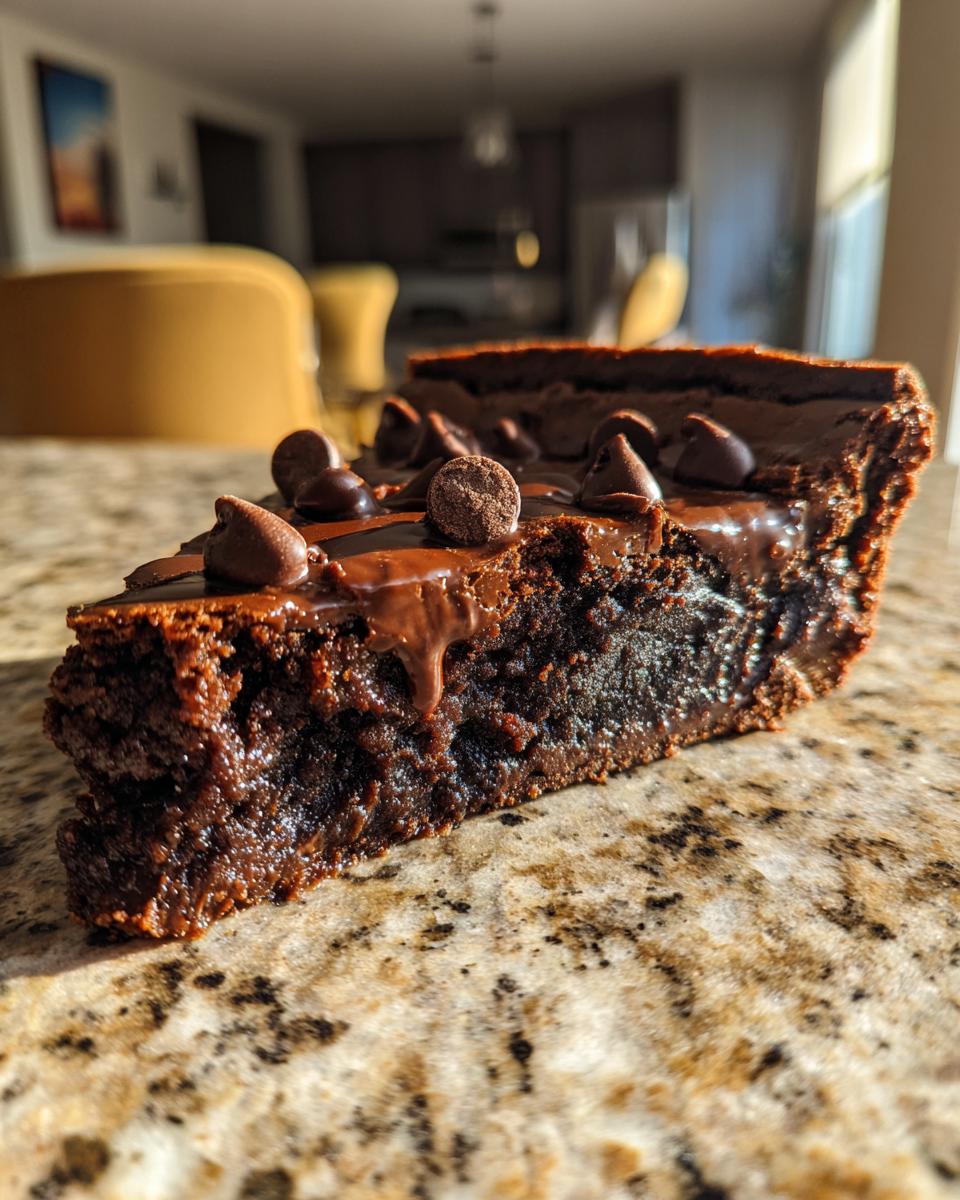
- It’s a true **Gooey Chocolate Pie** experience; the center stays wonderfully soft, almost molten, even after cooling slightly.
- It’s super fast! We are talking **Quick Chocolate Baking** here—it’s ready to go into the oven in about 10 minutes flat.
- The texture is unmatched. Think deeply intense, brownie-like richness, not a light, fluffy chocolate cake texture.
- If simplicity is what you need after a long day, this is it. Minimal dishes, maximum indulgence.
Essential Ingredients for the Ultimate Hot Fudge Pie
The beauty of this recipe is that it uses pantry staples—nothing weird or hard to find! Honestly, you probably have everything except maybe a dedicated pie crust sitting in the freezer right now. But buying that crust is the biggest time-saver here, trust me. For that truly **Ultimate Chocolate Indulgence**, here is exactly what you need:
- 1 (9-inch) unbaked pie crust (don’t substitute this yet, we’ll talk crusts later!)
- 1 cup granulated sugar
- 1/2 cup all-purpose flour
- 1/2 cup unsweetened cocoa powder
- 1/2 teaspoon salt
- 1/2 cup (1 stick) unsalted butter, melted—make sure it’s totally melted!
- 2 large eggs, lightly beaten
- 1 teaspoon vanilla extract
- 1/2 cup milk
- 1/2 cup semi-sweet chocolate chips
See? Totally straightforward stuff! The magic happens when these simple things combine into that thick, dark batter. Keep those chips handy, because they are what guarantee those pockets of molten bliss inside your finished **Homemade Fudge Pie**!
Tips for Perfecting Your Hot Fudge Pie Baking Experience
Baking this **Hot Fudge Pie** feels like a science experiment, but I promise it’s easy once you know the little secrets. The biggest thing? Ingredient temperament and how you mix the batter. Remember, we are aiming for a rich, fudgy texture—not a flaky, quiche-like structure. That means we treat the batter gently! Make sure your eggs aren’t straight out of the icebox; room temperature eggs mix in much better with the melted, slightly cooled butter.
When you mix, go slow! That instruction to “not overmix” after adding the wet ingredients? They mean it. Overmixing develops gluten, and gluten makes things cakey, which is the absolute enemy of that gooey center we crave. We want just enough mixing until those flour streaks disappear. We are looking for those perfect set edges and that soft, almost liquid center when it comes out. If you’re curious about how others handle their baking, folks over at Liyarecipes have a great take on making it super simple, too, which you can check out here.
Ingredient Notes and Substitutions for Hot Fudge Pie
So, about that crust. While my recipe calls for a standard 9-inch unbaked pie crust because it gives that fabulous structural integrity—what I call the ‘brownie in a pie crust’ effect—you absolutely can switch it up if you need to. If you want a seriously old-fashioned feel, go for a graham cracker crust instead! Just press it firmly into your pie plate, don’t blind bake it, and pour that batter right in. It crumbles beautifully when you eat it warm.
And the chocolate chips? Use the good stuff, or at least what you love to eat standing over the bag! Semi-sweet is perfect because it balances the sugar slightly, but feel free to mix in a handful of milk chocolate chips if you prefer a sweeter profile. Just don’t go cheap on the cocoa powder; that’s where the deep, dark chocolate flavor comes from. Good ingredients really do make the difference in a simple dessert like this.
Step-by-Step Instructions to Make Hot Fudge Pie
Getting this **Hot Fudge Pie** assembled is ridiculously easy, which is why I love it so much for weeknights! Before you even touch your bowl, you need to get the oven ready. Seriously, don’t skip this first step: Preheat your oven to 350°F (175°C). You want that heat waiting for the batter. Then, just set your unbaked pie crust right on a baking sheet—this catches any potential drips and makes it much easier to slide in and out of the hot oven.
Once the oven is warming up, we move right into the mixing. I follow the order exactly as written because timing matters when you’re building that fudgy texture. Watch how quickly this comes together! If you want to see how others tackle their baking setups, I saw some beautiful finished pies over at Just For Recipes that might inspire you for plating! Check out their presentation ideas here.
When it comes to checking if it’s done, ditch the full toothpick test. Remember how we want that soft, almost runny middle? Your visual cue is key: the edges of the pie should look set and matte, maybe just starting to pull slightly away from the crust. But the center? It must still look soft! If you stick a toothpick in and it comes out completely clean, you’ve baked a brownie, not a hot fudge pie sadly. We aim for moist crumbs there, not dry ones. After it comes out, let it rest for at least 20 minutes on a wire rack before you even think about slicing it. That waiting period is crucial for letting the center firm up just enough so it doesn’t completely run off the plate when you serve it warm.
Mixing the Batter for a Rich Chocolate Indulgence
This is where precision counts to achieve that spectacular **Rich Chocolate Indulgence**! Start by grabbing a medium bowl and whisking all your dry things together first: that’s the sugar, flour, cocoa powder, and salt. Whisking them separately prevents clumps of flour or pockets of sugar later on. It creates a more even base. Once that’s uniform, you add the wet things: the already-melted butter, the beaten eggs, the vanilla, and the milk.
Now, mix it, but gently! Use that whisk just until everything comes together and you don’t see any big streaks of dry flour anymore. Stop right there! If you beat into it trying to get it silky smooth like pancake batter, you’ll activate too much gluten, and suddenly your beautiful fudge pie is just a dense, tough cake. Don’t do that to yourself! Finally, fold in those chocolate chips—just a couple of gentle turns with a spatula—and pour that dark, gorgeous batter right into that waiting crust.
Serving Suggestions for Your Warm Chocolate Pie
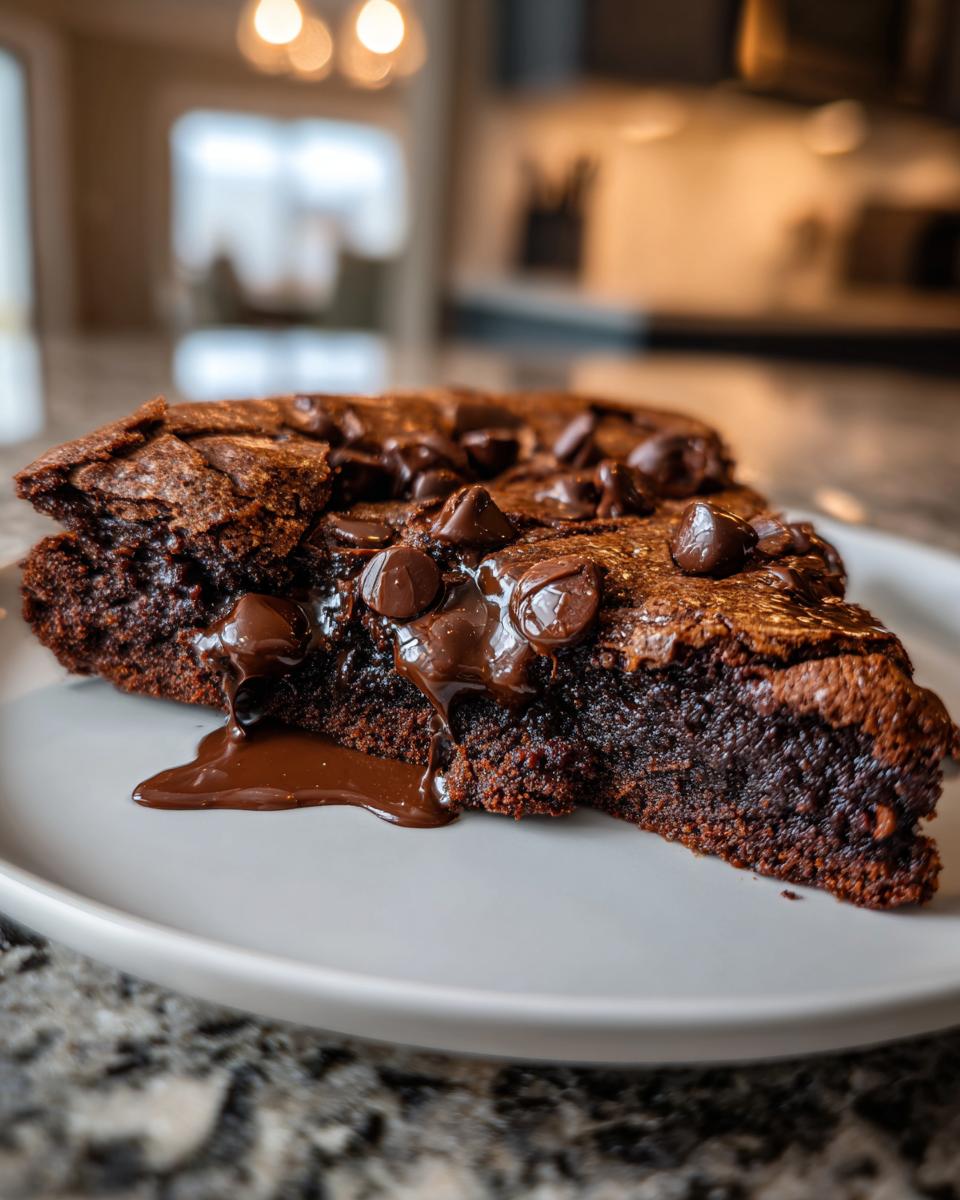
Oh, the serving! This is where the **Hot Fudge Pie** truly shines, my friends. After all that careful baking, you deserve the most decadent presentation possible. The number one rule I live by—and that most folks who make this swear by—is that this pie *must* be served warm. That’s what transforms it from a simple chocolate pie into that molten, chocolate-gooey dream we’re aiming for. Don’t let it cool completely; that fudgy center will solidify into something dense, which is great, but not what this recipe is about!
When it comes to toppings, the classics are classics for a reason. You absolutely have to try it with a generous scoop of good quality vanilla bean ice cream. The contrast between the screaming hot, rich chocolate and the cold, melting vanilla is just divine. Seriously, it’s a textural masterpiece!
If you aren’t an ice cream person, whipped cream works too, but here’s my pro-tip for achieving that “Restaurant Style Fudge Pie” look, which folks rave about online. Instead of just plopping a dollop on top, pipe the whipped cream around the edges in big, dramatic swirls. Or, if you’re feeling extra fancy, take some extra chocolate chips, melt a small handful with a tiny teaspoon of shortening (that’s the secret for shine, shhh!), and drizzle that runny chocolate artfully across the very top of the cooled pie *before* adding your ice cream. Look! Instant sophistication!
You can sneak a peek at how some other passionate bakers serve up their incredible desserts on Lyndy’s Kitchen; they always have gorgeous plating ideas that I draw inspiration from when I’m making this pie for guests. Check out their beautiful bakes for some visual ideas!
Storage and Make Ahead Chocolate Pie Tips
Okay, let’s talk about leftovers, because frankly, a whole **Chocolate Lover’s Dream Dessert** is a lot for one or two people to tackle in one sitting! The good news is this pie keeps well, but you have to treat that center right. If you have any delicious cake left over, you have a couple of options depending on how gooey you want it the next day.
If you want that perfect semi-firm, brownie-like slice tomorrow, cover the pie loosely with plastic wrap and stick it right in the fridge. Covering loosely is key, because if you wrap it tight while it’s still warm, you’ll trap moisture and get a soggy crust—and nobody wants a soggy bottom on their pie! Now, here’s the tricky part: reheating.
If you chill this pie, that wonderful fudgy center tightens right up. To bring back that molten magic, you can’t just microwave the whole thing, trust me, been there, done that, and it gets oddly tough in spots. Instead, take just the slice you want to eat. Pop it on a microwave-safe plate and heat it for about 15 to 20 seconds total. You want it warm, not steaming hot, or the structure will collapse entirely. A few seconds is all it takes!
Now, for the **Make Ahead Chocolate Pie** angle. Can we make parts ahead? Absolutely! You can mix up all the dry ingredients and keep them in a sealed jar for weeks—that’s a great little baking hack. You can also mix the entire wet/dry batter, cover it tightly, and keep it in the fridge for up to 24 hours. When you’re ready to bake, just preheat the oven, pour it into the unbaked crust, and add about 5 to 7 extra minutes to the baking time since the batter is cold. Always double-check that privacy policy link if you’re wondering about how we handle your data here on the site!
If you need to reach out with more specific questions about baking times or substitutions, don’t hesitate to send me a note via the Contact Page!
Troubleshooting Common Hot Fudge Pie Issues
Don’t panic if your first **Hot Fudge Pie** doesn’t come out looking exactly like the pictures! Honestly, this recipe pushes the limits between a pie and a soft, baked pudding, so it’s naturally tricky. But I’ve been there, staring at a wobbly mess, and I figured out the tricks to fix it. The two biggest issues I hear about are either a runny pie or, worst of all, a soggy crust. Let’s tackle those so you can get that perfect, gooey result next time!
If your pie came out looking more like soup than a baked dessert, you probably pulled it too early. I know, I know, we all want that lava center, but there’s a difference between gooey and unbaked. When you take it out, the edges should look completely set—they should be matte and firm, not glossy or jiggly. The center will still have a significant wobble, like firm Jell-O, but it shouldn’t look completely liquid when you gently nudge the pan. If it’s majorly runny, just pop it back into the 350°F oven for another five minutes and check again. That little bit of extra time usually firms up just enough.
Preventing the Dreaded Soggy Bottom
A soggy crust is heartbreaking! It usually happens for one of two simple reasons when making this type of **Fudgy Dessert Recipe**. First, the crust was too cold when it hit the hot oven, causing the butter in the pastry to immediately steam and create moisture against the batter. Second, and this is more common with this moist batter, you didn’t give the pie enough time to cool down before you put it on a flat surface.
My number one preventative tip when using a standard pastry crust is to always bake the pie on a preheated baking sheet. Remember how Step 1 says to place the crust on a baking sheet? That sheet needs to be in the oven while it preheats! Dropping that cold crust filled with batter onto a screaming hot metal surface instantly starts setting the bottom crust, minimizing the time the wet batter sits right against it. It’s a game-changer. Also, never serve this pie straight from the oven. That mandatory 20-minute cool-down time (Step 6) is non-negotiable; it allows the steam to release and the base to stabilize before you even cut into it.
Frequently Asked Questions About This Easy Fudge Pie
Is this Hot Fudge Pie more like a brownie or a cake?
That’s the million-dollar question! And look, I’m going to be totally honest with you: it’s closer to a super-gooey, slightly underbaked brownie that lives inside a pie crust. If you bake it for the time I recommended (30–35 minutes), the edges set up beautifully, but that middle stays intensely moist and fudgy—definitely not cakey or airy. If you’re hunting for a **Brownie in a Pie Crust**, you’ve found it!
How quick is this Easy Fudge Pie really? Can I make it on a busy weeknight?
Yes, you absolutely can! This is one of my favorite reasons to make it. After you whisk the ingredients together—which takes maybe 8 minutes if you’re not dawdling—it goes straight into the oven. Since it only bakes for about 35 minutes and you don’t have to chill or proof anything, you can honestly be sitting down to eat a slice about an hour after deciding you need chocolate. It’s **Easy Fudge Pie** magic at its finest.
Is this rich chocolate dessert suitable for major holidays?
Oh, 100% yes! While it’s fast enough for any night, this **Decadent Chocolate Dessert** is an absolute showstopper for holidays like Christmas or Easter. It looks so luxurious when you cut into it, especially with a dusting of powdered sugar or a fancy piped swirl of whipped cream. It travels well too, as long as you keep the serving instruction in mind—serve it warm! I actually prefer making it the day *before* a holiday dinner, letting it set perfectly, and then just reheating the slices.
Do I need to use a blind-baked crust for this pie?
Nope! And this is another major time saver. Because the batter is so rich and relatively thick, you pour it right into that raw pie crust and bake it all together. You don’t need to pre-bake anything, which keeps the process super quick. Just make sure you put the crust on a dedicated baking sheet *before* you start mixing, so you have a hot, ready landing pad for your batter!
If you want to check out our general policies on data handling, you can always review those details on our Privacy Policy page, just so you know we’re serious about keeping your information safe while you focus on baking!
Estimated Nutritional Data for Hot Fudge Pie
Alright, I know we are focused on pure, decadent indulgence here, but sometimes the people we feed want to know the scoop! Since this is a **Comfort Food Dessert** made with butter, sugar, and chocolate chips, it’s certainly not a light dish. But hey, everything in moderation, right? We calculated these numbers based on the ingredients list provided and assuming this makes 8 generous slices, just like the recipe says.
Please keep in mind that these values are just estimates! If you swap out semi-sweet chips for dark chocolate, or use a different kind of crust, these numbers will shift around a bit. These figures are here to give you a general idea of what you’re enjoying per slice.
- Serving Size: 1 slice
- Calories: Approximately 350
- Total Fat: About 18g
- Saturated Fat: Around 10g
- Carbohydrates: Roughly 45g
- Total Sugar: About 35g
- Protein: Around 6g
- Sodium: Near 150mg
It’s rich, it’s fudgy, and frankly, it’s worth every single calorie when paired with that cold vanilla ice cream. Enjoy this **Rich Chocolate Indulgence** knowing you made it perfectly from scratch!
Share Your Decadent Chocolate Dessert Experience
Now that you’ve made this incredible **Ultimate Gooey Hot Fudge Pie**—and I mean *really* made it, warm, gooey, and topped with ice cream—I need to know what you thought! Seriously, I pour so much love into developing these recipes to ensure they are the absolute best, and hearing back from you is the highlight of my week.
Did I nail the brownie texture? Did the edges set up just right? If you loved this **Decadent Chocolate Dessert**, please hop down to the comments section and leave me a rating! A simple five-star rating tells me instantly that this recipe is a winner and helps other folks find the same chocolate joy.
And oh my goodness, if you took a picture of your finished pie—especially if you got that perfect scoop of ice cream slowly melting over the warm fudge—you *have* to share it! Tag me on social media! Seeing your creations is genuinely the best encouragement I could ask for. When you’re serving up slices of this **Best Hot Fudge Pie Recipe**, I want to see your beautiful plates.
Remember to always check our Terms of Use if you have questions about using our content. But mostly, just go enjoy that amazing slice of pie you just earned! Happy baking, my friend!
PrintUltimate Gooey Hot Fudge Pie: Rich, Fudgy, and Ready in Under 40 Minutes

Make this rich, gooey hot fudge pie that tastes like a cross between a brownie and a molten cake. It is easy to prepare and serves as a decadent chocolate indulgence perfect for any occasion.
- Prep Time: 10 min
- Cook Time: 35 min
- Total Time: 45 min
- Yield: 8 servings 1x
- Category: Dessert
- Method: Baking
- Cuisine: American
- Diet: Vegetarian
Ingredients
- 1 (9-inch) unbaked pie crust
- 1 cup granulated sugar
- 1/2 cup all-purpose flour
- 1/2 cup unsweetened cocoa powder
- 1/2 teaspoon salt
- 1/2 cup (1 stick) unsalted butter, melted
- 2 large eggs, lightly beaten
- 1 teaspoon vanilla extract
- 1/2 cup milk
- 1/2 cup semi-sweet chocolate chips
Instructions
- Preheat your oven to 350°F (175°C). Place the unbaked pie crust on a baking sheet.
- In a medium bowl, whisk together the sugar, flour, cocoa powder, and salt until combined.
- Add the melted butter, eggs, vanilla extract, and milk to the dry ingredients. Mix with a whisk until the batter is smooth. Do not overmix.
- Stir in the semi-sweet chocolate chips.
- Pour the batter evenly into the unbaked pie crust.
- Bake for 30 to 35 minutes. The edges should look set, but the center will remain soft and fudgy.
- Remove the pie from the oven and let it cool on a wire rack for at least 20 minutes before serving warm.
- Serve warm with vanilla ice cream or whipped cream.
Notes
- For an old-fashioned version, you can use a pre-made graham cracker crust instead of a traditional pastry crust.
- This pie is best served warm to achieve the molten, gooey texture.
- If you want a crispier top, sprinkle a small amount of coarse sugar over the batter before baking.
Nutrition
- Serving Size: 1 slice
- Calories: 350
- Sugar: 35
- Sodium: 150
- Fat: 18
- Saturated Fat: 10
- Unsaturated Fat: 8
- Trans Fat: 0.5
- Carbohydrates: 45
- Fiber: 3
- Protein: 6
- Cholesterol: 60