
I’m going to tell you a secret right now: getting that perfect, shatteringly crisp coating on your **coconut shrimp** doesn’t require sinking them in a vat of oil! Seriously, ditch the deep fryer mess. This recipe is all about golden, tropical crunch achieved right in the oven, making it totally doable for a busy Tuesday night. As Aria always says over here at Cooking Zenith, elevating your everyday cooking means finding smarter ways to get those restaurant-quality results without the hassle. This is my go-to recipe for a satisfying appetizer or a quick, delicious seafood dinner.
- Why This Crispy Coconut Shrimp Recipe Works for Weeknights
- Gathering Ingredients for Your Homemade Coconut Shrimp
- Step-by-Step Instructions for Perfect Coconut Shrimp
- Mastering the Best Coconut Shrimp Dipping Sauce
- Tips for Achieving Restaurant Style Coconut Shrimp Texture
- Coconut Shrimp Variations and Adaptations
- Serving Suggestions for Your Tropical Shrimp Recipe
- Storing and Reheating Your Crispy Coconut Shrimp
- Frequently Asked Questions About Coconut Shrimp
- Estimated Nutritional Data for Coconut Shrimp
- Estimated Nutritional Data for Coconut Shrimp
Why This Crispy Coconut Shrimp Recipe Works for Weeknights
I know you’ve been looking for **Quick Shrimp Dinner Ideas** that don’t keep you standing over a hot stove! This recipe is exactly what you need when you want that amazing, deep-fried flavor without the cleanup. It’s fast, flavorful, and fits right into a busy schedule.
- Seriously under 30 minutes total—we’re talking 15 minutes prep and 12 in the oven.
- It’s a fantastic **Easy Coconut Shrimp Appetizer** for last-minute guests, too!
- Since we’re baking, we slash the fat, giving you a lighter crunch every time.
- The three-step breading station keeps the process organized, even when you’re rushing.
Gathering Ingredients for Your Homemade Coconut Shrimp
Okay, friend, let’s talk ingredients! To make this the ultimate **Tropical Shrimp Recipe** that actually delivers that satisfying crunch, you need a few key players. The secret weapon hiding in plain sight is the Panko breadcrumbs mixed right into the coconut. This creates that unbeatable, airy crunch we call the Panko Coconut Shrimp Crust. Do not skip the Panko! Having everything measured out before you start is crucial, especially when you’re moving fast.
Ingredients for the Crispy Coconut Shrimp Coating
Stick closely to these amounts—it really matters when you’re baking to ensure everything adheres properly. Remember, my best advice ever, and I learned this the hard way: you must pat the shrimp bone dry with paper towels before anything else happens. Dry shrimp equals crispy coating, trust me!
- 1 lb large shrimp, peeled and deveined—no tails needed!
- 1 cup all-purpose flour (for the first dredge).
- 2 large eggs, well beaten (our binder).
- 1 cup sweetened shredded coconut (the flavor star!).
- 1/2 cup Panko breadcrumbs (for lightness).
- 1/2 teaspoon salt and 1/4 teaspoon black pepper (just a little seasoning).
- Cooking spray (essential for turning them golden).
Ingredients for the Tangy Dipping Sauce
Forget heavy, creamy dips for now—we are going zesty! This apricot-based sauce is the **Best Coconut Shrimp Dipping Sauce** to slice through the sweetness of the coconut. It’s honestly so good you might want to make an extra batch because people fight over the leftovers.
- 1/2 cup apricot preserves (the sweet base).
- 1 tablespoon rice vinegar (for that necessary tang).
- 1 teaspoon sriracha or your favorite hot sauce (adjust this to how much heat you like!).
Step-by-Step Instructions for Perfect Coconut Shrimp
Now that we have our components ready, let’s get cooking! Follow these steps exactly, and you will have the most incredibly **Crispy Coconut Shrimp Recipe** without ever turning on the deep fryer. Our goal is gorgeous, golden seafood that doesn’t weep oil everywhere.
Setting Up the Breading Station for Coconut Shrimp
Organization is everything here, especially if you’re making these for a crowd or just trying to get dinner done fast. Get three shallow dishes lined up right next to your clean, dry shrimp. Dish one is just flour. Dish two is where your beaten eggs go to hang out. And dish three—that’s the magic mix of Panko and coconut. I’m reminding you again: make sure those shrimp are totally dry before they even see the flour; water is the enemy of crispness!
Coating and Preparing the Coconut Shrimp for Baking
This is the fun part! We go strictly in order: flour first, shaking off any extra dust. Next, a quick dip in the egg bath. Finally, and this is crucial for that **Shrimp Coated in Coconut** success, you need to press that coconut mixture onto the shrimp firmly with your fingers. Seriously press it on! When you place them on your greased baking sheet, give the tops a light misting of cooking spray. That little bit of extra fat is what helps them brown beautifully in the oven.
Baking the Coconut Shrimp Until Golden and Crisp
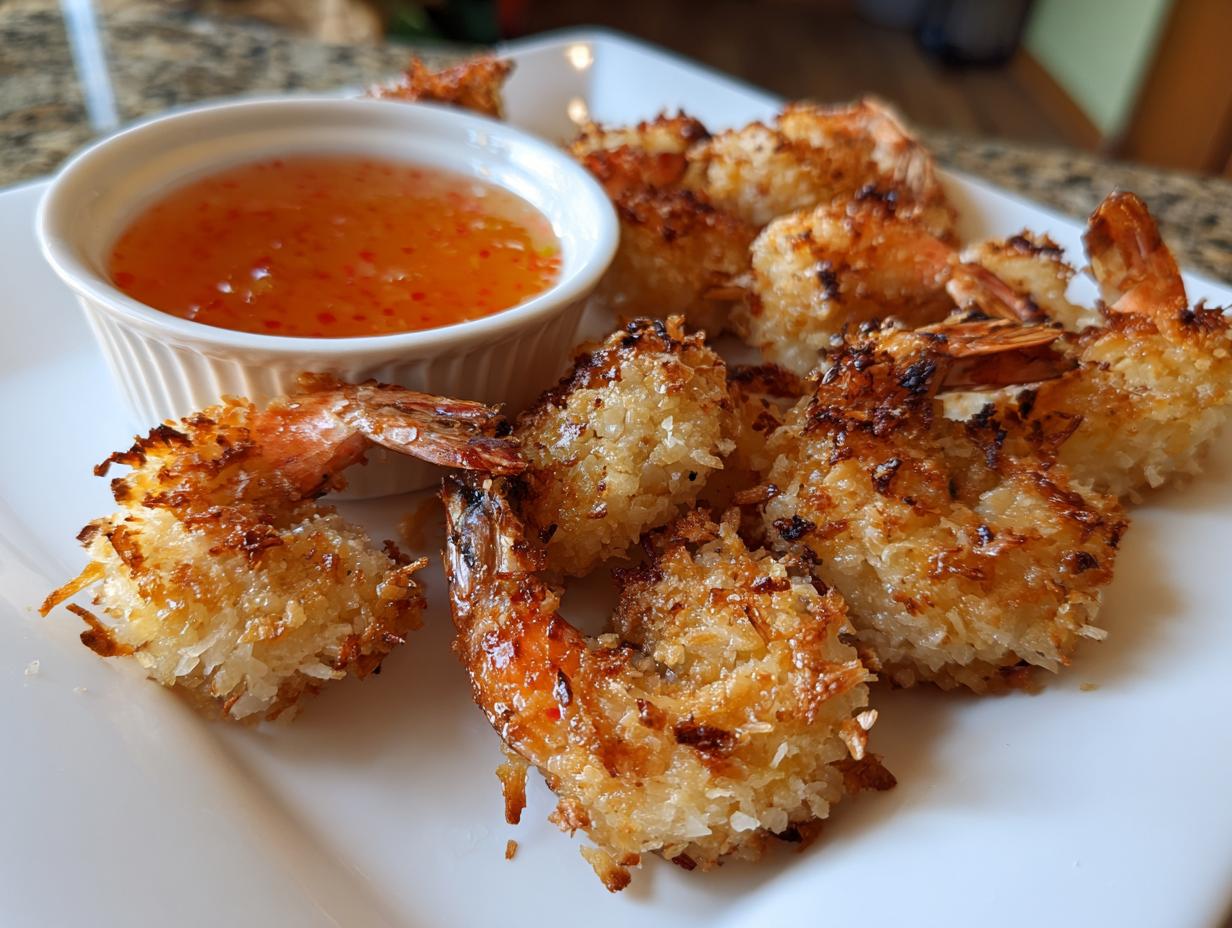
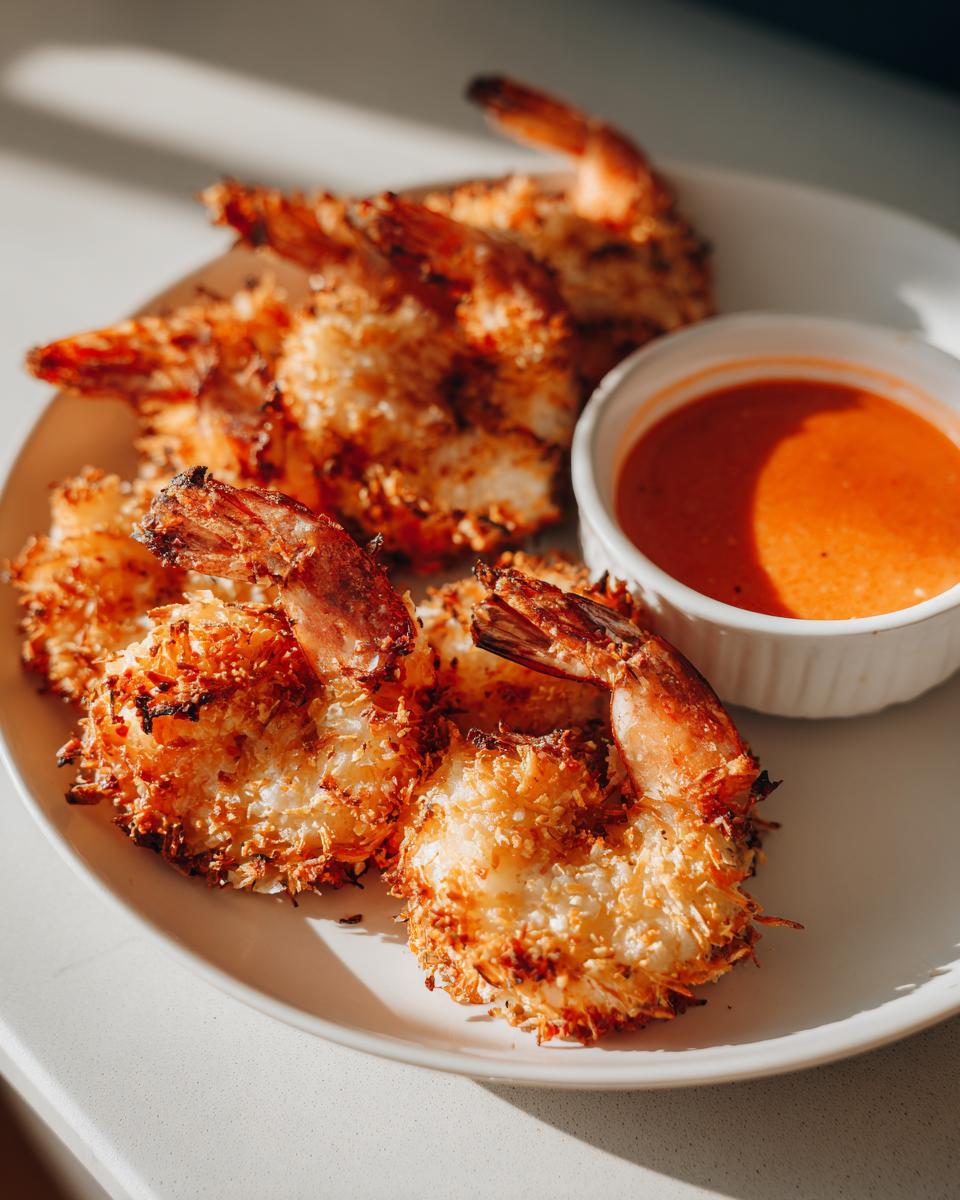
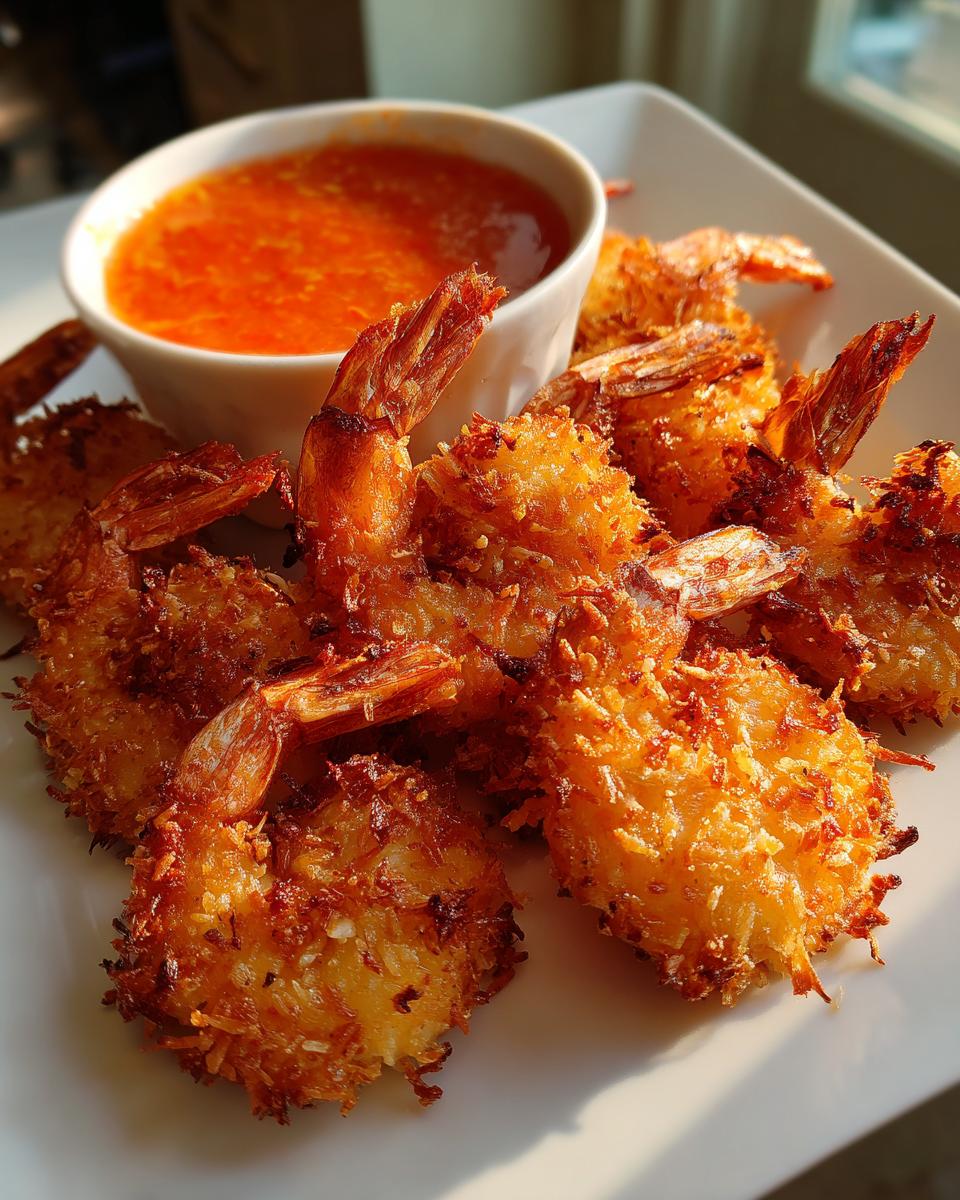
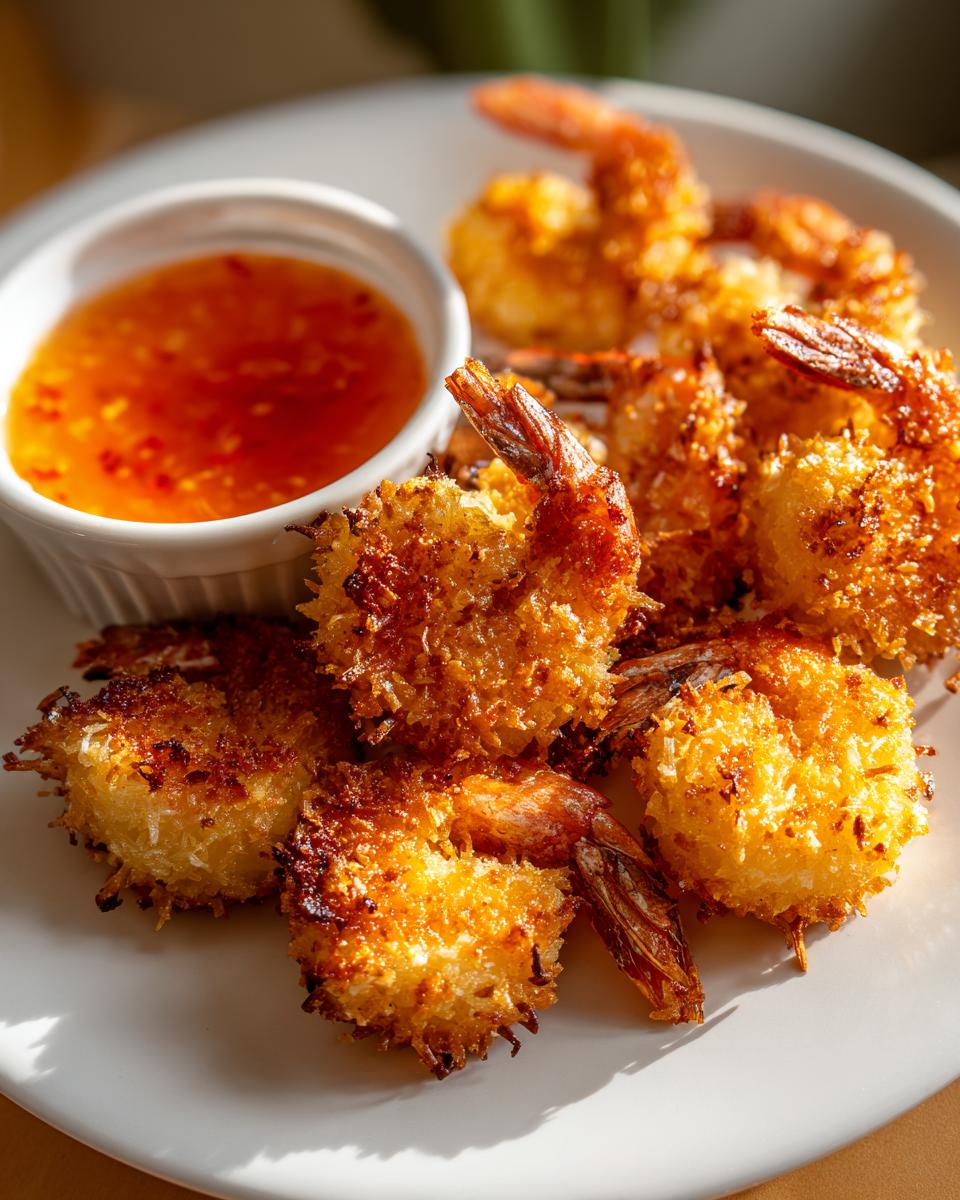
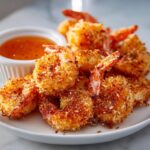
We are setting the oven hot—400°F (200°C)—because we want quick heat to crisp things up before the shrimp overcooks. Pop them in for about 10 to 12 minutes total. You absolutely have to flip them over halfway through so both sides get that perfect golden color. They’re done when they turn pink and that coconut coating looks beautifully browned. Check them out! You can see how much better they look than the deep-fried versions you see online, and you got that crunch without the greasy aftermath. You can find even more great tips over at that great resource!
Mastering the Best Coconut Shrimp Dipping Sauce
Honestly, I think the dipping sauce can make or break the whole experience, right? You can have the crunchiest shrimp ever, but if the dip is bland, what’s the point? This apricot and vinegar combo is what I consider the **Best Coconut Shrimp Dipping Sauce**, hands down. It’s got that sweet punch from the preserves that perfectly matches the coconut, but the vinegar wakes everything up so it doesn’t just taste like sugar.
Making it is so incredibly fast, which is why I love it for those frantic weeknights when company unexpectedly shows up. You just grab a little mixing bowl—no fancy heating or complicated techniques needed here. You want everything gently combined so the flavors don’t fight each other but blend nicely. Seriously, try not to double the batch because you’ll end up eating it with a spoon before the shrimp is even done!
We’re talking about whisking together the apricot preserves, the touch of rice vinegar, and that little bit of sriracha until it’s smooth and glossy. The color alone is gorgeous! If you want to see what another fantastic option looks like, check out how Natasha makes her sauce—it’s always good to have backup ideas for future shrimp nights!

Tips for Achieving Restaurant Style Coconut Shrimp Texture
Listen, we all want that crunch factor you get at the fancy places, right? That restaurant-style snap that makes you stop talking midsentence! We’ve already nailed the *baked* texture, which is way healthier, but let’s talk about two pro-level tweaks to ensure your **Homemade Coconut Shrimp** is truly next-level crispy, satisfying that *Copycat Red Lobster Coconut Shrimp* craving.
First up, that Panko-to-Coconut ratio we mentioned earlier? Aim for about 4 parts coconut to 1 part Panko by volume in your coating mixture. The Panko gives you the airy, sharp crispness, while the sweetened coconut provides the tropical flavor and sweet crunch. If you load up too heavy on the coconut, it tends to brown too fast and soften slightly under the heat.
Now, for those of you with an air fryer—oh my gosh, you need to try this! If you want the absolute fastest route to crispiness, the air fryer is your best friend. It circulates the heat so intensely that you get that fried texture with almost no added fat. It’s perfect for making a fast **Air Fryer Coconut Shrimp** batch when you skip the oven.
For the Air Fryer method, go ahead and preheat your basket to 375°F (190°C). Place your coated shrimp inside in a single layer, and cook for just 8 to 10 minutes total, making sure you flip them around the halfway mark. They come out unbelievably crisp! You can read up on all the air fryer details over here at this great guide.
Finally, remember that cooking spray we used while baking? It’s non-negotiable! That light mist of oil hitting the super-hot coating in the oven mimics the way oil flash-fries the crust in a deep fryer, setting the coconut flakes so they don’t fall off when you dip into that tangy sauce. Trust me, skipping the spray results in sad, fallen coatings.
Coconut Shrimp Variations and Adaptations
I love that this recipe is so flexible! Cooking should always feel like yours, right? Even though we are focusing on a beautiful baked crust here, I know people have different pantry situations or dietary needs, so we should talk about how you can easily adapt this for your crew.
If you’ve got someone who needs a **Gluten Free Coconut Shrimp Adaptation**, it’s incredibly simple to switch things up. You don’t have to change the core process at all! Just swap out the regular all-purpose flour for a good quality gluten-free blend, and make sure your Panko breadcrumbs are certified gluten-free as well. That’s it! The eggs and coconut don’t need changing, and you’ll still get a wonderful, crispy result.
Now, I know some of you are dreaming of that thick, almost creamy sauce often served up in Asian restaurants. That’s usually referred to as the **Chinese Buffet Coconut Shrimp** style, and while our zesty apricot dip is amazing, you can totally pivot to that richer flavor profile if you prefer.
Switching Up the Dipping Sauce for Creamier Flavor
When you’re ready for that creamy experience—maybe for a cozy night in rather than a party platter—you can easily modify the sauce we made. Instead of using the apricot preserve base, just grab some good sweet chili sauce (the kind you keep in the fridge) and mix it with a couple of tablespoons of real mayonnaise. It feels richer, and it definitely hits that salty-sweet spot similar to those buffet versions. Just keep that sauce chilled until you serve it!
Dealing with Different Shrimp Sizes
You might grab jumbo shrimp or maybe smaller ones if that’s what your store had. The main thing to remember is the timing. If you use very large shrimp—say, 16/20 count—they might need an extra minute or two in the oven. If you’re using much smaller salad shrimp, pull them out right at 10 minutes, because they go from perfect to rubbery shockingly fast. Keep an eye on them; visual checks beat fussy timers sometimes!
Serving Suggestions for Your Tropical Shrimp Recipe
Part of the fun of making this incredible **Homemade Coconut Shrimp** is figuring out what to serve it with! While it’s absolutely divine as a stunning **Seafood Appetizer Hot** at a party—especially with that zesty dip—it turns into a super simple **Weeknight Coconut Shrimp** meal with almost zero extra effort. Seriously, it’s one of my favorite dinner shortcuts!
To make it a filling plate, don’t overthink it. I usually pair these beauties with something light and fresh to balance out the sweet coconut. A crisp, colorful slaw dressed lightly in lime juice and cilantro is amazing. Or, if you are looking for something warmer, a simple coconut rice pilaf melts right into those tropical flavors. For more great serving inspiration for your next platter, check out these ideas over at Maria’s Mixing Bowl!
Storing and Reheating Your Crispy Coconut Shrimp
I hope you’re planning on eating these right away because, let’s be honest, they are at their peak straight out of the oven! But if you have leftovers—which, if you made a big batch for game day, you probably do—storage is key to maintaining that crunch quality.
Don’t even think about leaving them on the counter! Pop any extras into a shallow, airtight container. You want to make sure you aren’t cramming them in there, or they’ll steam each other into sogginess. They do great in the fridge for about two to three days tops. But here’s the big secret when it comes to leftovers: the microwave is a major NO-NO. Microwaving your **Coconut Shrimp** turns what was gloriously crisp into sad, hot rubber bands. Trust me on this one; I’ve ruined too many good things that way!
The Best Way to Crisp Them Up Again
If you want that texture back—that beautiful, delicate crunch that makes this recipe so good—you have to use dry heat to refresh them. You have two great options, depending on if you have time or if you’re in a mega rush.
For the True Crunch Enthusiast (The Oven Method)
If you want the absolute best second-day crunch that mimics the original bake, use your oven! Preheat it to about 350°F. Lay the cooled shrimp out in a single layer on a wire rack set over a baking sheet. Bake them for about 5 to 7 minutes. This gentle, dry heat sucks out any residual moisture and makes the Panko/coconut shell crisp right back up.
For Speed and Efficiency (The Air Fryer Resurrect)
If you have an air fryer, this is actually the fastest way to rescue leftovers! Set your air fryer to 350°F. Pop the shrimp in the basket in a single layer—don’t overcrowd it! Let them go for 3 to 4 minutes. They come out looking and tasting almost freshly made. It works like magic, giving you that satisfying texture back without messing up your whole kitchen.
Just remember: always serve these right away once reheated, especially if you are serving them as a special appetizer. Nothing beats that first bite!
Frequently Asked Questions About Coconut Shrimp
I get so many messages asking how to switch things up or troubleshoot messes! It’s totally normal; we all start somewhere on our quest for the perfect **Crispy Coconut Shrimp Recipe**. Here are the five questions I get asked the absolute most about making this **Easy Coconut Shrimp Appetizer** work perfectly every time.
Can I use frozen shrimp for this recipe?
You definitely can, but you need to be careful! If you use frozen shrimp, you *must* thaw them completely first. Then, whatever you do, pat them aggressively dry with paper towels—I mean, really blot them until they feel almost leathery. Because frozen shrimp hold so much water, if you don’t dry them out, your lovely coconut coating will slide right off as soon as they hit the heat. It’s worth the extra two minutes of blotting!
If you are skipping the oven and going for the Air Fryer method for your **Air Fryer Coconut Shrimp**, make absolutely sure they are dry, or the air circulation will just blow the coating off before it sticks!
What is the best oil substitute for spraying the shrimp?
When we bake, that light spray of cooking spray is essential to help the Panko and coconut crisp up and brown, right? If you, for some reason, don’t have basic cooking spray on hand, you can use a little bit of neutral oil, like canola, sunflower, or avocado oil—but you need to be careful how you apply it.
Instead of spraying directly, pour about a teaspoon of your oil into a tiny bowl. Then, use a soft pastry brush to very lightly dab tiny dots of oil all over the tops of the coated shrimp. You want just enough oil to encourage browning, but not so much that it pools up or makes the crust heavy. Remember, we are aiming for light and tropical, not fully fried!
Can I make this ahead of time?
This is where we run into trouble! If you are making these for a party, you can absolutely set up your breading station and coat the shrimp completely—flour, egg, coconut crust—and lay them out on the baking sheet. Cover that sheet tightly with plastic wrap and stash it in the fridge for up to four hours. When your guests arrive, just pull them out, give them that final light spray of cooking spray, and bake them according to the directions.
If you bake them ahead of time, they will lose their crunch horribly, as we talked about in the reheating section. Don’t bake them until you are ready to serve them for the best experience!
How can I make this spicy enough to punch up the flavor?
Our dipping sauce has a little kick from the sriracha, but if you love major heat, you should mix the spice right into the coating! When you are preparing that third dish with the coconut and Panko, add about a teaspoon of cayenne pepper or a half-teaspoon of red pepper flakes directly into the mixture. This gives the exterior a lovely heat that cuts through the sweetness, turning it into a spicy twist on the **Tropical Shrimp Recipe**! Just be warned, a little goes a long way when it comes to cayenne!
You can also check our privacy policy if you want to know more about how we handle your comments and questions!
Estimated Nutritional Data for Coconut Shrimp
I always like to give a rough idea of what you’re taking in when you enjoy these beauties, although remember this data is just an estimate based on the recipe above, set for four servings! Since we baked these instead of frying, the numbers are much friendlier for a regular **Quick Shrimp Dinner Idea**.
Please note that this information is calculated using the apricot preserves for the sauce and does not account for any dipping sauce consumed with the shrimp.
- Calories: 280
- Fat: 10g
- Saturated Fat: 6g
- Carbohydrates: 28g
- Sugar: 18g
- Protein: 18g
- Sodium: 350mg
If you are concerned about specific dietary needs or usage rights, please review our Terms of Use. Happy cooking!
PrintCrispy Baked Coconut Shrimp with Tangy Dipping Sauce
Make crispy coconut shrimp using a baked method for a lighter, flavorful appetizer or main dish. Serve with a zesty dipping sauce.
- Prep Time: 15 min
- Cook Time: 12 min
- Total Time: 27 min
- Yield: 4 servings 1x
- Category: Appetizer
- Method: Baking
- Cuisine: American
- Diet: Vegetarian
Ingredients
- 1 lb large shrimp, peeled and deveined
- 1 cup all-purpose flour
- 2 large eggs, beaten
- 1 cup sweetened shredded coconut
- 1/2 cup Panko breadcrumbs
- 1/2 teaspoon salt
- 1/4 teaspoon black pepper
- Cooking spray
- For the Dipping Sauce: 1/2 cup apricot preserves
- 1 tablespoon rice vinegar
- 1 teaspoon sriracha or hot sauce
Instructions
- Preheat your oven to 400°F (200°C). Lightly spray a baking sheet with cooking spray.
- Set up a standard breading station with three shallow dishes. Place flour in the first dish. Whisk eggs in the second dish. In the third dish, combine shredded coconut, Panko breadcrumbs, salt, and pepper.
- Pat the shrimp dry with paper towels. This helps the coating stick.
- Dredge each shrimp first in the flour, shaking off excess.
- Dip the floured shrimp into the egg mixture, letting excess drip off.
- Press the shrimp firmly into the coconut mixture, ensuring it is fully coated.
- Place the coated shrimp on the prepared baking sheet in a single layer. Spray the tops lightly with cooking spray for extra crispness.
- Bake for 10 to 12 minutes, flipping halfway through, until the shrimp are pink and the coating is golden brown and crisp.
- While the shrimp bakes, prepare the dipping sauce. In a small bowl, whisk together the apricot preserves, rice vinegar, and sriracha until smooth.
- Serve the hot, crispy coconut shrimp immediately with the tangy dipping sauce.
Notes
- For an air fryer method, cook at 375°F (190°C) for 8 to 10 minutes, flipping halfway.
- If you prefer a creamier sauce, substitute the apricot preserves with 1/2 cup sweet chili sauce mixed with 2 tablespoons mayonnaise.
- For a gluten free coconut shrimp adaptation, use gluten free flour and gluten free breadcrumbs.
Nutrition
- Serving Size: 4 shrimp
- Calories: 280
- Sugar: 18g
- Sodium: 350mg
- Fat: 10g
- Saturated Fat: 6g
- Unsaturated Fat: 4g
- Trans Fat: 0g
- Carbohydrates: 28g
- Fiber: 2g
- Protein: 18g
- Cholesterol: 130mg