
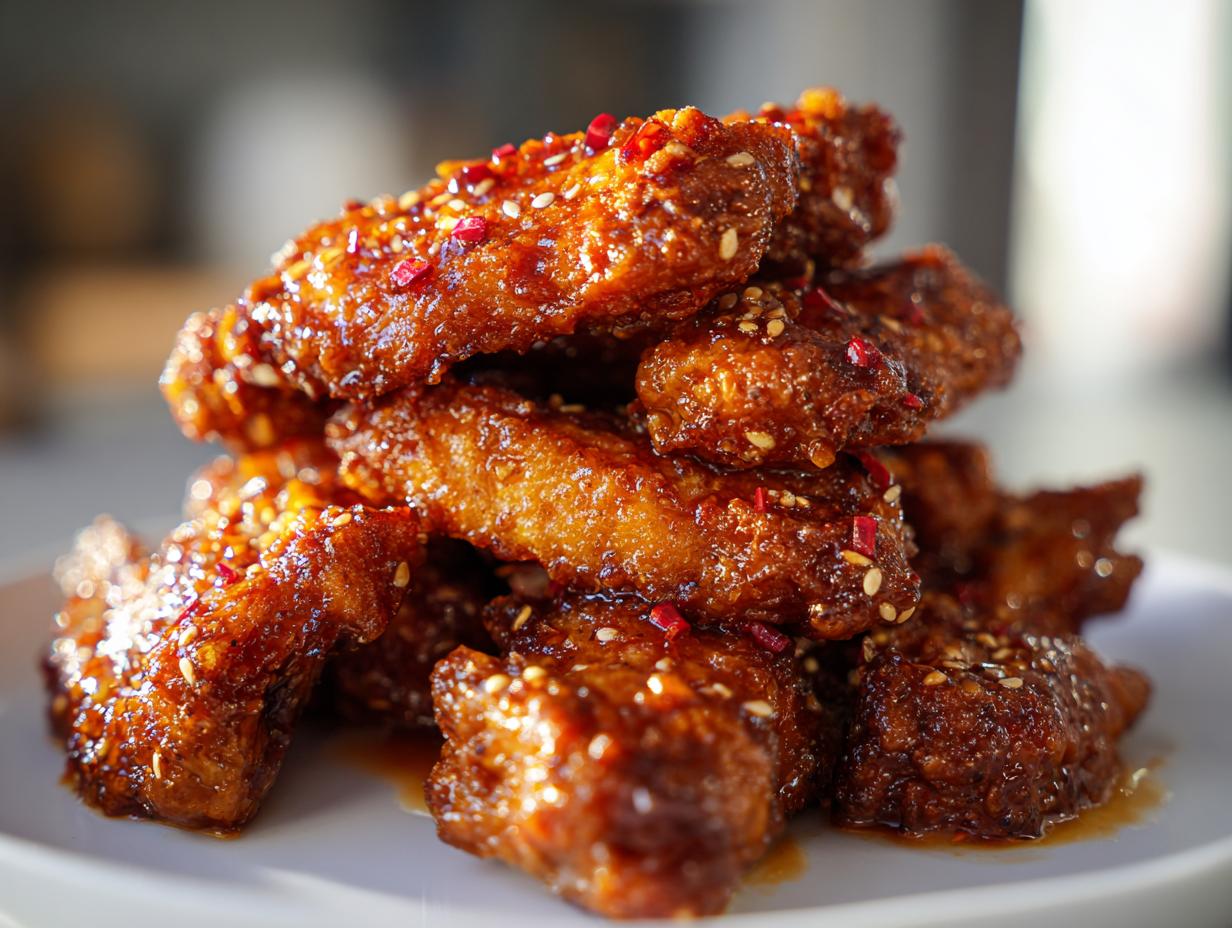
Oh my gosh, can we just agree that there is nothing—absolutely nothing—better than biting into a perfectly crispy **chicken wing**? I mean, the crunch should sing! For years, I thought that level of shatteringly crisp skin meant diving headfirst into a vat of hot oil. Nope! Not anymore. I spent way too much time perfecting a foolproof, no-fry technique that delivers the incredible crunch everyone craves, while keeping the inside unbelievably juicy. Trust me, these **Game Day Chicken Wings** are about to change your appetizer game forever. Forget the mess and the fuss; we’re unlocking that oven magic right here! If you’re looking for quick flavor inspiration while you’re here, check out my recipe for easy no-cook homemade pizza sauce—it’s quick, and sometimes you just need a great shortcut!
- Why This Baked Chicken Wing Recipe Beats Frying
- Essential Ingredients for Ultimate Crispy Baked Chicken Wings
- How to Prepare Easy Chicken Wings in the Oven
- Tips for Success: Mastering the Crispy Chicken Wings
- Serving Suggestions for Game Day Chicken Wings
- Storage and Reheating Instructions for Leftover Chicken Wing
- Frequently Asked Questions About Crispy Baked Chicken Wings
- Estimated Nutritional Data for This Chicken Wing Recipe
- Share Your Best Baked Wings Ever Experience
Why This Baked Chicken Wing Recipe Beats Frying
I know what you’re thinking: Baked wings are never as good as deep-fried wings. That used to be my exact thought! But we are going to ditch the heavy oil and the smoky kitchen cleanup that comes with frying. These **Crispy Chicken Wings** are healthier—you still get all the flavor without all the deep-fry drama. Plus, they are so easy for meal prep or turning into a truly fantastic snack later in the week.
Achieving True Crunch: The No Fry Chicken Wings Secret
The game-changer here is one simple, inexpensive ingredient: baking powder. Seriously, don’t skip it! It pulls just enough moisture away from the skin surface while they bake. This chemical reaction creates a dry exterior layer that crisps up beautifully in the high heat of the oven. It’s the entire secret to successful **No Fry Chicken Wings**.
The Perfect Juicy Chicken Wings Technique
When you fry, you risk drying out the meat trying to get that crisp. Not so here! Because we aren’t submerging them in oil, the flavor from our dry rub stays right on the skin, and the inside of the **chicken wing** stays plump and tender. By controlling the heat environment, we nail the **Juicy Chicken Wings Technique** every single time.
Essential Ingredients for Ultimate Crispy Baked Chicken Wings
We need just a few key players to make this happen! Don’t run to the store thinking you need a million bottles of specialty stuff. The magic is in the technique and one special dusty helper. Grab your wings—flats and drumettes mixed is perfect—and get ready to season them up. If you’re looking for a great side sauce inspiration while you gather these bits, check out my easy honey butter recipe; it works wonderfully with these wings post-bake!
Coating and Seasoning for Your Chicken Wing
You absolutely need 2 pounds of wings, patted bone dry. Then comes the dry rub: salt, pepper, garlic powder, and optional cayenne for a little kick. But the non-negotiable hero? Baking powder. Make sure you’re grabbing aluminum-free if you can find it! This is what makes the skin crisp, so please don’t try substituting it out. Give this dry seasoning an even toss over every precious **chicken wing**.
Finishing Touches and Flavor Options
Once they are baked crisp, we add a small touch of melted butter—just for richness! After that, it’s entirely up to you. You can toss these perfect carriers in your favorite bottled sauce for amazing **Honey Garlic Wings**, or just dust them heavily with store-bought **Lemon Pepper Wings** seasoning right out of the oven. That’s how you customize your flavor!
How to Prepare Easy Chicken Wings in the Oven
Okay, I’m walking you through this because watching these things go from pale to perfectly crunchy is pure kitchen theater! For the best results, you need room for air to move around the wings, so make sure you have a large enough sheet pan. If you love that incredible texture from my roasted potatoes, you’ll appreciate the setup here, since we use a rack for this perfect crispy roast potatoes recipe too!
Prep Work: Drying and Coating the Chicken Wing
First things first: crank that oven to 425°F (220°C) and get your baking sheet lined with foil—trust me on the foil, cleanup is a dream! Set your wire rack right on top. Now for the critical part: grab paper towels and pat those wings until they feel dry. I mean *bone dry*. If there’s any surface moisture left, you’ll get steam, and steam equals soggy skin. Once they are dry, toss them with the seasoning mix we made, making sure that baking powder coating covers every single surface of your **chicken wing**.
Baking for Maximum Crisp: Oven Baked Wings Recipe Timing
Arrange the wings on the rack so they aren’t touching at all—they need their own personal space to crisp up! Pop them in for 25 minutes. Set a timer! When that timer goes off, pull them out and flip every single one over. Back into that hot oven they go for another 20 to 25 minutes. This two-stage process is what takes these from okay to the **Best Baked Wings Ever**.
Saucing Your Chicken Wing for Flavor
When they come out, they should look golden and perfect! Immediately transfer them to a clean bowl. We melt just a tiny bit of butter and toss them gently—this helps the sauce stick. Then, go wild with the sauce! If you want that **Sticky Glazed Wings** texture? Toss them in your sauce and put them back in the oven for just 3 to 5 more minutes. That final little bake sets the glaze beautifully.
Tips for Success: Mastering the Crispy Chicken Wings
You’ve got the basic framework down, but getting them to that ultimate, restaurant-quality crisp takes just a couple of extra focused thoughts. I’ve made enough of these **chicken wing** batches to know exactly where things can go wrong, so let me share the little adjustments that make these the **Best Crispy Baked Chicken Wings** you’ll ever make at home. If you’re looking for a great side dish that pairs perfectly with wings, you have to try my chicken fried rice recipe!
The Importance of Surface Area for Your Chicken Wing
Listen, I know your pan is crowded sometimes, especially when you’re prepping for a big crowd. But you must resist the urge to stack them! Every **chicken wing** needs space, meaning they sit on that wire rack by themselves, not touching Uncle Larry’s drumette. If they are crowded, they steam each other, and steaming is the absolute enemy of crispiness. Give them room to breathe so the hot air can circulate everywhere.
Flavor Variations: Beyond Basic BBQ Chicken Wings Recipe
While my base seasoning works magic on its own, you have options! If you want that bright, zesty kick, skip the butter and hot sauce step and toss them immediately after baking with good quality **Lemon Pepper Wings** seasoning for amazing results. Conversely, if you prefer sticky sweetness, make sure your **Honey Garlic Wings** sauce is brushed on right at the end. Remember, the powder makes it crispy; the sauce makes it flavorful!
Serving Suggestions for Game Day Chicken Wings
So, you’ve pulled off the crispy miracle! Now, how do you serve these beauties? When I make these for **Game Day Chicken Wings** viewing parties, I like to offer at least two completely different flavor profiles right next to each other—usually one spicy and one sweet/tangy. This way, everyone finds something they love among the **Party Appetizer Chicken Wings** spread!
Since these wings are rich and intensely flavored, you need cool, creamy dips to balance things out. My go-to is always a fantastic veggie platter paired with a thick dip. Try making my ultra-creamy caramelized onion dip, or the classic best homemade onion dip from scratch. They are just the perfect foil for that salty, crunchy skin!
Storage and Reheating Instructions for Leftover Chicken Wing
If you manage to have any **chicken wing** leftovers—which, let’s be honest, rarely happens in my house—storage is key to preserving that delicious crispiness we worked so hard for! For the fridge, let them cool completely first, then zip them into an airtight container. They’ll hang out happily for about three days. If you need them to last longer, tossing them in the freezer is the way to go.
Now, for reheating, please, for the love of crunch, skip the microwave! Microwaves are the enemy of crispiness. The absolute best way to bring back the texture on these **No Fry Chicken Wings** is to put them back on a wire rack set over a baking sheet. Pop them into a 350°F oven for about 10 minutes. They come out piping hot and almost perfectly crunchy again. This makes them a great option for quick healthy lunch ideas the next day!
Frequently Asked Questions About Crispy Baked Chicken Wings
It happens! Whenever a recipe relies heavily on texture, questions always pop up. I want to help you troubleshoot anything that might keep you from enjoying the absolute crunchiest **chicken wing** experience possible. Remember, these tips are based on hours of me testing things in my own kitchen, so they’ve been put through the ringer!
Can I use baking soda instead of baking powder for my chicken wing?
Oh, please don’t! I know they sound similar, but chemically, they are totally different creatures. Baking soda is super alkaline, and if you use too much or use it incorrectly in a recipe like this, you risk getting a weird, slightly metallic or soapy flavor in your otherwise perfect **Baked Chicken Wings Recipe**. Stick with the baking powder; it’s designed to create that gentle lift and skin drying we need for the crisp texture!
How do I make these wings spicy like a Buffalo Chicken Wing?
That’s an easy fix once you get the base crispness down! If you like heat, I suggest adding a bit more cayenne pepper to the initial dry rub—maybe a full teaspoon instead of just a quarter. If you want true Buffalo flavor, you simply toss the finished, hot wings in your favorite store-bought Buffalo sauce right after the butter phase. That high heat locks the spice in beautifully!
My wings are still soggy. What went wrong with my No Fry Chicken Wings?
Don’t stress; this means you were super close! Usually, sogginess comes down to one of three things that all relate to moisture. First, did you pat them absolutely dry? If there was moisture left, they steamed. Second, were they crowded on the rack? If they were touching, they trapped steam. Third, make sure your oven was truly up to 425°F before they went in. If you nail the drying, spacing, and temperature, you will get amazing results for your **No Fry Chicken Wings**!
If you need a great main course idea for next time, be sure to check out my guide on simple weeknight dinners. Happy cooking!
Estimated Nutritional Data for This Chicken Wing Recipe
Okay, so here’s the part where I have to put on my “responsible adult” hat for just a second! We used a technique that cuts down on oil, which is great, but these are still delicious, fully loaded **chicken wing** bites!
The following estimates are based on serving four people (four wings each) before you douse them in, say, a heavy sugary glaze. Remember, because you control the sauce at the end, you control the final sugar and fat counts. If you are looking for quick inspiration for the mornings after wings, take a peek at my easy breakfast recipes guide!
- Serving Size: 4 wings
- Calories: 280
- Fat: 18g
- Protein: 26g
- Carbohydrates: 1g
These numbers look pretty fantastic for a Game Day staple, don’t you think? Amazing flavor without packing on too much of the heavy stuff!
Share Your Best Baked Wings Ever Experience
I put every bit of my kitchen knowledge into making this the **Best Baked Wings Ever** recipe, but the true magic happens when you try it out in your own kitchen! I absolutely love hearing about your successes, your little tweaks, and which sauce you picked to finish them off. Did you go classic BBQ, or did you try mixing up your own spicy glaze? Tell me everything!
Take a moment right now and let me know how they turned out down in the comments section below. If you loved the crispiness, please give this recipe a rating out of 5 stars—it genuinely helps other home cooks see that this no-fry technique really works! If you snap a picture of your perfectly golden **chicken wing** platter, tag me on social media! It makes my day to see your creations. If you ever have a question about technique in the future, don’t hesitate to reach out through my contact page!
PrintUltimate Crispy Baked Chicken Wings: The Foolproof No-Fry Technique

You achieve shatteringly crispy, juicy baked chicken wings without frying. This easy recipe uses a simple technique to lock in moisture and create perfect crunch every time. These wings are ideal for game day, parties, or quick weeknight dinners.
- Prep Time: 15 min
- Cook Time: 50 min
- Total Time: 65 min
- Yield: 4 servings 1x
- Category: Appetizer
- Method: Baking
- Cuisine: American
- Diet: Low Fat
Ingredients
- 2 lbs chicken wings (flats and drumettes separated)
- 1 tablespoon baking powder (aluminum-free is best)
- 1 teaspoon salt
- 1/2 teaspoon black pepper
- 1/2 teaspoon garlic powder
- 1/4 teaspoon cayenne pepper (optional)
- 2 tablespoons melted butter (for tossing after baking)
- Your favorite wing sauce (e.g., Honey Garlic or Lemon Pepper)
Instructions
- Preheat your oven to 425°F (220°C). Line a large, rimmed baking sheet with aluminum foil for easy cleanup. Place a wire cooling rack on top of the foil-lined sheet.
- Pat the chicken wings completely dry using paper towels. This step is crucial for crispiness.
- In a large bowl, combine the baking powder, salt, pepper, garlic powder, and cayenne pepper.
- Add the dried chicken wings to the bowl and toss them thoroughly until every piece is evenly coated with the dry mixture.
- Arrange the coated wings in a single layer on the wire rack. Do not let the wings touch each other; space them out for maximum air circulation.
- Bake for 25 minutes.
- Flip each wing over. Return the pan to the oven and bake for another 20 to 25 minutes, or until the skin is deeply golden brown and very crisp.
- Remove the wings from the oven. Immediately place them in a clean, large bowl. Drizzle with the melted butter and toss to coat lightly.
- Toss the wings in your chosen sauce until they are fully covered. Serve immediately for the best texture.
Notes
- Using baking powder is the secret to achieving a dry surface that crisps up like fried wings in the oven. Do not skip this ingredient.
- For extra sticky wings, toss them in the sauce, then return them to the oven for 3-5 minutes before serving.
- If you prefer Lemon Pepper flavor, skip the butter and sauce step; instead, toss the hot wings directly with lemon pepper seasoning after baking.
Nutrition
- Serving Size: 4 wings
- Calories: 280
- Sugar: 1
- Sodium: 450
- Fat: 18
- Saturated Fat: 5
- Unsaturated Fat: 13
- Trans Fat: 0
- Carbohydrates: 1
- Fiber: 0
- Protein: 26
- Cholesterol: 85