
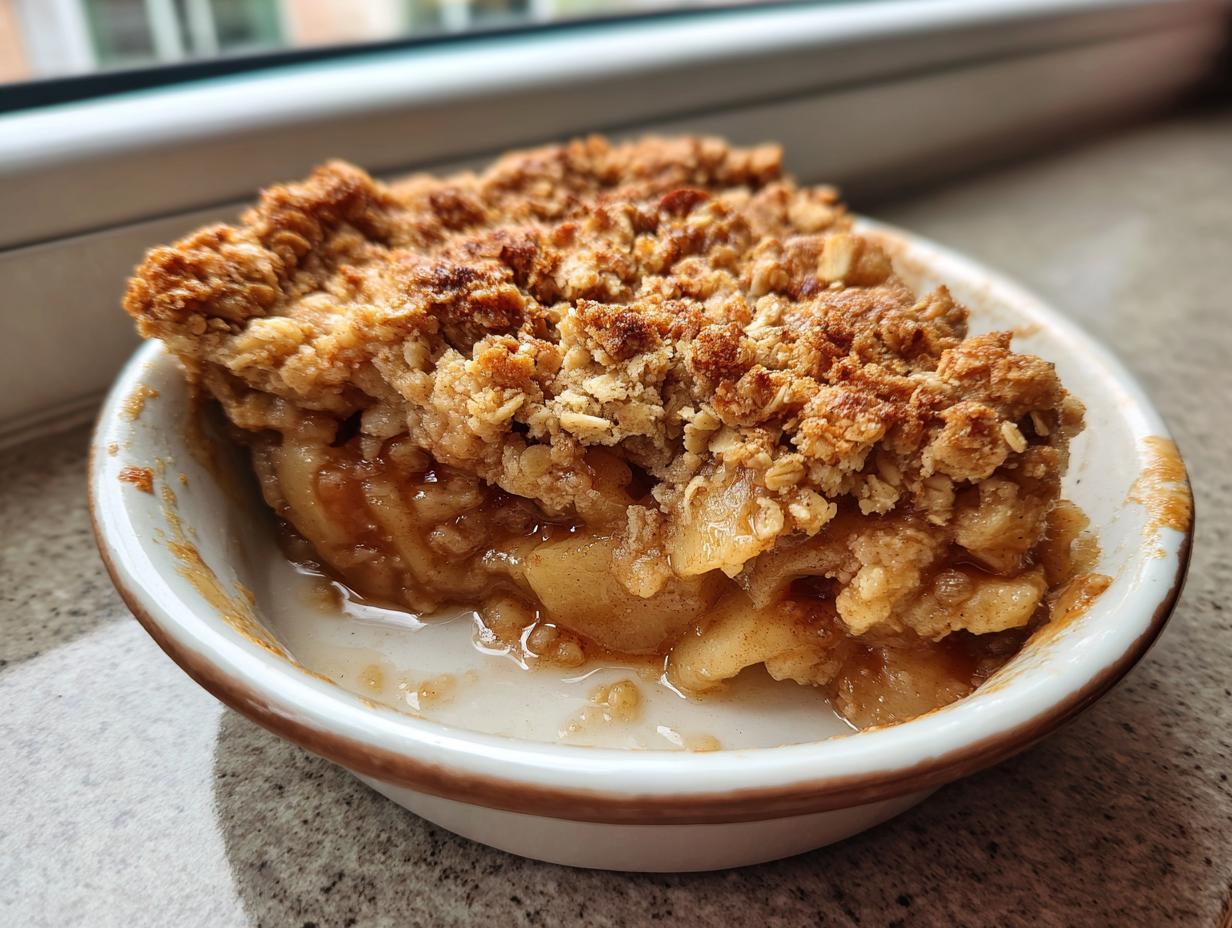
Oh, the smell of fall baking! There is nothing that settles the soul quite like the scent of cinnamon, warm apples, and a hint of melting butter filling your kitchen. When the leaves start turning, my absolute go-to comfort food has to be a truly classic apple crisp. Not one of those soggy messes, mind you, but the Best Classic Apple Crisp with a Crunchy Oat Topping that stays wonderfully crisp right down to the last spoonful. This recipe isn’t fancy; it’s foolproof, born from the kind of simple, reliable methods I learned growing up. If you’re looking for that incredible, nostalgic taste without any fuss, I promise this rendition of the apple crisp is going to become yours, too. You can learn more about my cooking philosophy over on the About Page!
- Why This Classic Apple Crisp Recipe Stands Out
- Gather Your Ingredients for the apple crisp
- Step-by-Step Instructions for Your Easy Apple Crisp Recipe
- Tips for the Most Amazing apple crisp Success
- Serving Suggestions for Your Warm Dessert Idea
- Storage and Reheating Instructions for Leftover apple crisp
- Frequently Asked Questions About Making apple crisp
- Nutritional Estimate for This apple crisp
- Share Your Cozy Season Treats
Why This Classic Apple Crisp Recipe Stands Out
I’ve tweaked so many fall desserts over the years, but this one? This one always pulls me back to the basics because it simply works, every single time. It’s that perfect balance of soft apples and that glorious, textured top layer you crave in an apple crisp. This isn’t fancy baking; it’s foolproof, born from the kind of simple, reliable methods I learned growing up. If you’re looking for that incredible, nostalgic taste without any fuss, I promise this rendition is going to become yours, too.
Here’s what makes my version the one you’ll keep running back to:
- It’s incredibly fast! You can have this in the oven in under 15 minutes if you’re organized. Check out my easy breakfast recipes for more quick wins!
- The flavor is pure autumn—nothing artificial, just warm cinnamon and real butter goodness.
- It sets up beautifully, meaning fewer runny apple soup disasters in your baking dish!
The Secret to a Truly Crunchy Oat Topping
The magic here is definitely in the topping. Most sad crisps happen because the butter is too warm or maybe you used instant oats, which just dissolve into mush. For our Buttery Topping Recipe, you must use very cold butter cut into small cubes. This keeps the topping crumbly when mixed, giving you those fantastic, deeply golden chunks after baking, instead of a flat, soft sheet.
Foolproof Apple Filling for the Best apple crisp
I always tell folks that the apple selection is key for the best apple crisp. You need apples that hold their structure! I use a 50/50 mix of something tart like Granny Smith and something sweet-but-firm like Honeycrisp. Coating them lightly in flour and sugar *before* they hit the dish is what stops them from releasing too much liquid and turning into watery sadness. Trust me, that light coating locks in the flavor and keeps the filling thick.
Gather Your Ingredients for the apple crisp
Okay, time to get organized! Think of this as gathering your paints before you start a masterpiece. You really only need pantry staples, which is why this is such a fantastic, simple apple dessert. Don’t substitute the rolled oats—we need those hearty ones, not the instant kind, for the right texture! Pay close attention to the butter; it has to be cold for that beautiful crumble.
Here’s the list you need for your apple filling and that perfect, crunchy oat topping:
- 6 medium baking apples (I love Granny Smith or Honeycrisp), peeled, cored, and sliced
- 1/4 cup all-purpose flour
- 1/2 cup granulated sugar
- 1 teaspoon ground cinnamon
- 1/4 teaspoon ground nutmeg
- 1 tablespoon lemon juice (keeps those apples looking nice!)
- 1/2 cup all-purpose flour (for topping)
- 1/2 cup packed light brown sugar (for topping)
- 1/2 cup rolled oats (not instant)
- 1/4 teaspoon ground cinnamon (for topping)
- 1/4 teaspoon salt
- 1/2 cup (1 stick) cold unsalted butter, cut into small pieces
Step-by-Step Instructions for Your Easy Apple Crisp Recipe
Now for the fun part! Since this is the Easy Apple Crisp Recipe, we want to keep the steps clear so you can move fast. You’ll find this is such a Simple Apple Dessert that you can still whip it up even on a busy weeknight. Just remember the golden rule: cold butter stays cold!
Preparing the Spiced Apples
First thing, get that oven going! You’ll preheat it to 375 degrees Fahrenheit and lightly grease your 9-inch pie dish or 8×8 pan. Now, grab a big bowl. Toss those gorgeous sliced apples with the 1/4 cup of flour, granulated sugar, the main teaspoon of cinnamon, nutmeg, and that splash of lemon juice. You want to toss this gently—we need everything coated well, but we don’t want to bruise the apples. Once they look beautifully spiced, spread them out in an even layer in your prepared dish.
Making the Buttery Topping Mixture
Switching bowls, we work on the magnificent topping. In a separate bowl, whisk together the remaining 1/2 cup of flour, the brown sugar, those hearty rolled oats, the second dash of cinnamon, and the salt. This is where technique matters hugely! Take your cold butter pieces and use a pastry blender or even just your fingertips to cut them into that dry mix. You are aiming for coarse crumbs, listen for that sandy texture, but make sure you still see some pea-sized chunks of butter. Those chunks are your secret weapon for that great crunch!
Baking and Resting the apple crisp
Sprinkle that crumbly topping evenly over your apples—don’t pack it down too much!—and pop it into the hot oven. You’re looking for about 40 to 50 minutes. The visual cues are key: the apple filling should be bubbling up around the edges, and that oat topping should be deep golden brown. Seriously, don’t skip the resting part! When you pull that amazing apple crisp out, let it sit on the counter for at least 15 minutes before serving. This lets the juices thicken up nicely underneath that lovely crunch. If you need quick dinner ideas while this bakes, check out my quick lunch ideas!
Tips for the Most Amazing apple crisp Success
We want this to be the kind of Old Fashioned Apple Crisp that tastes like pure, glorious Comfort Food Baking, right? Since this is meant to be foolproof, I wanted to share a couple of things I learned the hard way so you don’t have to! Getting the right fruit and managing the oven heat are the two things that scare people away, so let’s tackle those. A truly great crisp is all about texture contrast, and these little tricks ensure you get that perfect snap on top over tender, barely-soft fruit beneath.
Apple Selection and Slicing Guide
If you use apples that break down too quickly, you’re going to end up with apple mush, and that’s not what we want! Stick to firm baking apples. Granny Smith is my tart backbone because it refuses to collapse, and Honeycrisp offers sweetness without getting too soft. As for slicing, I aim for about 1/4 inch thick. If they are too thin, they disappear; too thick, and they stay crunchy even when the topping is perfectly done. Consistency is king here!
Preventing a Browned Topping
This happens easily, especially if your oven runs hot or your apples are extra juicy and bubble up fast. If you notice the topping is achieving a magnificent golden brown color but the apples underneath still aren’t quite tender—don’t panic! Just grab a sheet of aluminum foil and loosely tent it over the baking dish. That shield stops the direct heat from scorching the oats and sugar while letting the bottom finish cooking through. It’s the best way to guarantee a perfect finish every time you make this apple crisp.
If you’re looking for more reliable comfort food that fits into a busy schedule, check out my simple weeknight dinners page. We take the stress out of Tuesday night!
Serving Suggestions for Your Warm Dessert Idea
Okay, the apple crisp is out of the oven, it’s piping hot, and the aroma is totally intoxicating. But what do you serve with this incredible Warm Dessert Idea? Honestly, you can eat it straight from the dish with a spoon—I won’t judge! However, to truly elevate the experience, you need a temperature contrast.
My favorite, of course, is a big scoop of high-quality vanilla bean ice cream. The cold cream melting into the warm, spiced apples? Perfection! If you aren’t a fan of ice cream, try a healthy drizzle of salted caramel sauce before serving. It makes this Apple Dessert with Ice Cream seem extra special, whether it’s for a holiday or just a Tuesday night treat. Find more inspiration for small moments of joy in my guide to healthy snack ideas!
Storage and Reheating Instructions for Leftover apple crisp
We all hope for leftovers because that means we nailed the recipe! But how do you keep that crunchy topping from getting soft overnight? That’s the critical question when saving any apple crisp.
First things first: you absolutely must let this cool down before you try to store it. If you cover it while it’s still warm, you trap steam, and steam equals mushy topping, which we just worked so hard to avoid!
Once fully cooled to room temperature, cover your baking dish tightly with plastic wrap or transfer the portions to an airtight container. This wonderful dessert keeps beautifully in the refrigerator for about four days. I find that leftovers are great the next day, especially if you’re just having a little something warm alongside a glass of refreshing drink recipes!
Reheating to Restore the Texture
The microwave is quick, yes, but it tends to steam things and softens the crisp right away. If you only have a minute and want an individual serving, go for it, but know the texture will change.
For the absolute best results—to bring back that beautiful golden crispiness—you need the oven or an air fryer if you have one. Pop your portion (or the whole dish if you dare!) back into a 350°F oven for about 10 to 15 minutes. You just want it heated through and for the top to start smelling fragrant again. If you reheat the whole pan, check it sooner, around 10 minutes, to ensure that buttery topping gets its satisfying crunch back!
Frequently Asked Questions About Making apple crisp
It’s funny, even with simple recipes like this apple crisp, folks always have little questions about making it *their* perfect dessert. I’ve gathered the biggest ones I hear all the time about texture, flavor, and those little tweaks that make a huge difference in your final bake. Feel free to reach out through my Contact Page if you have one I missed!
Can I substitute the oats in the topping?
You certainly can play around, but just know the texture will change! The rolled oats are what give this the satisfying, hearty chew we look for in a crisp. If you’re out of oats, you could try using an equal amount of chopped nuts, like pecans or walnuts, maybe even add some seeds like flax or sunflower seeds for bulk. However, if you leave the oats out entirely, you are basically making a true *crumble*, which is a slightly different texture altogether—less structure, more sandy.
What is the difference between apple crisp and apple crumble?
That’s the million-dollar question in American baking! Traditionally, the difference is just one ingredient: oats. An old-fashioned apple *crumble* topping is usually just flour, sugar, and butter rubbed together until crumbly. An apple *crisp*, though, always has oats in that topping mixture. The oats give you that extra golden crunchiness we are obsessed with here. So, technically, since ours has oats, we are proudly making a crisp!
Can I make this apple crisp ahead of time?
Yes, you absolutely can prep this ahead, which is great for entertaining! You can mix the spiced apples and put them in the greased dish up to a day in advance. Keep them covered tightly in the fridge. You can even mix the topping ingredients together, but here’s the trick for the topping: don’t cut the butter in yet! Once you assemble the topping mixture, store that dry mix in a separate baggie. When you’re ready to bake, cut in the cold butter, sprinkle over the chilled apples, and bake as directed! This keeps that topping perfectly crisp.
Nutritional Estimate for This apple crisp
I always keep this in the back of my mind, especially when I’m thinking about sharing this apple crisp recipe with my family or friends. Now, look, I’m just a home cook sharing what I love, not a certified nutritionist! These numbers are based on standard ingredient calculations, and your actual values might shift depending on the exact apples you use or brands you favor. But it gives you a good ball-park idea for our rich and comforting dessert!
Here is the estimate for one serving of this amazing bake:
- Serving Size: 1 serving
- Calories: 380
- Sugar: 35g (That’s where the joy is, right?)
- Sodium: 150mg
- Fat: 18g
- Saturated Fat: 11g
- Carbohydrates: 55g
- Fiber: 5g
- Protein: 4g
So yes, it’s a treat! It’s packed with that fiber from the apples and oats, but definitely lean into that sweet spot when you serve it warm with a scoop of vanilla ice cream on the side. Enjoy every bite!
Share Your Cozy Season Treats
That’s it! You’ve created pure autumn magic. I truly hope this apple crisp brings warmth and comfort to your table, just like it does mine every year. I’d love to hear how it turned out for you! Please leave a rating and let me know in the comments below if you served it with ice cream or maybe tried adding pecans to the topping. Happy baking!
If you ever need to check out my policies, you can read more over at the Privacy Policy page anytime.
PrintThe Best Classic Apple Crisp with a Crunchy Oat Topping

This recipe delivers the ultimate comfort food: tender, cinnamon-spiced apples baked under a buttery, crunchy oat topping. It is simple to prepare and perfect for any fall gathering or cozy evening treat.
- Prep Time: 15 min
- Cook Time: 45 min
- Total Time: 60 min
- Yield: 6 servings 1x
- Category: Dessert
- Method: Baking
- Cuisine: American
- Diet: Vegetarian
Ingredients
- 6 medium baking apples (like Granny Smith or Honeycrisp), peeled, cored, and sliced
- 1/4 cup all-purpose flour
- 1/2 cup granulated sugar
- 1 teaspoon ground cinnamon
- 1/4 teaspoon ground nutmeg
- 1 tablespoon lemon juice
- 1/2 cup all-purpose flour (for topping)
- 1/2 cup packed light brown sugar (for topping)
- 1/2 cup rolled oats (not instant)
- 1/4 teaspoon ground cinnamon (for topping)
- 1/4 teaspoon salt
- 1/2 cup (1 stick) cold unsalted butter, cut into small pieces
Instructions
- Preheat your oven to 375 degrees Fahrenheit. Lightly grease a 9-inch pie dish or an 8×8 inch baking pan.
- In a large bowl, combine the sliced apples, 1/4 cup flour, 1/2 cup granulated sugar, 1 teaspoon cinnamon, nutmeg, and lemon juice. Toss gently until the apples are evenly coated.
- Pour the apple mixture into your prepared baking dish and spread it into an even layer.
- In a separate medium bowl, prepare the topping. Combine the 1/2 cup flour, brown sugar, rolled oats, 1/4 teaspoon cinnamon, and salt. Whisk these dry ingredients together.
- Cut in the cold butter using a pastry blender or your fingertips. Work the butter into the dry ingredients until the mixture resembles coarse crumbs with some pea-sized pieces of butter remaining. Do not overmix.
- Sprinkle the oat topping evenly over the apple mixture in the baking dish. Press it down lightly.
- Bake for 40 to 50 minutes, or until the topping is golden brown and the apple filling is bubbly and tender when pierced with a fork.
- Remove the apple crisp from the oven and let it cool on a wire rack for at least 15 minutes before serving. This allows the filling to set slightly.
- Serve warm with vanilla ice cream or a drizzle of caramel sauce.
Notes
- For the best texture, use a mix of tart and sweet apples.
- If your topping begins to brown too quickly during baking, loosely cover the dish with aluminum foil for the last 10 to 15 minutes.
- You can add 1/4 cup of chopped pecans or walnuts to the oat topping mixture for extra crunch.
Nutrition
- Serving Size: 1 serving
- Calories: 380
- Sugar: 35g
- Sodium: 150mg
- Fat: 18g
- Saturated Fat: 11g
- Unsaturated Fat: 7g
- Trans Fat: 0.5g
- Carbohydrates: 55g
- Fiber: 5g
- Protein: 4g
- Cholesterol: 45mg