

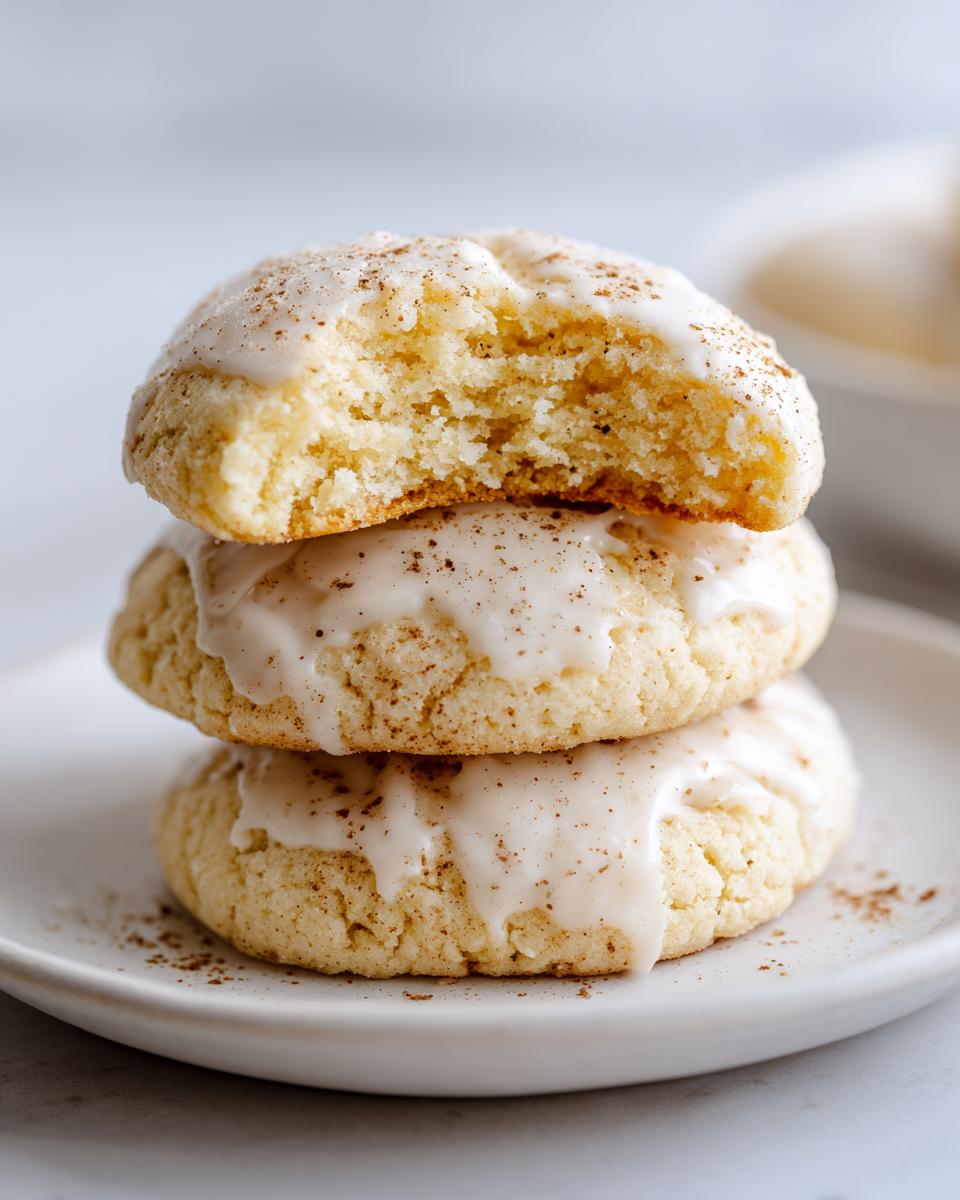
The smell of nutmeg and something creamy wafting through the house—that’s how I know the holidays are officially here. Look, I’ve got a million fussy cookie recipes tucked away, but when it comes to ease and that true festive punch, nothing beats these eggnog cookies. Trust me, these are the soft and chewy stars of my Christmas cookie exchange every single year.
Growing up in the Midwest, we always had plates overflowing with festive treats, usually something my dad insisted on trying to bake “just like Grandpa.” I learned quickly that the best holiday recipes are the ones that work consistently, which is why I developed this recipe obsessively right here in my own kitchen. It delivers that incredible signature eggnog flavor enhanced by a lightning-fast glaze. If you’re ready to skip the fuss and go straight to the delicious part, you’re in exactly the right spot. You can check out more about my baking philosophy over on the About Page!
- Why These Soft Eggnog Cookies Are Your New Holiday Favorite
- Gathering Ingredients for Your Homemade Eggnog Flavored Cookies
- Step-by-Step Instructions for Perfect Eggnog Cookies with Eggnog Glaze
- Expert Tips for Mastering Eggnog Cookies
- Storage and Keeping Your Chewy Christmas Cookies Fresh
- Frequently Asked Questions About Eggnog Cookies
- Estimated Nutritional Information for These Festive Cookie Baking Treats
- Share Your Best Eggnog Cookies Creations
Why These Soft Eggnog Cookies Are Your New Holiday Favorite
Why should you ditch your old standby and try these eggnog cookies? Because they nail that sweet spot everyone wants during the crazy holiday season: maximum flavor with minimum fuss. They’re cozy, they taste exactly like your favorite winter drink, and they disappear fast. Seriously, they’re fantastic!
- They are guaranteed soft and chewy—none of those crumbly sugar cookies here!
- The flavor is pure holiday bliss, thanks to that hit of nutmeg.
- They look impressive with the simple drizzle of glaze, but they’re secretly super quick to whip up.
Quick Prep for Easy Holiday Cookies
When you’re juggling shopping, wrapping, and a dozen other baked goods, you need quick wins. I timed this whole process, start to cool, and we’re looking at about 26 minutes total time! The dough for these treats comes together so fast, it’s honestly shocking. You mix it, scoop it, and bake it. Simple!
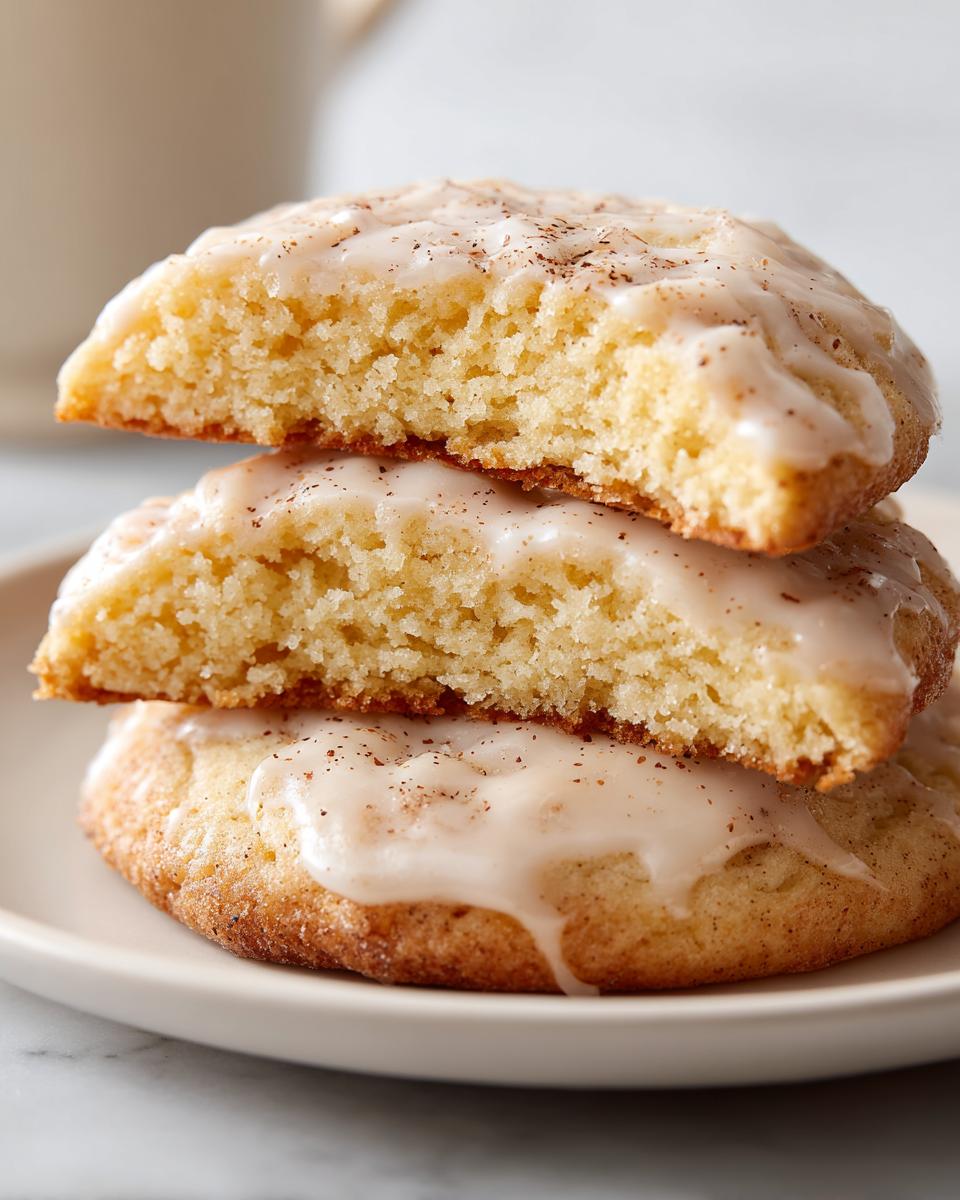
The Perfect Soft and Chewy Eggnog Cookies Texture
That magic soft texture isn’t an accident; it’s science, kind of! We rely heavily on creaming the butter and sugar just right to get those little air pockets in the dough, which keeps them from getting flat and hard. Plus, using the actual eggnog in the recipe, instead of milk, keeps them tenderly moist even after they’ve cooled completely.
Gathering Ingredients for Your Homemade Eggnog Flavored Cookies
Okay, timing is everything, but so are the ingredients, right? You don’t want to start mixing these amazing eggnog cookies only to realize you’re missing that crucial splash of liquid gold—the actual eggnog! Don’t worry this list is short and sweet because we rely on pantry staples.
This batch yields about 24 of these festive little beauties. Make sure your butter is soft, not melted, because that makes a huge difference in how the dough comes together. We’re going to split the list just like we split the process: what goes in the dough, and what goes into that dreamy top coat.
Dough Components for the Best Eggnog Cookies
These are the main players that give you that perfect soft base. Grab your apron and let’s get organized:
- 1 cup unsalted butter, softened
- 1 1/2 cups granulated sugar
- 1 large egg
- 1/2 cup eggnog
- 1 teaspoon vanilla extract
- 2 3/4 cups all-purpose flour
- 1 teaspoon baking powder
- 1/2 teaspoon salt
- 1/4 teaspoon ground nutmeg (for dough)
Simple Nutmeg Glaze Ingredients
This glaze is the easiest part, I promise! It sets up nicely but stays soft enough that it doesn’t crack when you crunch into the cookie. You only need three quick things for this perfect topping:
- 1 1/2 cups powdered sugar
- 2 tablespoons eggnog
- 1/4 teaspoon ground nutmeg (for glaze topping)
Step-by-Step Instructions for Perfect Eggnog Cookies with Eggnog Glaze
Alright, put on your favorite holiday playlist and let’s get these amazing eggnog cookies mixed up! Follow these steps closely, especially regarding mixing, and I promise you’ll get that beautifully soft result every single time. We’re aiming for cookies that whisper ‘Christmas’ when you bite into them.
Mixing the Soft Eggnog Cookies Dough
This is where we build that signature soft texture, so pay attention to the creaming part! First thing, get your oven set—preheat it to 350°F (175°C). While that’s warming up, line a couple of baking sheets with parchment paper. Trust me, no one wants to scrape baked dough off a tray!
In your big mixing bowl, cream together your softened butter and the granulated sugar. You need to beat this until it looks genuinely light and fluffy—I mean, noticeably paler yellow. Next, beat in the egg, that half-cup of rich eggnog, and the vanilla extract. Just mix it until those wet things are integrated; don’t beat it into oblivion.
Now, go grab your bowl with the dry stuff—that’s your flour, baking powder, salt, and that 1/4 teaspoon of dough nutmeg. We’re adding this in turns! Gradually add the dry mixture to the wet stuff, keeping your mixer on low speed. Stop mixing the second you see that soft dough come together. Seriously, the second it looks like cookie dough, stop! Overmixing is the enemy of soft cookies, so resist the urge to keep going!
Baking and Cooling Your Festive Cookie Baking
Time to scoop! Use a rounded tablespoon for each cookie and drop those balls of dough onto your prepared sheets. Make sure you give them space—about 2 inches apart—because they spread a little bit in that warm oven.
Bake them for 9 to 11 minutes. Here is your most important visual cue: you’re looking for the edges to just barely look set firm, but the very middle of the cookie should still look a little soft and slightly underdone. Pull them out right then!
Let them hang out on the hot baking sheets for about five minutes. This lets the centers finish cooking gently without hardening up. Then, carefully move them over to a wire rack to cool down completely. You need them totally cool before we mess with the glaze, or you’ll have melted soup!
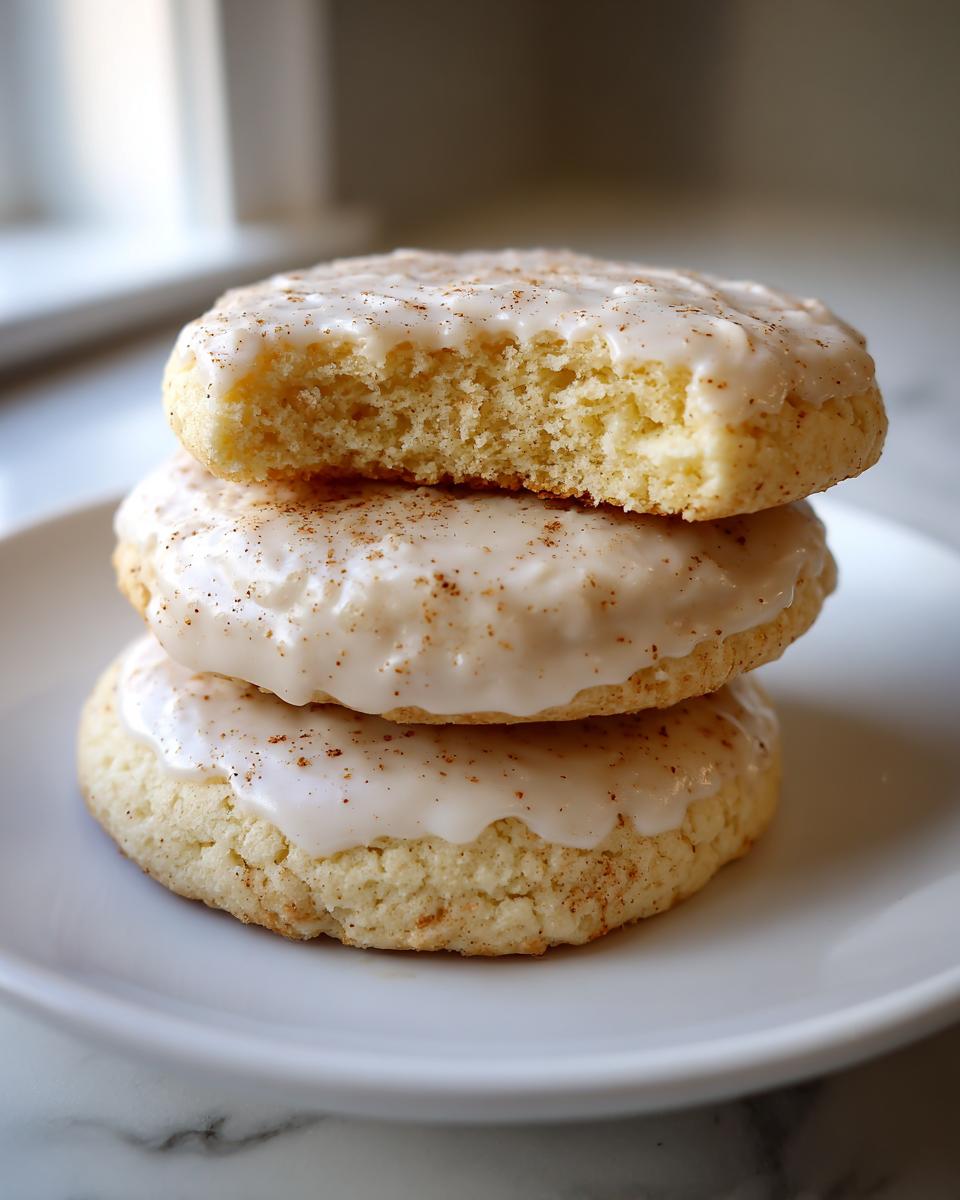
Applying the Nutmeg Glaze to the Cookies
Once those cookies are completely cooled—and I mean cold—we make the sweet, simple topping. In a small bowl, whisk up the powdered sugar and the tablespoon and a half of eggnog. You’re aiming for something that pours nicely but thickly. If it seems like it might run right off the cookie, just add another little teaspoon of eggnog until it looks right.
Now comes the fun and slightly messy part! Dip the top of each cooled cookie right into that eggnog glaze, tilting the bowl a bit to get an even coat. Let the extra drip off for a second.
Quickly, before that glaze dries, hit the top of each cookie with a tiny sprinkle of that final 1/4 teaspoon of nutmeg for spice appeal. Set them back on the rack until that glaze hardens up. That’s it! Easy holiday cookies that look like you spent hours on them!
Expert Tips for Mastering Eggnog Cookies
You’ve got the recipe down, but if you want to take these festive spiced cookies from great to absolutely legendary, here are a few little tricks I rely on. When you’re making something as special as eggnog cookies, those small details really make the flavor pop and ensure that chewy texture lasts all through the holiday week.
These aren’t just random ideas; these are things I tinkered with endlessly when I was perfecting this holiday treat for parties. Mastering the texture and flavor enhancement means you nail that perfect nutmeg aroma every time you open the cookie jar!
Ingredient Substitutions for Your Eggnog Dessert Recipes
I know sometimes you either run out of something or you just want to play around with the recipe a bit, so don’t panic if you’re missing one item! Luckily, these cookies are forgiving, which is what you want for busy holiday baking.
If you’re looking to enrich that already lovely cookie just a touch, try swapping out a quarter cup of that all-purpose flour for almond flour. It adds a small, subtle richness to the crumb that’s just divine. It makes them feel a little more luxurious, honestly.
Now, what if you’ve run out of store-bought eggnog but you still want that spiced liquid element in the dough? Don’t just use plain milk! That will dry them out. My trick is to use regular milk but mix in about half a teaspoon of rum extract. It mimics that warm, spiced flavor profile of the real stuff, and the cookies won’t know the difference!
Remember, even small changes like these substitutions help make these eggnog cookies uniquely yours while keeping the core texture intact.
Storage and Keeping Your Chewy Christmas Cookies Fresh
We spent all that time getting the texture perfect, so we sure don’t want them going stale on day two! The fantastic news about these chewy Christmas cookies is that they are built to last—or at least last until the next batch is needed.
Since these have a soft glaze, you don’t want to stack them too aggressively right away. Just let that glaze set hard, and then tuck them into an airtight container. I usually put a piece of parchment paper between the layers just to be safe, but honestly, they stay wonderfully soft for up to four days just fine at room temperature. No need to chill them!
If you’re making these way ahead of time for a big holiday party, you can totally freeze them unfrosted. Just wrap the cooled cookies tightly in plastic wrap first, then put them in a freezer bag. When you thaw them, just make the glaze fresh on the day you plan to serve!
Frequently Asked Questions About Eggnog Cookies
I get so many questions when people start baking these for the first time, which just shows how popular these eggnog cookies are becoming! These are the same things I always wondered about when I first tried making them for my family’s holiday baking list.
Can I make these Eggnog Cookies without actual eggnog?
Yes, absolutely! While real eggnog gives you that authentic, rich flavor, sometimes you just don’t have it on hand, or maybe you’re trying to make a batch for someone who can’t have alcohol since store-bought eggnog often contains liquor.
If you’re out, don’t worry! Go back up to my expert tips section. I mentioned my trick: use regular milk instead of the 1/2 cup specified in the dough, but you need to balance that flavor with about half a teaspoon of rum extract mixed right into the milk. It gives you that spiced warmth without needing the actual festive drink in the batter. It’s a fantastic solution for quick holiday cookies!
How do I get the softest Eggnog Cookies?
Getting that soft and chewy Christmas cookie texture is mostly about timing and how you treat them when they come out of the oven. The biggest mistake people make is leaving these cookies in until they look totally golden brown. They’ll turn hard as a rock cooling down!
My absolute key here is pulling them out when the edges are set, like I said in the steps, but the center still looks a smidge gooey. They firm up outside the oven. Also, make sure you store them correctly in that airtight container soon after the glaze sets. Good storage is half the battle to keep those melt-in-your-mouth cookies soft for days!
Estimated Nutritional Information for These Festive Cookie Baking Treats
Okay, let’s talk briefly about the fuel factor for these delicious, festive treats. Since these are homemade, and we all know exactly what goes into them—real butter, sugar, and eggnog—the nutrition can definitely vary based on how thick you make your glaze or if you sneak an extra splash of butter in there!
Please treat these numbers as a general guide, that’s what I always tell people when they ask. This estimate is based on the recipe yielding 24 cookies and covers the cookie plus the simple nutmeg glaze topping. It helps me plan, though honestly, I try not to stress too much about the numbers when the holidays roll around!
But, for those of you who like tracking or planning your seasonal indulgences, here’s how the math breaks down for about one cookie:
- Calories: Roughly 180 (Wow, not bad for a holiday splurge!)
- Fat: About 9 grams (We use real butter, remember? It’s worth it!)
- Sugar: Around 18 grams (That’s mostly the sugar and the glaze!)
- Carbohydrates: About 24 grams
- Protein: A nice little boost at 2 grams
You can see the sugar is the biggest component, which is what makes these sweet, melt-in-your-mouth cookies so satisfying. Enjoy them with a nice cup of coffee or, better yet, a chilled glass of—you guessed it—eggnog!
Share Your Best Eggnog Cookies Creations
Whew! Now that you’ve baked up a batch of these amazing eggnog cookies, I really, truly want to hear about them! That’s my favorite part of sharing these recipes—seeing your amazing results, whether they’re perfectly glazed or you tried adding a little something extra.
Did you use them for a cookie exchange? Did the kids help you dip them in the glaze? Was the aroma exactly what you hoped for when you pulled them out of the oven? Don’t keep those triumphs secret!
Please take a moment to leave a rating right here on the page and share your sweet stories in the comments below. If you want to send me a picture of your festive spread, you can always reach out through the Contact Page. I look forward to reading every single note about your successful holiday baking!
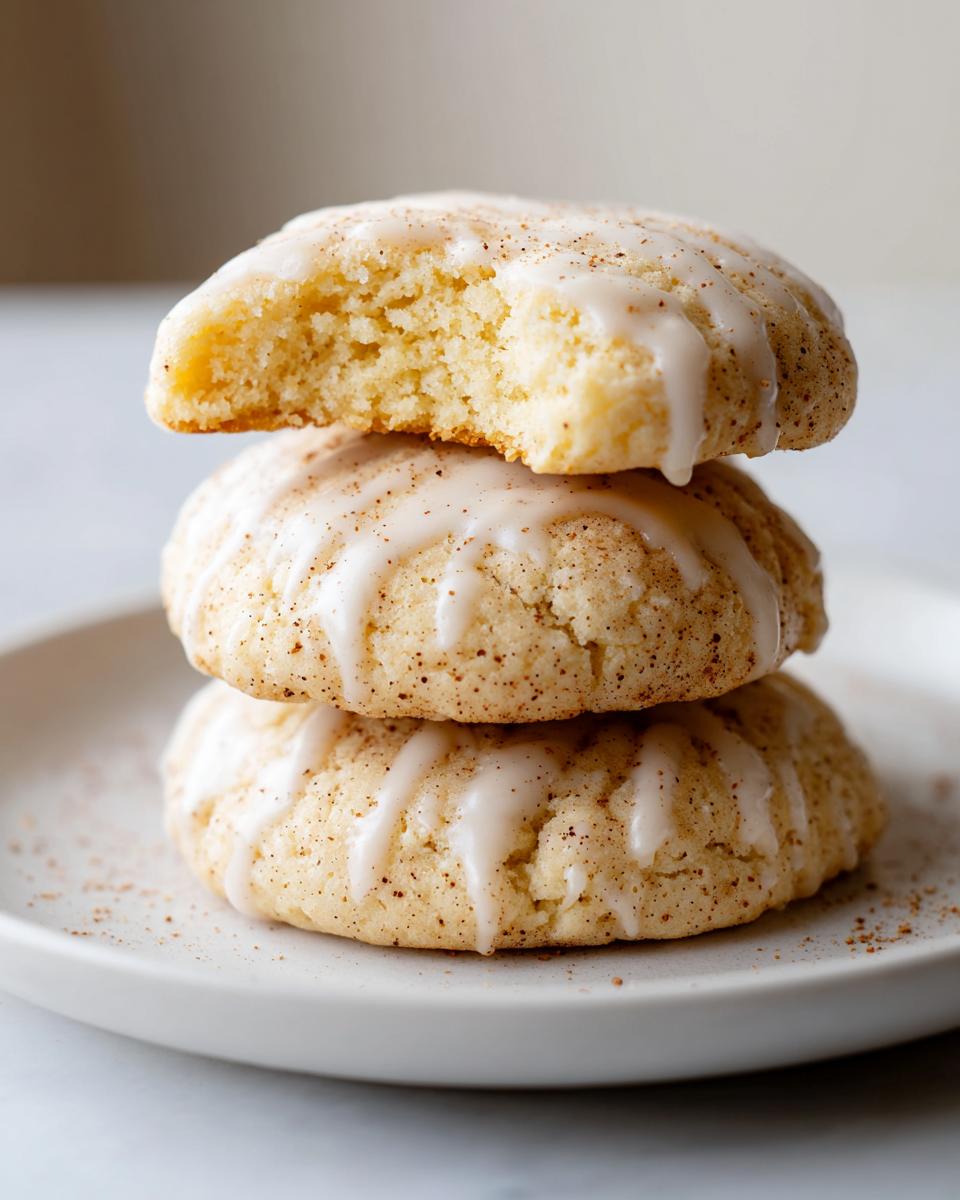
PrintSoft and Chewy Eggnog Cookies with Simple Nutmeg Glaze
Bake soft, chewy holiday cookies infused with classic eggnog flavor and topped with a quick nutmeg glaze. These are simple to make for Christmas gatherings.
- Prep Time: 15 min
- Cook Time: 11 min
- Total Time: 26 min
- Yield: 24 cookies 1x
- Category: Dessert
- Method: Baking
- Cuisine: American
- Diet: Vegetarian
Ingredients
- 1 cup unsalted butter, softened
- 1 1/2 cups granulated sugar
- 1 large egg
- 1/2 cup eggnog
- 1 teaspoon vanilla extract
- 2 3/4 cups all-purpose flour
- 1 teaspoon baking powder
- 1/2 teaspoon salt
- 1/4 teaspoon ground nutmeg (for dough)
- 1 1/2 cups powdered sugar (for glaze)
- 2 tablespoons eggnog (for glaze)
- 1/4 teaspoon ground nutmeg (for glaze topping)
Instructions
- Preheat your oven to 350°F (175°C). Line baking sheets with parchment paper.
- In a large bowl, cream together the softened butter and granulated sugar until light and fluffy.
- Beat in the egg, 1/2 cup eggnog, and vanilla extract until just combined.
- In a separate bowl, whisk together the flour, baking powder, salt, and 1/4 teaspoon nutmeg.
- Gradually add the dry ingredients to the wet ingredients, mixing on low speed until a soft dough forms. Do not overmix.
- Drop rounded tablespoons of dough onto the prepared baking sheets, spacing them about 2 inches apart.
- Bake for 9 to 11 minutes, or until the edges are set but the centers remain soft.
- Let the cookies cool on the baking sheets for 5 minutes before transferring them to a wire rack to cool completely.
- Prepare the glaze: Whisk together the powdered sugar and 2 tablespoons of eggnog until smooth. Add more eggnog, one teaspoon at a time, if the glaze is too thick.
- Dip the top of each cooled cookie into the glaze, letting the excess drip off.
- Immediately sprinkle the tops with the remaining 1/4 teaspoon of nutmeg before the glaze sets.
- Allow the glaze to set completely before serving or storing.
Notes
- For extra flavor, you can substitute 1/4 cup of the all-purpose flour with almond flour for a slightly richer texture.
- If you do not have eggnog, you can substitute it with milk mixed with 1/2 teaspoon of rum extract for a similar spiced flavor profile in the dough.
- These cookies store well in an airtight container at room temperature for up to four days, maintaining their soft texture.
Nutrition
- Serving Size: 1 cookie
- Calories: 180
- Sugar: 18g
- Sodium: 95mg
- Fat: 9g
- Saturated Fat: 5g
- Unsaturated Fat: 4g
- Trans Fat: 0g
- Carbohydrates: 24g
- Fiber: 0g
- Protein: 2g
- Cholesterol: 30mg